Digiflow
Digiflow SyncClient Test
Hint: Activate the java console for a better debugging!
-
Open 'Java Control Panel' → Erweitert → Java-Konsole → Select 'Konsole anzeigen' and 'Debugging'
MAM:
-
Open MAM over Main menu (right top corner)
-
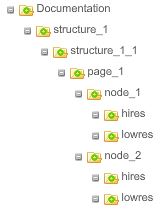
Create a folder structure like in the picture below (create a new subfolder with the green +)
PM:
-
Open PM over Main menu
-
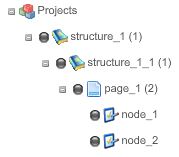
Create a folder structure like in the picture below (same like in MAM without the hires and lowres folders)
-
Set a random integer for DigiflowID
-
Important is that the correct project types are selected: first two layer’s are 'Digiflow Structure Node', third layer is a 'Digiflow Page Node' and fourth layer are two "Digiflow Node'.
Drag and drop nodes from MAM to PM:
-
Open PM and MAM over Main menu
-
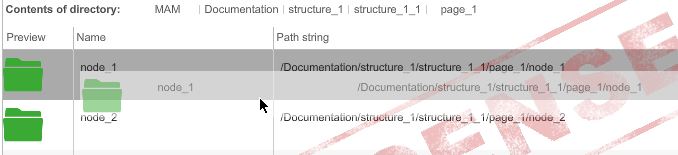
Navigate to folder 'page_1' in MAM → in the central FSDetail you should see the two node folders
-
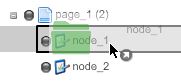
These folders you can link to the nodes in PM (see picture story below)
Drag node in MAM
Change to PM
Drop node in PM
-
Check if linking worked correct → you should see the linked folder under 'C.ProjectAssetView'
Download Digiflow SyncClient:
-
Download the Digiflow SyncClient over main menu (Download DSC) → 'digiflow.jnlp'
-
Run the 'digiflow.jnlp'
-
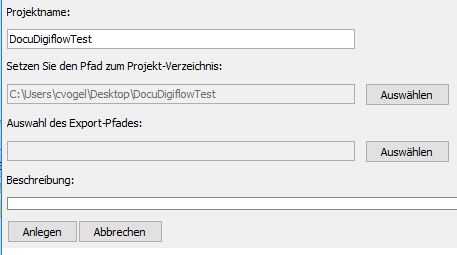
New → enter a project name → select a project folder → create (picture below)
-
Log in with the OMN credentials → select your mandator
-
Navigate through your structure and drop a few pictures in a node (process need a few time) → example result you could see below
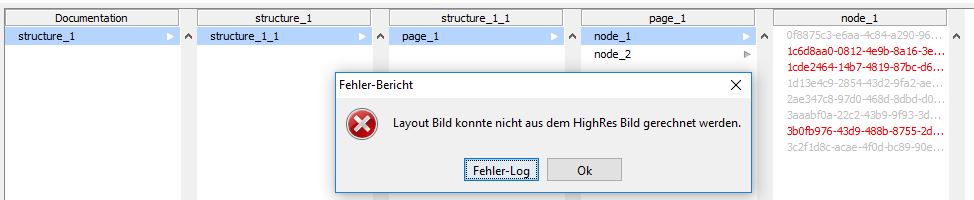
If there is an error report and pictures name with red text:
-
Click 'Ok' at error report
-
Select the red picture names → press and hold 'Alt' on keyboard → click 'Sync-Status für Auswahl wird zurückgesetzt' → Some task should run → press 'Ok'
-
All file names should get from grey to black
Hint for fix of this problem: Save file again with Photoshop (Metadata get set)
If there is no error report and no pictures name with red text:
-
Select pictures
-
Click 'Sync'
-
Some task should run → press 'Ok' → all file names should get from grey to black
Navigate to the OMN frontend → PM → node_1 → C.ProjectAssetView:
-
In the folder 'node_1' should be a 'hires' and 'lowres' folder
-
In the lowres folder should be the pictures you uploaded with the SyncClient
-
The hires folder should be empty
Hires-upload:
-
Navigate to PM → node_1 → 'Projektinfos' → 'Digiflowparameters'
-
Select 'required' for 'hires upload'
-
Click the save-button (disk) at the right bottom corner
-
for testing you could change also other parameters
-
Change to the SyncClient → select all picture names → press 'Sync' → something should work → press 'Ok'
-
Change to hires folder in PM → node_1 → C.ProjectAssetView
-
Hires pictures should be availiable
SelectionClient:
-
If you want to use the SelectionClient, you have to set a few attributes:
-
page_1: 'OmnSpreadProjectID' with random input (for test)
-
node_1: 'ProductIDs' with random input (for test) and 'IsPageBased' with input "true"
-
Navigate to PM → node_1 → 'C.SelectionClient'
-
Selection:
-
for every picture you can check 'Selected' (ignore the error pop-up for the pictures, which had a red file name in the SyncClient → these pictures does not work)
-
click 'Selected' in the toolbar on top for filtering the selected pictures
-
if a picture is selected, a workflow should have started → check it under main menu → 'Workflow'
-
-
Rating:
-
You can rate every picture with between one and five stars
-
Click 'Rated' or select stars in the toolbar on top for filtering the rated pictures
-
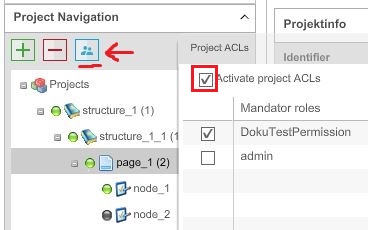
Permissions:
-
For 'Digiflow Structure Node', 'Digiflow Page Node' and 'Digiflow Node' permissions to 'usable roles' can be set.
-
PM → select the node → click on 'ACL Project'-button → Check 'Activate project ACLs' → Check the mandator roles you want (picture below)
-
Test it out with the SyncClient