Management of the plugin instances
A plugin instance is a specific configuration of the plugin that was created by the user (with its own identifier) to be used in the UI.
The creation and management of plugin instances is done in the same way throughout the system – no matter what type of plugin it is. To access all mentioned possibilities the user need to select the plugin type (e.g. Terminology page plugin, FSTable content plugin, etc.). This is how the page looks like:
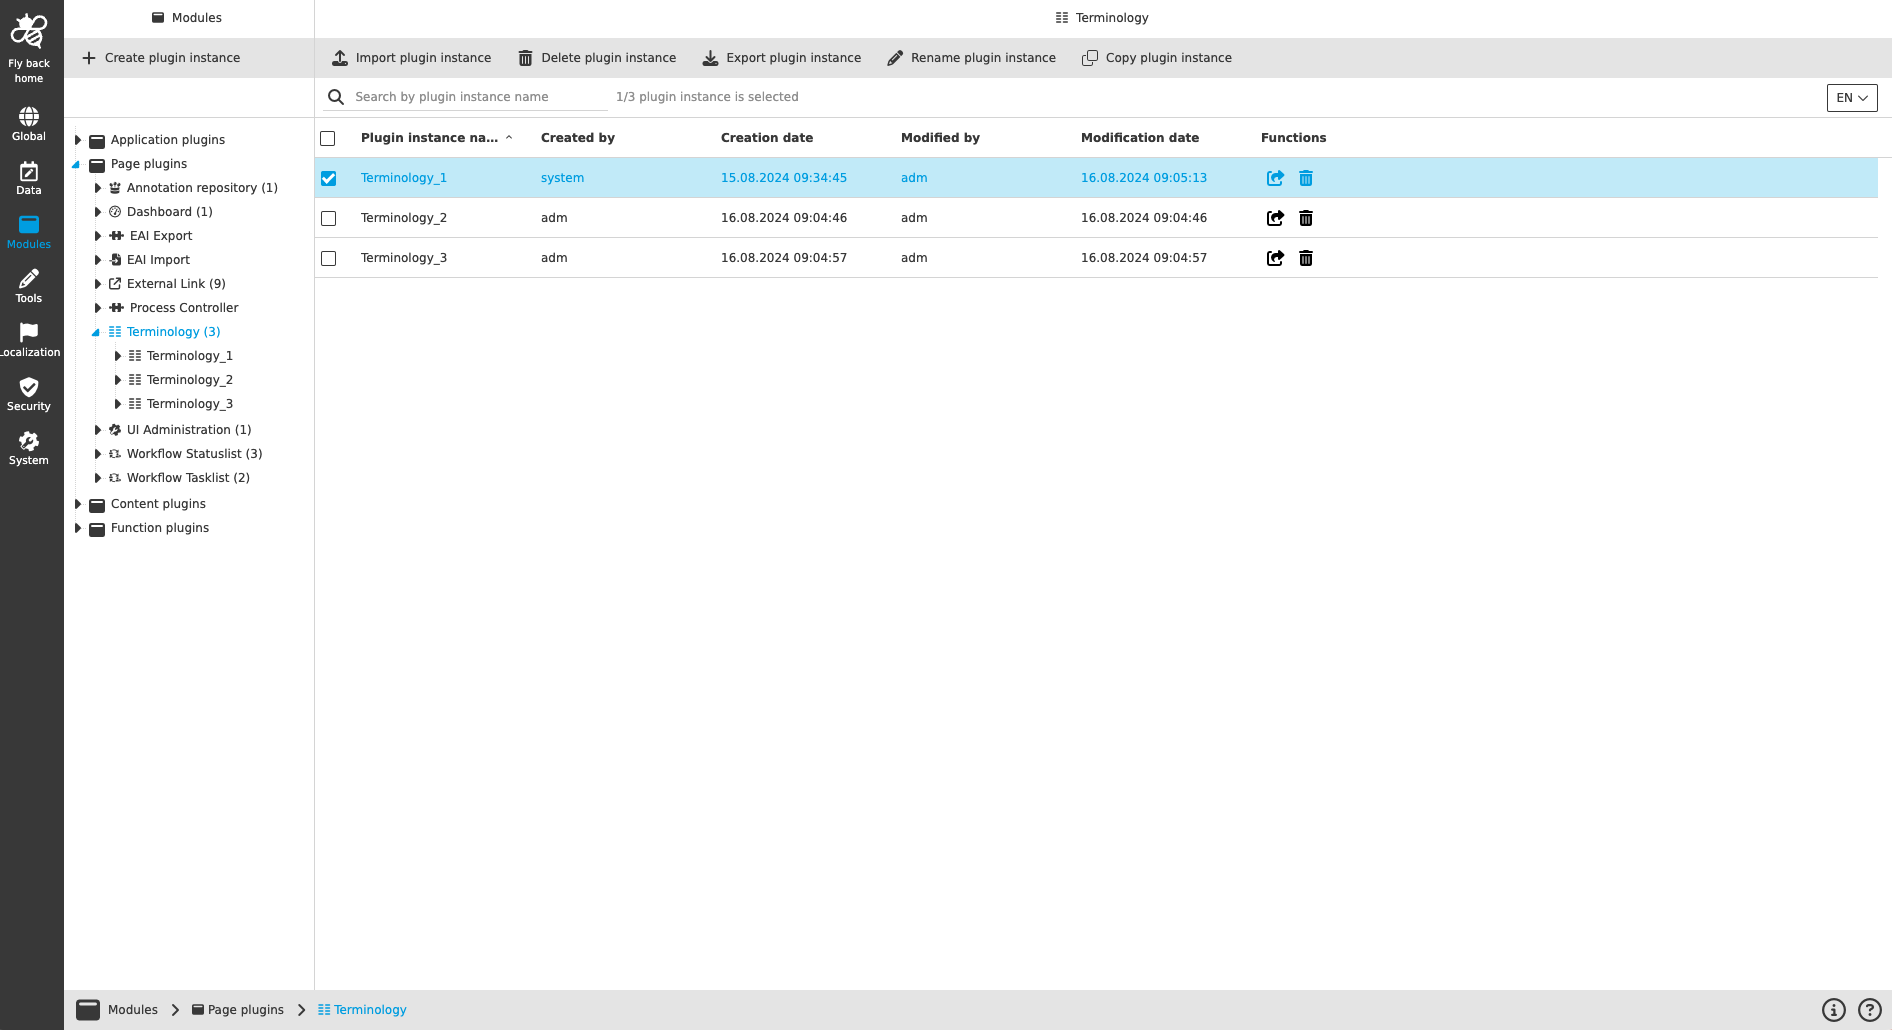
Overview of existing plugin instances
When the user selects the plugin in the tree in the left view, the overview of all existing plugin instances can be seen in two places – as subnodes in the tree and in the table of the center view.
The table lists the following information:
| Column name | Description |
|---|---|
Plugin instance name |
Name of the plugin instance, which has been defined during creation |
Created by |
Name of the user who created the instance |
Creation date |
Date when the instance was created |
Modified by |
Name of the user who modified the instance last time |
Modification date |
Date when the last modification was done |
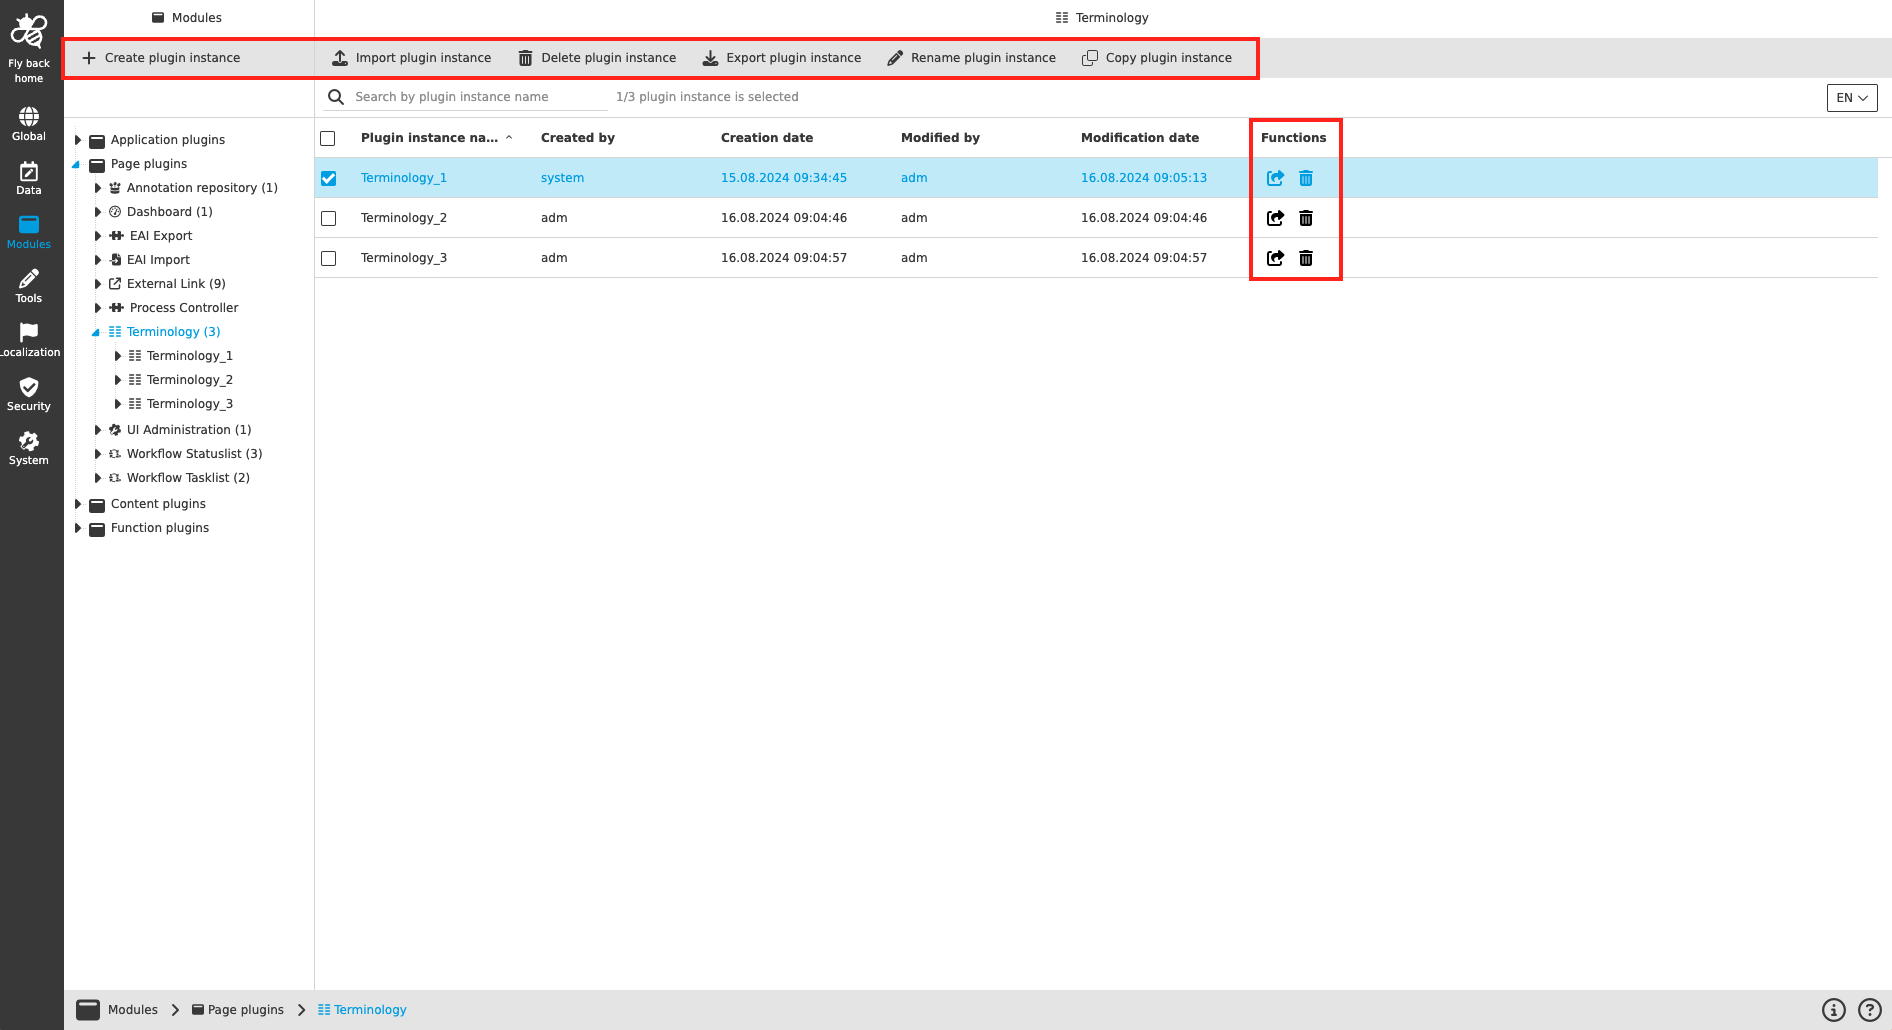
Functions |
Functions to open the instance and remove the instance |
The following functions are available on the page:
Function name |
Description |
Note |
Create plugin instance |
For creating a new instance |
see 'Create plugin instance' |
Delete plugin instance(s) |
For deleting an existing instance |
|
Import plugin instance |
For importing a instance out of an XML file |
see 'Import plugin instance' |
Export plugin instance |
For exporting an existing instance as an XML file |
see 'Export plugin instance' |
Rename plugin instance |
For renaming an existing instance |
see 'Rename plugin instance' |
Copy plugin instance |
For copying an existing instance |
see 'Copy plugin instance' |
Open plugin configuration |
For opening an existing instance in first configuration tab in a new browser tab |
Create plugin instance
The function ‘Create plugin instance’ is available in the toolbar in the left view.
-
Click 'Create plugin instance'
-
Enter a name of the instance
-
Confirm the creation → Click 'Create plugin instance'
| The name of the plugin instance needs to be unique throughout the application. |
Delete plugin instance(s)
The function ‘Delete plugin instance’ is available in the table for each row (trash icon).
Also, the function ‘Delete plugin instance(s)’ is available in the toolbar as soon as the user selects at least one plugin instance in the table. With this function it is possible to delete several plugin instances at a time.
-
Select the plugin in the tree in the left view to see the ‘Available plugin instances’ table
-
Select the instance which should be deleted (there may be more than one)
-
Click 'Delete plugin instance(s)'
-
Click 'Confirm deletion of plugin instance(s)'
| If the user deletes a plugin instance, it is removed from all the places where it was used (e.g. Sidebar item). |
Import plugin instance
The function 'Import plugin instance' is available in the toolbar by default. By clicking the function an upload modal is opened, where the user can insert an configuration XML file. This is possible via Drang and Drop or by using the function 'Add XML' (in the modal toolbar).
-
Go to the plugin instance overview of the corresponding plugin type
-
Click 'Import plugin instance'
-
Select configuration XML file
-
Define the name for the imported plugin instance (this field is mandatory, the plugin instance name needs to be unique and must contain less than 100 characters)
-
Click 'Upload'
| In first implementation it is only possible to import one plugin instance after the other. A plugin identifier validation within the XML file will be implemented in later version. This means that it is currently possible to upload other plugin types. This can lead to incorrect configuration states. |
Export plugin instance
The function ‘Export plugin instance’ is available in the toolbar as soon as the user selects one plugin instance in the table. With this function it is possible to download selected plugin instance as XML file. Within the XML file, configurations can be adjusted outside of the OMN system and then uploaded.
-
Select the plugin in the tree in the left view to see the ‘Available plugin instances’ table
-
Select the instance which should be exported
-
Click 'Export plugin instance'
-
Click 'Export' in modal to confirm and start the download
If the user exports the plugin instance, the download of the XML file will be started automatically.
| Export of multiple plugin instances will be supported in later version. |
Rename plugin instance
The function 'Rename plugin instance' is available in the toolbar as soon as the user selects one plugin instance in the table. With this function it is possible to change the name of the selected plugin instance (more precise the identifier of the plugin instance). Once adjusted, the new name will be shown in the ‘Available plugin instances’ table and in the navigation tree.
-
Select the plugin in the tree in the left view to see the ‘Available plugin instances’ table
-
Select the instance which should be renamed
-
Click 'Rename plugin instance'
-
Enter new plugin instance name in the modal
-
Click 'Rename' in modal to confirm the new name
| The new name of the plugin instance needs to be unique throughout the application. |
Copy plugin instance
The function 'Copy plugin instance' is available in the toolbar as soon as the user selects one plugin instance in the table. With this function it is possible to copy a plugin instance with all its configurations.
-
Select the plugin in the tree in the left view to see the ‘Available plugin instances’ table
-
Select the instance which should be copied
-
Click 'Copy plugin instance'
-
Adjust name in the modal (optional)
-
Click 'Copy' in modal to confirm and create a plugin instance
| The new name of the plugin instance needs to be unique throughout the application. The copied plugin instance will be opened in first configuration tab automatically. |
Open plugin configuration
The function 'Open plugin configuration' is available as table row function in the ‘Available plugin instances’ table. With this function the first configuration tab of the related plugin instance will be opened in a new browser tab.
-
Select the plugin in the tree in the left view to see the ‘Available plugin instances’ table
-
Select the instance which should be opened
-
Click 'Open plugin configuration'