ImageEditor Configuration
Configuration guide for ImageEditor
Several steps should be performed to configure the ImageEditor functionality:
Create ImageEditor Function plugin
-
Navigate to the back-end configuration
-
In the left view expand "Mandators" → "<Mandator name>" → "Function plug-ins" → "ImageEditor"
-
Set a "Configuration identifier" in the corresponding field and click the
Create new configuration-button.
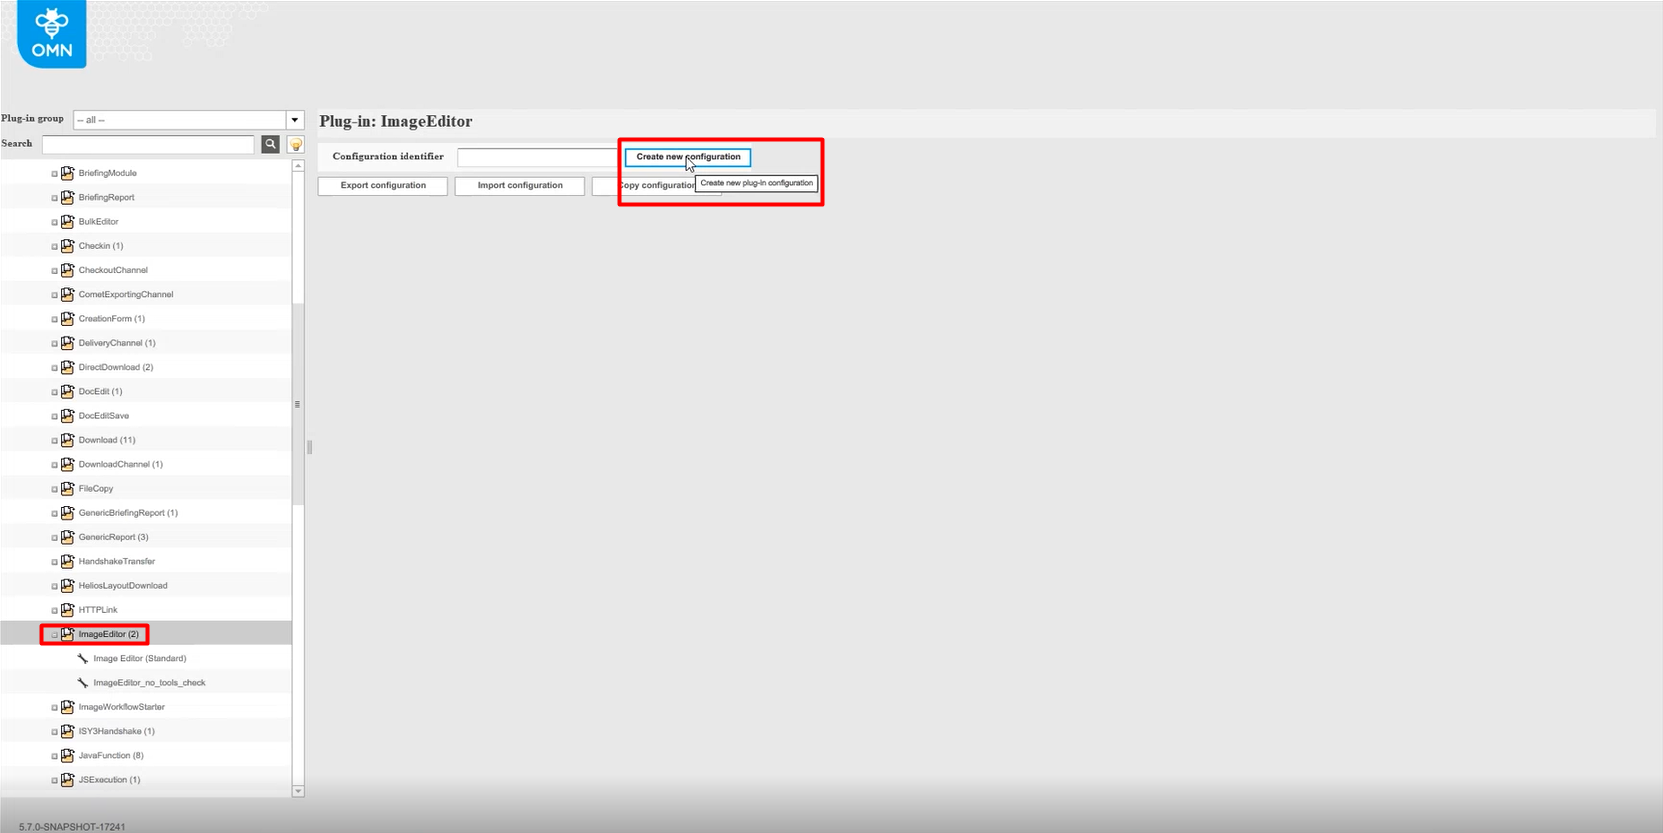
| It is possible to create several ImageEditor configurations. Besides creating a configuration, the export, import, and copy of an ImageEditor configuration can be started from the creation page. |
Configure ImageEditor plugin
General
After any of the previously created configurations is clicked on in the left menu, the "General"-configuration-tab opens in the right view.
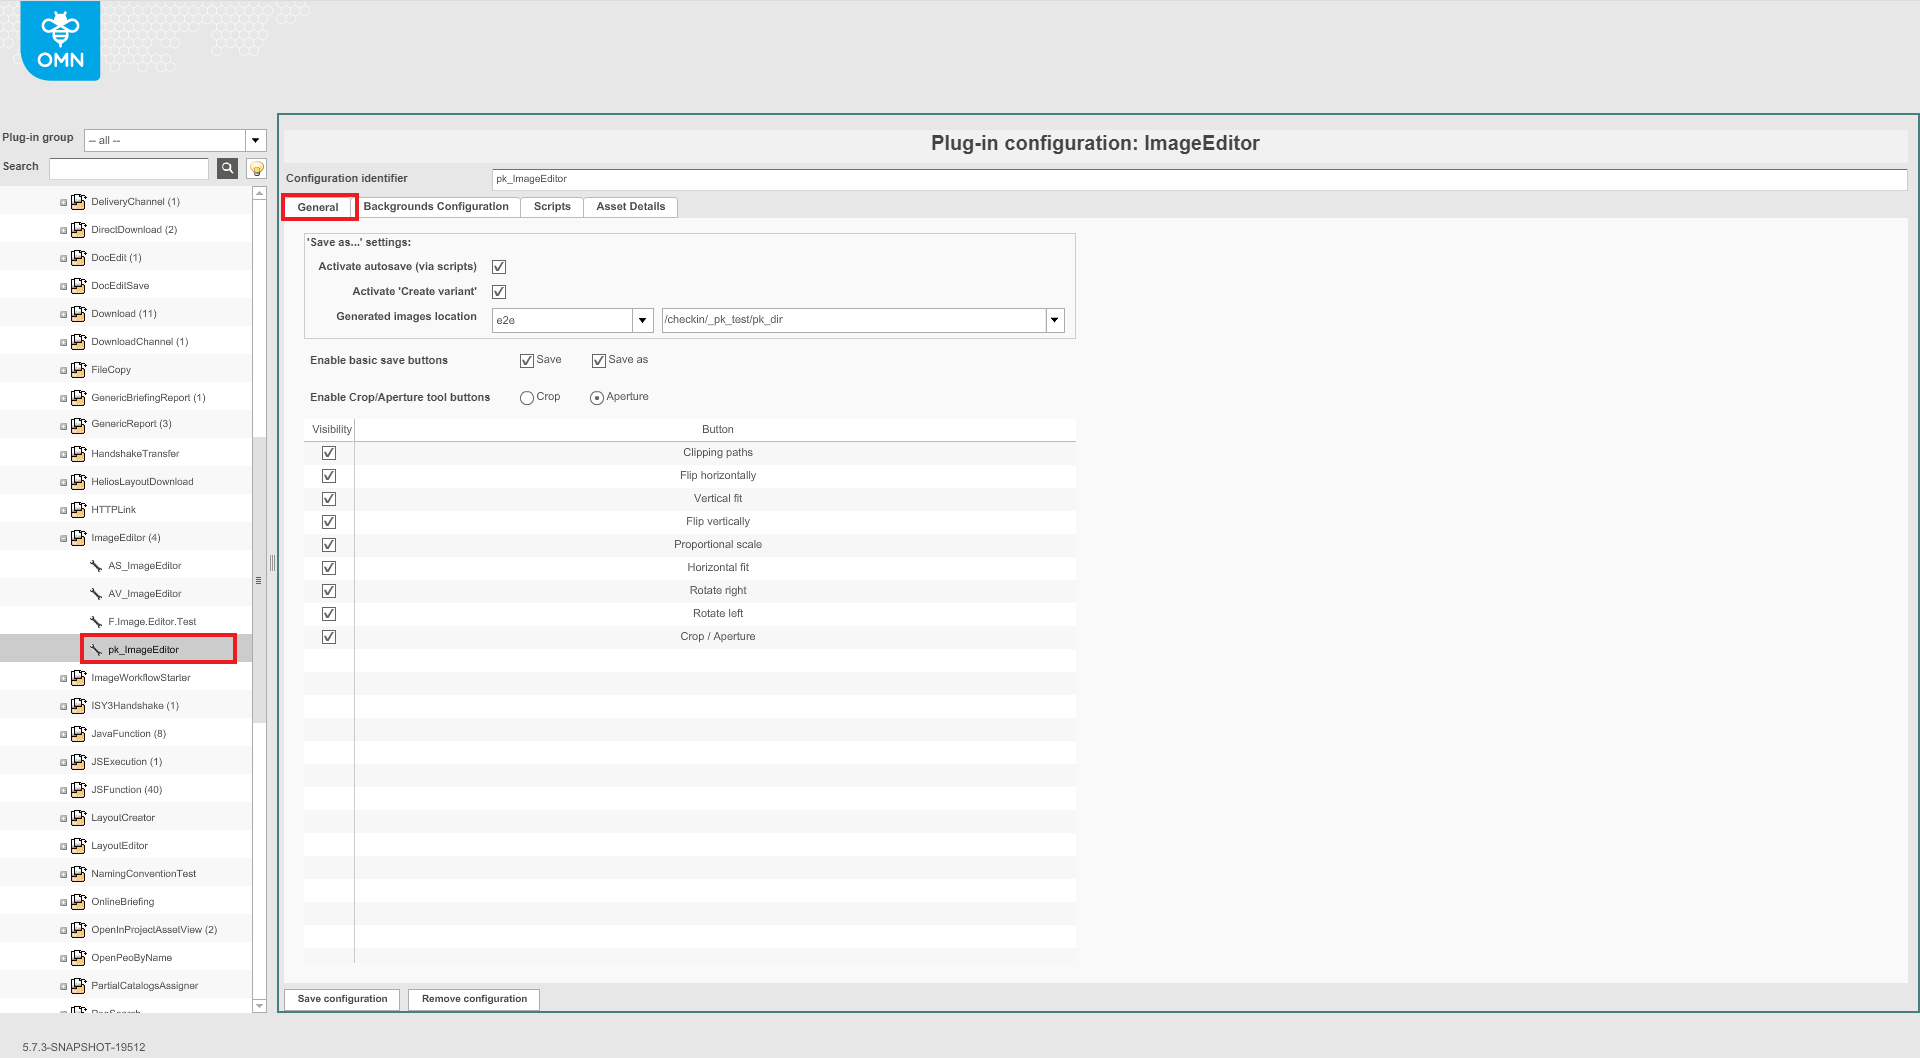
The settings block "Save as…" enables the configuration of the Save as button in the front-end.
If the checkbox "Activate autosave (via scripts)" is activated, a user will not see a confirmation modal and a new image will be saved in accordance with the script requirements. Groovy scripts can be added under the "Scripts" tab.
If the checkbox "Create variant" is activated, then a user who is following a click on the Save as-button will see a modal view with a dropdown that enables to create a variant.
If the "Activate autosave (via scripts)"-option is chosen, ensure that the path "Generated images location" is configured. New assets will be automatically saved to the specified path. It is possible to choose predefined paths from the dropdowns.
The field "Enable basic save buttons" allows to activate the buttons Save and Save as in the front-end. Both buttons can be activated together. The button Save will overwrite the same asset. The button Save as will save a new asset as per the provided path.
-
In case "activate autosave" is not checked and function
Save asis activated the user needs to enter a name for the newly generated image. -
In case the user performs
Savethe original image will be overwritten.
The field "Enable Crop/Aperture tool buttons" allows choosing what tool will be activated in the front-end. It is only possible to configure one tool at a time. User can configure Aspect Ratios under the "Backgrounds Configuration" tab.
"Visibility"-checkboxes allow activating functions to be applicable to image assets in the front-end.
Press the button Save configuration to save changes.
To delete configuration, press the button Remove configuration.
Backgrounds Configuration
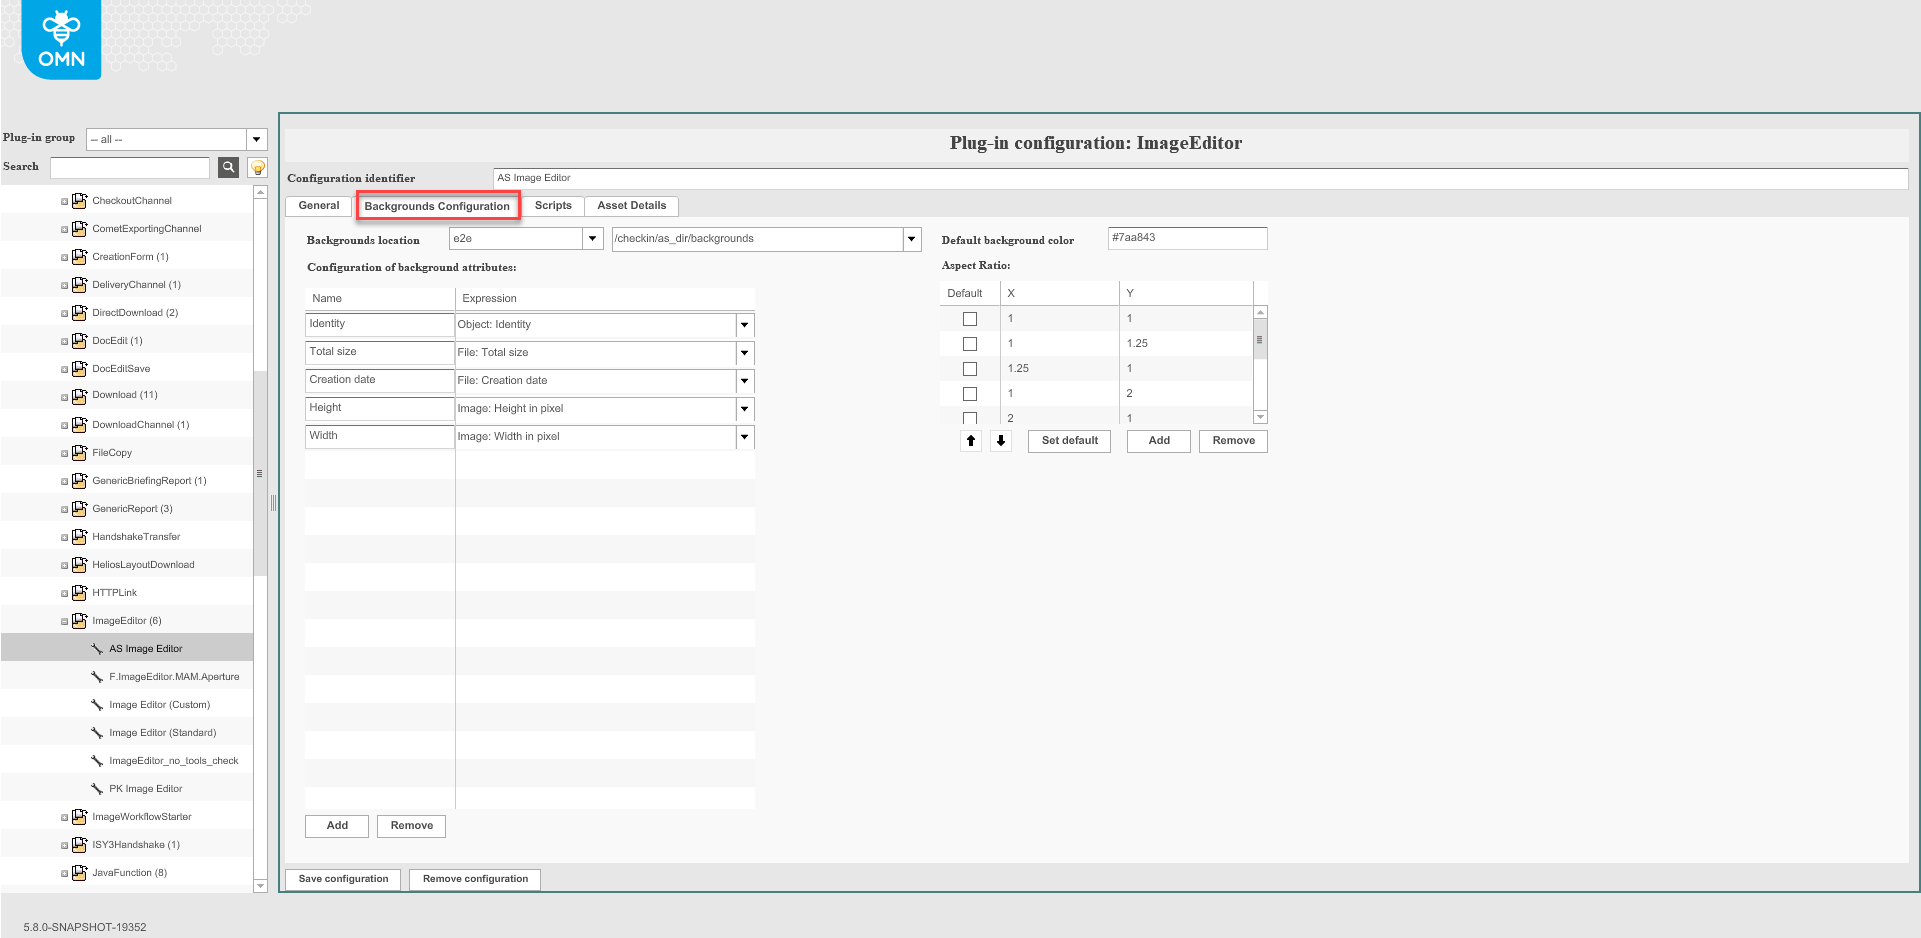
Fill in or select the predefined paths "Background locations" to be available in the front-end. All background images will be taken from this path.
The field "Configuration of background attributes" enables to set the Name and Expression for background assets. These values will be shown in the modal windows for background assets in the front-end. Any name can be entered while expression is chosen from the available metadata list.
Add and remove background attributes by clicking on the corresponding buttons on the bottom of the table.
| Background attributes are not applicable for gradient. |
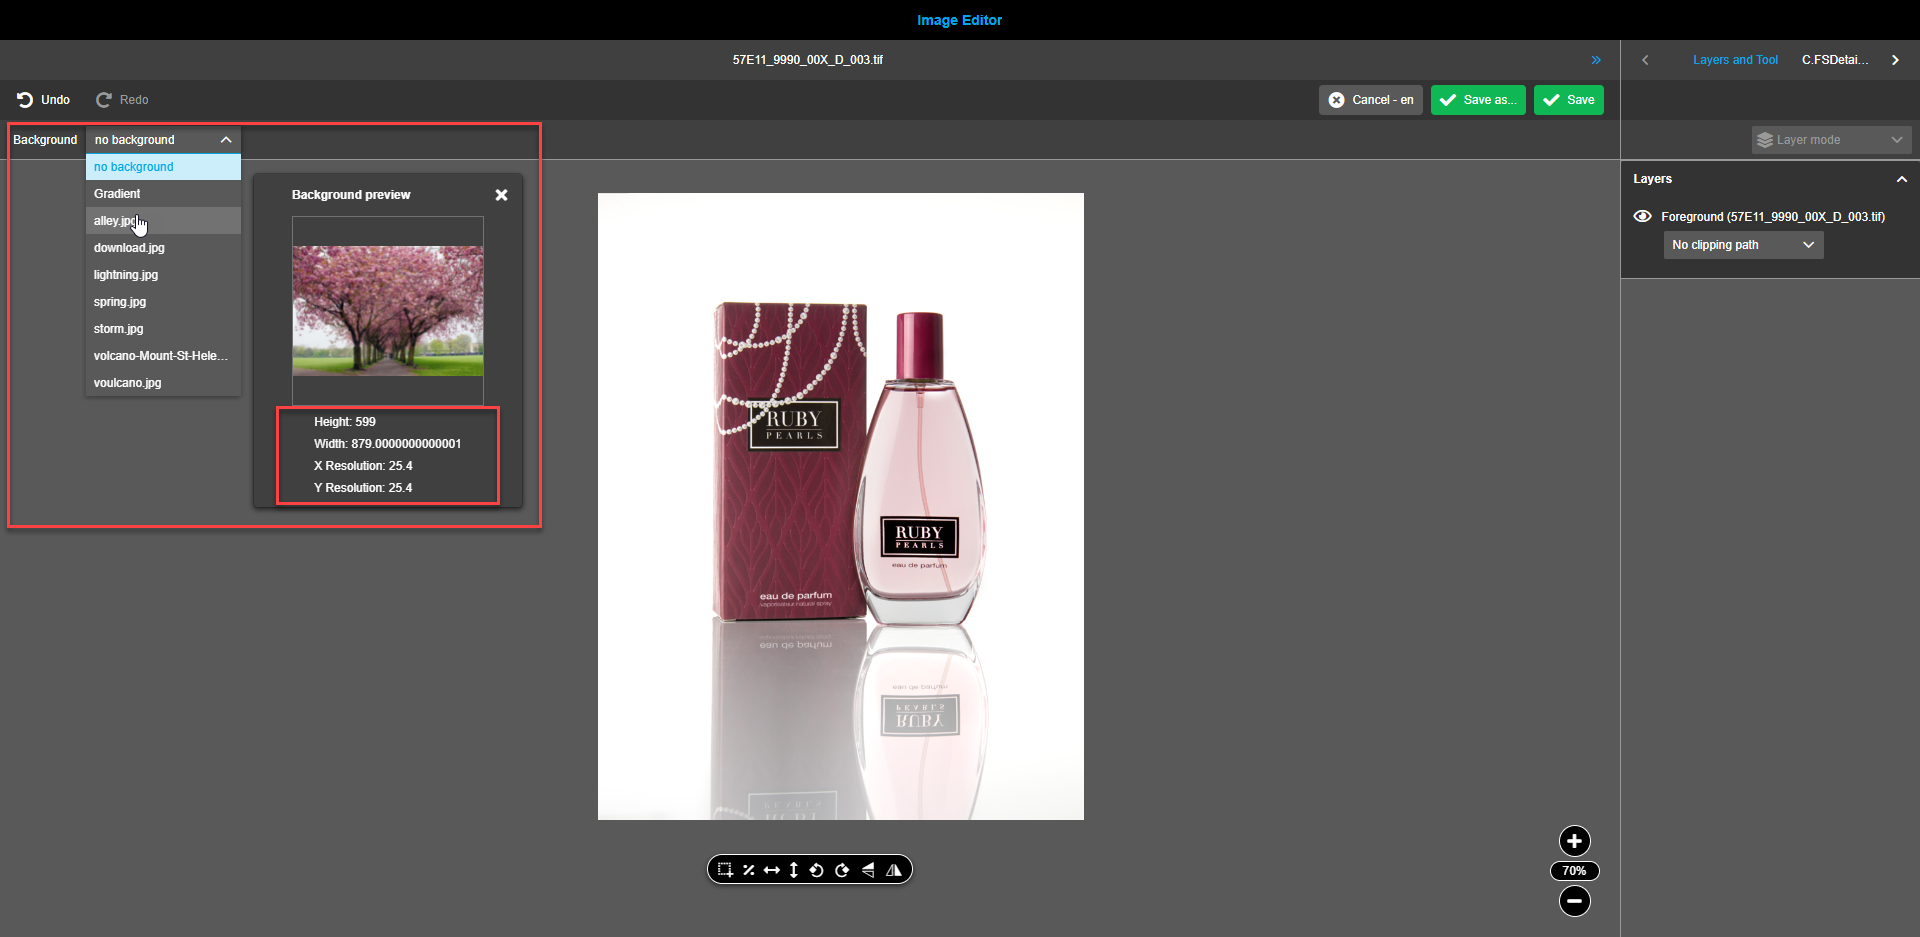
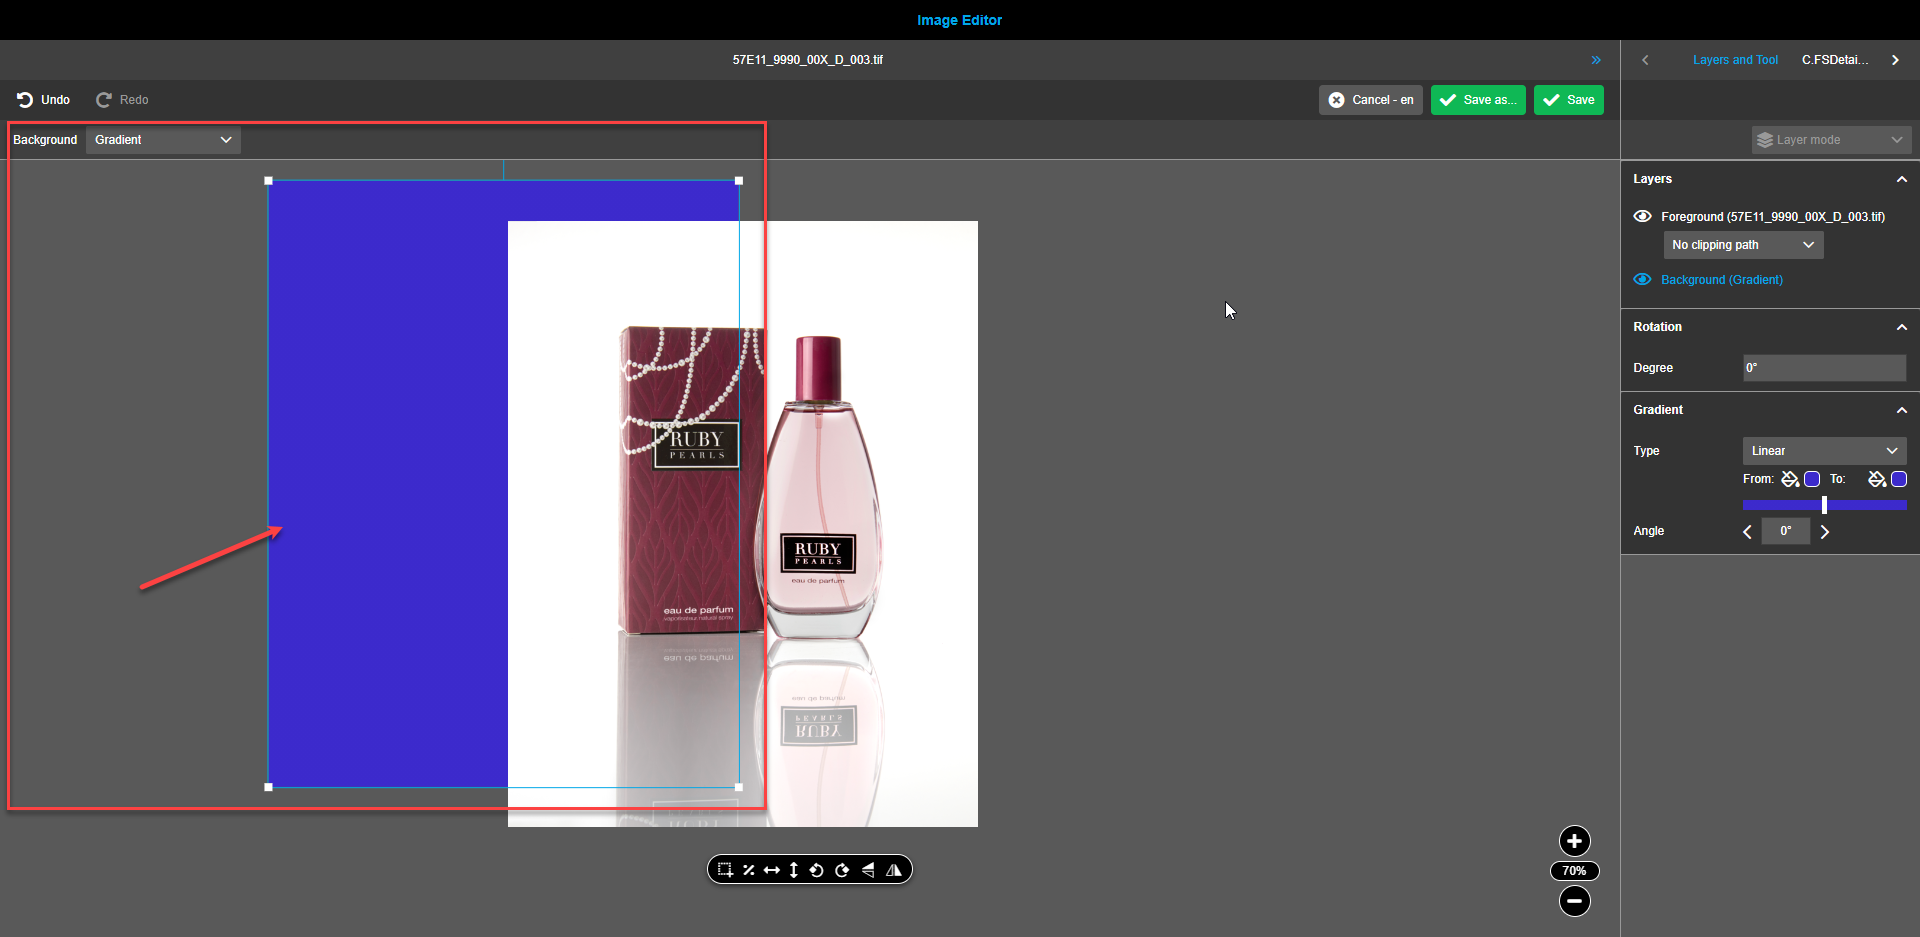
Set the "Default background color" for the gradient background in the front-end. This color will always appear in the front-end when the gradient background option is selected. If no color is set, then plain white color will be used for gradient by default.
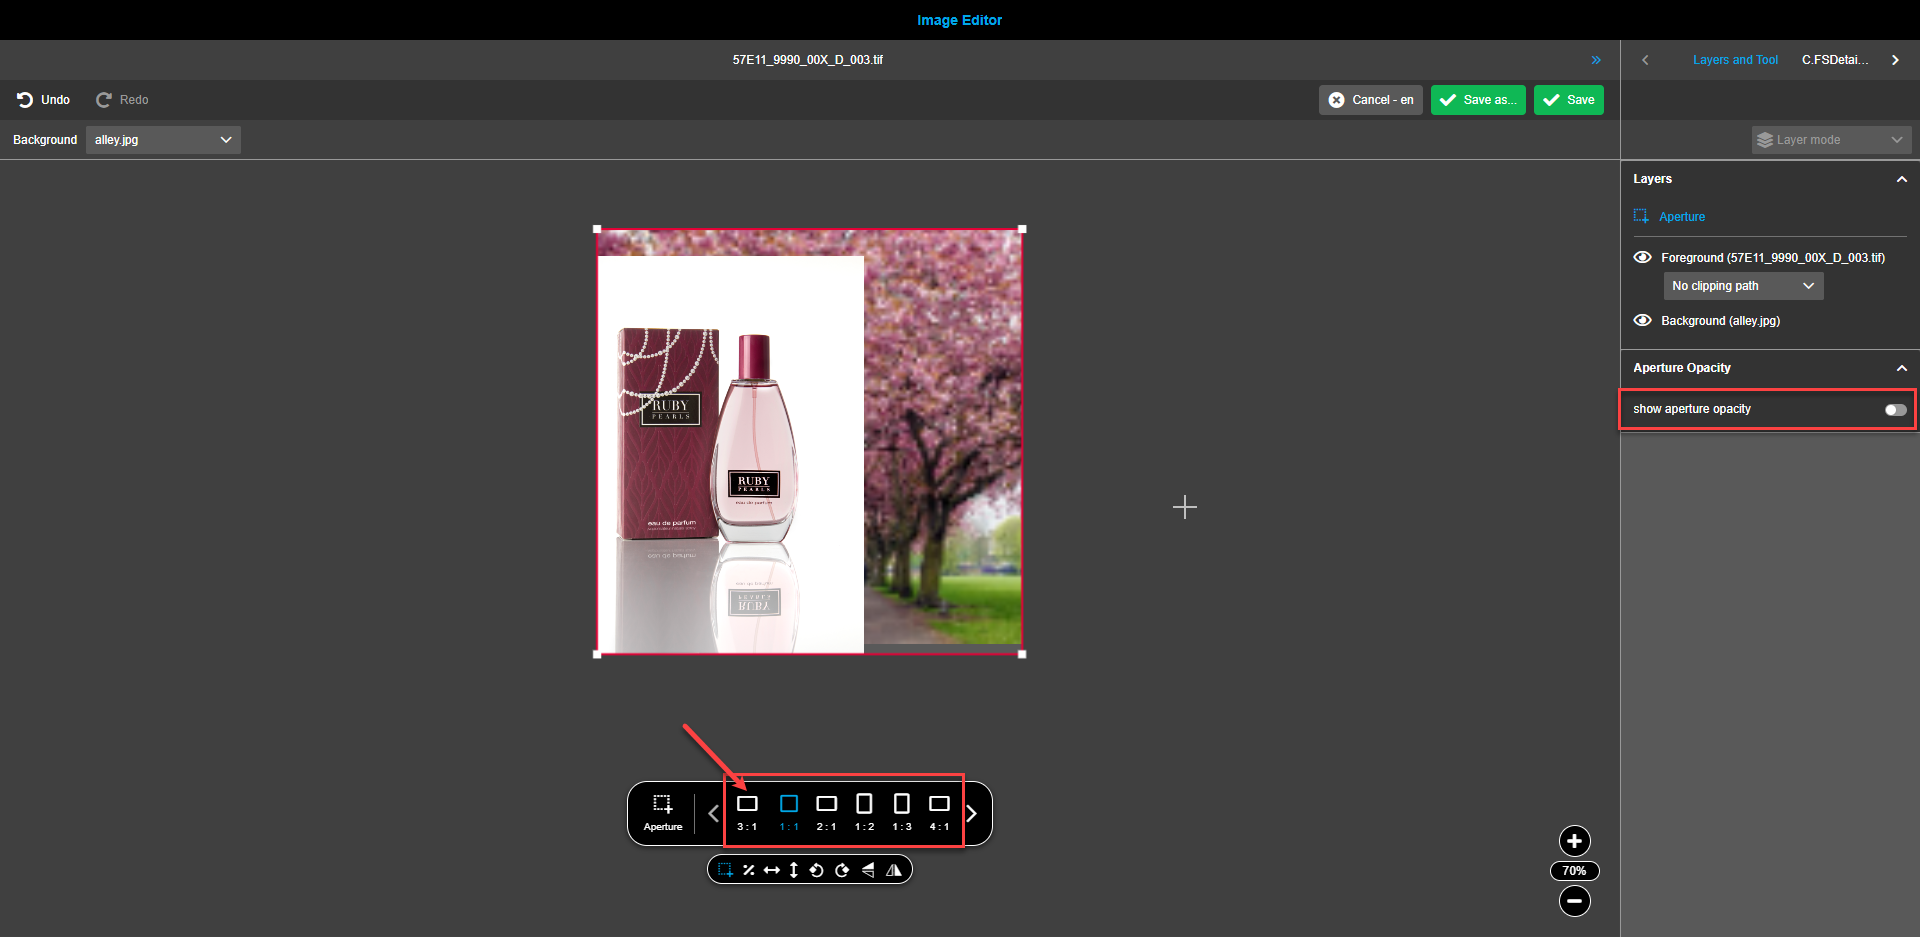
Aspect ratios configuration is applied when using Crop or Apperture (according to configuration in the "General" tab) tool in the front-end. The values can be entered for X- and Y-axes.
-
If no aspect ratios are defined and user clicks on tool in the frontend then free cropping or free aperture will be executed.
-
If aspect ratios are defined then additional floating toolbar with predefined aspect ratios will be shown.
-
It is possible to configure a default aspect ratio, which is preselected in the additional floating toolbar and displayed as the first option. The default value will be preselected in the front-end.
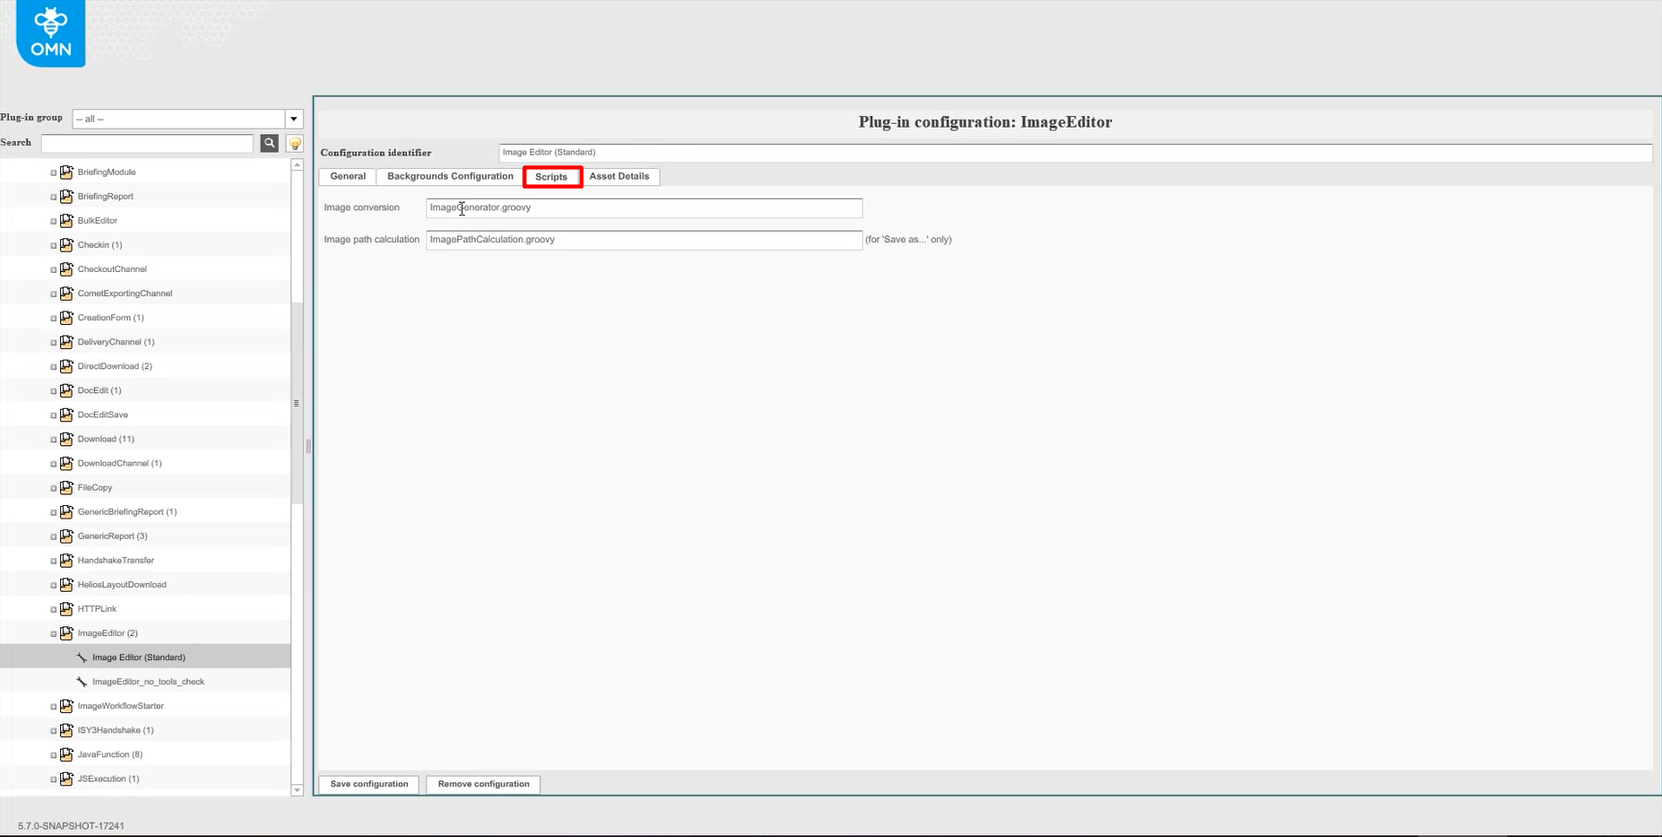
Scripts
-
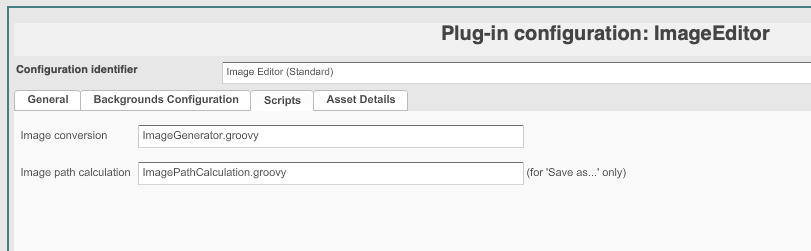
The script "Image conversion" defines save parameters for image assets.
-
The script "Image path calculation" defines the name pattern for image assets.
| The "Image Path Calculation" script executes only if a user clicks "Save as…" button and the "Activate autosave (via scripts)" option is turned on. |
For more information about the scripts, see How to use ImageEditor Image conversion scripts
Asset Details
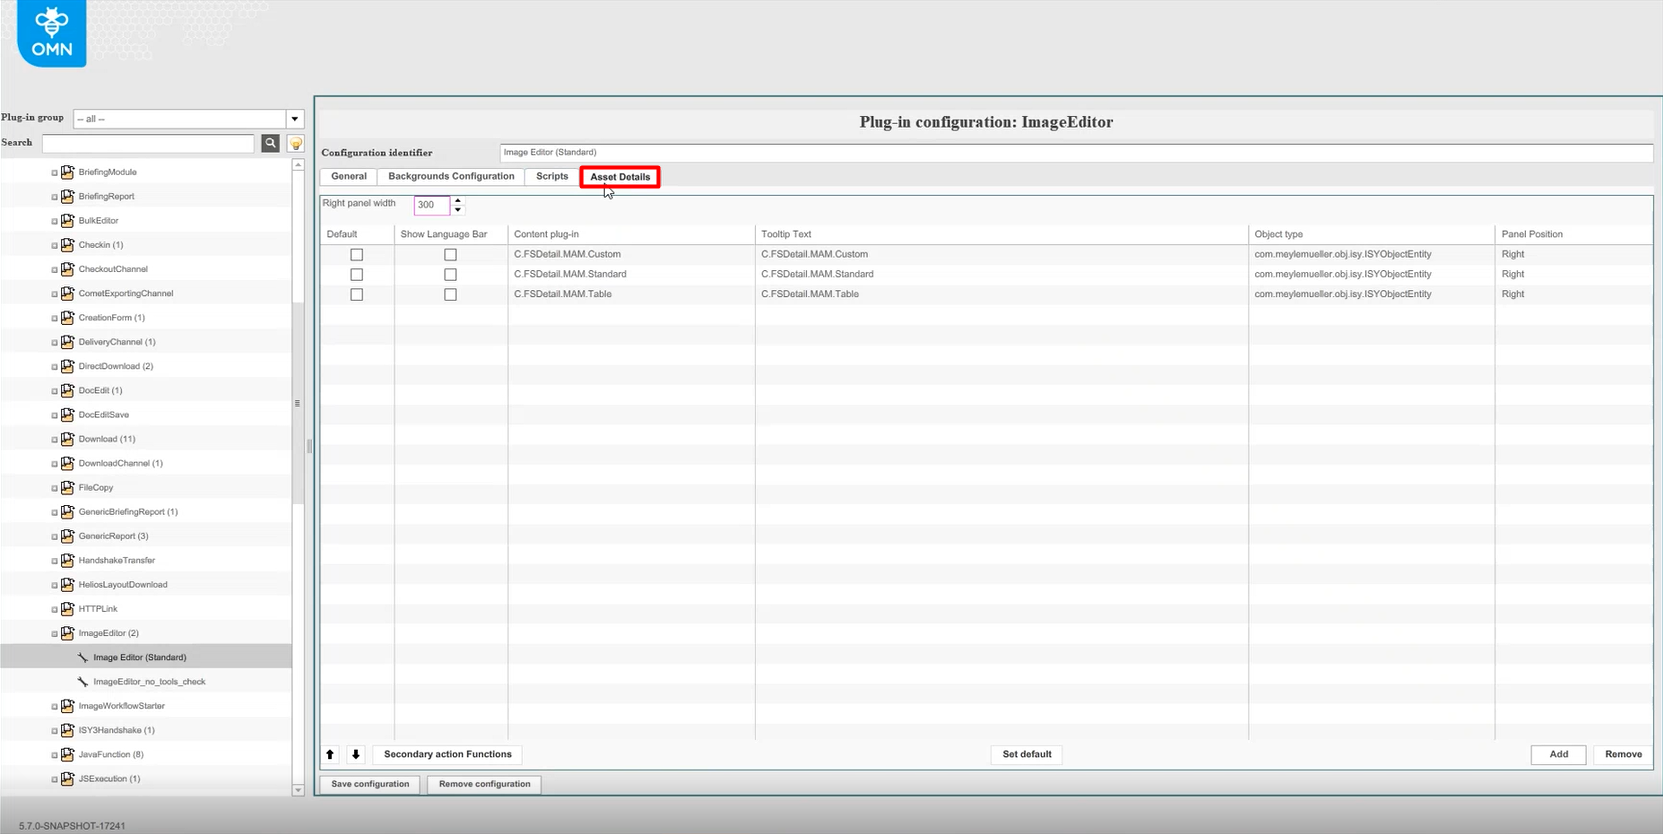
The tab "Asset Details" enables adding FSDetail-plug-ins to the right view of the ImageEditor.
Determine the default right panel width by entering integer value into the field to get the required value. Alternatively up and down arrows can be used.
If several languages are required click on the checkbox in the "Show Language Bar" column.
The column "Content plug-in" reflects the added plug-in names.
In the column "Tooltip Text" create a required plug-in name to be visible in the front-end.
The column "Object type" reflects types of objects for selected plug-ins.
The "Panel position" has the default value "Right" and can not be changed.
Up- and Down-arrows help to change order of added plug-ins on the list. Plugins will be shown in the same order in Image Editor.
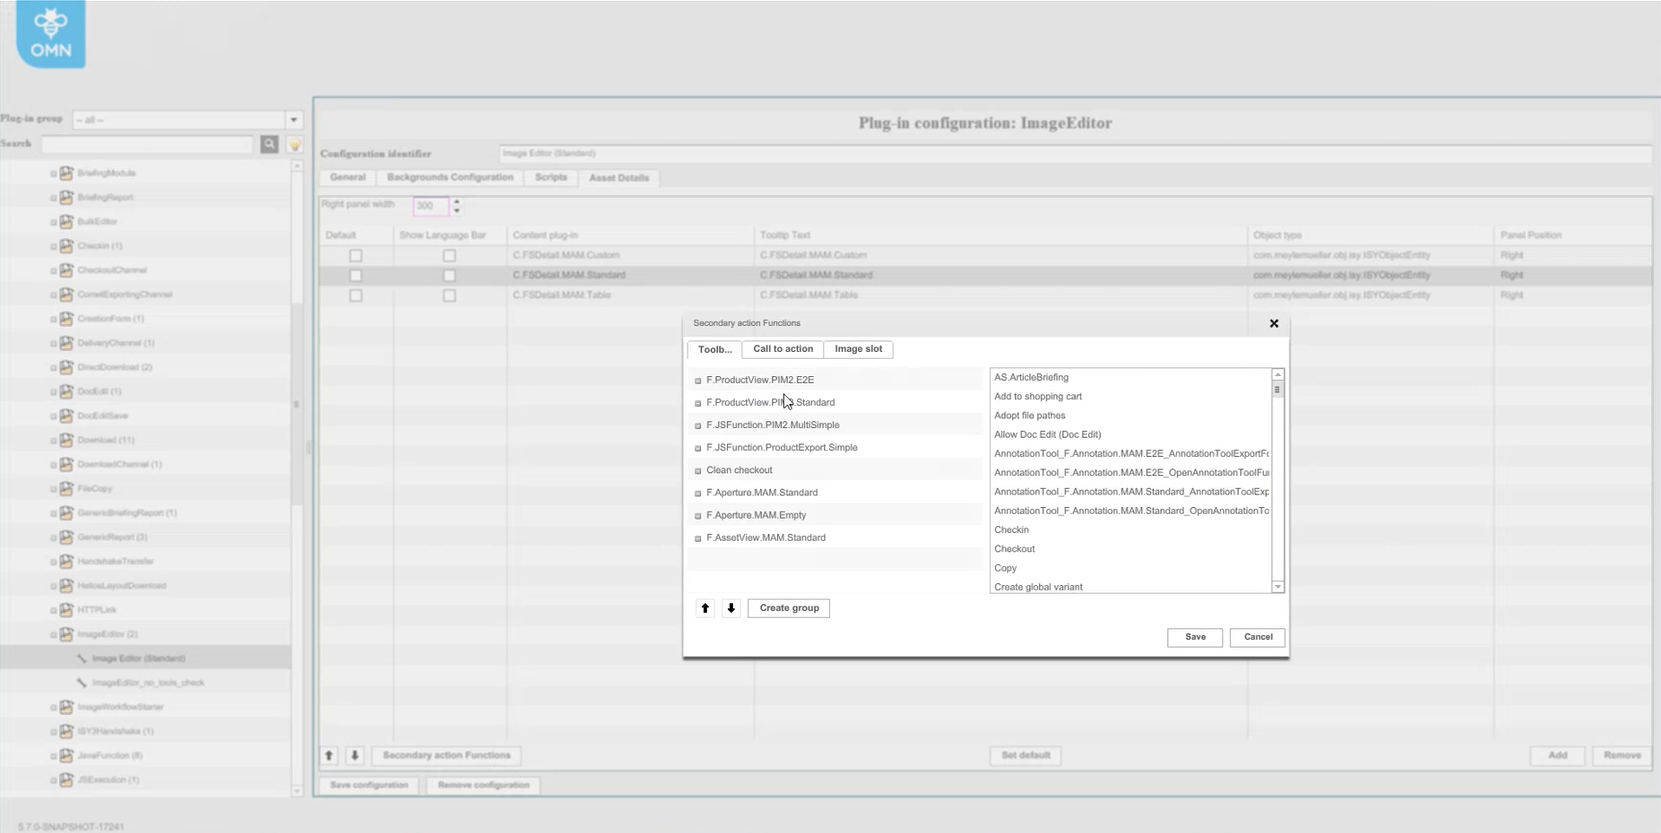
To add secondary action functions to content-plug-ins, click on the corresponding button. Add the required functions by drag and drop from right to left.
To group secondary functions click "Create group" button, enter the name of new group and fill it by DnD.
Click the button Save to save the made changes. If you want to discard changes then use the button Cancel.
If several plug-ins are set and it is required to set the default plug-in, select the required plug-in from the list of already added plug-ins. Press the button "Set default". The checkbox in the "Default" column is activated.
Use the buttons Add and Remove to create the required list of content plug-ins.
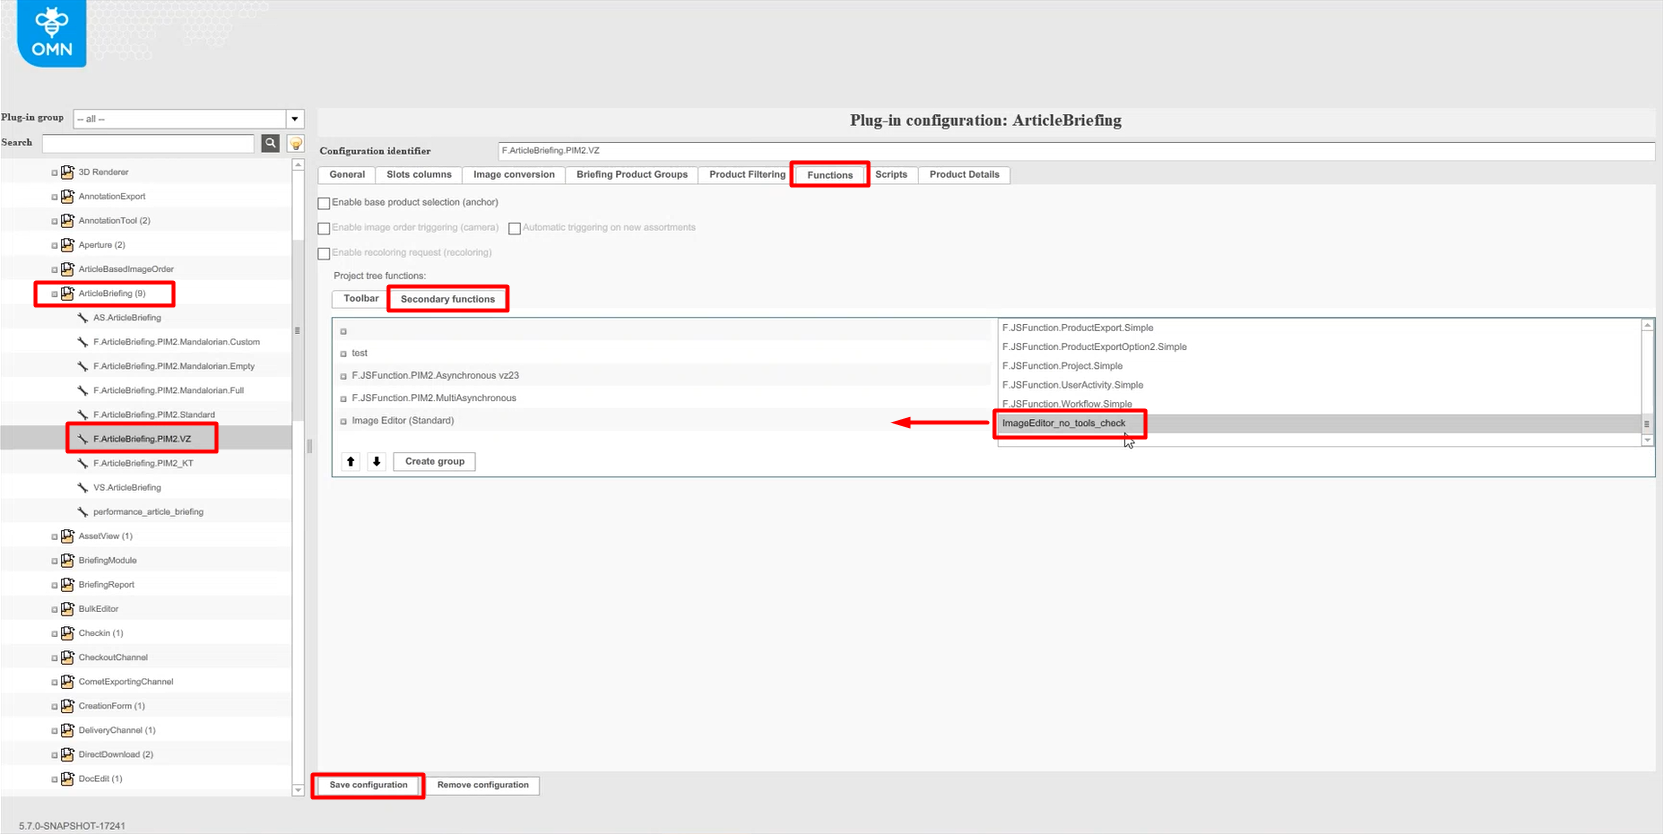
Configuration of ImageEditor for ArticleBriefing
To configure the created ImageEditor plug-in for ArticleBriefing, navigate to the back-end configuration.
In the left view expand "Mandators"→ "<Mandator name>" → "Functional plug-ins" → Select the required plug-in.
Open in the central view the tab "Functions" . Under the block "Project tree functions" open the "Secondary functions". Find the required ImageEditor plug-in in the right view, and drag it to the left view. When finished, click on the button "Save configuration".
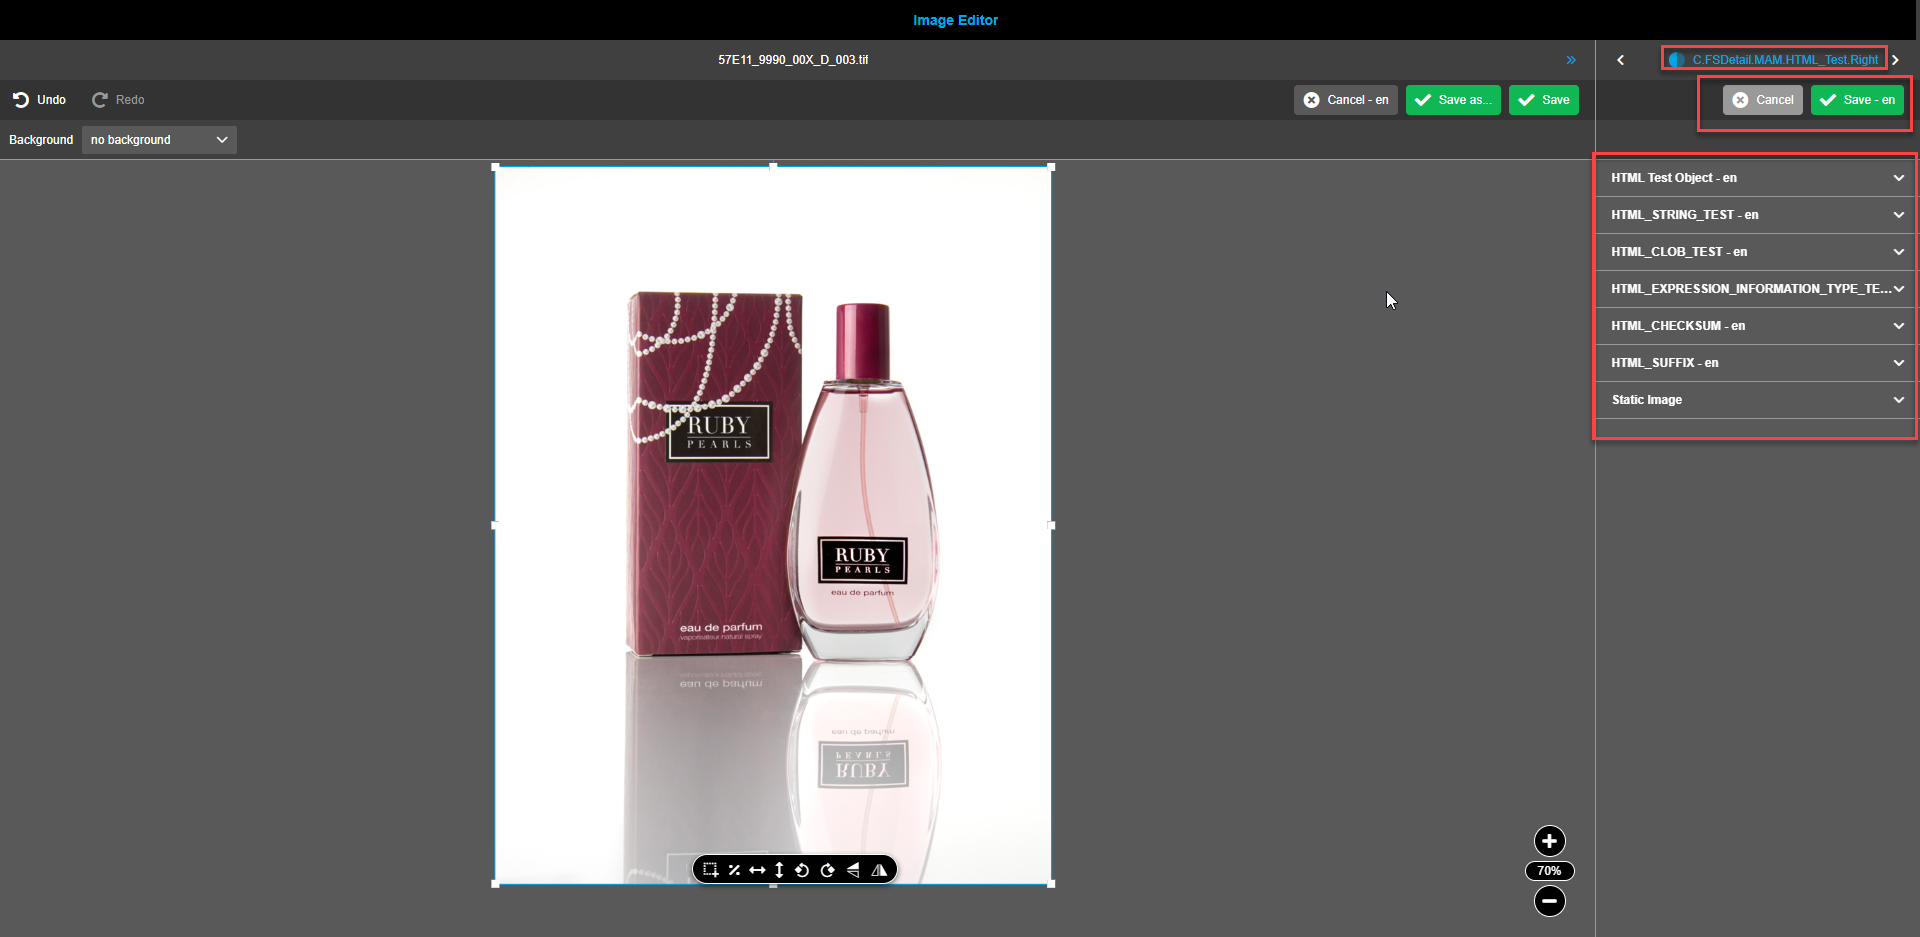
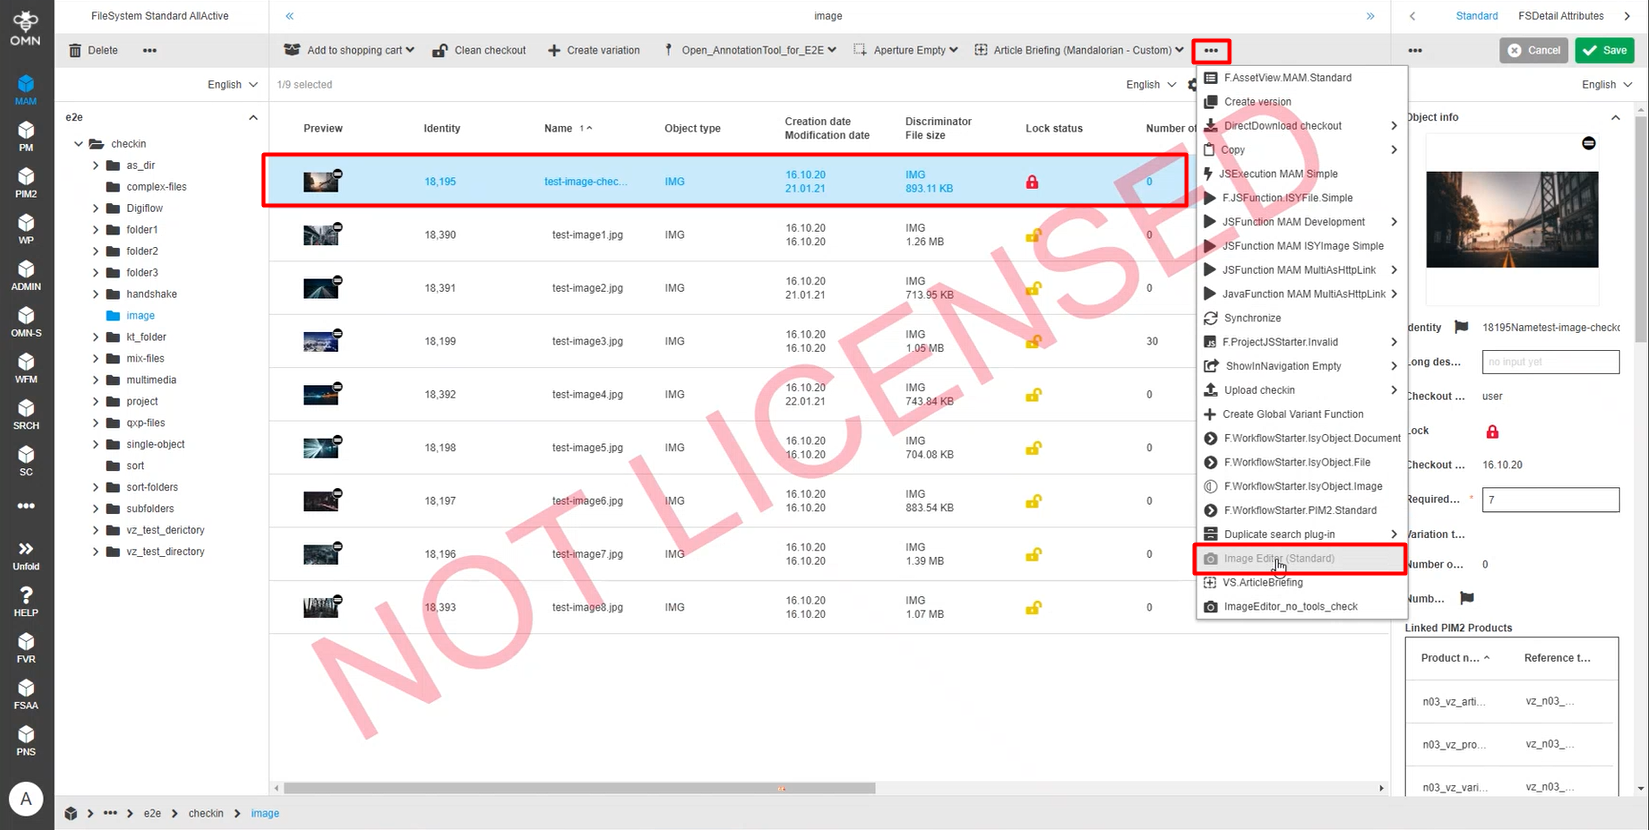
After configuration settings are done, re-login to the client and open ArticleBriefing. Select the required asset and check the central view toolbar for a new ImageEditor plug-in to appear. It might be behind the dots in dropdown menu.
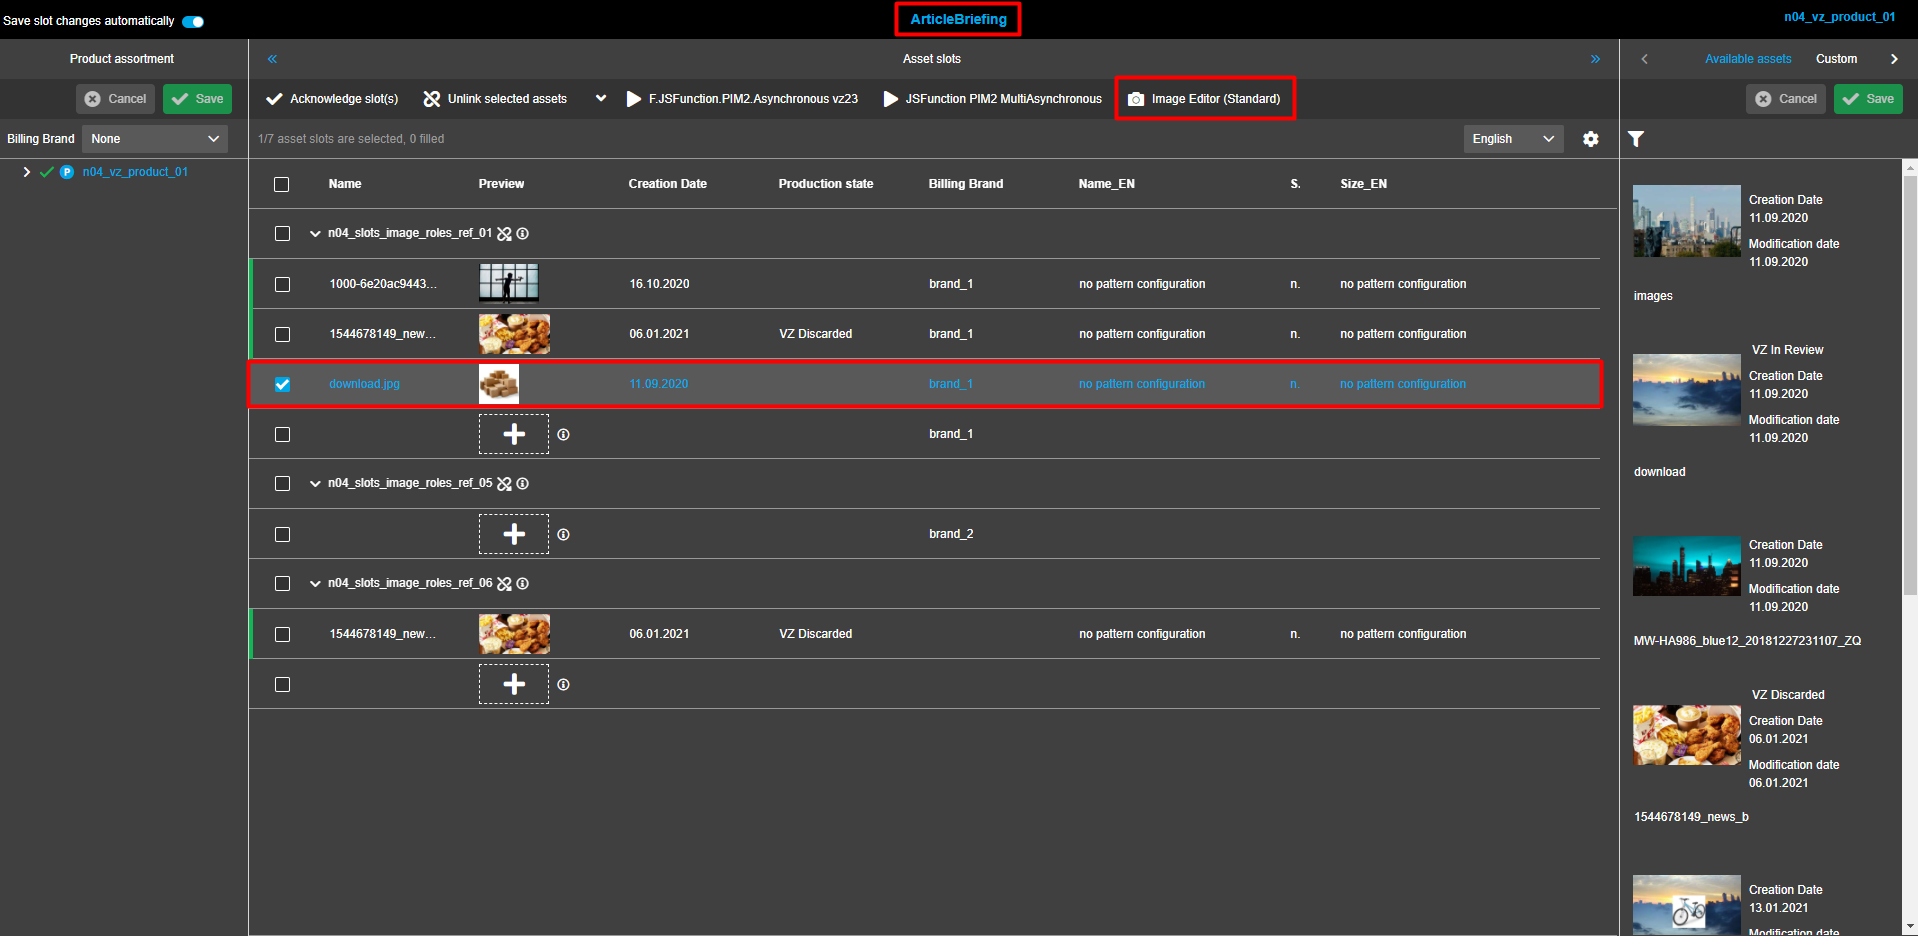
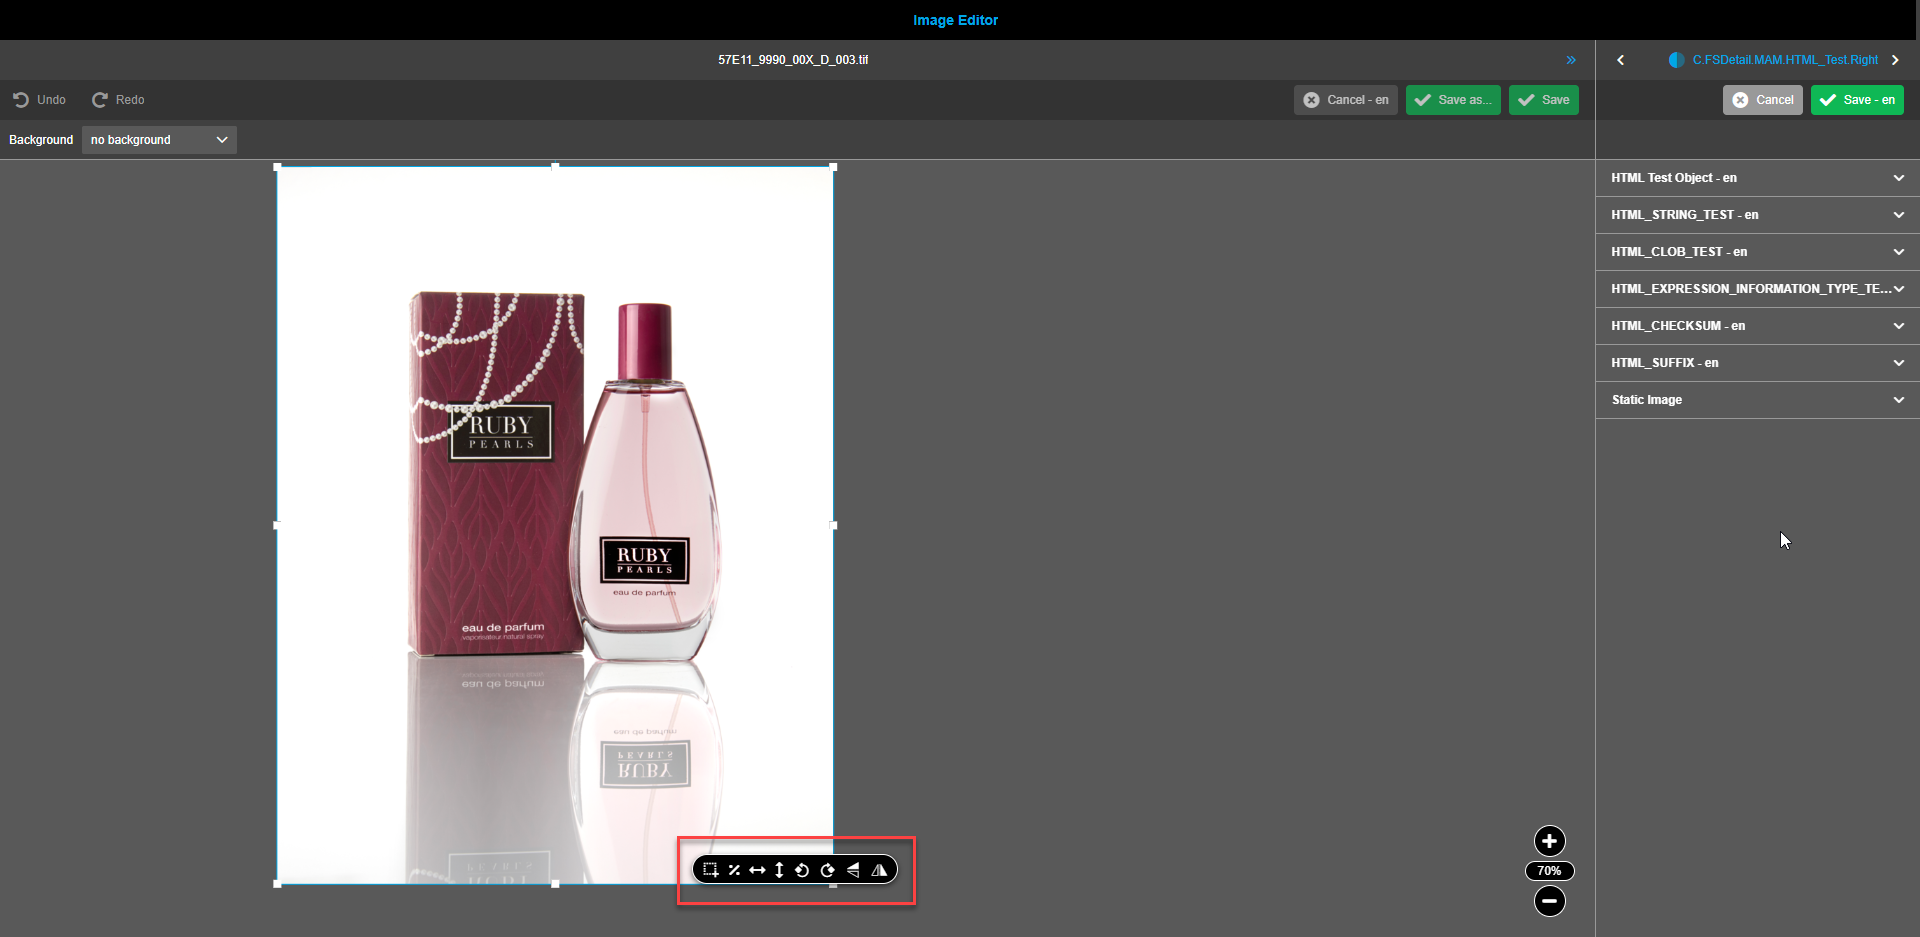
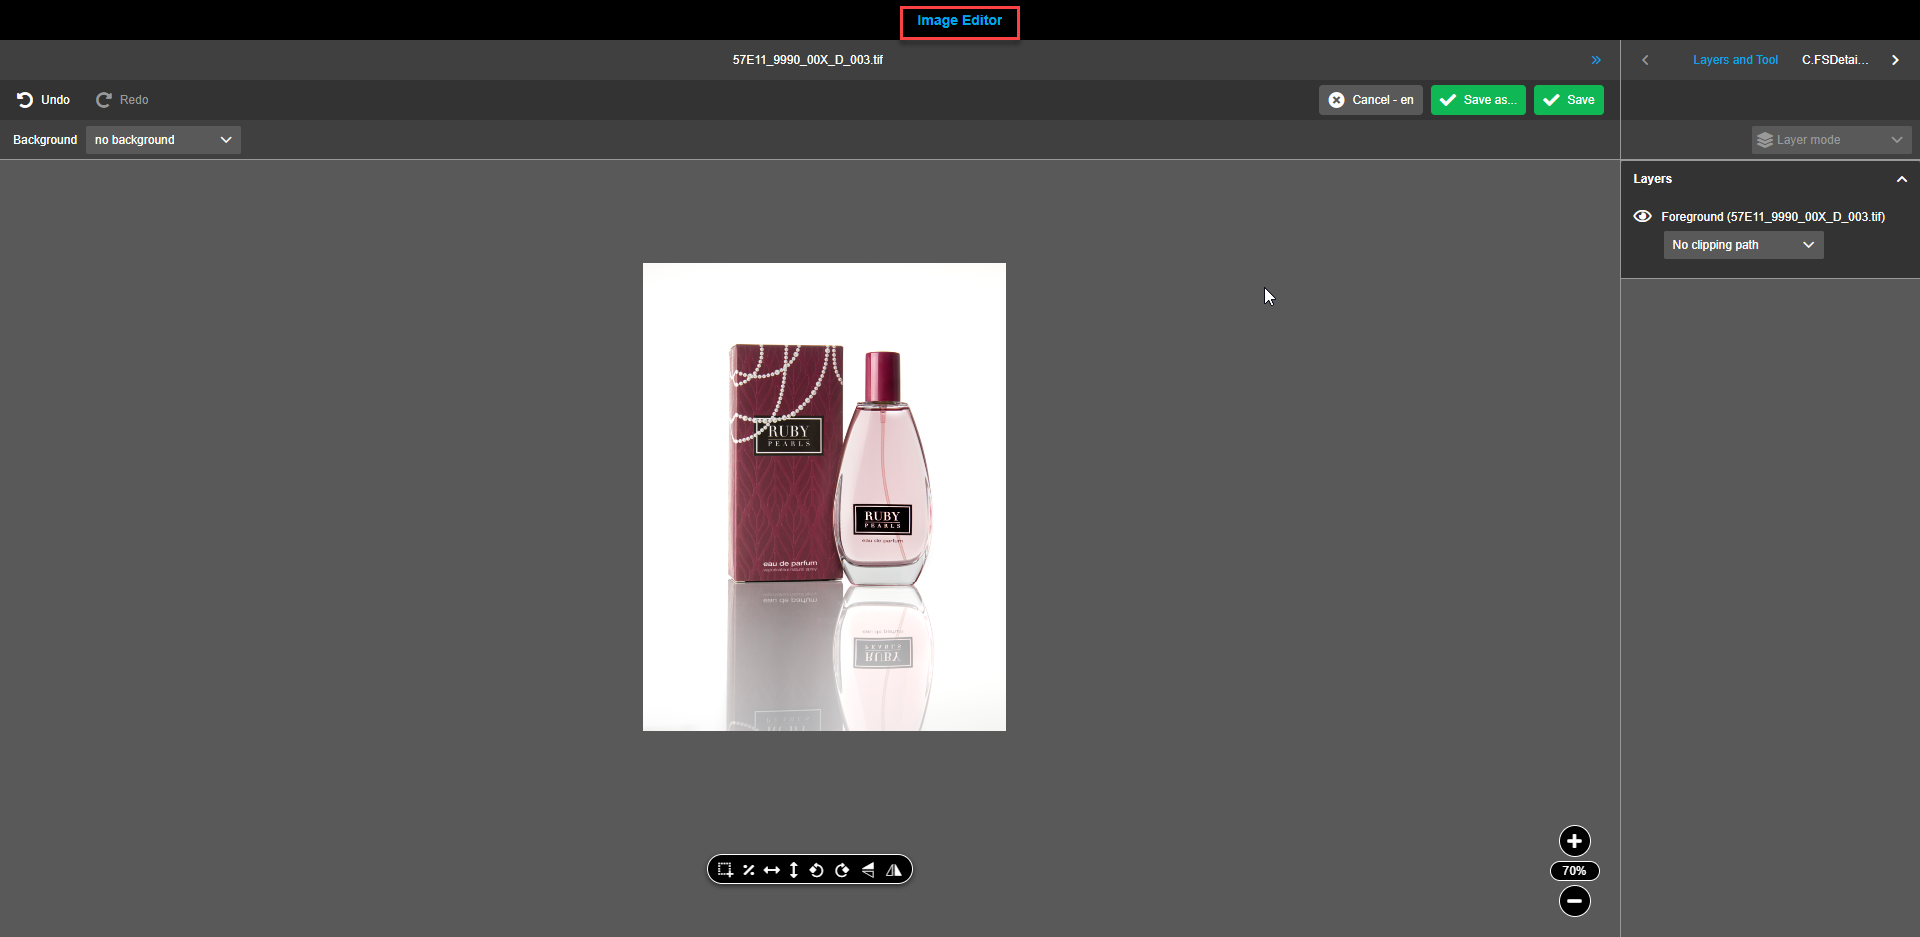
Open ImageEditor by clicking on the corresponding button in the central view toolbar.
|
For Article Briefing, only for unacknowledged assets the ImageEditor can be opened and applied. After DnD asset to central slot it should be saved in case autosave option is Off. |
Configuration of ImageEditor in Page Plug-ins
For plug-ins assuming operations with image assets (FSNavigation), the ImageEditor can be configured for content viewer type.
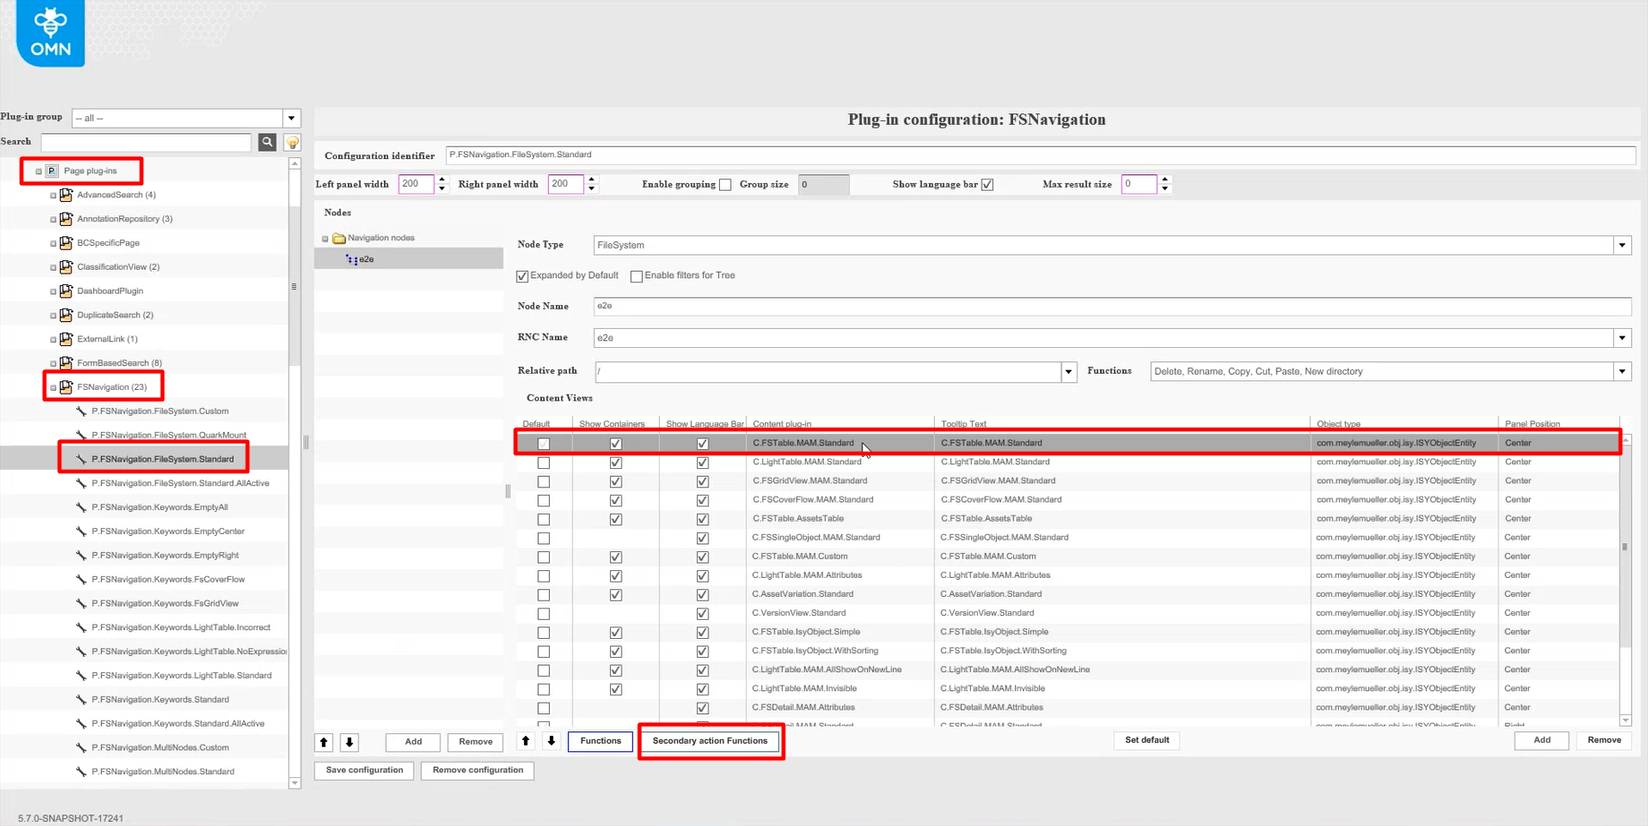
To configure ImageEditor for a content view, navigate to the back-end configuration. In the left view expand "Mandators"→ "<Mandator name>" → "Page plug-ins" → Select the required plug-in and open the needed configuration.
Select the required content view and press the button Secondary action Functions.
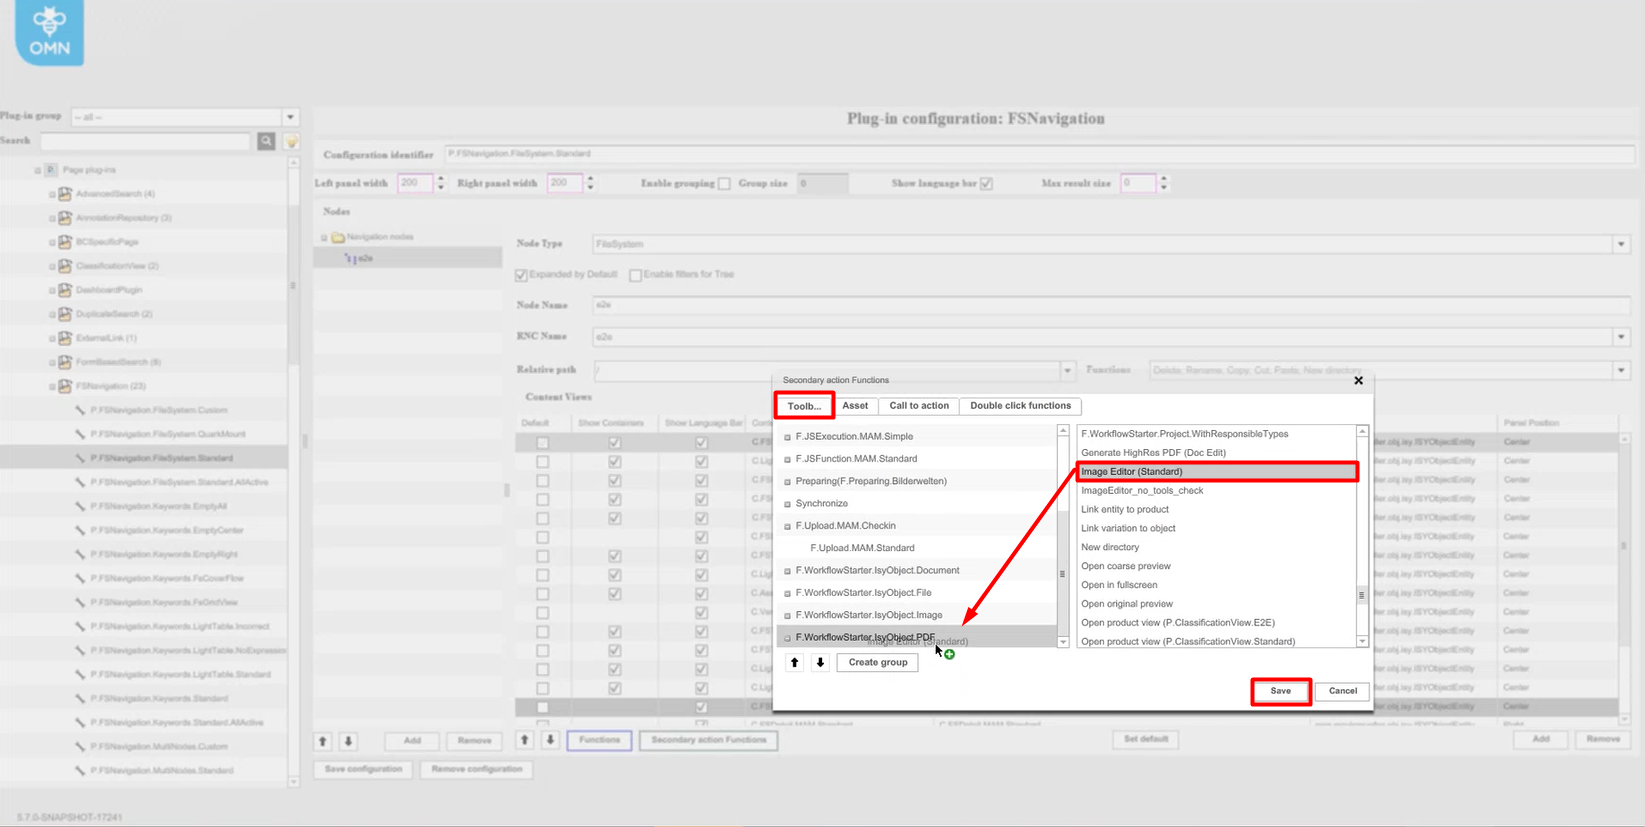
In the modal window, select the "Toolbar tab". In the right view find the ImageEditor and drag it to the left view. To save changes, press the button Save. If you want to discard changes, then use the button Cancel.
After configuration settings are done, re-login to the client. There open the required page with image assets. Select the required image asset and check the central view toolbar for a new ImageEditor plug-in to appear. It might be behind the dots dropdown menu.
To open the ImageEditor, click on the corresponding button in the central view toolbar.
Process pool configuration
Image generation process is actually pretty heavy. In order to speed up the image generation process, the process can be executed remotely on a different server.
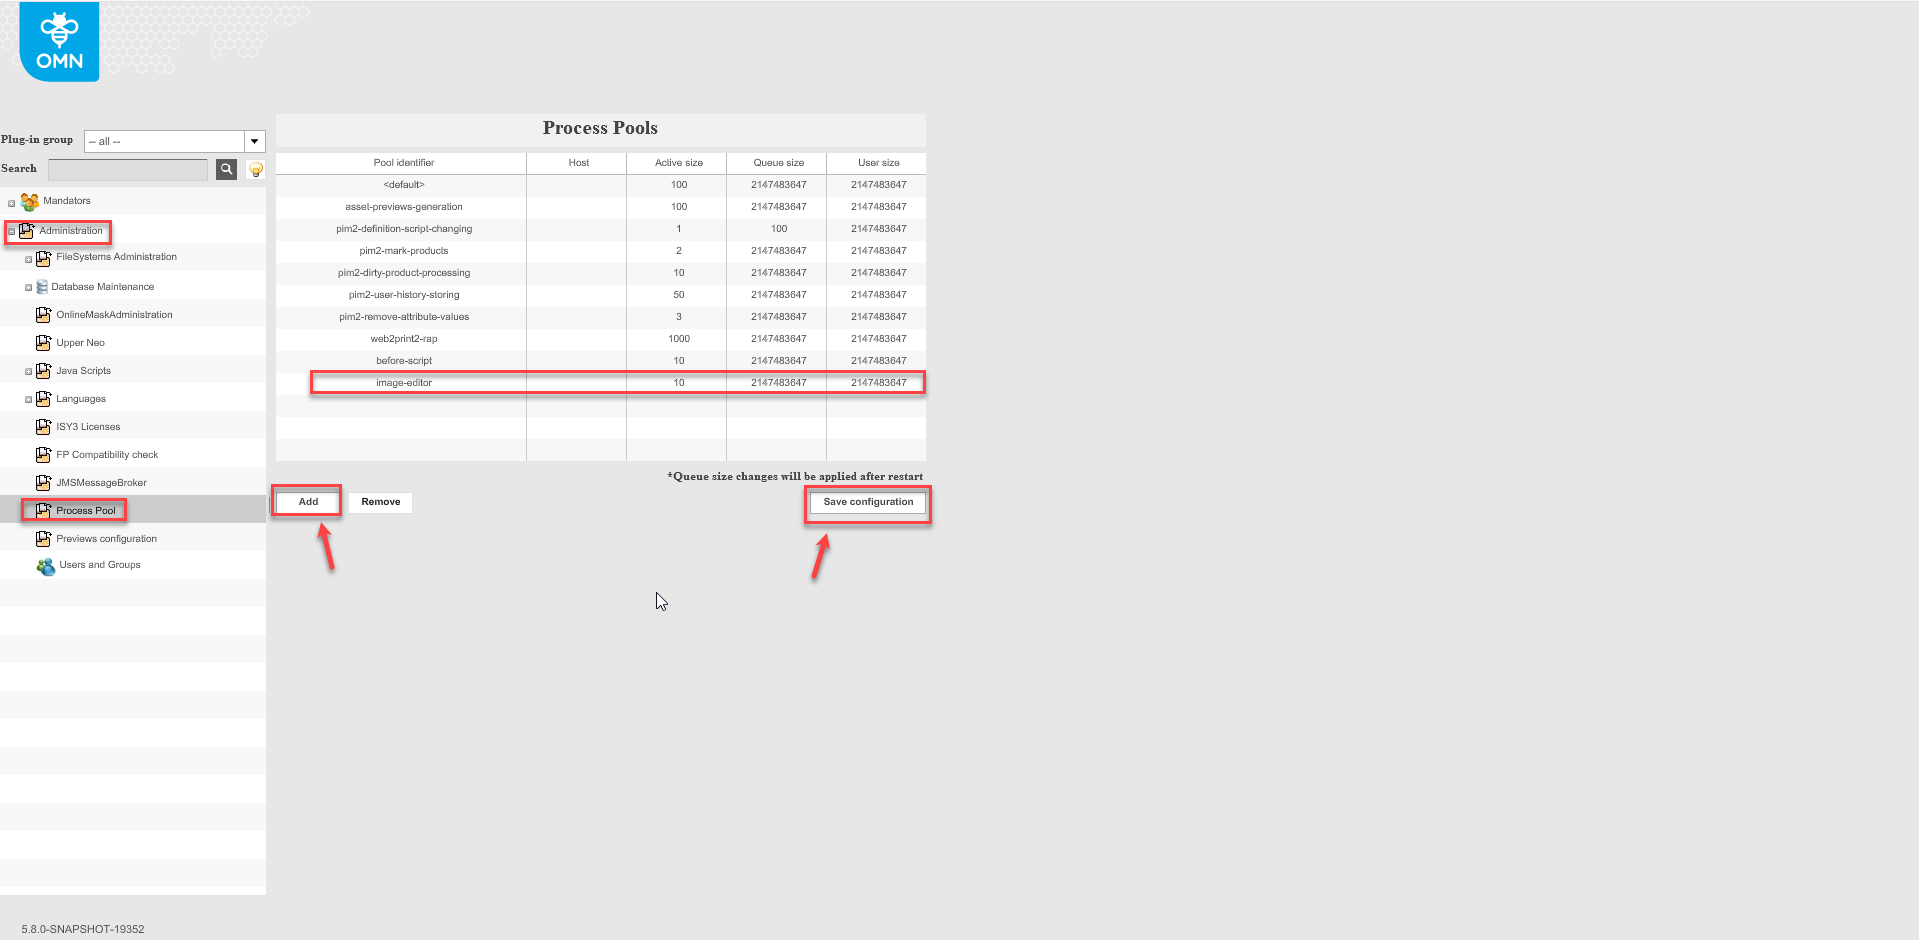
In the back-end configuration expand "Administration" → "Process Pool" .
Click "Add" to add new process pool.Type "image-editor" into "Pool identifier" column, host address in the "Host" column, and amount of threads in the "Active size" column.Save the configuration.
To perform the rest of configuration and to configure the host please contact the dev-ops team.
How to use ImageEditor Image conversion scripts
Image saving logic in HTML5 client ImageEditor is being managed by the following scripts:
-
ImageGenerator.groovy + ImageGeneration.sh - Generates the image using the foreground and background images and different composition parameters.The 3rd party ImageMagick tool is used to generate a result image.
-
ImagePathCalculation.groovy - calculates the image path using the information about project, product, reference type and asset.The temporary file generated by the Image Conversion script is copied to the given path.
The "Image conversion" groovy script should be used to generate the new image;
The "Image path calculation" groovy script should be used to generate the path of the new image if the "Activate autosave (via scripts)" option is activated;
If the "Activate 'Create variant'" option is activated, a variation of the source image will be created;
The new image will be placed into a directory for which path starts from the "Generated images location" directory (for example: "<generated_images_location>/<custom_path>/<new_saved_image>");
| If the "Activate autosave (via scripts)" option is activated, the server side will add additional path "_generated/<source_image_id>" for the path of the "Generated images location" option. So the following path will be used to place a saved image: "<generated_images_location_path>/_generated/<source_image_id>/<image_path_calculation>/saved_image_name"; |
"Image conversion" scripts are managed in OMN Git in the following directory: omn/…/mam/plugin-image-editor/distrib/src/main/resources/config/imageeditor/
"Image conversion" scripts are deployed with OMN (works out of the box). Target path: /usr/local/omn/config.samples/imageeditor/
Configuring Image Conversion scripts after deployment
After the application has been deployed, to enable "Image conversion" scripts you need to perform the next steps:
-
Copy scripts from the default config directory (/usr/local/omn/config.samples/imageeditor/) to the application config directory: /usr/local/omn/config/groovyscripts/<mandator-name>/
-
Check, whether the
ImageGenerator.groovyscript contains the correct path to theImageGenerator.shscript
To check it, openImageGenerator.groovyand check the command line parameters:
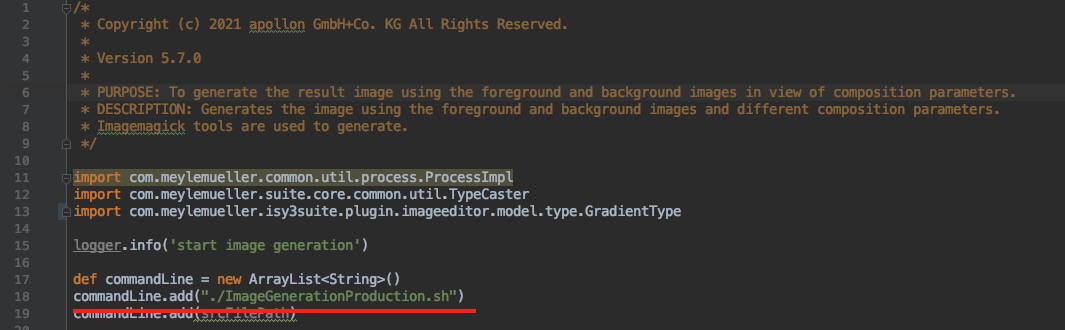
| Keep in mind, that the path is relative to the used script, so by default both the ImageGenerator.groovy and the ImageGeneration.sh must be placed in the same directory |
-
Configure needed scripts on OMN config client
-
Open the ImageEditor plugin configuration
-
Select the "Scripts" tab
-
Type in the script path
-
| The scripts path is being taken by the relative path (starting from /usr/local/omn/config/groovyscripts/<mandator-name>/) |