Project Types
This configuration provides you with the possibilities to create, remove and manage existing project types that are used in the ProjectNavigation plug-in in the Frontend client.
This is the overview of how the configuration page looks like:
| Area | Description | Notice |
|---|---|---|
Table with available project types |
Here you can always find all created project types. For each type there is additional information in the brackets on how many projects of this type are created in the Frontend. With 'Add' button you can create a new project type. With 'Remove' button you can remove a not needed project type. To continue with adjustments of the project type, you need to select the type in the table and switch to the right panel with different tabs. |
|
'Basic properties' tab |
This tab contains simple base settings for project type, e.g. name, icon, display pattern, etc. |
More details can be found here |
'Hierarchy' tab |
This tab allows you to define the relations between different project types. |
More details can be found here |
'Attributes' tab |
In this tab custom attributes for the project type can be defined. |
More details can be found here |
'Functions' tab |
With this tab you can define which icons are allowed for the projects created with this project type. |
More details can be found here |
'Project views' tab |
In this tab you have the possibility to define all needed content views that should be shown for the projects created with this type in the center area of ProjectNavigation in the Frontend. |
More details can be found here |
'Creation script' tab |
Here you can add a script that should be performed when the new project is created in the Frontend. |
More details can be found here |
'Update script' tab |
Here you can add a script that should be performed when the project is updated in the Frontend. |
More details can be found here |
'Update order sequence script' tab |
Here you can add a script that should be performed when the project is reordered in the Frontend. |
More details can be found here |
'Deletion script' tab |
Here you can add a script that should be performed when the project is deleted in the Frontend. |
More details can be found here |
'Asset script' tab |
Here you can add a script that should be performed when an asset is linked to the project in the Frontend. |
More details can be found here |
'Asset unlink script' tab |
Here you can add a script that should be performed when an asset is unlinked from the project in the Frontend. |
More details can be found here |
Basic properties
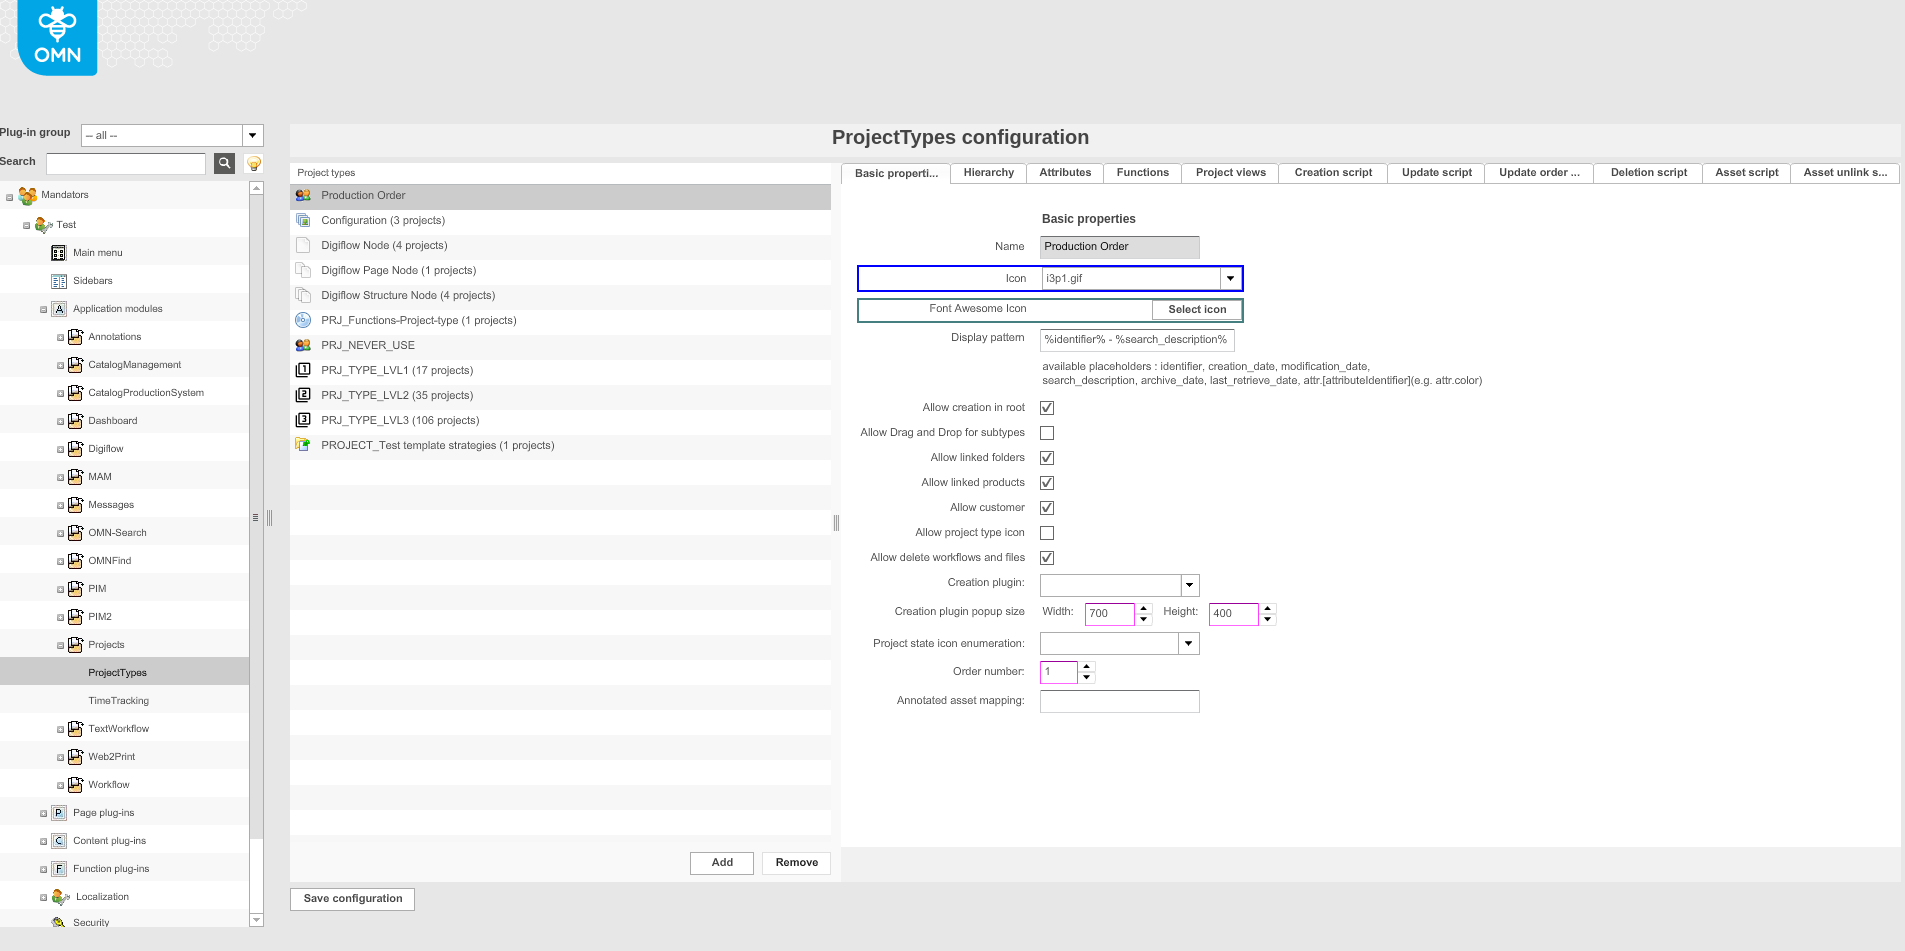
This configuration tab contains different options that can be considered as basic settings for each project type. Here is the overview of all configuration possibilities:
| Option | Description | Notice |
|---|---|---|
Name |
Here you can see the name of the project type. You can also change it here. |
|
Icon |
With this option you can define the icon for each project type. Chosen icon is shown for each project created with specified project type in the left-view navigation in the Frontend. |
This option has influence on old client only. The icon will be shown on the Frontend only when 'Allow project type icon' checkbox is activated. More details on configuration of icons can be found here. |
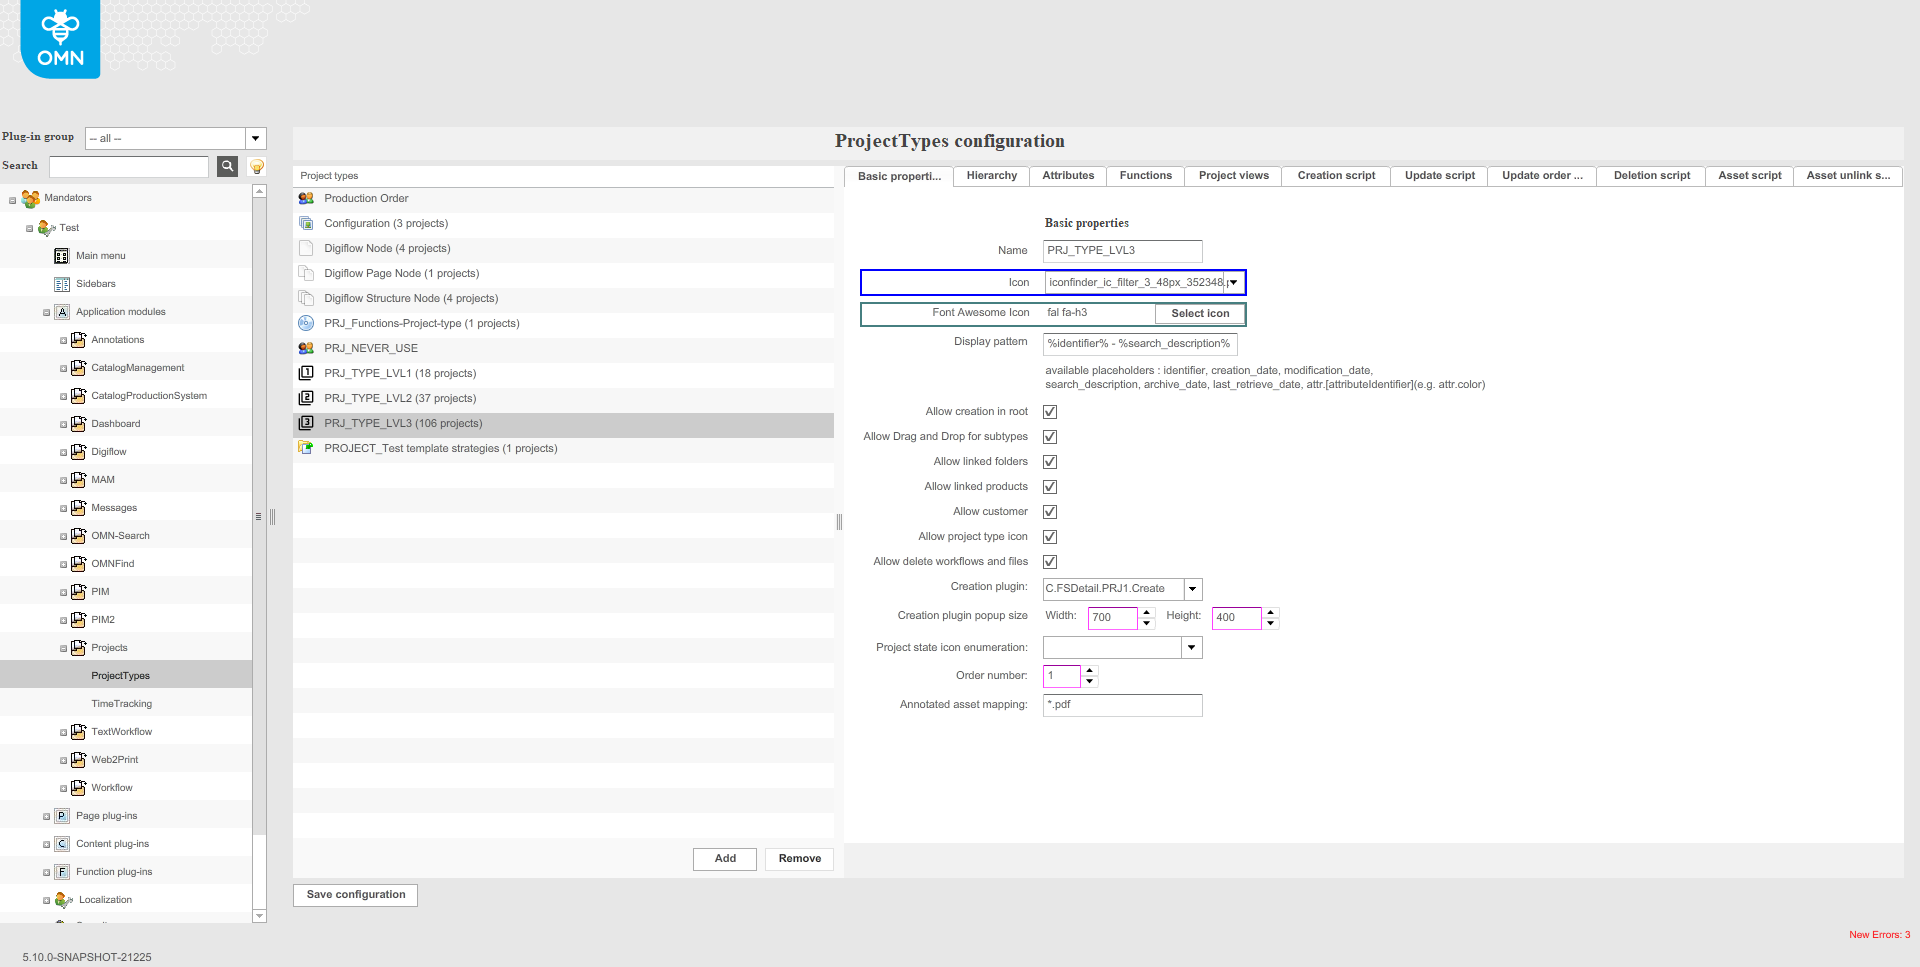
Font Awesome Icon |
With this option you can define the icon for each project type. Chosen icon is shown for each project created with specified project type in the left-view navigation in the Frontend. |
This option has influence on HTML5 client only. The icon will be shown on the Frontend only when 'Allow project type icon' checkbox is activated. More details on configuration of icons can be found here. |
Display pattern |
Here the additional display pattern can be defined for each project type. It contains project attributes. Projects will be displayed in the set pattern in the tree navigation in ProjectNavigation in the Frontend.
|
|
Allow creation in root |
>> Activate the checkbox if the projects of this type can be created on the first level (without parent project). |
|
Allow Drag and Drop for subtypes |
>> Activate the checkbox if the child projects of this type can be moved. If the checkbox is not activated, DnD of sub-projects is not possible (even if the hierarchy rules are kept). |
This setting has influence only on old client. |
Allow linked folders |
>> Activate the checkbox to allow linking of folders to the project. |
|
Allow linked products |
>> Activate the checkbox to allow linking of products to the project. |
|
Allow customer |
>> Activate the checkbox if projects of selected type can be created by the frontend user. |
This option has influence only on old client. |
Allow project type icon |
>> Activate the checkbox if configured icons should be shown for projects. |
|
Allow delete workflows and files |
>> Activate the checkbox if the user should have the possibility to delete related objects when deleting the project in the Frontend. |
Special modal window is shown in the Frontend if the option is activated:
|
Creation plugin |
For selecting a configuration of FSDetail plugin that will be used for the manual creation of a project in the Frontend. |
|
Creation plugin popup size |
For configuring the size of the popup window the creation plugin opens in. |
|
Project state icon enumeration |
Here you can define on base of what enumeration attribute the state icons for the project should be shown. Enumeration attribute should be pre-configured with the icons in the tab 'Attributes':
|
In the Frontend the state icons are shown before the icon of project type:
|
Order number |
For setting an order for the project types in the Frontend. |
|
Annotated asset mapping |
Here the type of the asset file should be defined if the AnnotationTool function will be executed on the project. The asset type should be defined in the following way: *.jpg |
Without correctly defined type of asset, it will be impossible to execute AnnotationTool function on project. |


Hierarchy
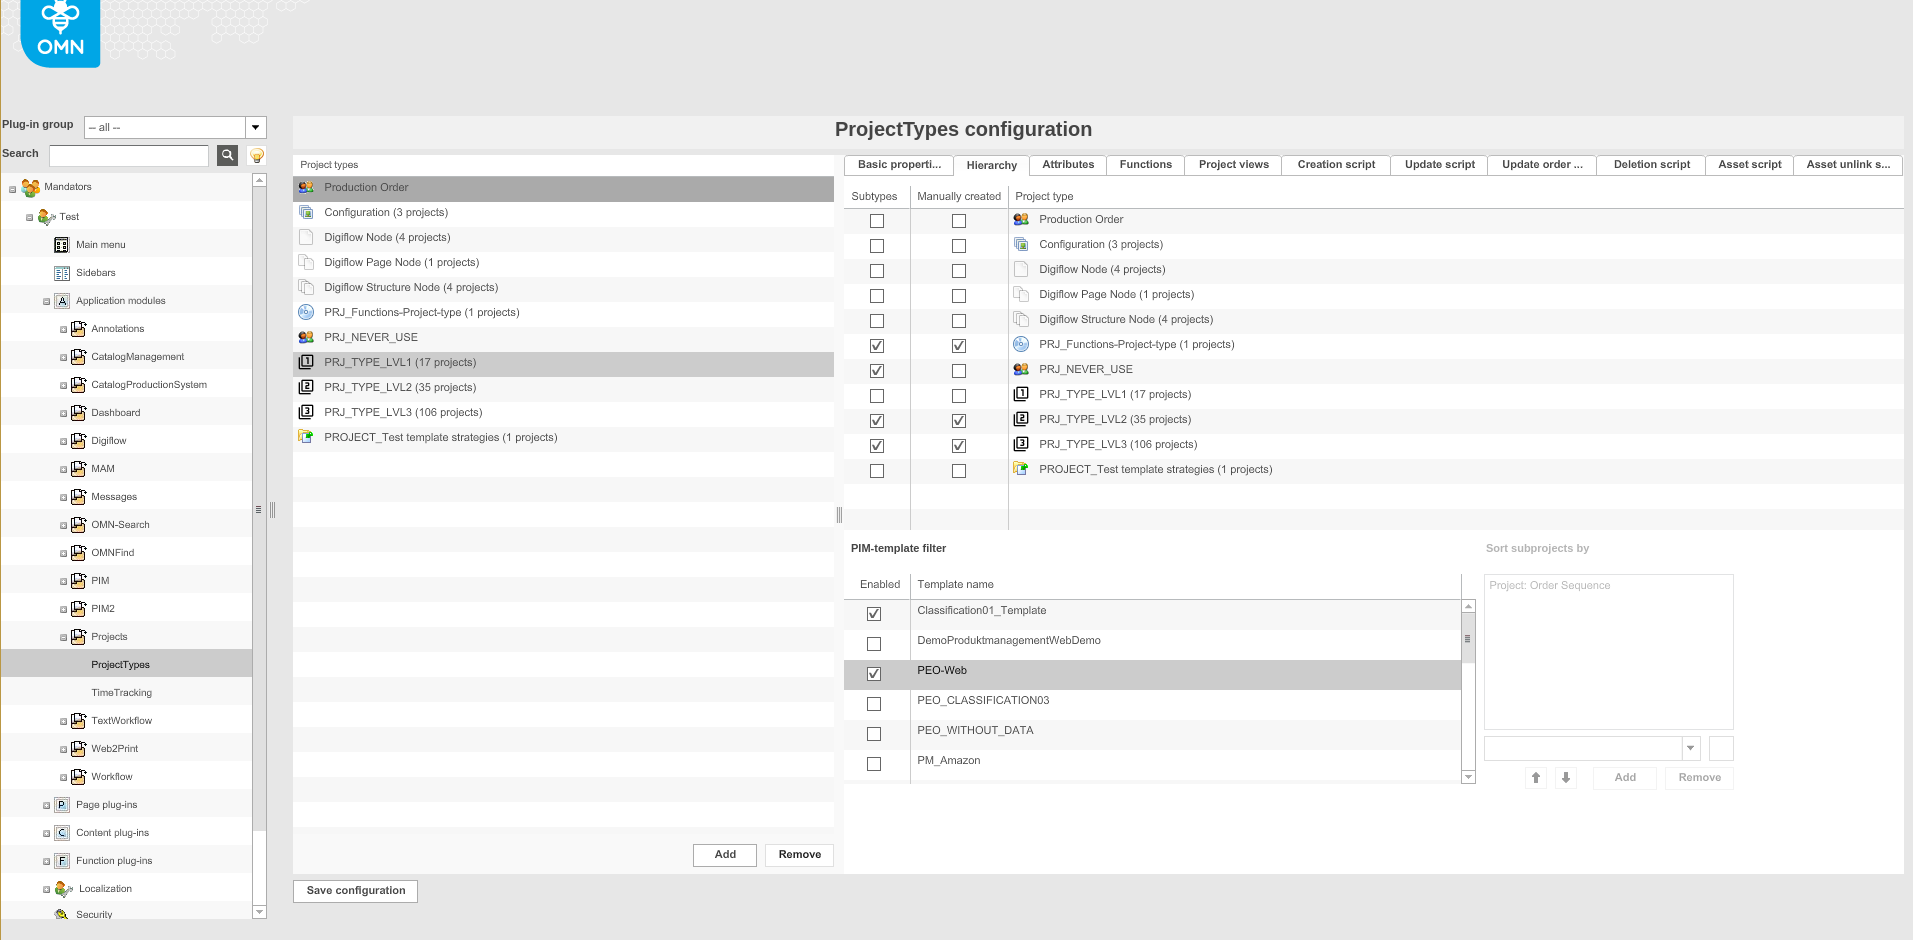
The goal of this tab is to define the rules for relations between projects.
Make sure that you have the following prerequisites ready:
✓ Templates are configured in the application module "PIM2"
✓ At least two project types exist
-
Activate the checkbox in front of the project type in the column Subtypes, to choose project types as sub-types (child elements) of the currently chosen project type.
-
To enable creating the sub-types manually in the Frontend, activate the checkbox in front of the project type in the column Manually created.
-
To define templates that shall be available in the Frontend, activate the checkbox in front of the template in the column Enabled.
-
Define a sorting order for the sub-types in the area Sort subprojects by.
- NOTE
-
Definition of a sorting order in this area can be done only when Drag and Drop for subtypes is not allowed (in the tab 'Basic properties').
-
To save the configuration and all changes made, click Save configuration.
Attributes
This configuration tab provides you with the possibility to create project type’s specific attributes of different types. This is how the configuration looks like:

| Field | Description | Notice |
|---|---|---|
Identifier |
This is a technical identifier for the new metadata field. |
It is shown only in the Backend. It is allowed to use the following characters:
|
Label |
Not technical name of the metadata field. |
It is shown in the Frontend. |
Type |
The needed attribute type can be chosen here. Available types are:
|
For enumerations, a list of values has to be specified. For variations, you should add table columns by using the column 'Table / Default'. |
Required |
>> Activate the checkbox if a metadata field shall be marked as required. A metadata field marked as required cannot be empty. |
|
Language |
Metadata fields of type String and Clob may have different content languages. >> Activate the checkbox if the metadata field shall be multilingual. |
|
No validate |
This option can be set only for String and Clob attributes. |
This option is not supported on HTML5 client. |
Table / Default |
For entering default values or edit the values for enumerations or variations. |
|
'Add' button |
For creating new attribute for project type. |
|
'Remove' button |
For removing the not needed attribute. You should select it and click the button. |
Functions
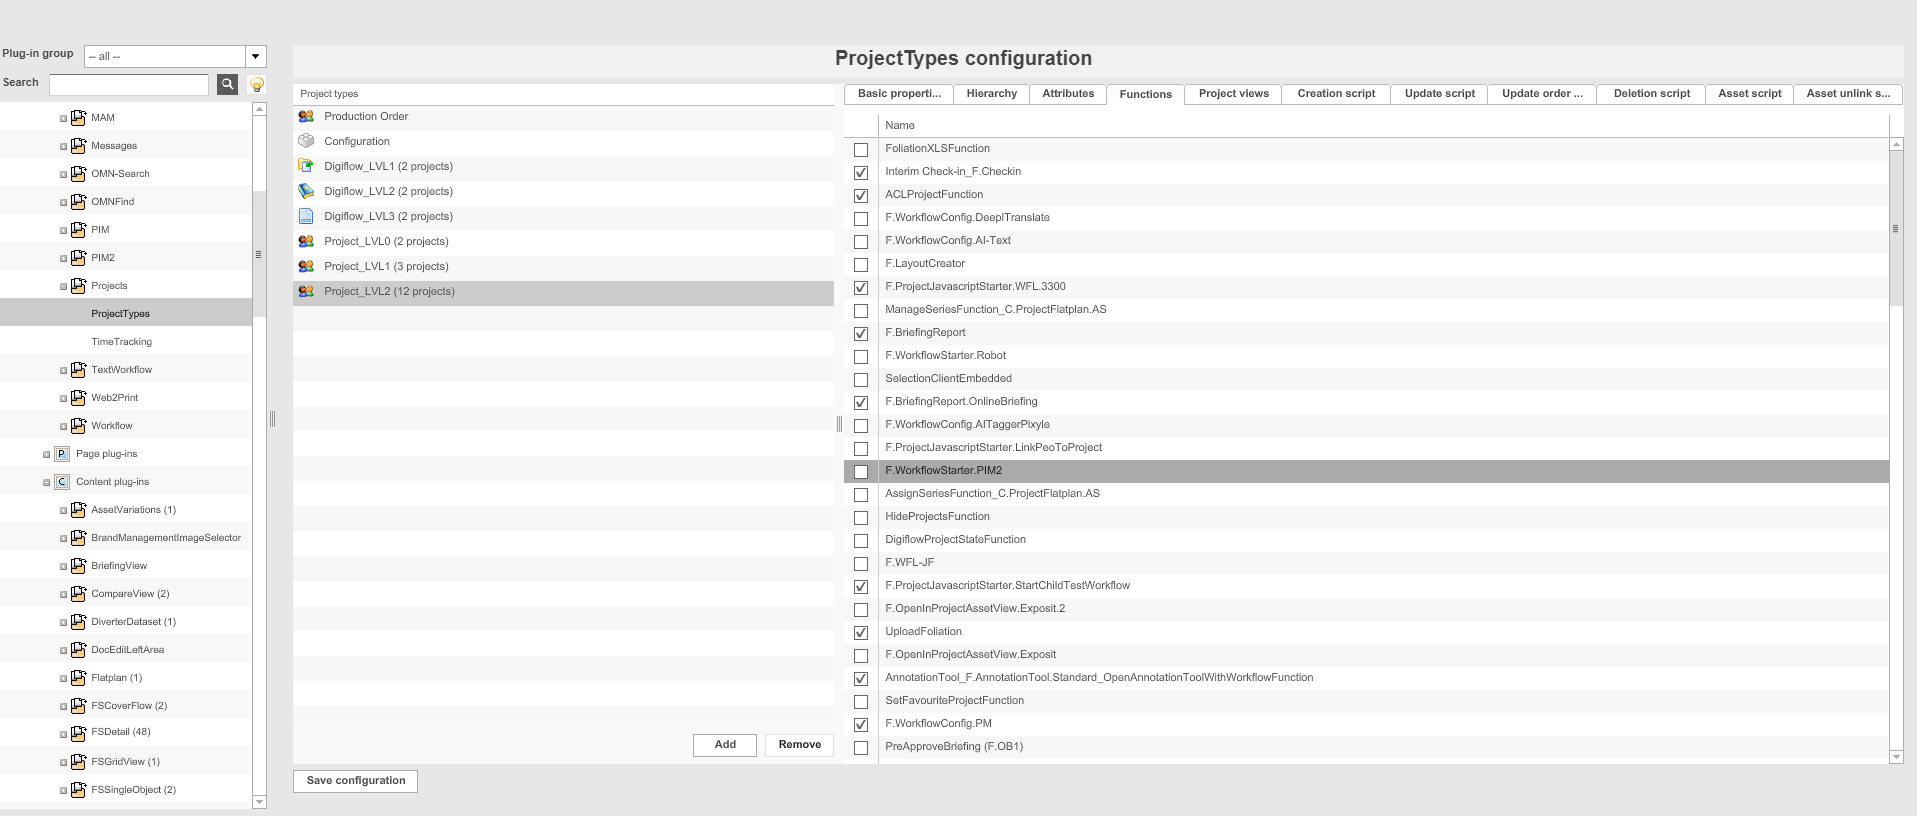
This Tab is used to enable the functions which should be displayed for chosen project in ProjectNavigation in the Frontend.
| This configuration relates only to functions run on the project (not on related asset, product). |
The functions are visible only if following prerequisites are met:
- The function itself is configured
- The function is activated in the plugin where it should be displayed (ProjectTableView or left view of ProjectNavigation)
- Permission/Rules are not prohibiting it to let the function be shown
|
Please be aware for what project type your function should work or in short what is your target. Example: The ProjectTableView shows the children (CH) of a project (P). If you enable the function on P level you won’t see it. So you need to enable the function on CH level. |
Project views
This configuration tab allows you to define the list of content plugins that should be available in the Frontend to represent project-related data.
Make sure that you have at least one of the following plug-ins available:
✓ Content plug-in “FSDetail”
✓ Content plug-in "ProjectAnnotationView"
✓ Content plug-in "ProjectAssetView"
✓ Content plug-in "ProjectFlatplanView"
✓ Content plug-in "ProjectFoldersView"
✓ Content plug-in "ProjectHTMLView"
✓ Content plug-in "ProjectProductsView"
✓ Content plug-in "ProjectTable"
✓ Content plug-in "ProjectWorkflowsView"
✓ Content plug-in "DiverterDataset"
✓ Content plug-in "SelectionClient"
Here you can see how the configuration looks like:
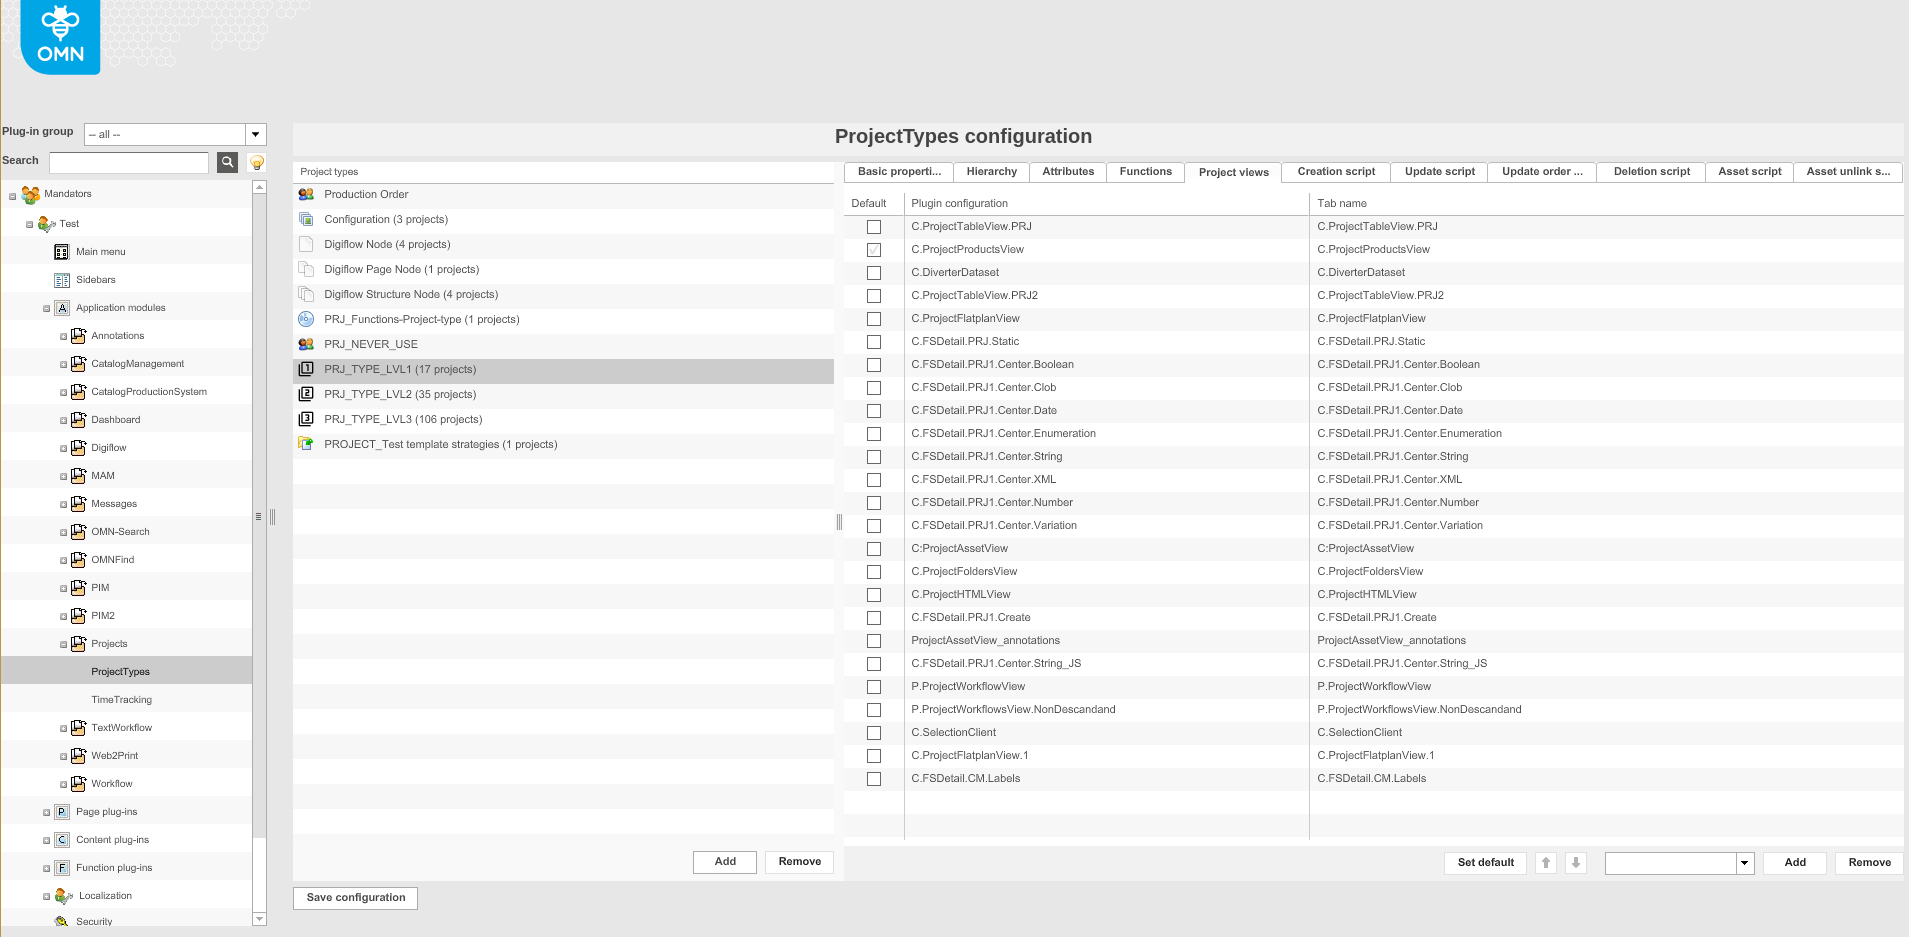
-
Open the dropdown menu at the bottom.
-
Choose the desired content view.
-
To add selected content view as a project view, click Add.
-
You can define the tab name that will be shown in the Frontend.
-
To remove a project view, highlight it and click Remove.
-
To save the configuration and all changes made, click Save configuration.
Creation script
In this configuration tab you can add the script that should be executed when the project of the selected type is created.
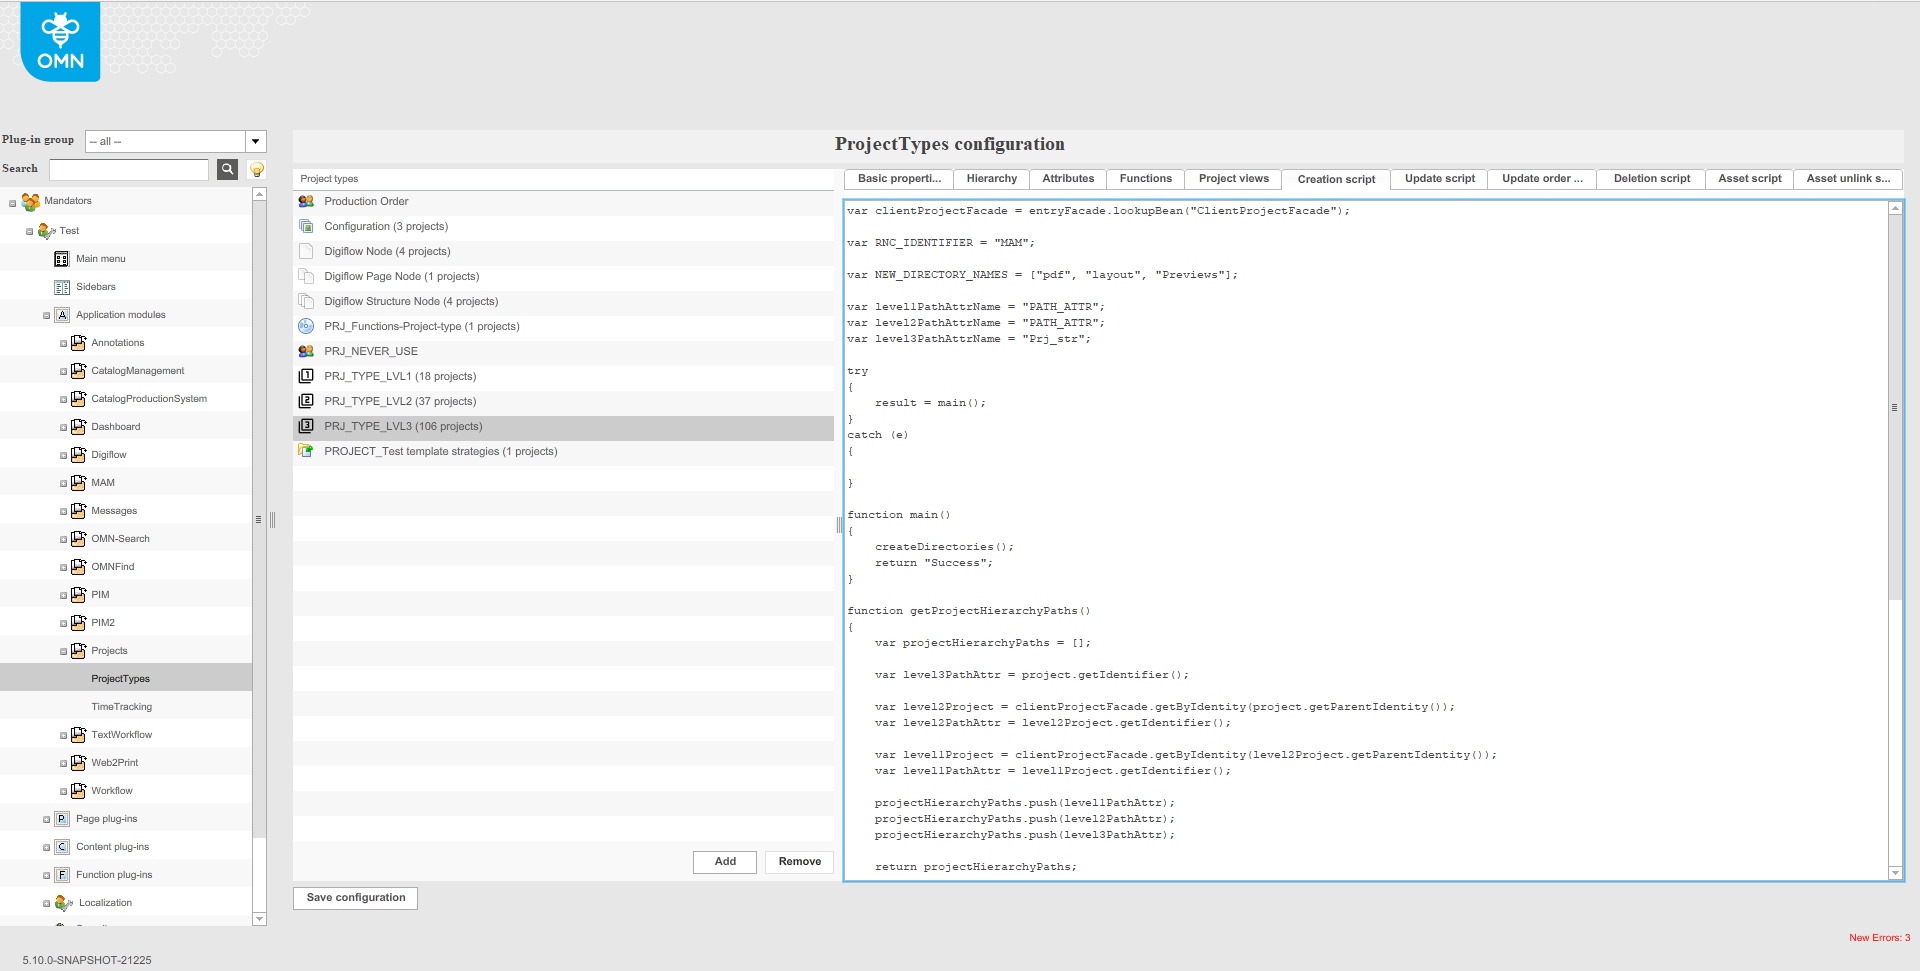
Here is the script from the example:
var clientProjectFacade = entryFacade.lookupBean("ClientProjectFacade");
var RNC_IDENTIFIER = "MAM";
var NEW_DIRECTORY_NAMES = ["pdf", "layout", "Previews"];
var level1PathAttrName = "PATH_ATTR";
var level2PathAttrName = "PATH_ATTR";
var level3PathAttrName = "Prj_str";
try
{
    result = main();
}
catch (e)
{
}
function main()
{
    createDirectories();
    return "Success";
}
function getProjectHierarchyPaths()
{
    var projectHierarchyPaths = [];
    var level3PathAttr = project.getIdentifier();
    var level2Project = clientProjectFacade.getByIdentity(project.getParentIdentity());
    var level2PathAttr = level2Project.getIdentifier();
    var level1Project = clientProjectFacade.getByIdentity(level2Project.getParentIdentity());
    var level1PathAttr = level1Project.getIdentifier();
    projectHierarchyPaths.push(level1PathAttr);
    projectHierarchyPaths.push(level2PathAttr);
    projectHierarchyPaths.push(level3PathAttr);
    return projectHierarchyPaths;
}
function createDirectories() {
    logger.info("Starting to create directories in RNC: " + RNC_IDENTIFIER);
    var projectHierarchyPaths = getProjectHierarchyPaths();
    var clientRnc = clientProjectFacade.getRNCByName(RNC_IDENTIFIER);
    var level3ProjectIdentity = project.getIdentity();
    var arrayLength = NEW_DIRECTORY_NAMES.length;
    for (var i = 0; i < arrayLength; i++) {
        // Clone the array
        var paths = projectHierarchyPaths.slice(0);
        paths.push(NEW_DIRECTORY_NAMES[i]);
        var dirPath = paths.join("/");
        logger.info("Starting to create directory: " + dirPath);
        clientProjectFacade.createFolder(clientRnc, paths);
    }
    logger.info(java.lang.String.format("Starting to link the directory(%s) to arbeitsseite(%s)"
        , projectHierarchyPaths.join("/"), level3ProjectIdentity));
    clientProjectFacade.addFolderLink(level3ProjectIdentity, clientRnc, projectHierarchyPaths);
    logger.info("Directories have been created and linked.");
}
Update script
In this configuration tab you can add the script that should be executed when the project of the selected type is updated.
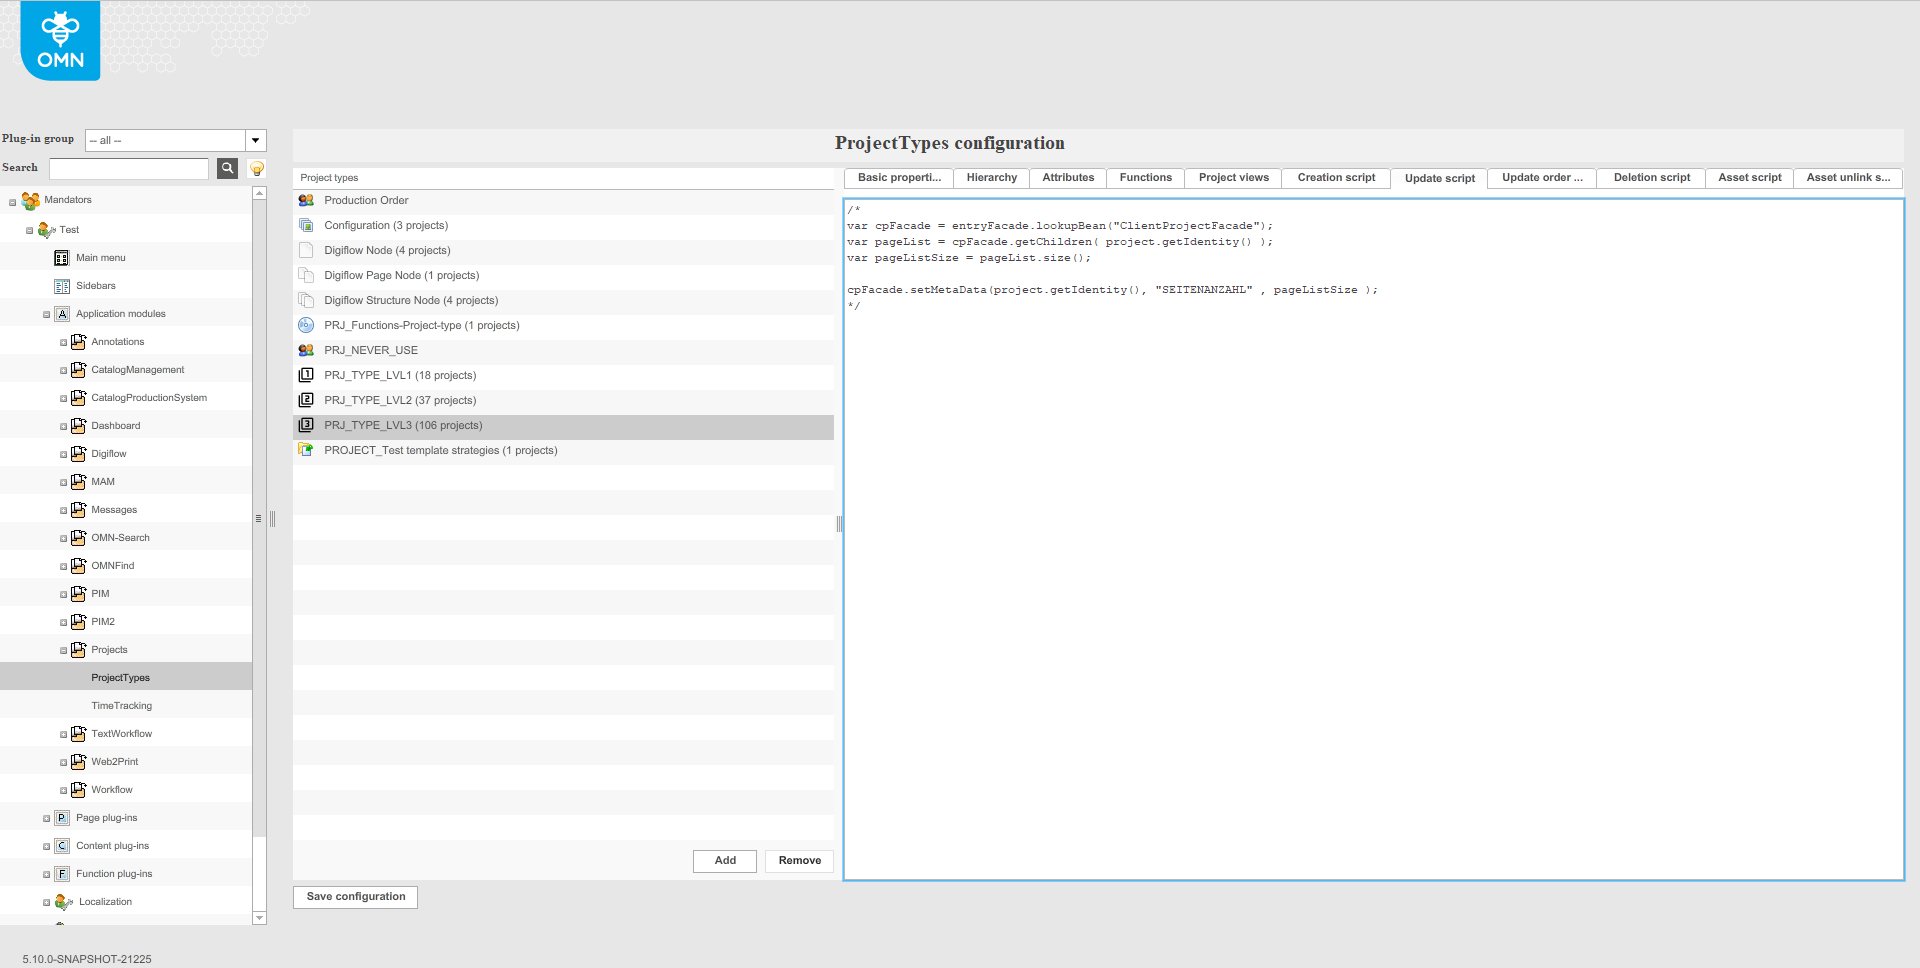
Here is the script from the example:
/*
var cpFacade = entryFacade.lookupBean("ClientProjectFacade");
var pageList = cpFacade.getChildren( project.getIdentity() );
var pageListSize = pageList.size();

cpFacade.setMetaData(project.getIdentity(), "SEITENANZAHL" , pageListSize );
*/