Classification Path Mapping
Purpose of the Classification Path Mapping
The Classification Path Mapping is used to assign or map classification paths. It is based on a source attribute that provides values required for value mapping.
Introduction
With the help of Classification Path Mapping, value mapping can be performed for classification paths, without which successful attribute mapping cannot be carried out.
In addition to manual value assignment (for which a source attribute, e.g., the product group, must first be assigned), automatic mapping is also available to the user.
Prerequisites and relations to other modules
The Classification Path Mapping is part of the Mapping Editor.
It is necessary for a successful Attribute Mapping.
The view can only be opened if the import mode “Creation” or “Creation and Update” has been selected in the Import Profile.
How to use
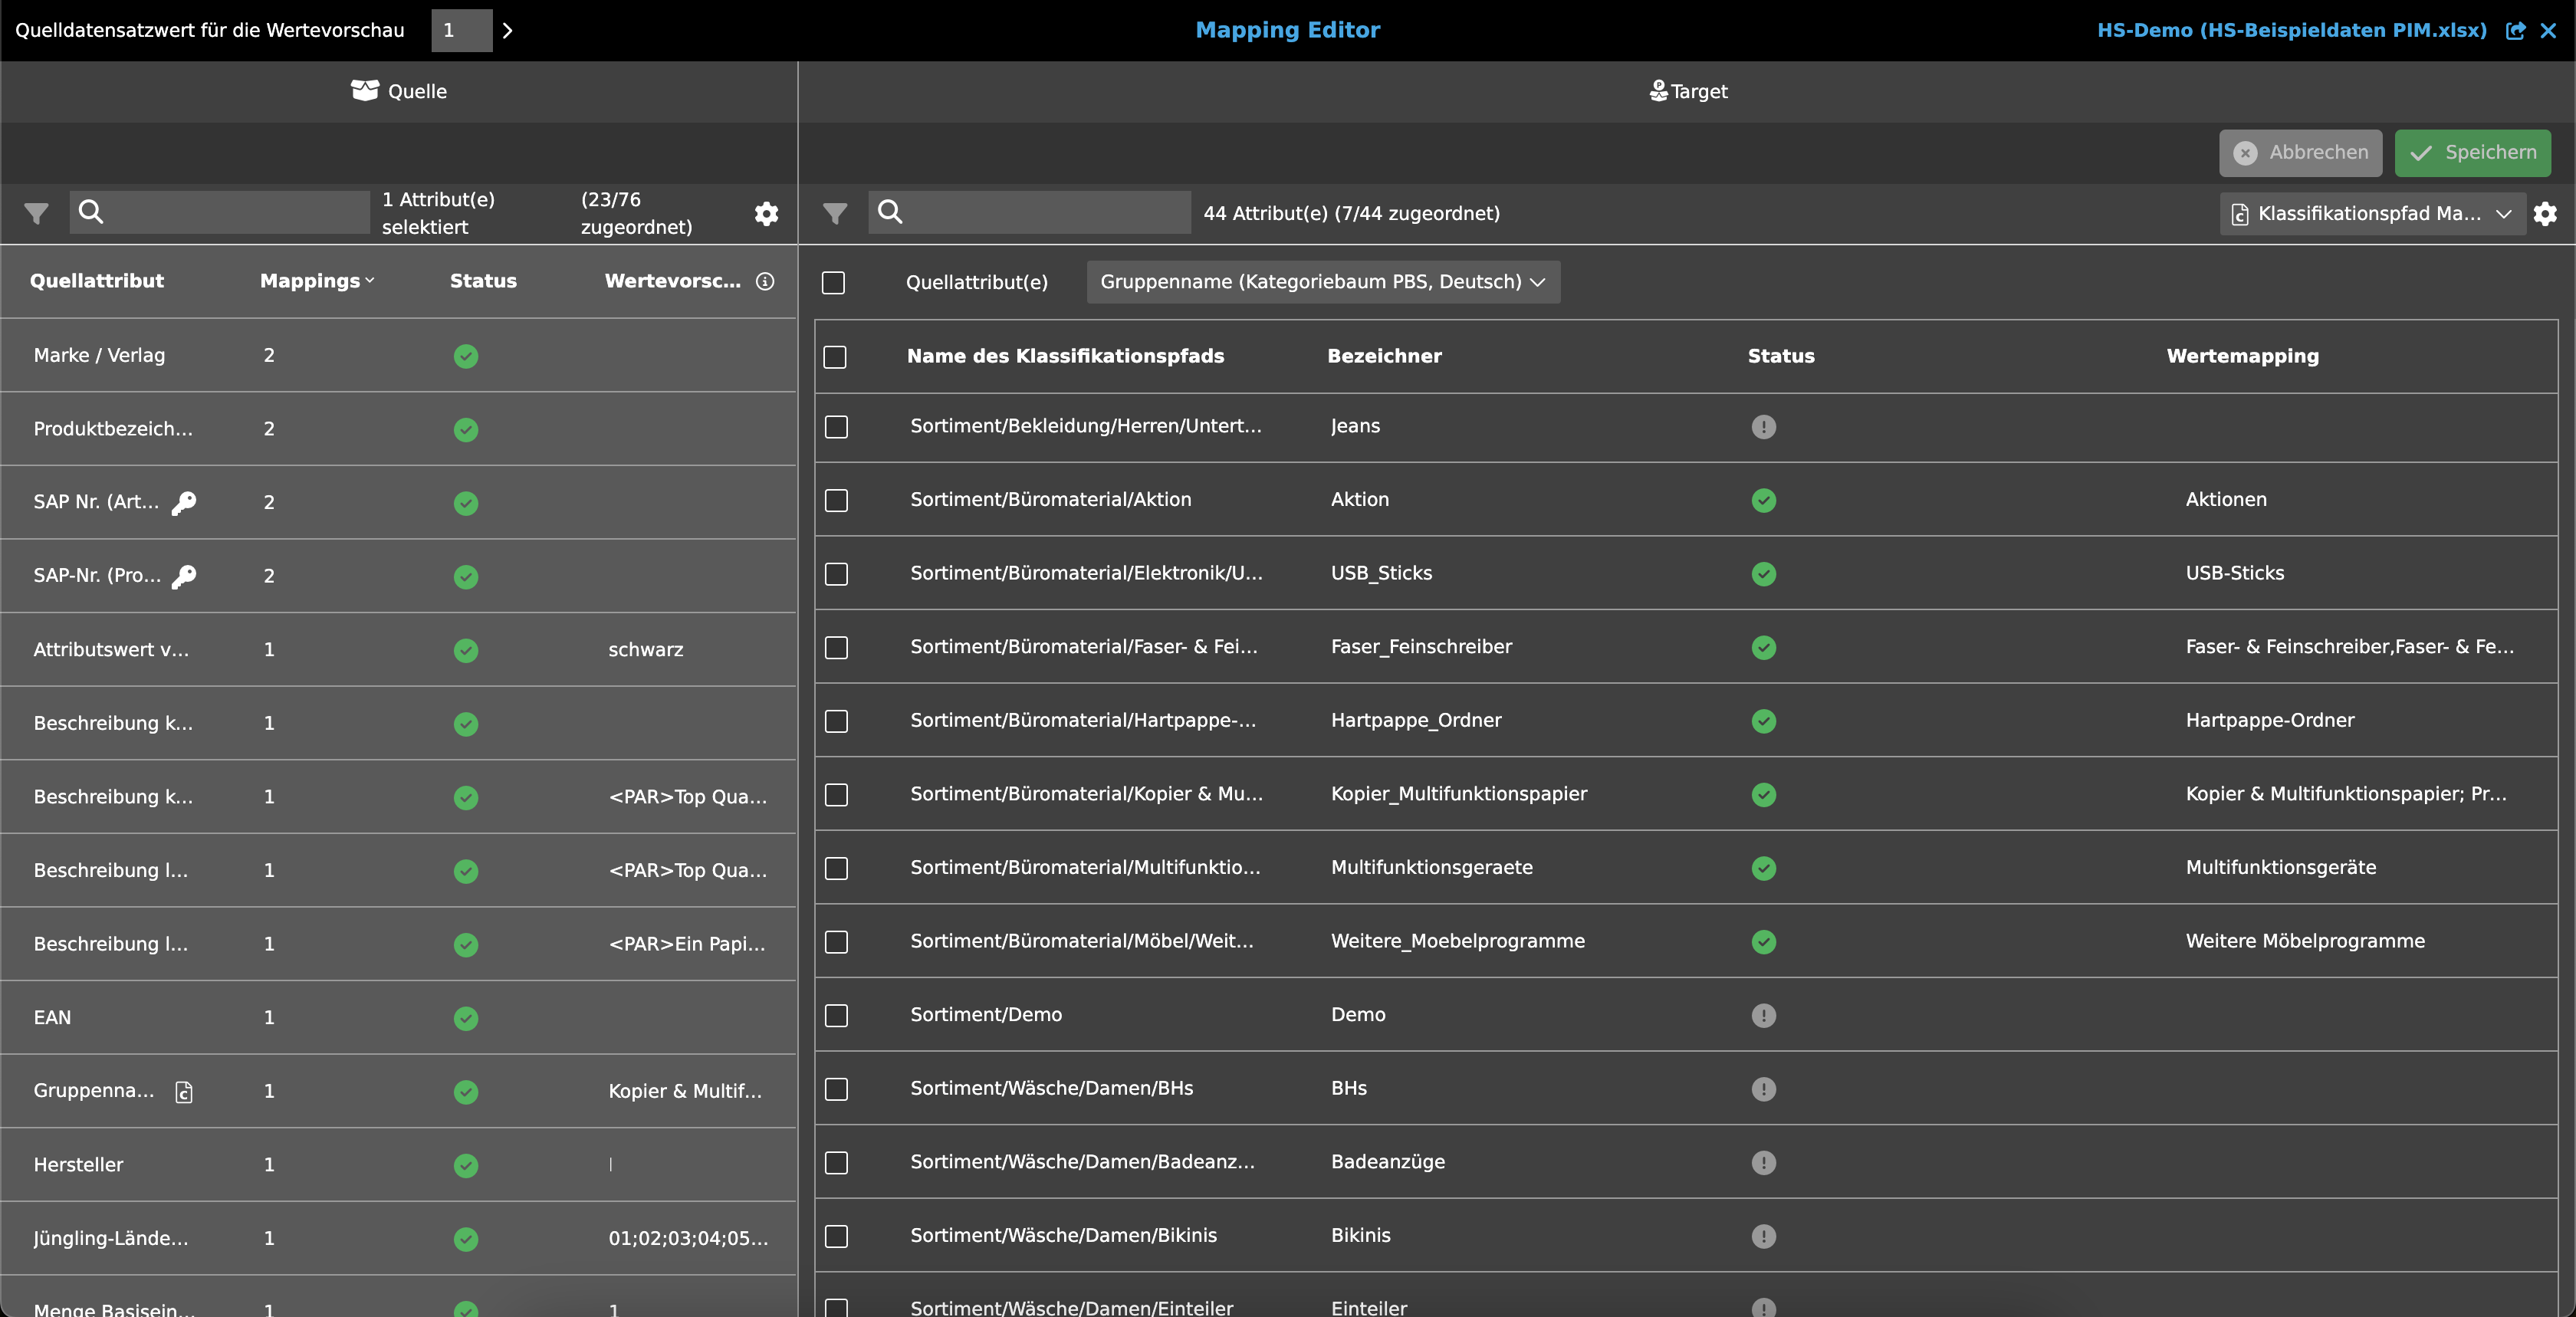
The Classification Path Mapping view is always located in the center view of the Mapping Editor and is selected using the content switcher in the statusbar.
By default, the Attribute Mapping is always selected as the view.
Toolbar
The toolbar can contain up to three functions.
Map and Transform
If the source attribute checkbox is activated, the toolbar contains the Map and Transform function, which allows users to add combinations of multiple source attributes to the mapping, for example.
This means that users can not only perform simple 1:1 mappings (OMN attribute to source attribute), but also more complex transformations.
Delete Mapping
Once a mapping has been made and the source attribute or a classification path has been selected, the “Delete Mapping” function is displayed.
When this is executed, a “Delete Mapping” message is displayed, asking the user if he wants to perform the action.
After confirmation, the entry is deleted from the source attribute dropdown or the value mapping column.
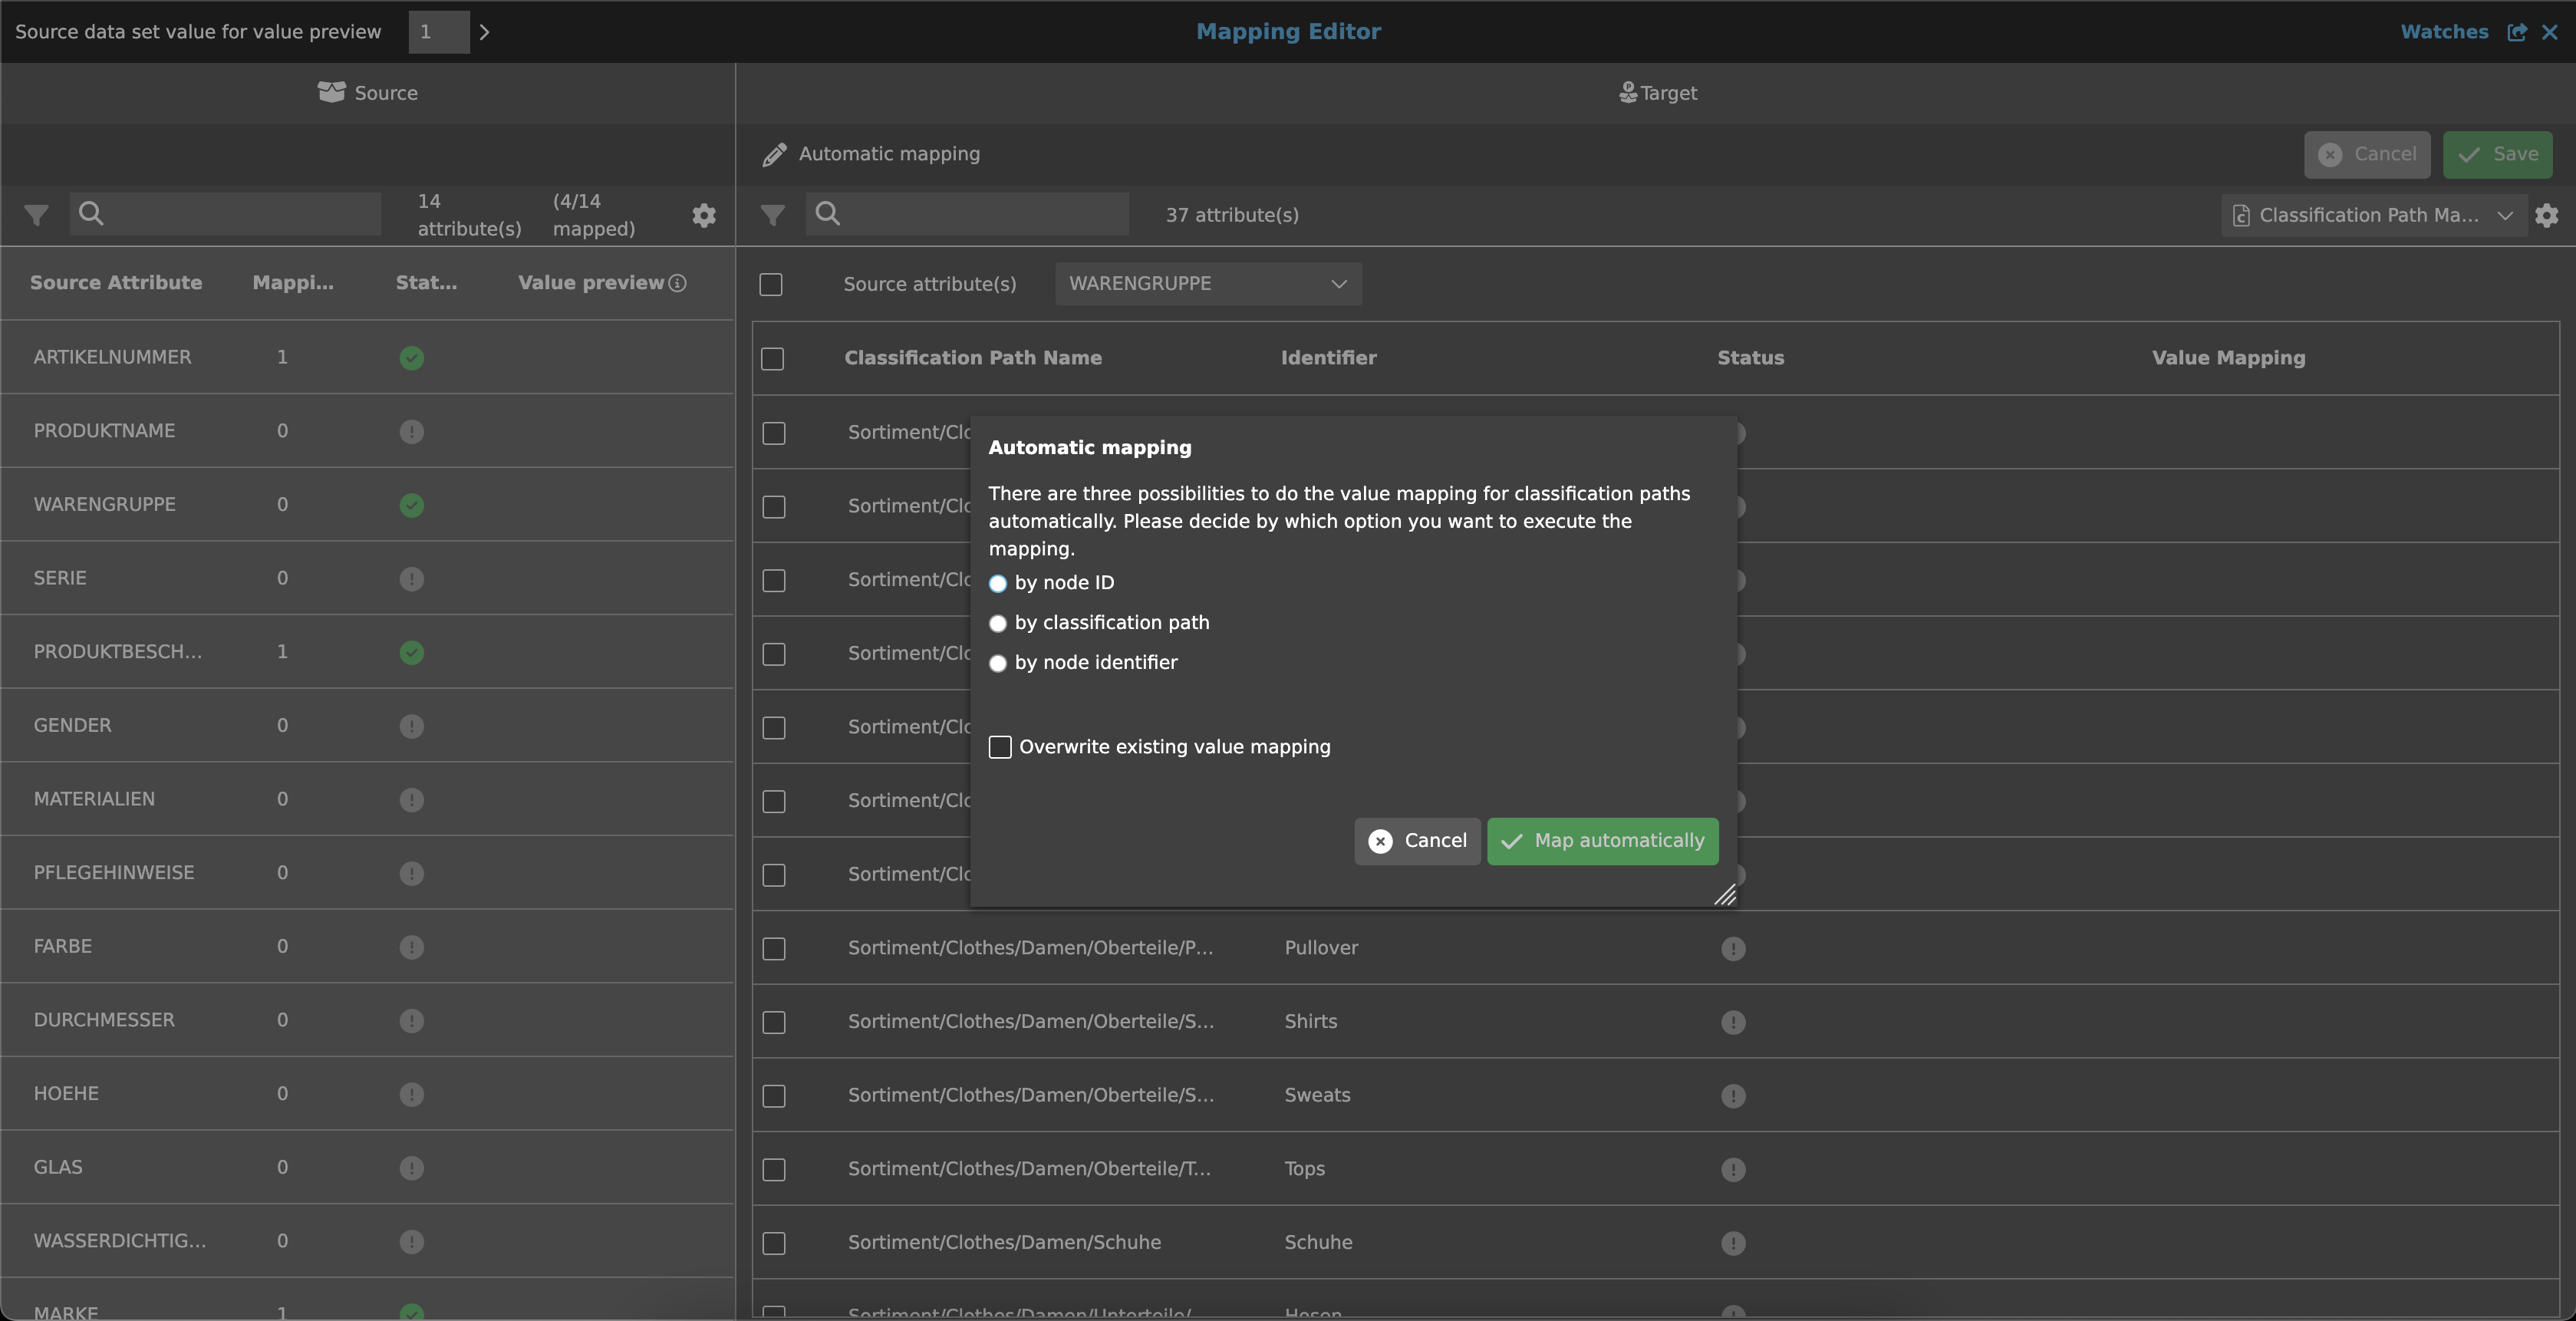
Automatic Mapping
There is also an “Automatic Mapping” function that can be used to automatically map values for the classification paths based on three options.
Once the function has been selected, a dialog opens.
Here, users can select one of three options to decide on which basis the value mapping should be performed:
-
by node ID
-
by classification path
-
by node identifier
The node identifier must be unique.
If desired, it is also possible to select the option to overwrite all previously assigned values.
| Automatic mapping is available from OMN version 6.3 onwards. |
Statusbar
The statusbar includes a quick filter, an object counter, a content switcher and settings.
Quick filter & Object counter
A quick filter is available to users to reduce classification paths and simplify the search for specific paths.
One or more values can be entered here to find the desired path.
Next to the quick filter is an “Object Counter,” which displays the number of classification paths and the assigned values.
Canvas
The canvas displays a source attribute field with a table below it, which shows an overview of all classification paths (OMN PIM) and the associated value mapping.
The source attribute field is a dropdown containing a list of all source attributes that can be used for assigning classification paths.
It defines which values can be assigned in the table below (e.g., product group).
The dropdown supports single assignment. Multiple assignments are possible using the “Map and Transform” function. In this case, selected attributes are displayed separated by commas.
There is a checkbox in front of the source attribute field that can be used to select the source attribute. This makes the “Map and Transform” function visible in the toolbar and allows a transformation to be applied to the source attribute(s).
An f(x) symbol is displayed to the right of the dropdown field if a transformation has been applied to the source attribute(s).
The table contains the following columns:
-
Checkbox
-
for multi-selection
-
-
Classification Path Name
-
The column shows all classification paths of the lowest node level of the classification selected in Import Profile.
-
The absolute path is displayed.
-
-
Identifier
-
Identifier of the node
-
-
Status
-
The column indicates whether the value mapping of the node is valid or not.
-
Green
The node has been successfully mapped. -
Gray
The node has not yet been mapped. -
Red
An error has occurred. The value added to the node is invalid.
-
-
-
Value Mapping
-
In this column, the user can select one or more relevant values for the classification path mapping for each node using a dropdown.
The selected values define the organization of the created products within OMN. -
The dropdown …
-
… supports multi-selection
-
… displays selected values separated by commas
-
… supports adding new values
-
The newly added values are stored in the configured import profile and mapping file so that they can be reused.
-
-
-
Once a value mapping has been executed, the classification symbol is displayed in the left view behind the source attribute column (selected attribute from the source attribute field).
-
-
If the selected source attribute is deleted, the added value mappings also become invalid and are removed.