FSDetail (Content Plugin)
This plug-in offers an interface to show the details of one or more chosen objects like an asset, product, project, etc.
-
Access the plug-in via Mandators → <Mandator name> → Content plug-ins → FSDetail
You can use the plug-in as follows:
-
Right Area of the Frontend:
– Page plug-in "AdvancedSearch"
– Page plug-in "FSNavigation"
– ShoppingCart
-
Center Area of the Frontend
– Page plug-in "FSNavigation"
Here you can see the overview of configuration possibilities for FSDetail content plugin:
| Field | Description | Notice |
|---|---|---|
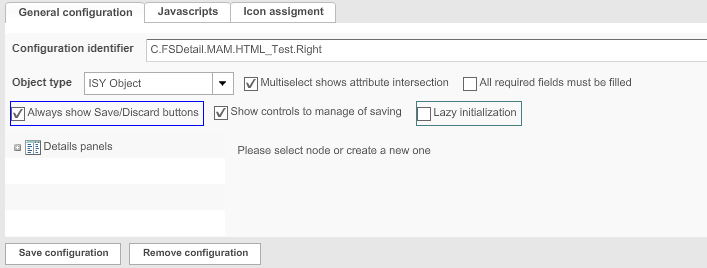
General configuration |
General configuration of the plug-in |
|
Javascripts |
For assigning a Javascript program to the plug-in |
|
Toolbar |
For assigning an icon for the plug-in |
|
Object types |
Available object types:
|
To use MAM, PIM2Product, Product Export Option and Project etc. the integration of the corresponding OMN module is needed. |
Multiselect shows attribute intersection |
Description is coming soon |
|
All required fields must be filled |
>> Activate the checkbox to allow a change in metadata attributes only to be saved if all required fields are filled |
|
Always show Save/Discard buttons |
>> Activate the checkbox to always show the Save/Discard buttons. Otherwise, the buttons are only shown if a metadata attribute has been changed |
Option is no longer supported for HTML5 frontend |
Show controls to managing saving |
>> Activate the checkbox to show controls for saving |
Option is no longer supported for HTML5 frontend |
Lazy initialization |
>> Activate the checkbox if you have a lot of fields configured (recommended). It affects the way how fields are loaded on the client:
|
This option is only available for HTML5 Frontend |
Adding a Detail View
Here you can find the description how to add a detail view for FSDetail plugin:
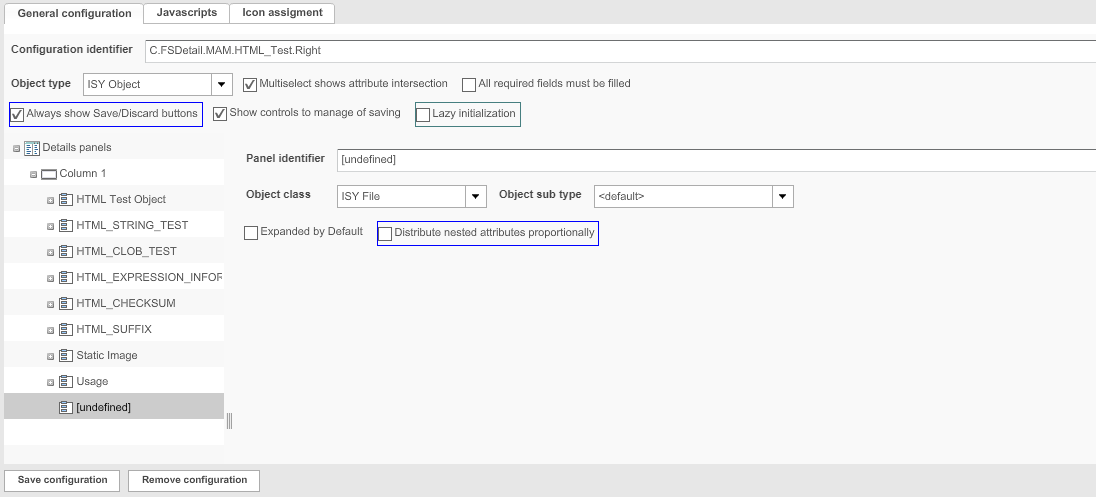
1. Highlight Details panels.
2. Click Add.
→ A new column is created.
3. Highlight the new column.
4. Click Add.
→ A new panel is created.
5. Fill in the fields for the new panel.
6. Highlight the panel.
7. Click Add.
→ A new row is created
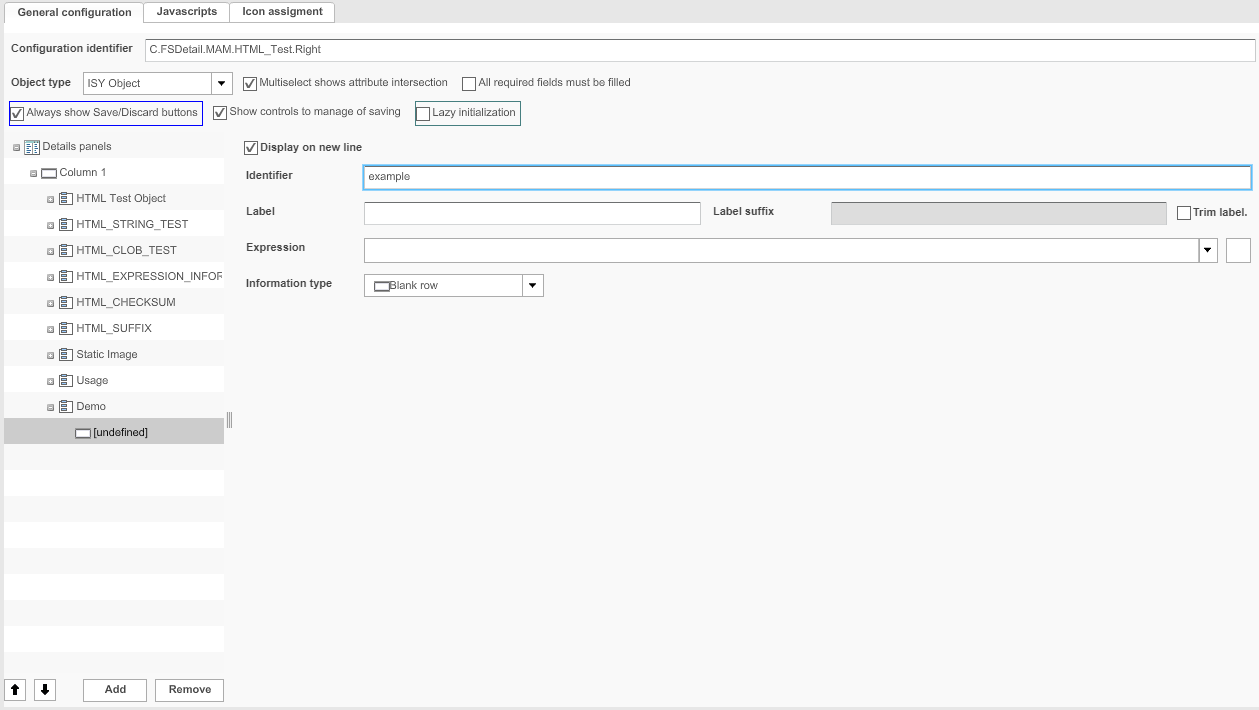
8. Fill in the fields for the new row (see "Adding Rows to Templates").
9. Add as many new columns, panels and rows as needed.
10. To save the configuration and all changes made, click Save configuration.
Configuring panels for subtypes of PIM2 Products
There is a possibility to assign each panel a subtype of the product hierarchy - Product, Article, Variation. It allows you to create different panels to show the values from the product’s assortment.
Here you can see how the configuration can be done:
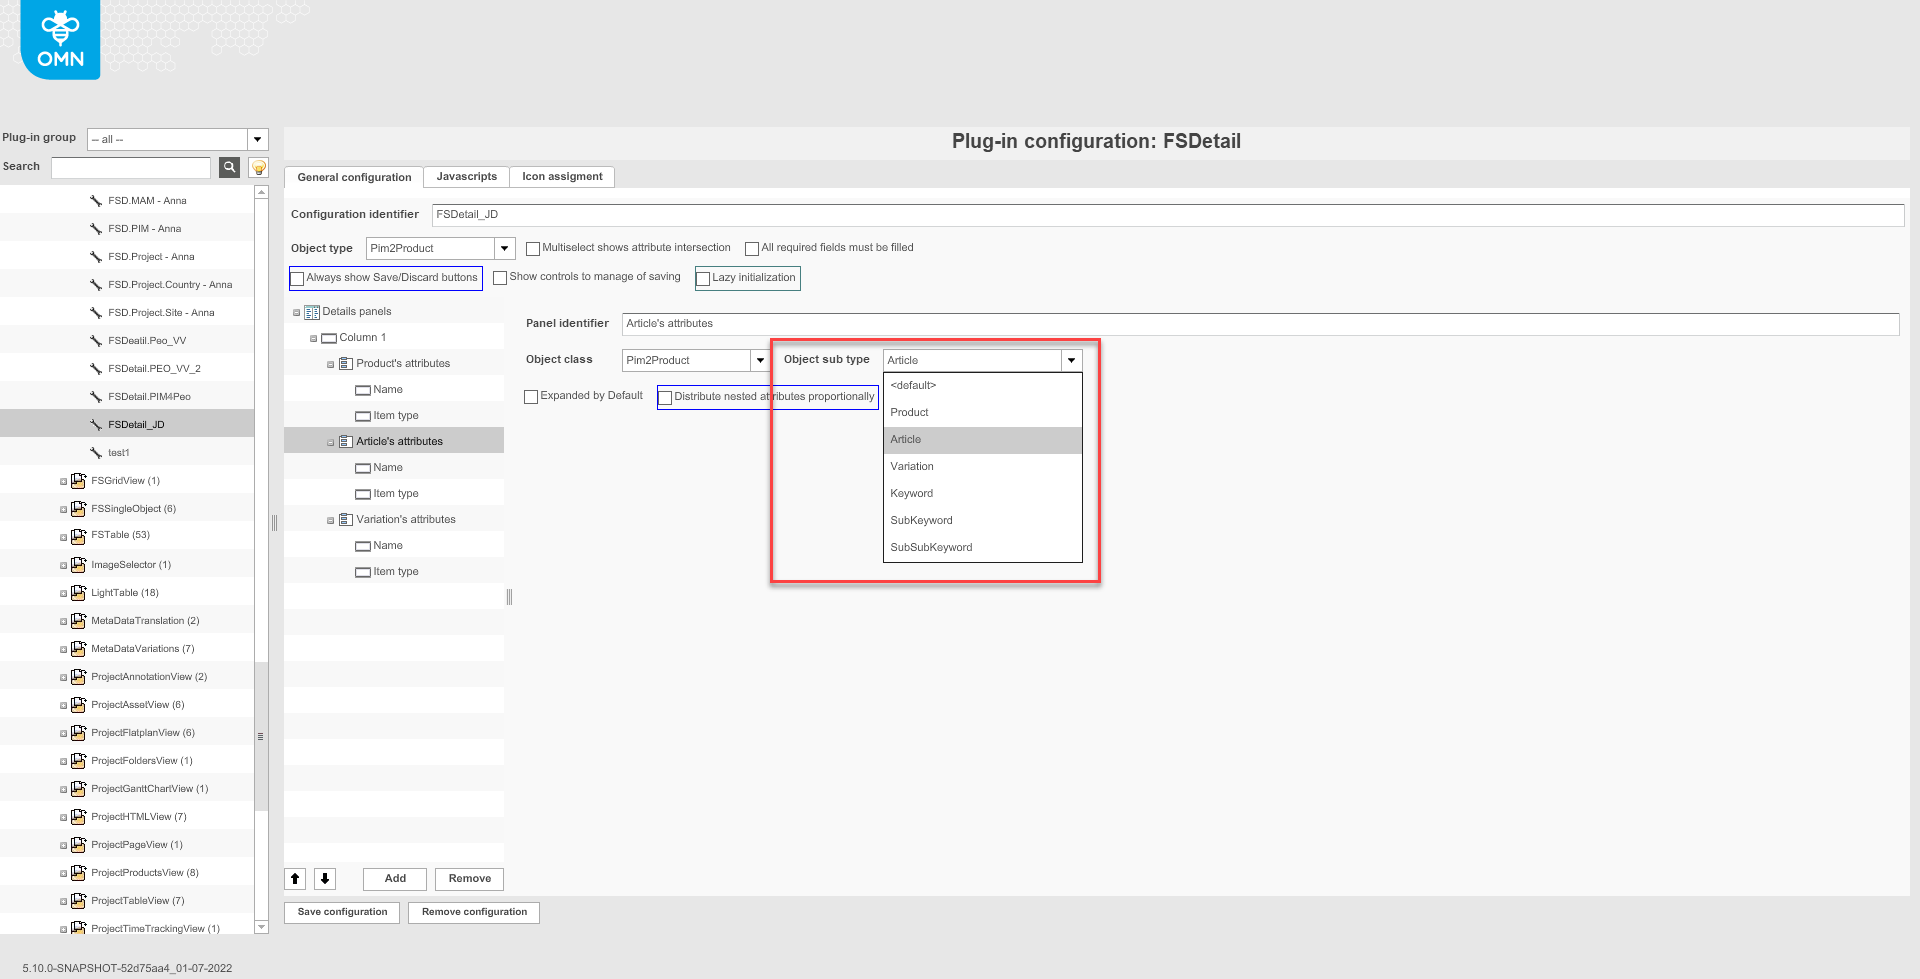
| Subtypes 'Keyword', 'SubKeyword', 'SubSubKeyword' can be configured, but they are not supported on HTML5 client. |
Such configuration can be done for ProductView to show the values of attributes for the whole assortment tree. Each level of assortment will have its own panel.
Configuring visibility of linked products
Make sure that you have at least one of the following plug-ins available:
✓ Function plug-in “ProductView”
-
Add a new row
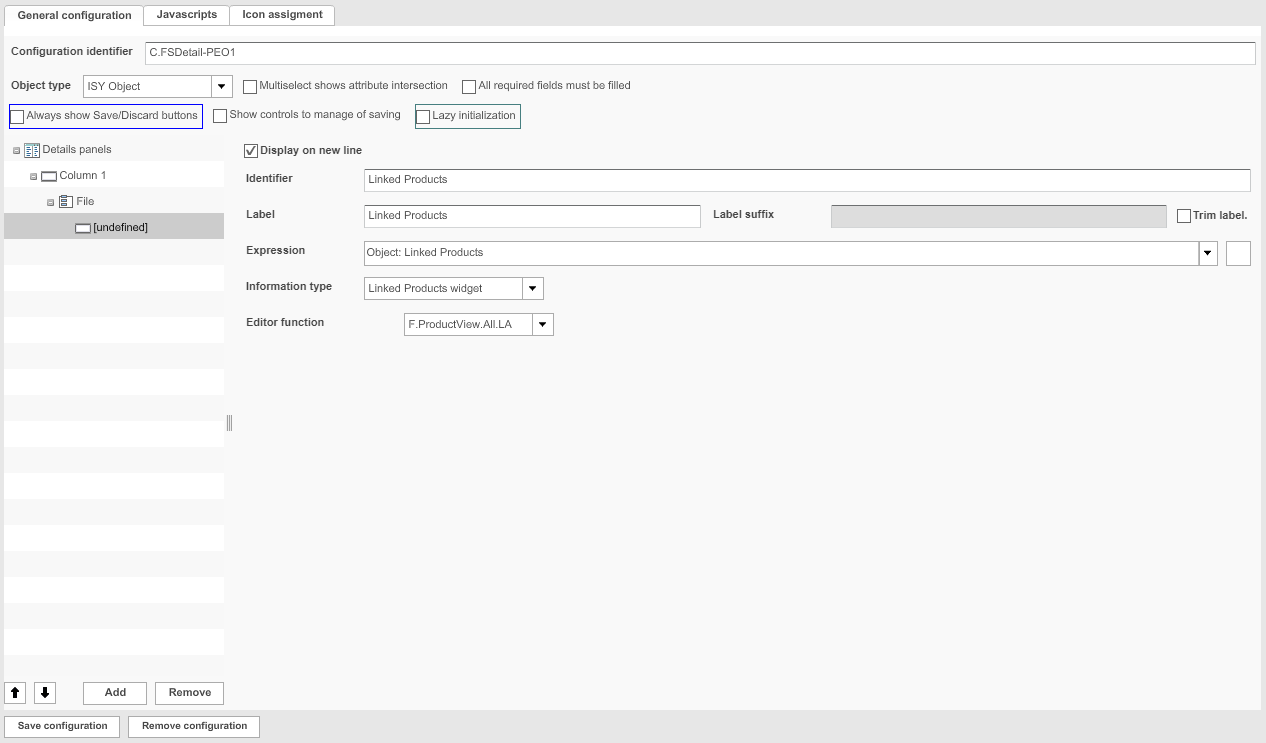
2. Fill in the fields for the new row
– Choose as expression Object: Linked Products
– To show the product view of a linked product, choose a ProductView in the field Editor function
3. To save the configuration and all changes made, click Save configuration.
Configuring a PEO Usage Detail View
A PEOUsage Detail View is only possible if a PM module is integrated.
1. Create a new FSDetail plug-in
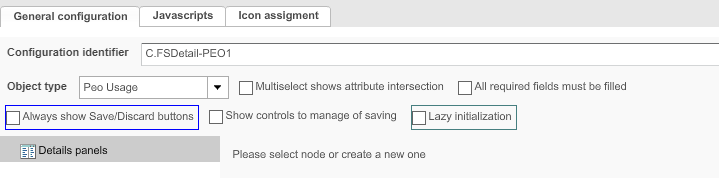
2. Fill in the fields for the new configuration.
– Choose as object type Peo Usage
3. Configure panels and rows as needed.
4. To save the configuration and all changes made, click Save configuration.
Adding Javascript
Here you can find the description how Javascript can be added to FSDetail.
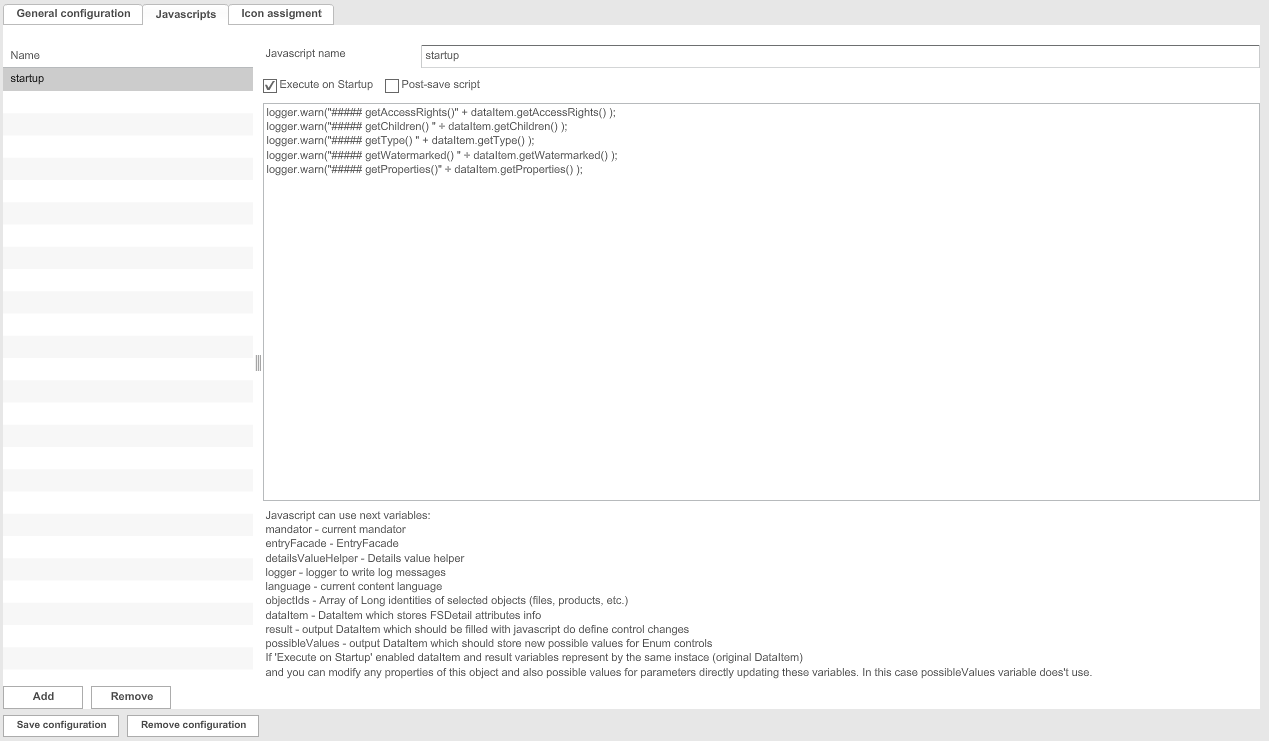
1. Open the tab Javascripts.
2. Click Add.
→ A new Javascript is created.
3. Enter a name for the Javascript in the field Javascript name.
4. Activate the checkbox Execute on Startup if the Javascript shall be executed as soon as the plug-in is started.
5. Enter the Javascript.
Possible variables are displayed below the text field.
6. To save the configuration and all changes made, click Save configuration.