General functions and operating elements
Working with Drag and Drop (DnD)
OMN allows you to work using “drag and drop” (DnD) within a browser window, but also between open browser tabs in your Internet browser. This allows you to intuitively organize data and create relationships between objects within the system.
Typical DnD actions in everyday OMN use are, for example:
-
(Re)organize files in the file system (copy, move) or keyword structures (link), e.g. in the DAM module
-
Add files from a navigation or search to a shopping cart/collection
-
Assign selected files in the DAM to products in the PIM module
-
Assign products from the PIM module to projects in Channel Management, e.g. to create a chapter structure or link products to a webshop category
To be able to use the DnD functionality within the system, you can proceed as follows:
-
First select the desired object(s), e.g. a product in the content area of the table view.
-
Click on the selected object and hold down the left mouse button. Then move the mouse in any direction. The mouse pointer changes to indicate the DnD action.
-
Then drag the selected object to the desired destination. OMN visualizes by so-called “drop zones” and by changing the mouse pointer whether the object can be dropped at this location or not.
|
The selected objects can be moved within the page or dragged to another browser window. OMN visualizes the areas in light blue that serve as drop zones. |
By releasing the left mouse button, you can drop the object at the desired position to perform an assignment or action (e.g. move).
Depending on the use case, the display of a button or project node may change, or there may be other visualizations to show that the DnD function has been successfully executed (usually a green success message is displayed at the top right).
For example, if you add a file to the shopping cart in the sidebar using DnD, the number of objects it contains is displayed or changed.

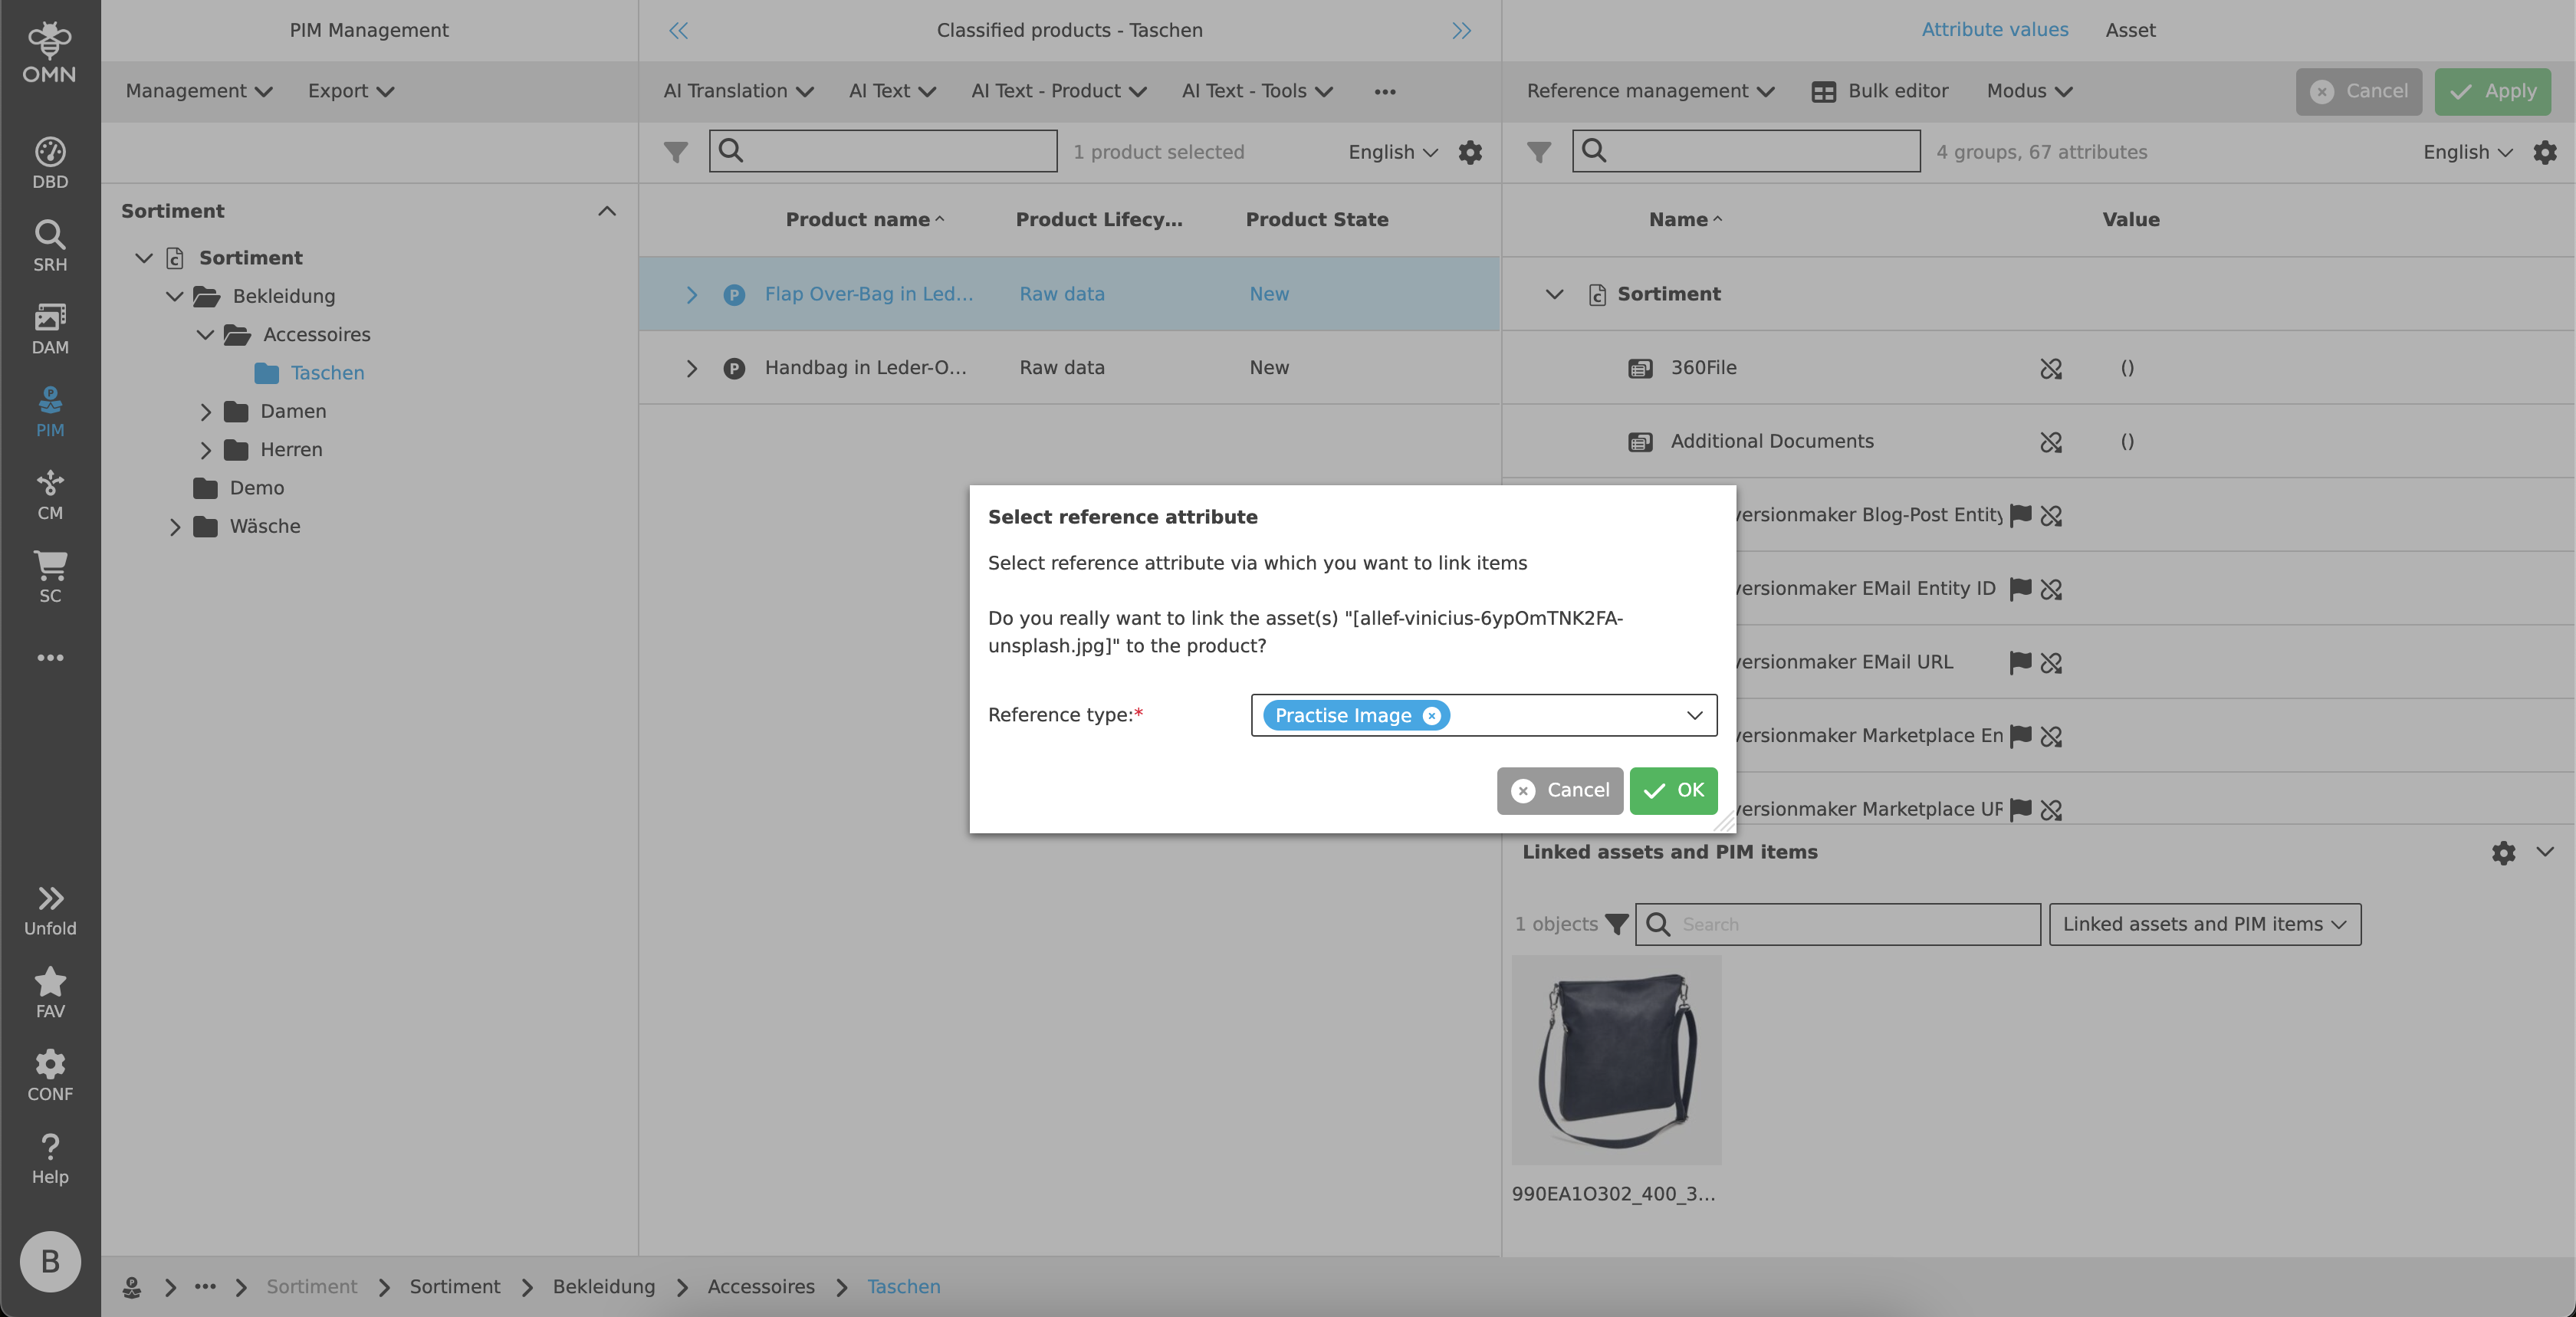
Furthermore, depending on the use case, the system may open a dialog box after assigning one object to another, in which you must specify the link between the two objects in more detail.
This is the case, for example, if you want to link a picture to a product via DnD and have to specify the reference type (e.g. main picture) in the dialog box.
You can find more information here: Working with DnD
Multi selection of objects
Within most OMN modules, you have the option of selecting several objects and then editing them simultaneously or executing functions on them.
To do this, you can use the following key combination, as you would on your own computer:
| Keyboard shortcut WIN | Keyboard shortcut MAC | Meaning |
|---|---|---|
CTRL + A |
CMD + A |
Select all |
CTRL + left mouse button |
CMD + left mouse button |
Individual selection of several objects |
SHIFT + left mouse button |
SHIFT + left mouse button |
Selection of all objects between the first and last selected object |
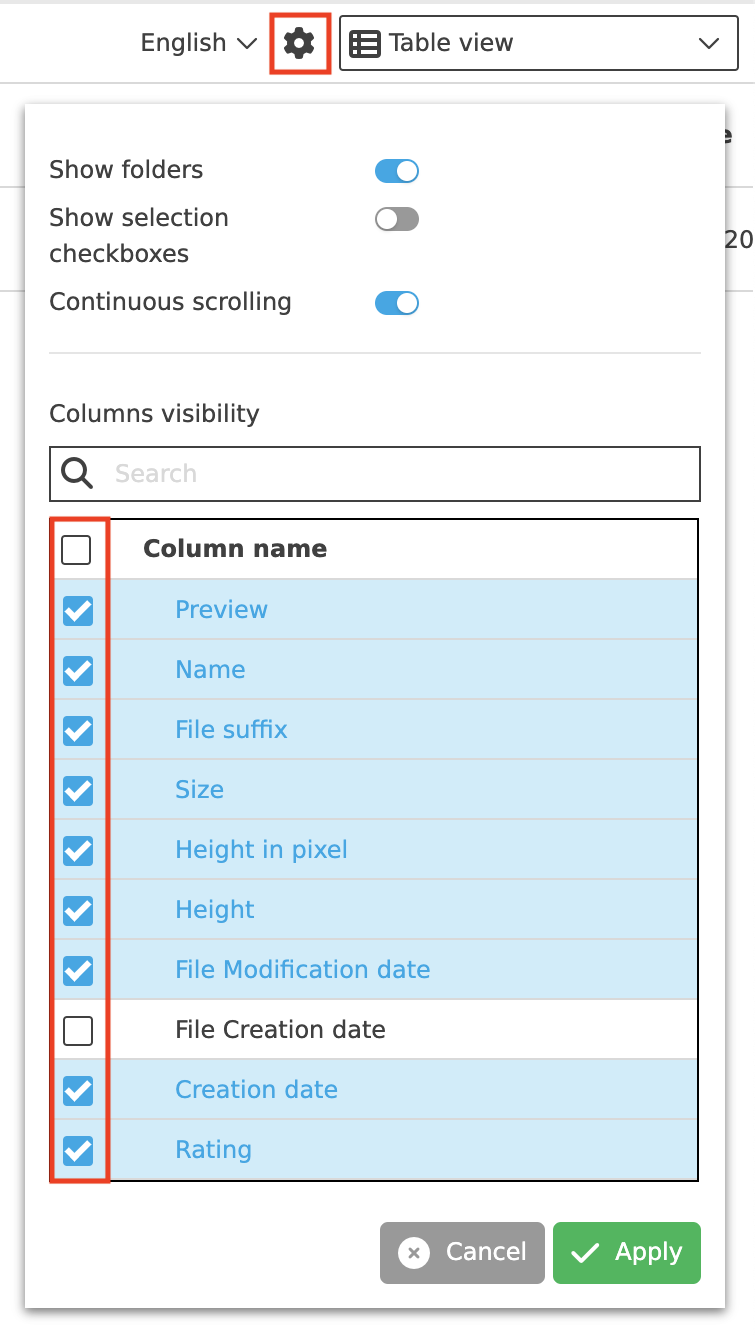
If you want to select all elements from the content area, simply click on the “Select all” checkbox:
|
If the checkboxes are not displayed, you can show them via the settings in the view (if multiple selection is allowed in the view):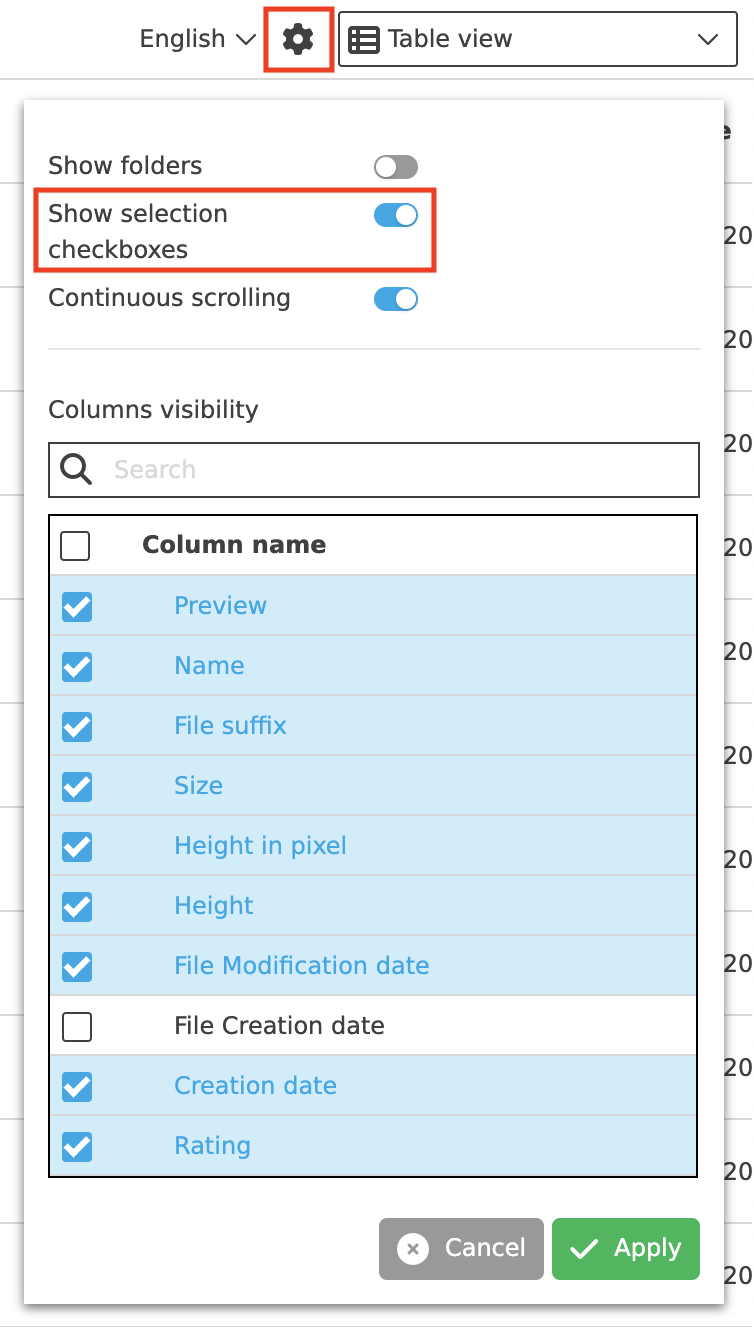
|
Moving vs. copying objects in OMN
By combining the DnD functionality with keyboard shortcuts, you can control in OMN whether an object is to be copied or moved from A to B.
This behavior applies to use cases in which objects are to be transferred to other physical directories, e.g. when copying or moving files from a source folder to a target folder.
If the object is moved to a target directory, as described in the chapter Working with Drag and Drop (DnD), the file is moved.

If the “CTRL” or “CMD” key is also pressed before the DnD action and held down during the process, the file is not moved but copied.

The type of process can also be understood from the status message in the dialog box, which appears as soon as the file has been stored in the target directory.
Refreshing views
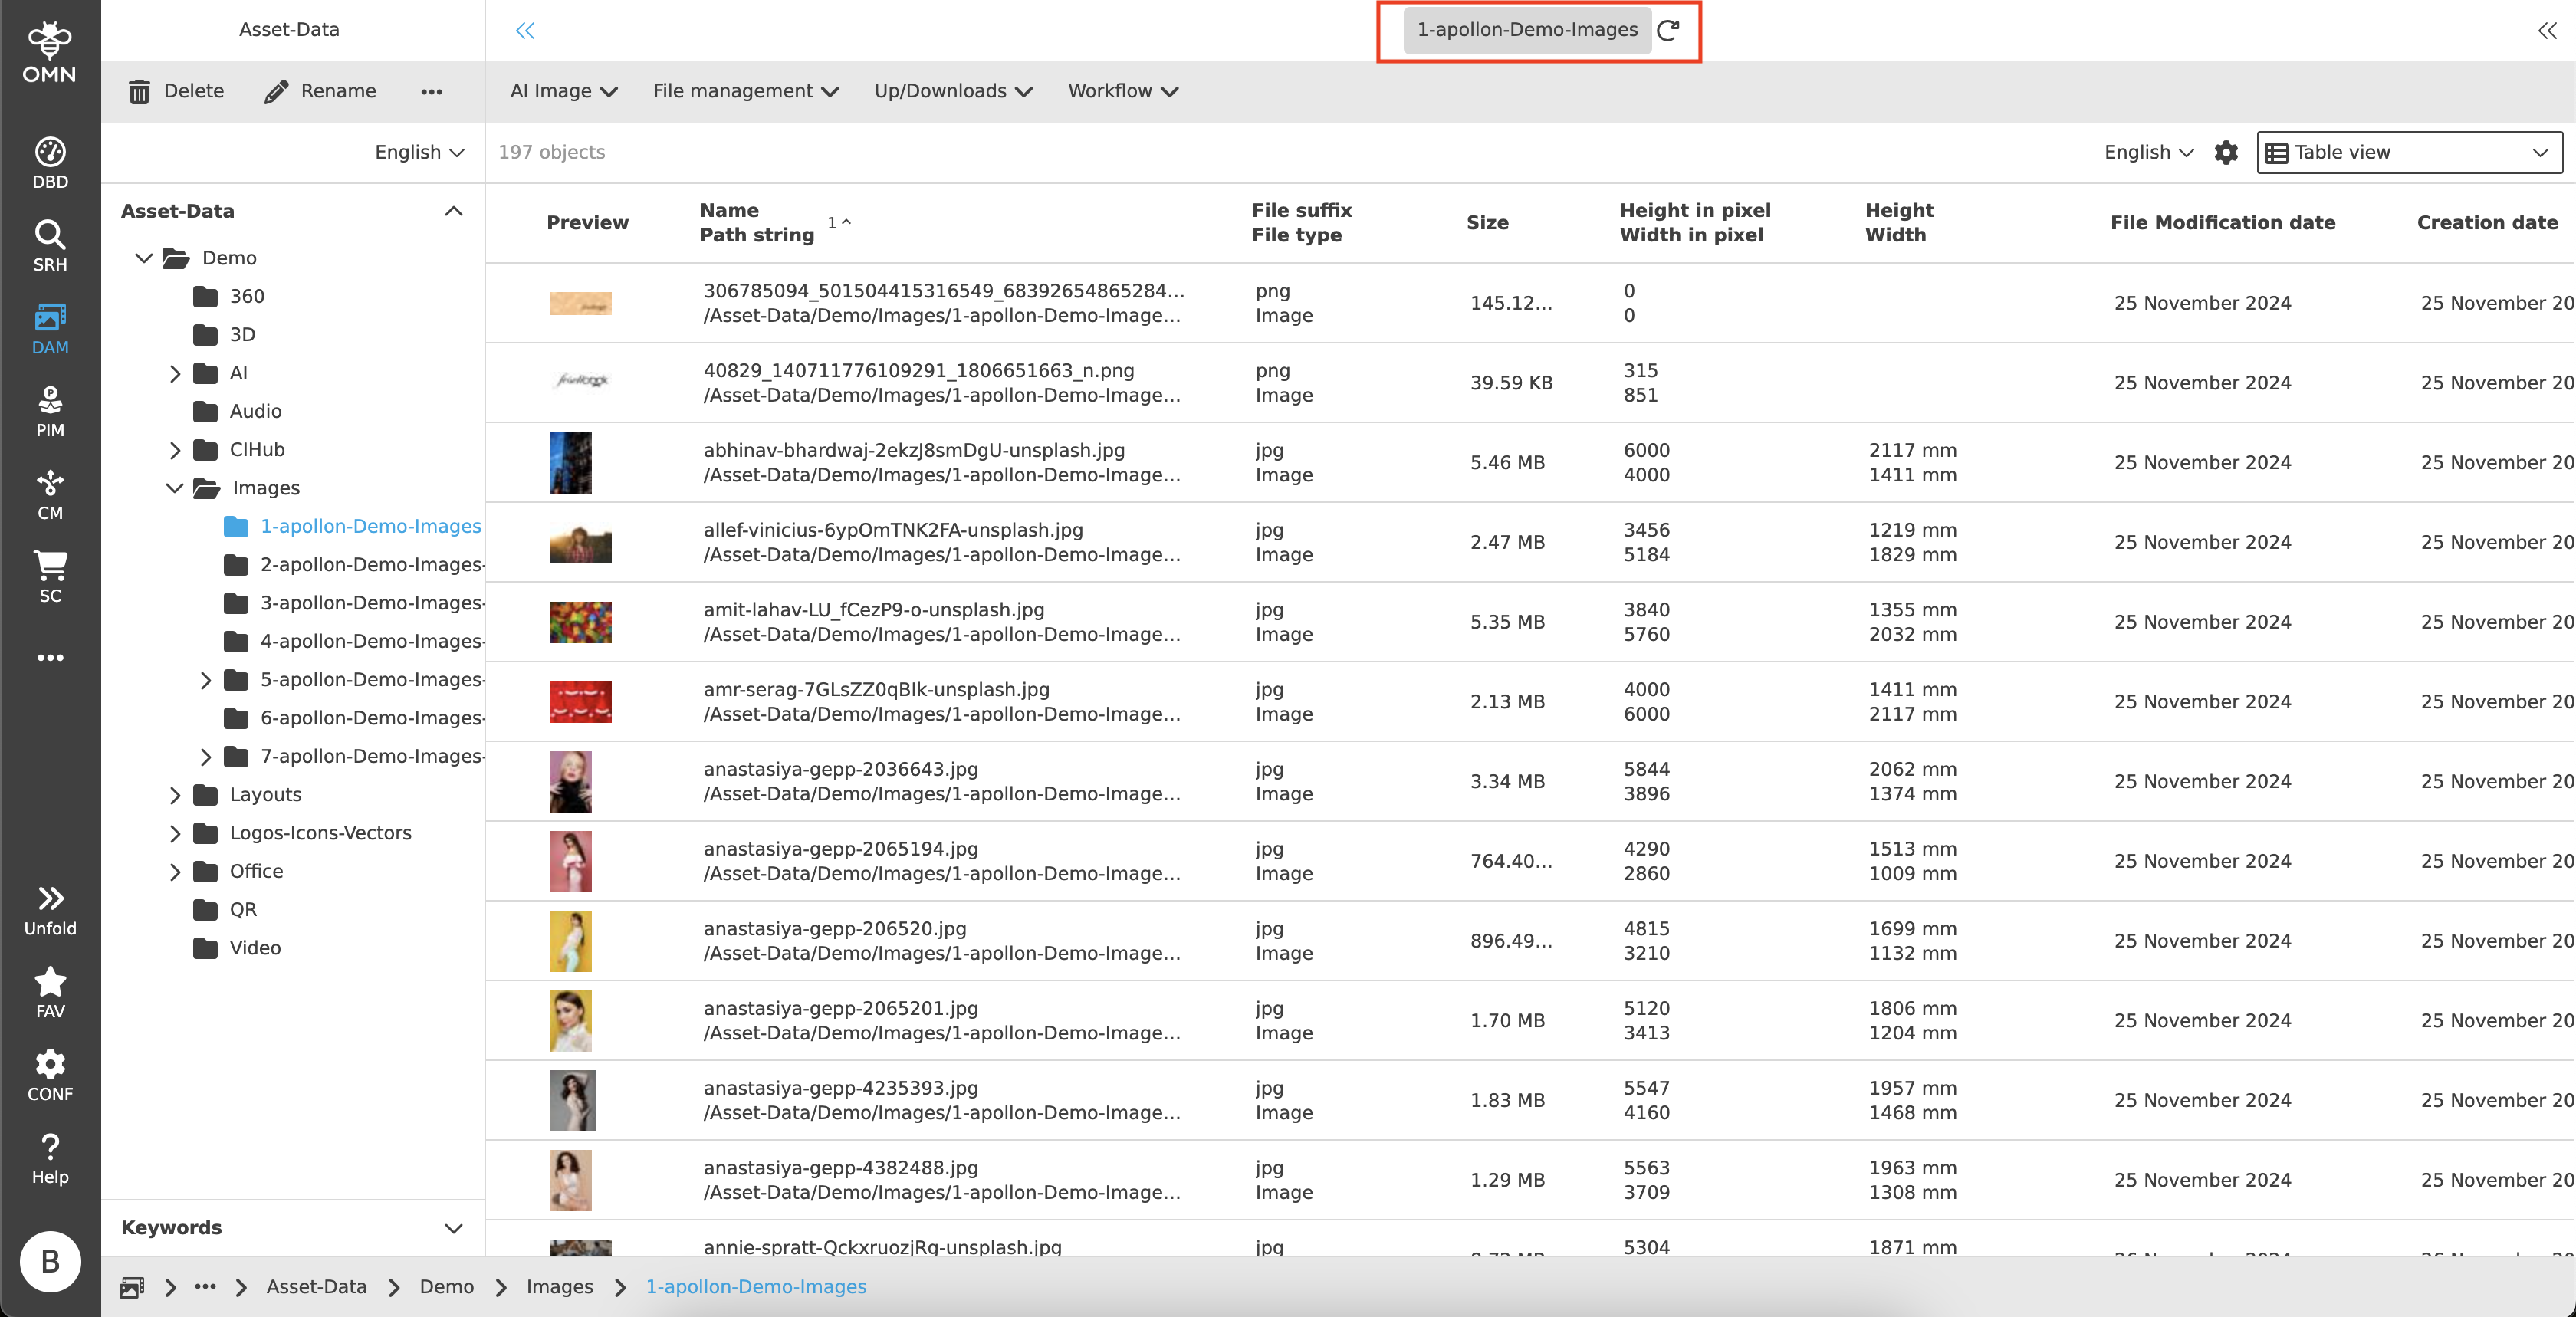
To refresh a view in OMN, most views have a “Refresh” button in each navigation bar (left, center, right). This appears as soon as you move the mouse pointer over the name (title).
Click on the name to refresh the selected view.
The same functionality is also partially available within the project navigation, e.g. to update the order structure after creating new orders or data collections.
In a few exceptional cases, it may be possible that no refresh button is available in a view. To update this view anyway, it is sufficient to first click on another project node within the project navigation (left column), for example, in order to then return to the previous view. This view should then also be up-to-date again.
In general, a page can also be updated via the browser. However, the focus may be lost in the process.
|
When the “Refresh” button in the left navigation bar is pressed, all views, including the middle and right views, are updated. If the button in the center navigation bar is pressed, the center and right views are updated. If the button in the right navigation bar is pressed, only the right view is updated. |
Showing and hiding columns within a table view
Certain columns are preconfigured by default for each table view and are displayed to the user.
If necessary, you can show or hide additional columns.
To show and hide columns, proceed as follows:
-
Click on the “Settings” icon on the right side of the statusbar in the desired view.
-
In the dialog box that opens, select the columns you want to show or hide in the “Column visibility” area.
-
Confirm your changes by clicking on the “Apply” button. You can discard the changes by clicking on the “Cancel” button.
The table will then adapt to your new settings.
Filter by values of properties/attributes
In addition to showing and hiding entire table columns, the OMN can also be filtered according to specific values for properties or attributes. Two filter functions are provided to the user for this purpose.
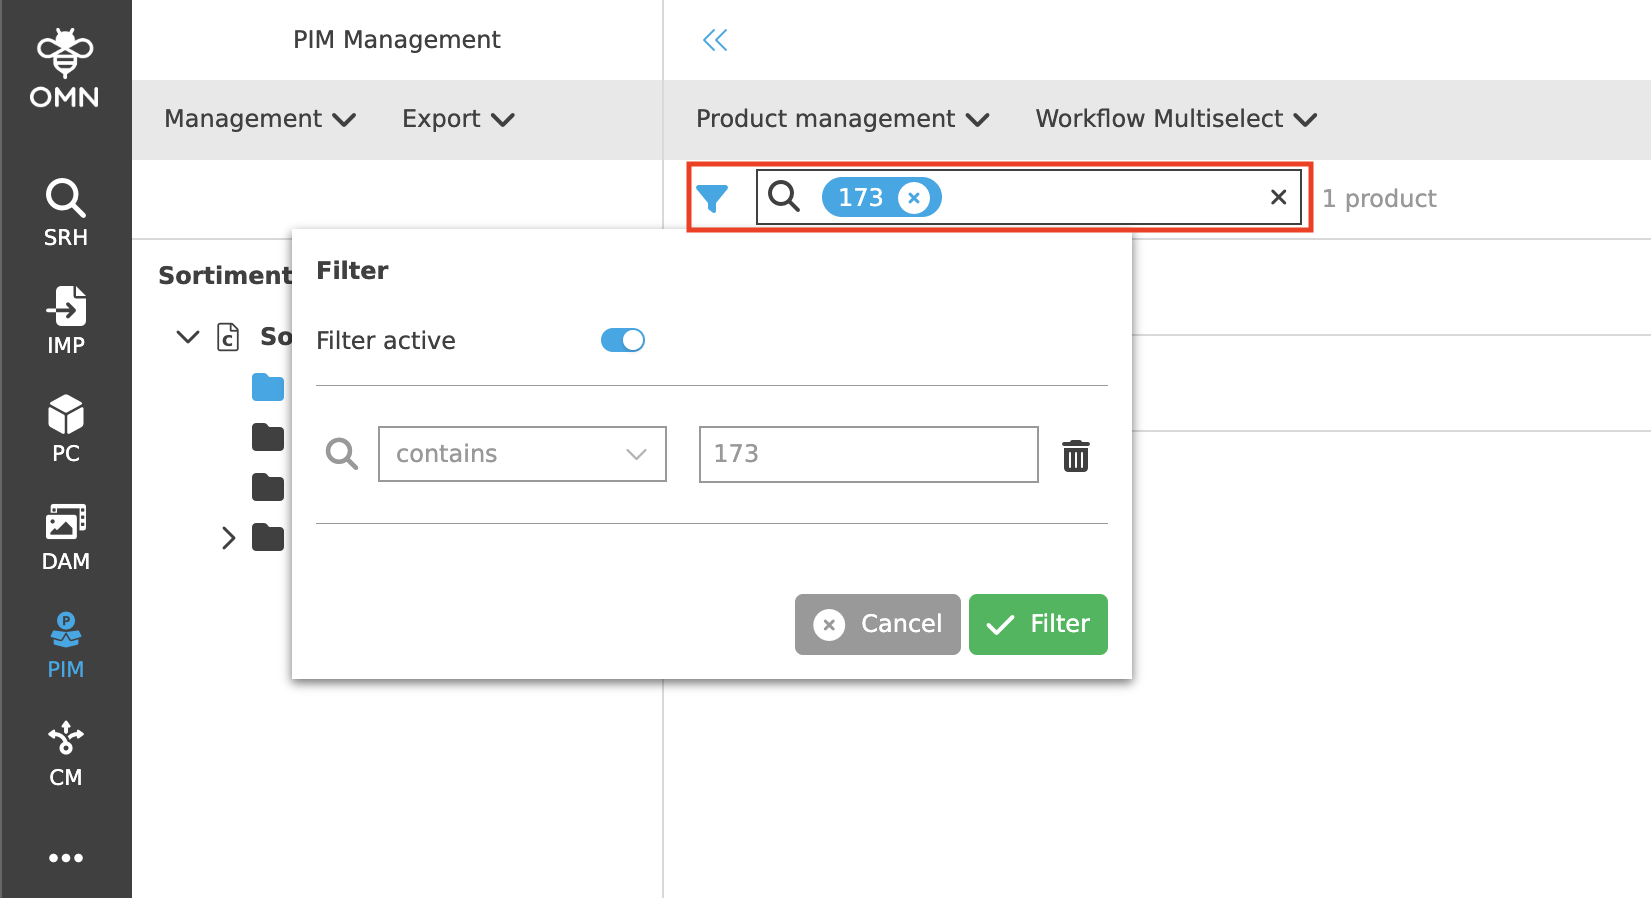
Quickfilter in the statusbar
In many modules, the statusbar contains a quickfilter with which you can quickly filter according to certain properties (usually predefined according to the name/product name or similar).
To do this, a specific value/term is entered in the input field and filtered by pressing “Enter”. Only the matching values/lines are displayed. Several terms can also be entered and combined.
The filter dialog can only be opened if a value has already been entered in the input field. It visualizes all active filters, but these cannot be changed.
Filters can either be deleted via this dialog (trash can symbol), deactivated via the toggle or removed in the input field.
Column filters
To filter certain columns, proceed as follows:
-
Select a table column and move the cursor over the column name. A filter symbol will appear.
-
Click on the filter symbol. A dialog box opens in which you can make the appropriate filter settings.
-
An operator (e.g. “contains”) is usually initially available as a dropdown list. Once you have selected this, the filter is automatically activated (toggle) and an input field appears in which you can enter the value you want to filter by.
-
If you wish, you can add further filter criteria by using the “Add filter” function. The filter criteria can be removed at any time using the “Delete” symbol.
-
After clicking on the “Filter” button, the entries in the table are filtered. Only the matching entries are displayed.
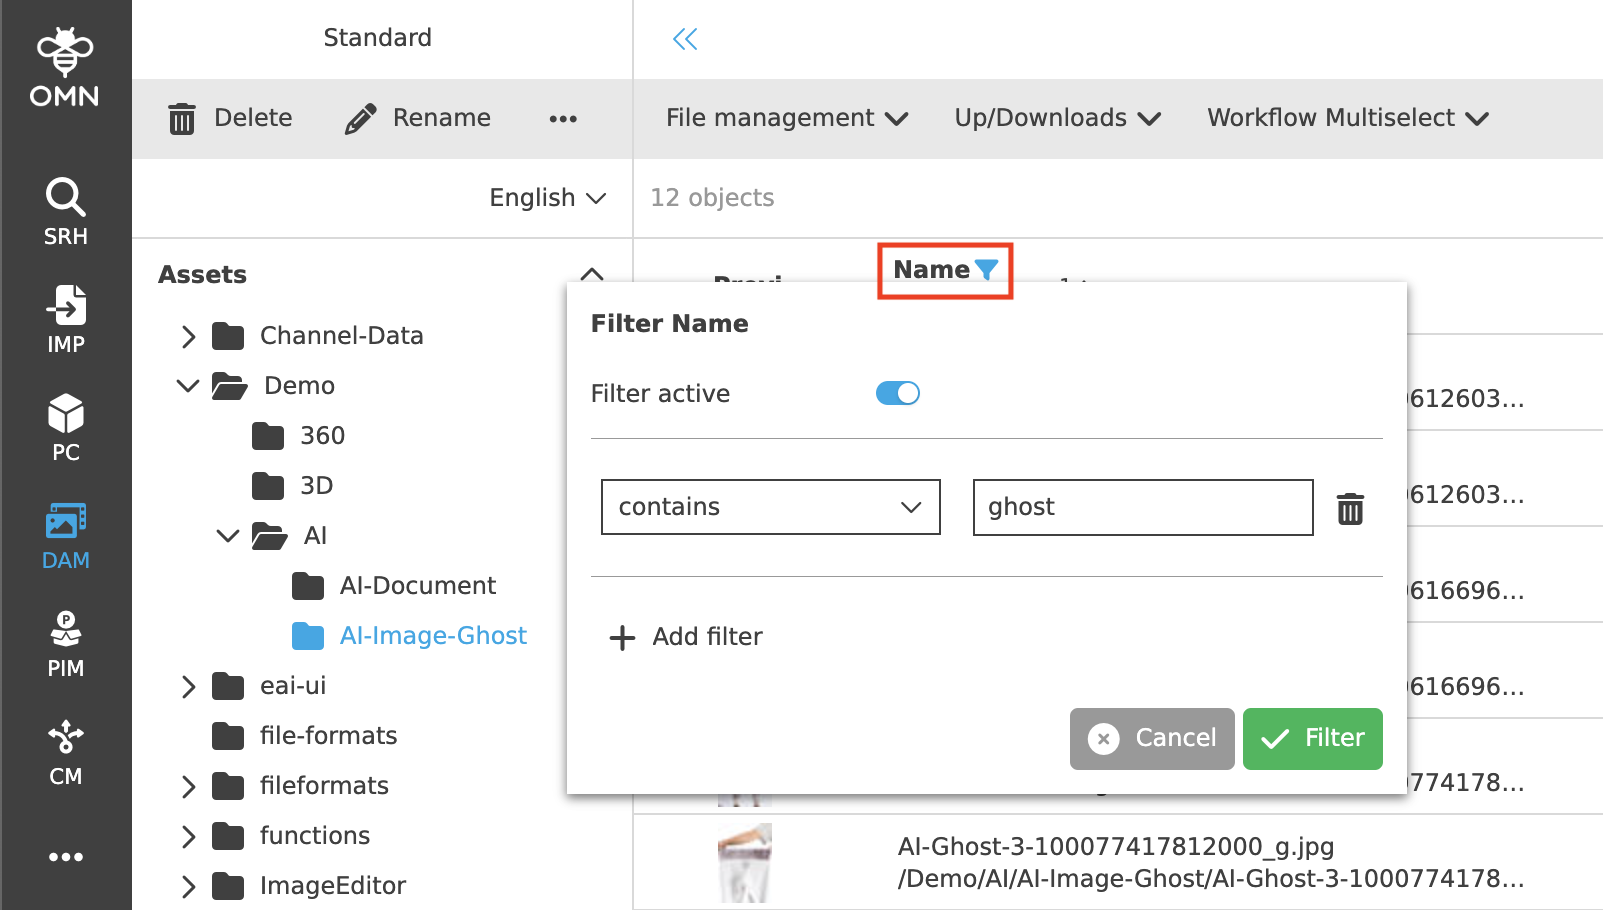
| Filters can be deactivated at any time if the toggle in the filter dialog is deactivated or the individual filters are deleted. |
Personal user settings
You can open the user settings by clicking on your profile picture at the bottom of the sidebar and then selecting “User settings”.
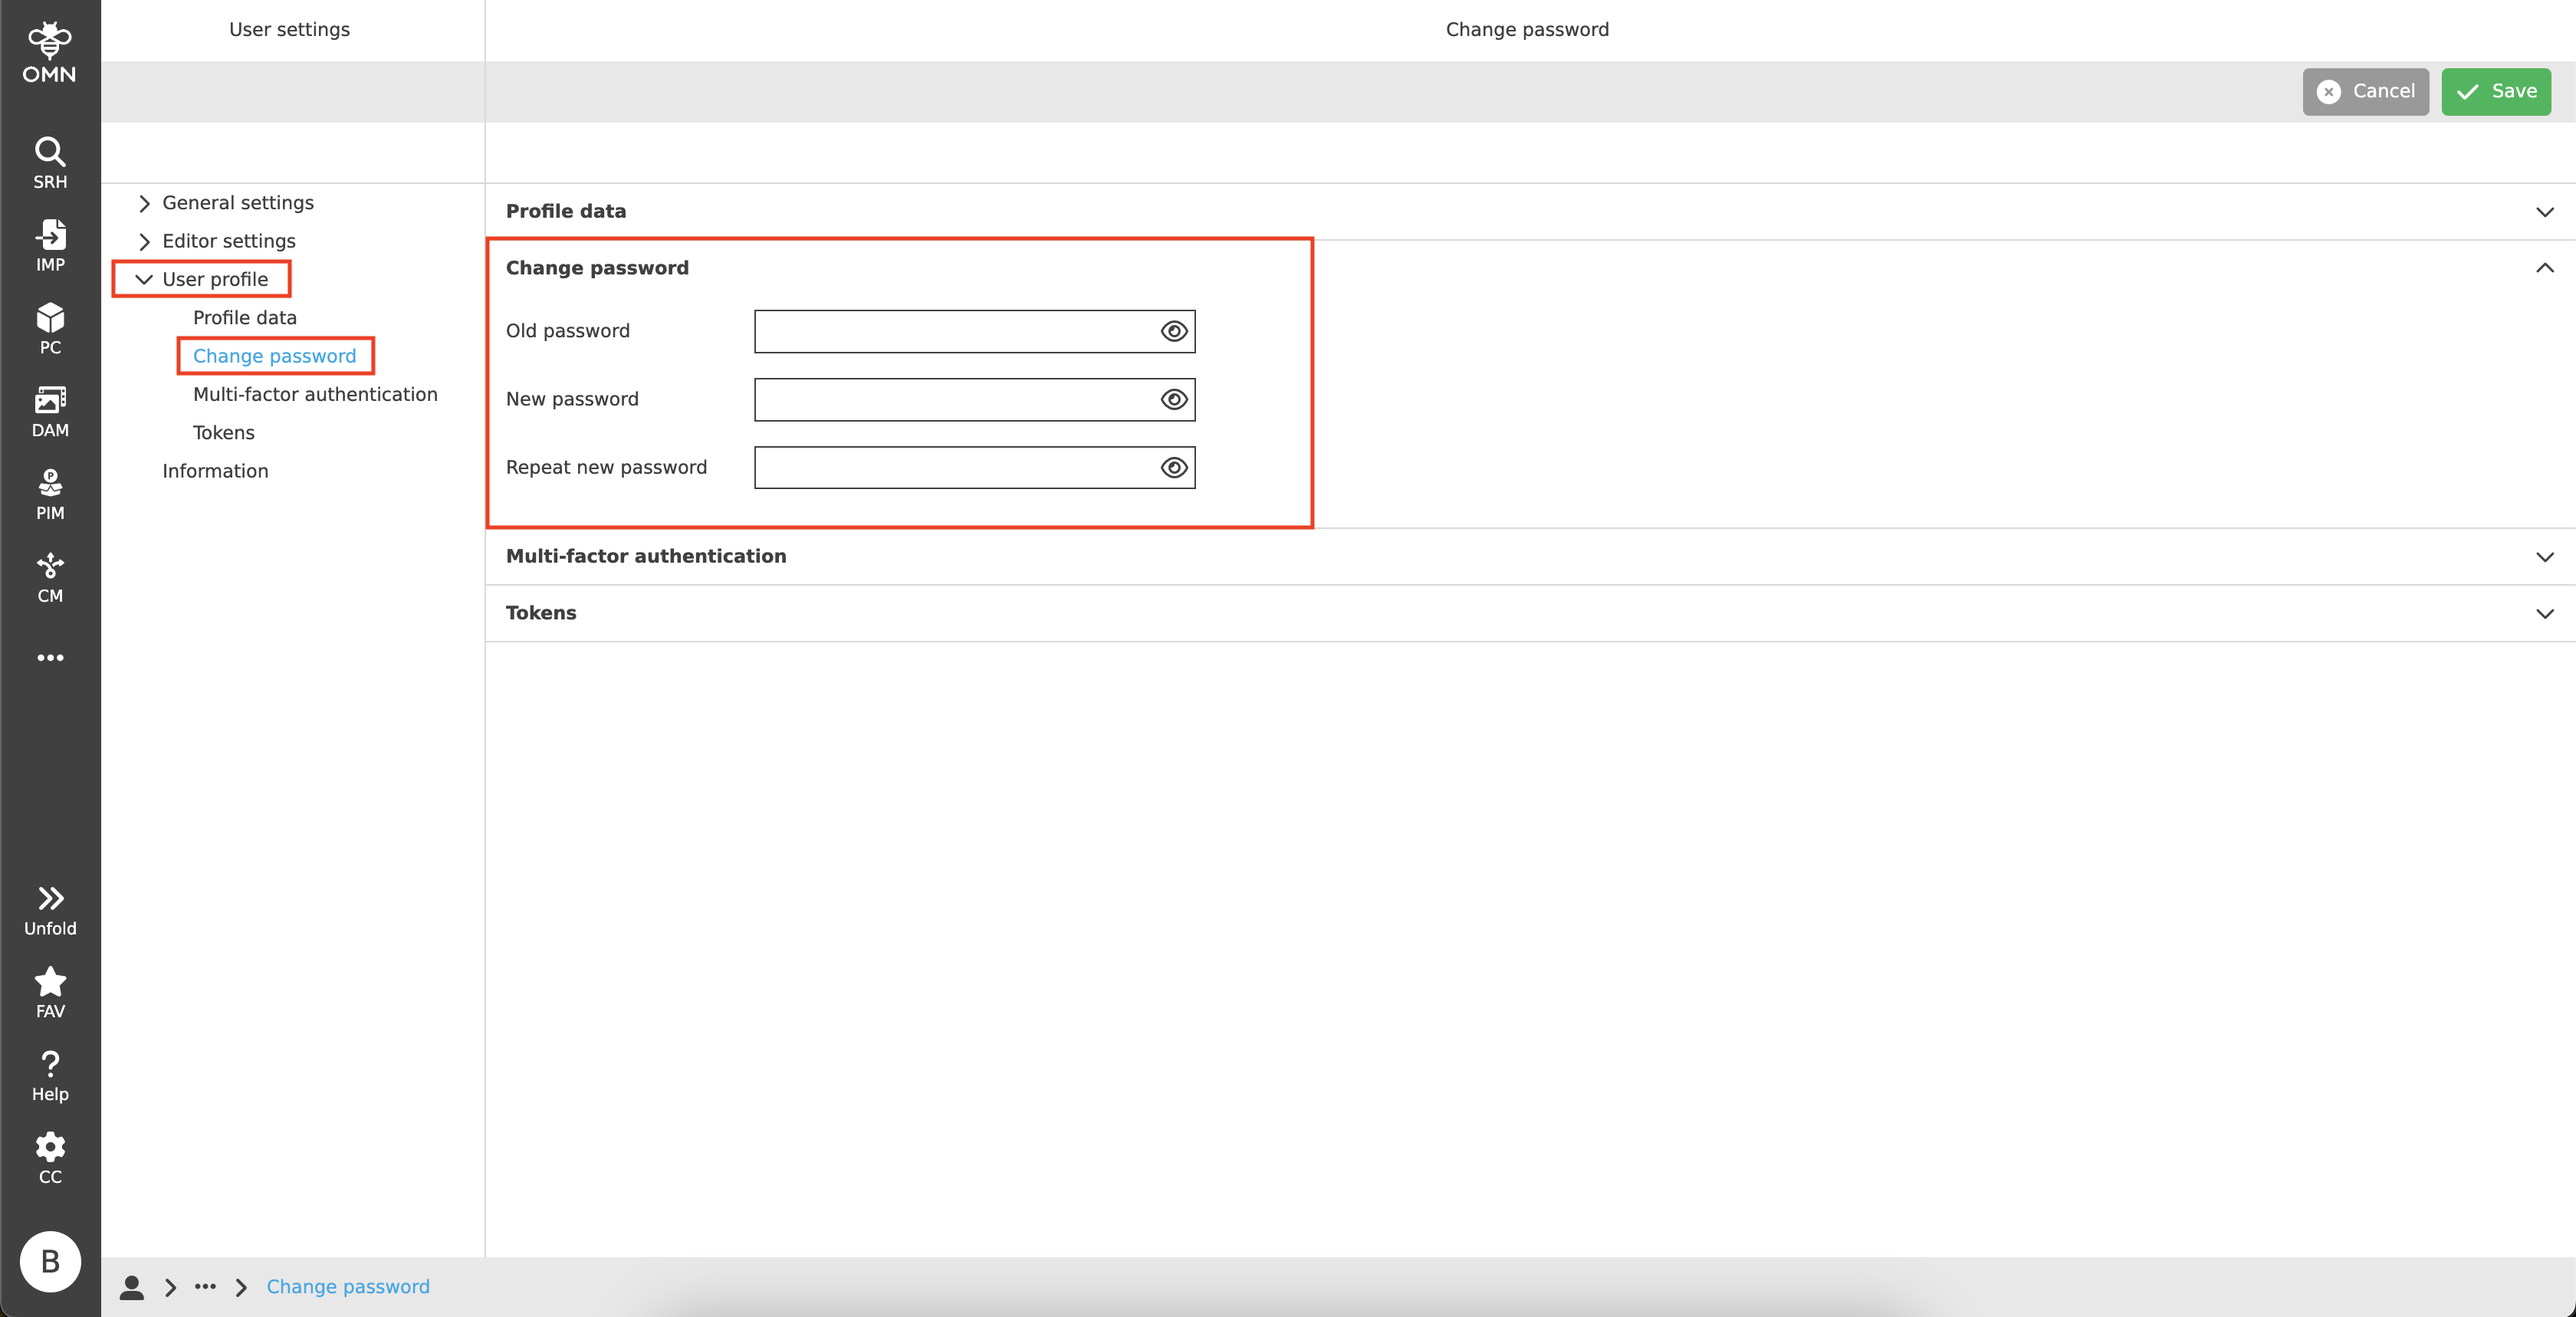
Change password
If you want to change your password, proceed as follows:
-
Open the user settings.
-
Go to “User profile” and select the “Change password” section.
-
First enter your old password and then enter your new password twice. Then save the process.
Change language settings in OMN
There are two types of languages in OMN: the data/content language and the system language.
To change one of the two languages, proceed as follows:
-
Open the user settings.
-
Go to the “General settings” area and select “Language”.
-
Select the desired data/content language or system language. Then save the process.
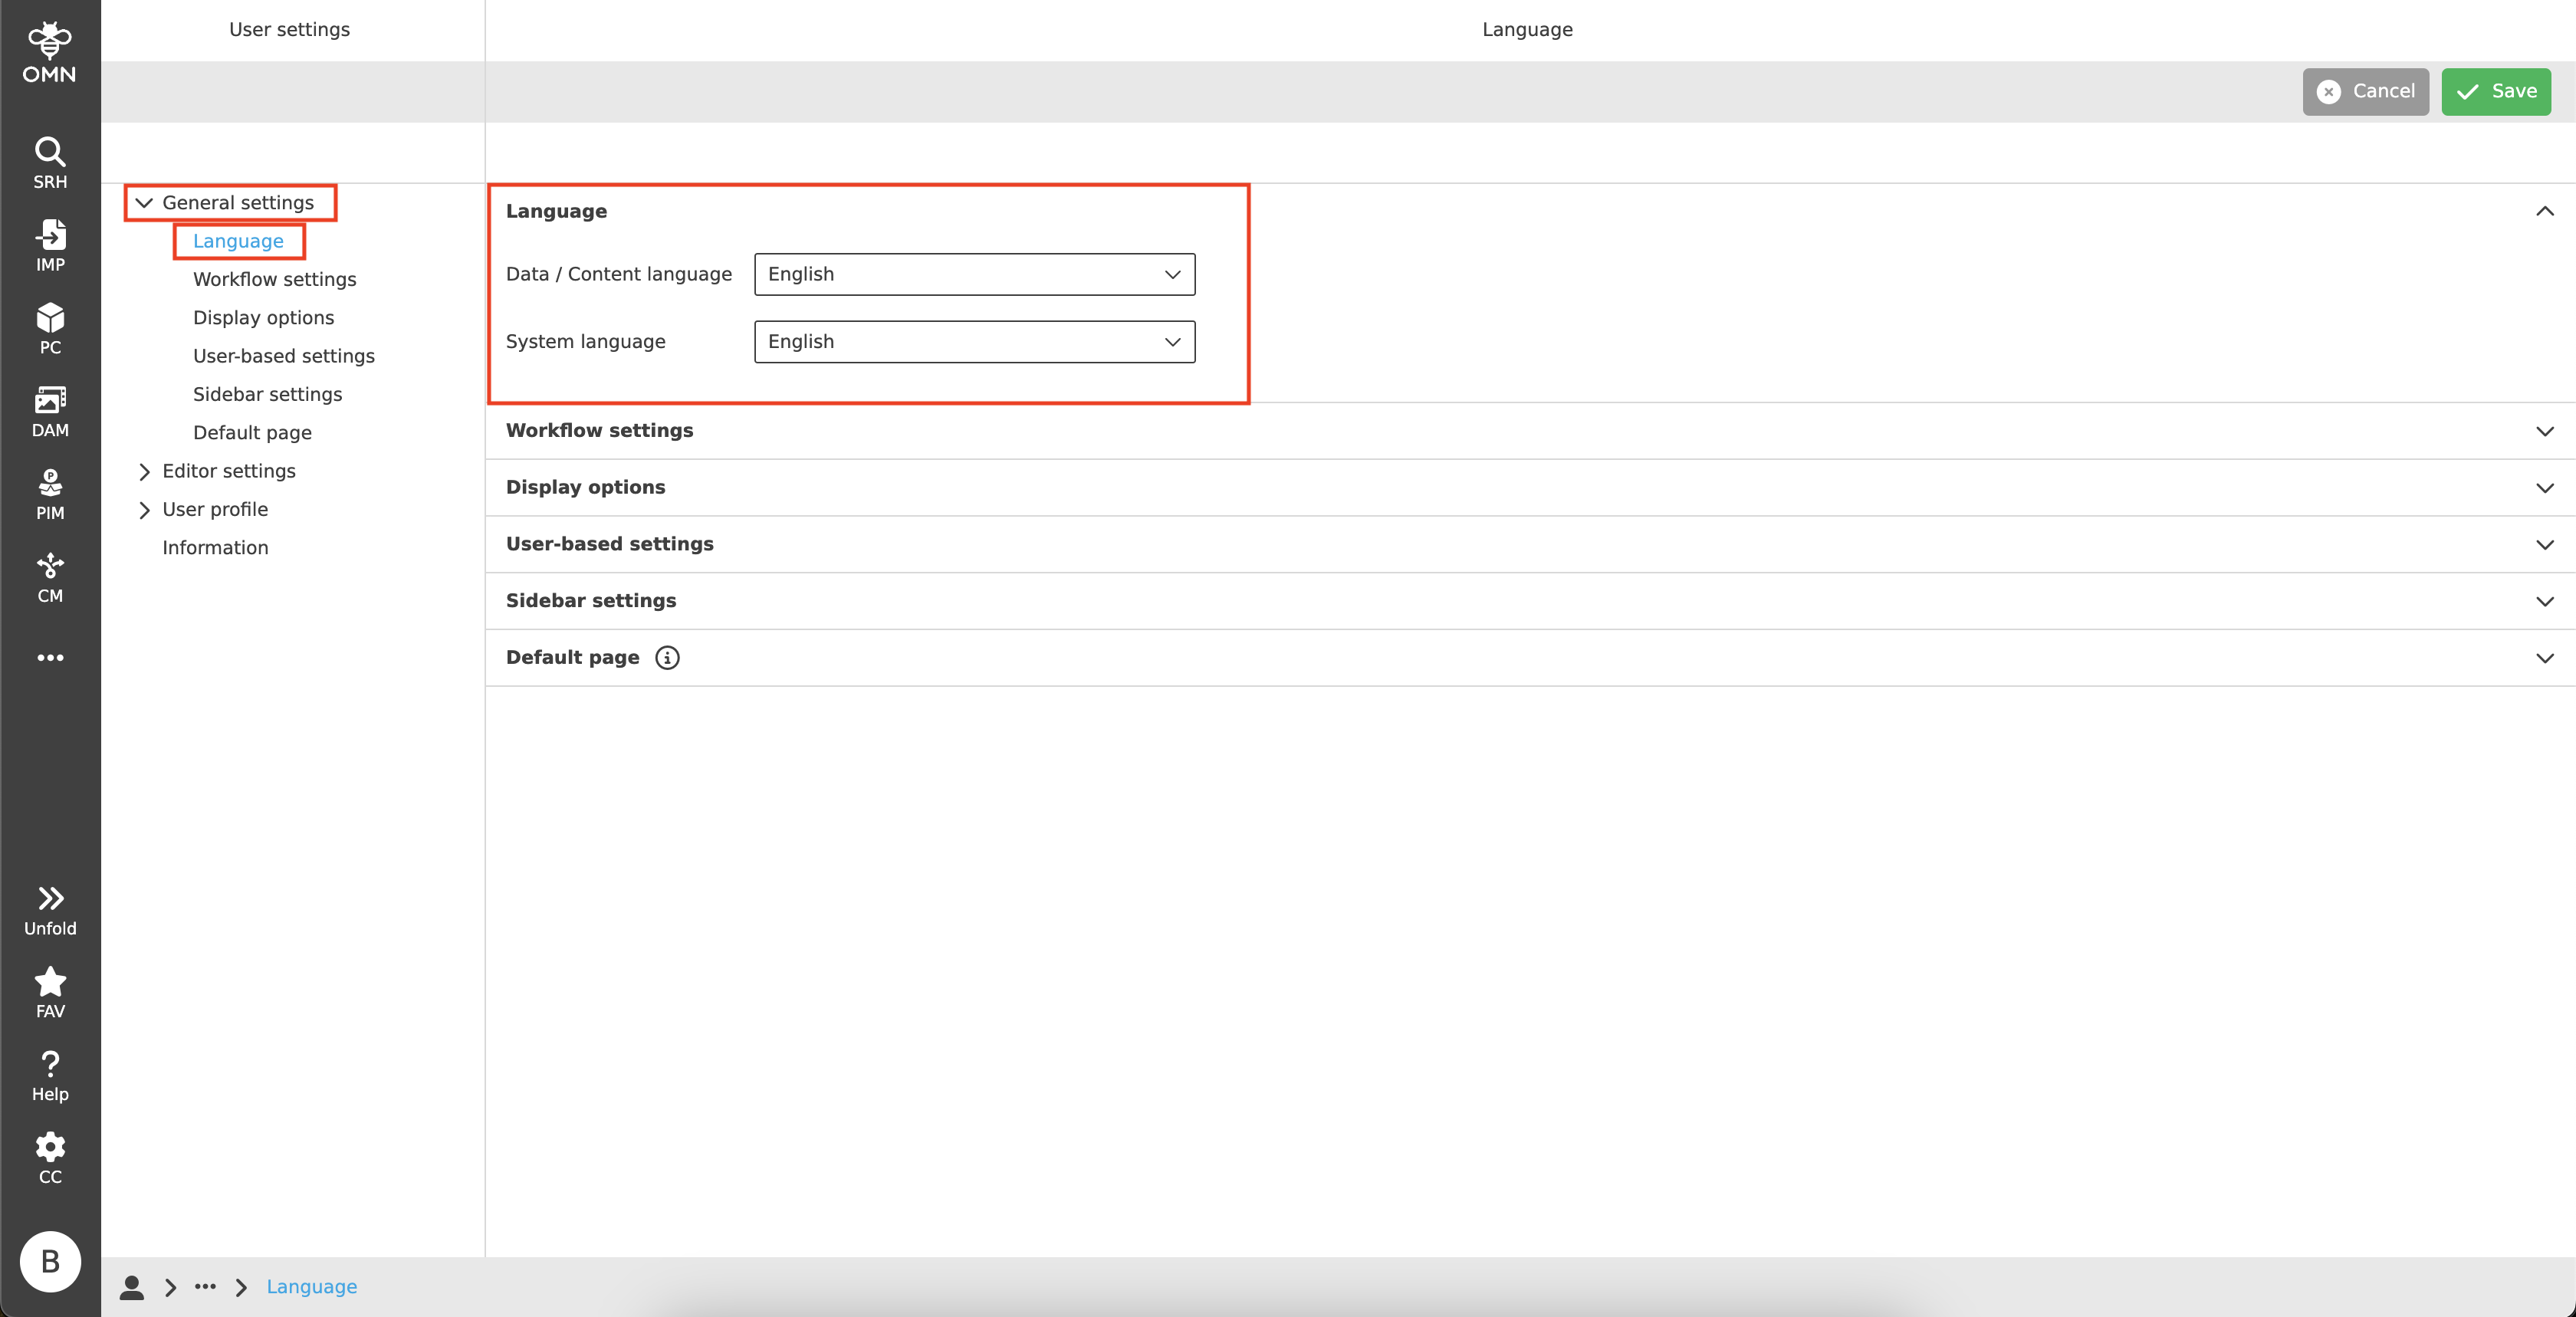
| The language can only be changed if several languages are enabled for the system. In OMN you will always find German and English as standard. |