Overview of AI functions in OMN Accelerator
Service Overview
OMN Accelerator has a variety of AI functions that you can use directly from the interface in various OMN modules.
In the following table you will find an overview of the AI functions that can be used in the OMN Accelerator Standard:
| Function | Function group | Icon | Module | Purpose |
|---|---|---|---|---|
AI Image (DallE) |
|
|
DAM |
|
AI remove background |
|
|
DAM |
|
AI create clipping |
|
|
DAM |
|
AI Image (Standard Templates) |
|
|
DAM |
|
AI Image (Custom Templates) |
|
|
DAM |
|
AI Image (Ghost Mannequin) |
|
|
DAM |
|
AI Tagger Image |
|
|
DAM |
|
AI Tagger Fashion |
|
|
DAM |
|
AI Text Recognition (OCR) |
|
|
DAM |
|
AI Image Captioning |
|
|
DAM |
|
AI text translation with Google |
|
|
PIM |
|
AI text translation with DeepL |
|
|
PIM |
|
AI text translation with Microsoft |
|
|
PIM |
|
AI text translation with Systran |
|
|
PIM |
|
AI Document Translation with DeepL |
|
|
DAM |
|
AI Text (Advertising & Ads) |
|
|
PIM |
|
AI Text (Communication) |
|
|
PIM |
|
AI Text (eCommerce) |
|
|
PIM |
|
AI Text (Rewrite) |
|
|
PIM |
|
AI Text (Social Media) |
|
|
PIM |
|
AI Text (Website) |
|
|
PIM |
|
AI Text (Writing Tools) |
|
|
PIM |
|
AI Text (OpenAI-Davinci) |
|
|
PIM |
|
AI Text (OpenAI-ChatGPT) |
|
|
PIM |
|
AI text generation (shoes) |
|
|
PIM |
|


AI services and integrations in OMN are constantly evolving. Not all artificial intelligence functions that OMN supports are part of the accelerator standard.
You can find an overview of all available OMN AI services at: AI-Services
If you are looking for more general information about AI functions with Online Media Net, please visit our website at: Products - apollon.
Requirements for using AI services
The prerequisite for using the individual services is a corresponding one-time licensing of the OMN AI connector and the deposit of a valid API key for the respective service.
In most cases, an API key for a service is also linked to a subscription for the service from the respective service provider, since many AI services are subject to a fee.
Example:
If you would like to use ChatGPT and already have an API key for professional use (and thus a subscription), this can be stored in OMN via configuration. Alternatively, you can also book the ChatGPT service directly through apollon. In this case, usage-based billing is then carried out directly through apollon.
If you have specific questions about licensing, please contact your personal contact person.
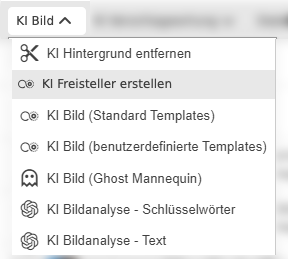
AI Image Services
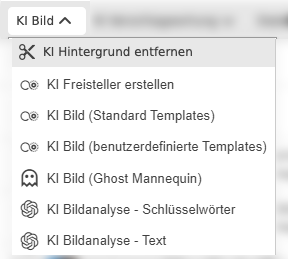
In OMN Accelerator you will find AI services that can create or edit images under the AI Image function group.
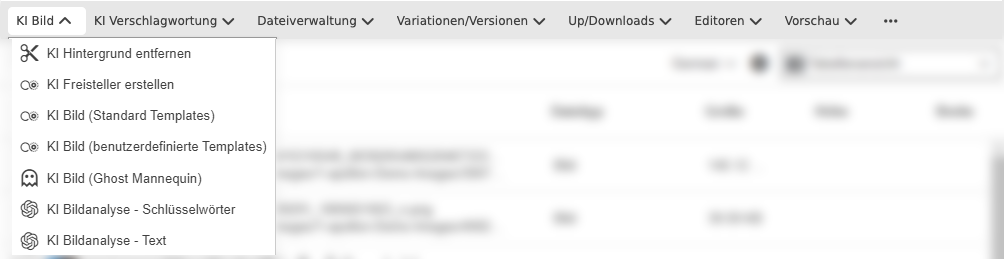
The following AI image functions are currently available in OMN Accelerator:
You can find an explanation of which use cases the individual AI functions cover in the AI service overview.
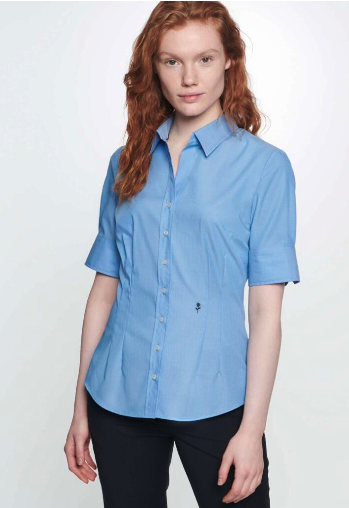
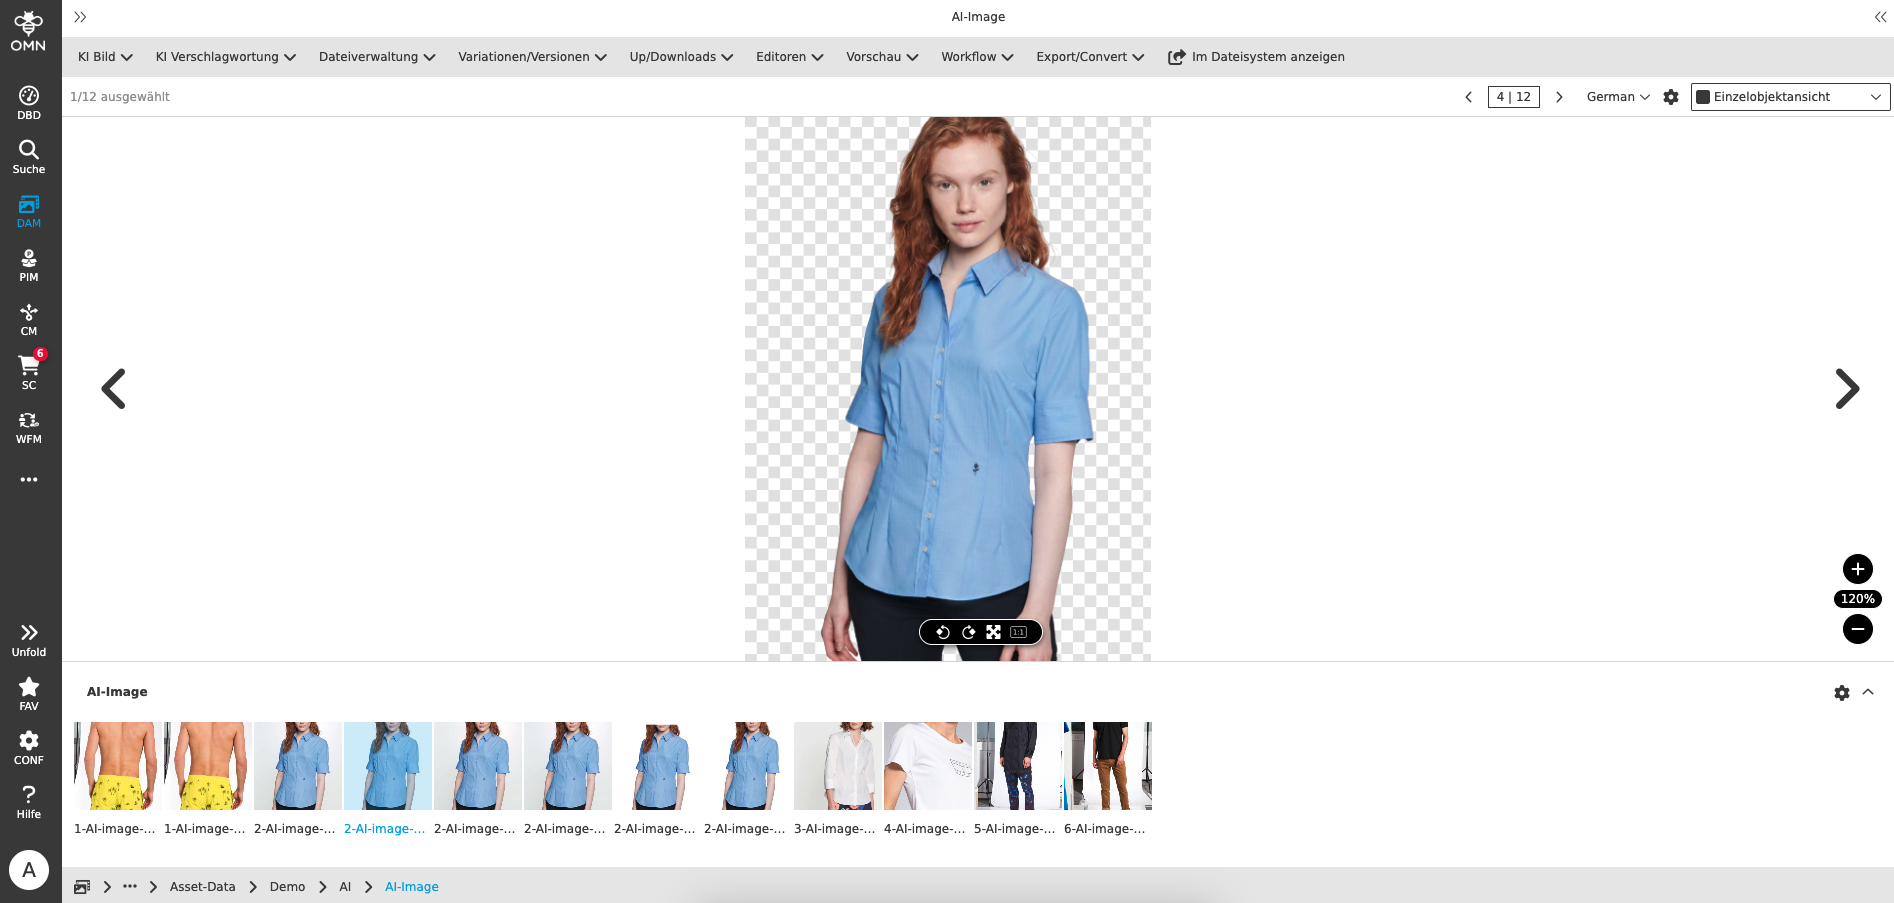
Using Remove Background
With this service, based on Remove.BG, you can automatically remove pixel images in OMN with a single click.
You can find the function under AI Image >> AI remove background
The function can be executed on one or more selected images in the DAM module or from the search. To execute the function, a parameterization is possible in which the resolution or quality of the resulting image is calculated.
The following settings are possible:
-
"Preview": Resize the image to 0.25 megapixels (e.g. 625×400 pixels) - 0.25 credits per image
-
"HD": Use original image resolution, up to 4 megapixels (e.g. 2000×2000) - 1 credit per image
-
"Full": Use original resolution, up to 25 megapixels (e.g. 6250×4000) for ZIP or JPG formats, or up to 10 megapixels (e.g. 4000×2500) for PNG - 1 credit per image
-
"50MP": Use original resolution, up to 50 megapixels (e.g. 8000×6250) for ZIP or JPG formats, or up to 10 megapixels (e.g. 4000×2500) for PNG - 1 credit per image
When cutting out a copy of the original image, the background is removed and made transparent. The result is a cut-out file in PNG format.
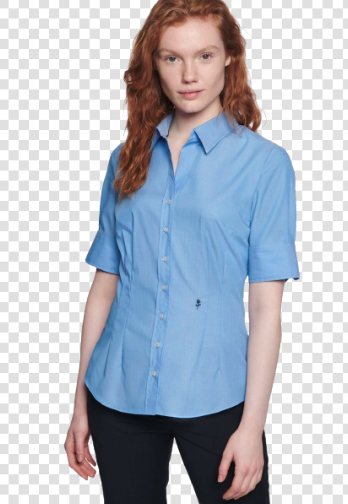
| The best way to view the result of the service is in the OMN single object view. There you will find an option to display transparency in the view settings. |
Please note that the service currently
-
can process the image formats JPG and PNG
-
can process image sizes up to max. 50 megapixels (8000x6250px) in ZIP or JPG formats and up to 10 megapixels (4000x2500px) in PNG format
-
see: AI Mask - remove.bg
-
the following table shows the corresponding output formats, broken down by resolution, as well as further information:
Format Resolution Pro and Contra PNG
Up to 10 megapixels, e.g. 4000x2500
+ Easy integration
+ Supports transparency
- Large file sizeJPG
Up to 50 megapixels, e.g. 8000x62500
+ Easy integration
+ Small file size
- No transparency supportedZIP
Up to 50 megapixels, e.g. 8000x6250
+ Small file size
+ Supports transparency
- Integration requires compositing
-
-
the isolation is optimized for certain types of images where the subject is clearly in the foreground What images are supported? – remove.bg
-
People
-
Products
-
Animals
-
Cars
-
Graphics
-
Using AI to create clippings
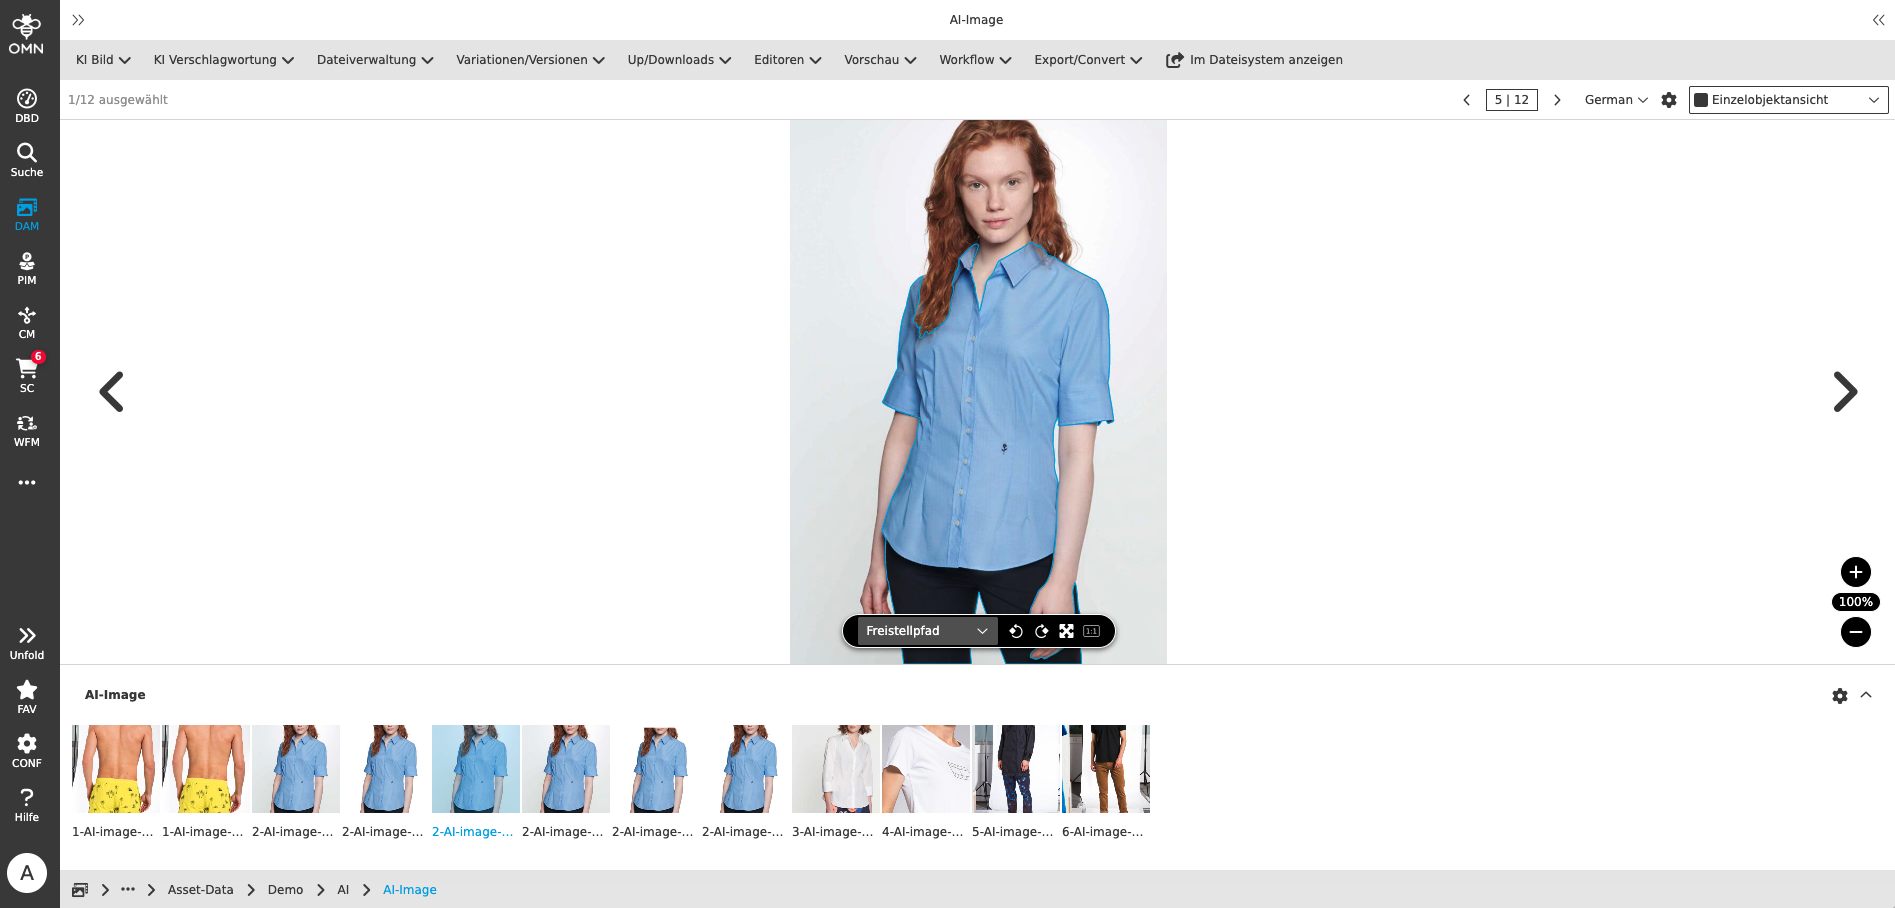
With this service, you can automatically create a Photoshop path for pixel images in OMN with a single click, which cuts out the object.
You can find the function under AI Image >> AI create clipping
The function can be executed on one or more selected images in the DAM module or from the search. No further parameterization is required to execute the function.
When cutting out with a Photoshop path, a copy of the original image is created and the cutout is created on it in the form of a path. You can edit or modify this path with Adobe Photoshop, for example. The easiest way to do this is with our OMN CI HUB Connector, which you can use to open images saved in OMN directly in Photoshop.
The result is a file in JPG format cut out using a Photoshop path.
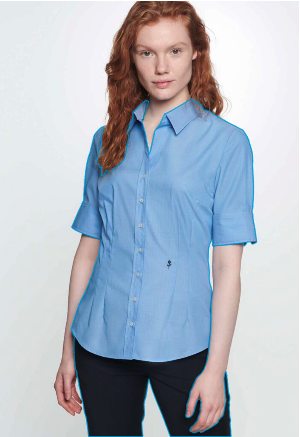
| The best way to view the result of the service is in the OMN single object view. There you can directly view the path generated by AI, but also other images contained in the path. |
Please note that the service currently
-
can process the image formats JPEG, PNG, Tiff and WebP
-
can process maximum image sizes of 100 MB AI Image - autoRetouch
-
Maximum output size: 10k x 10k px (images are reduced to 4096 x 4096 px)
-
the cutout is optimized especially for fashion product images
Using AI Image (Standard Templates)
With this service you can perform various manipulations on pixel images based on so-called templates.
A template is a combination of different image processing steps (e.g. cutting out an image, positioning a tile in a cut-out image, outputting the image as a JPG).
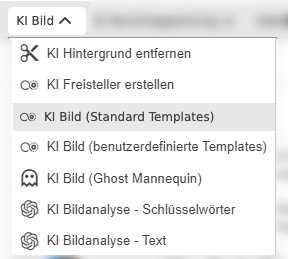
You can find the function under AI Image >> AI image (standard templates)
The function can be executed on one or more selected images in the DAM module or from the search.
To execute the function, you must select a template.
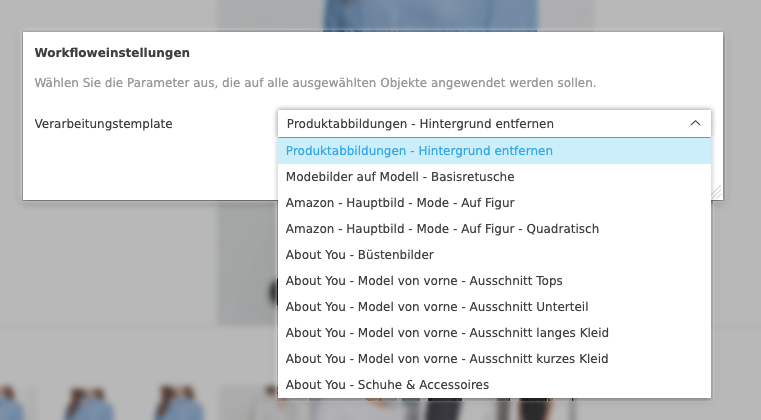
OMN-Accelerator provides a large selection of standard templates for various image manipulations. The following standard templates can be used in OMN Accelerator Standard:
| Template | Functionality |
|---|---|
Product Imagery - Remove Background |
|
Fashion Imagery on Model - Basic Retouch |
|
Amazon - Main Image - Fashion - On Figure |
|
Amazon - Main Image - Fashion - On Figure - Square |
|
Shopify - Fashion - On Model |
|
Shopify - Fashion - Clothing Only |
|
Shopify - Objects |
|
About You - Bust Images |
|
About You - Model Front Crop Tops |
|
About You - Model Front Crop Bottoms |
|
About You - Model Front Crop Long Dresses |
|
About You - Model Front Crop Short Dresses |
|
About You - Shoes & Accessories |
|
Breuninger - Full/Half Body Model with Feet |
|
Breuninger - Full/Half Body Model Without Feet |
|
Breuninger - Clipping / Mannequin |
|
Breuninger - Model Detail |
|
Breuninger - Product |
|
Inno - Jewelry (Plain Background) |
|
Inno - Jewelry (Non-Plain Background) |
|
Inno - Jewelry Detail |
|
Inno - Accessories |
|
Inno - Shoes & Bags |
|
Inno - Bust / Mannequin |
|
Inno - Model Images (Clothing) |
|
Using AI Image (custom templates)
With this service you can perform various manipulations on pixel images based on so-called templates.
A template is a combination of different image processing steps (e.g. cropping an image, positioning a tile in the cropped image, outputting the image as a JPG).

You can find the function under AI Image >> AI Image (custom templates)
The function can be executed on one or more selected images in the DAM module or from the search.
To execute the function, you must select a template.
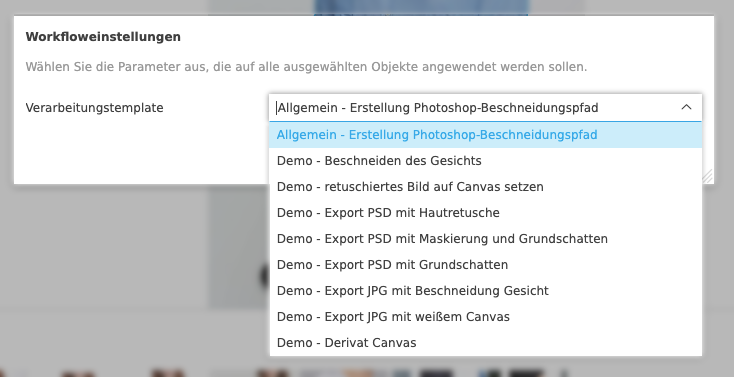
OMN-Accelerator provides some example demo templates for various image manipulations. The following user-defined demo templates can be used in the OMN Accelerator Standard. In contrast to the standard templates, templates in this area can be changed or extended by the administrator.
| Template | Functionality |
|---|---|
Demo - Photoshop clipping path creation |
|
Demo - Face Cropping |
|
Demo – Retouch with set on canvas |
|
Demo – Skin Retouch - Export PSD |
|
Demo – Mask, Ground Shadows - Export PSD |
|
Demo – Ground Shadows - Export PNG |
|
Demo – Export JPG with face cropping |
|
Demo – Export JPG with white canvas |
|
Demo – Derivative Canvas |
|
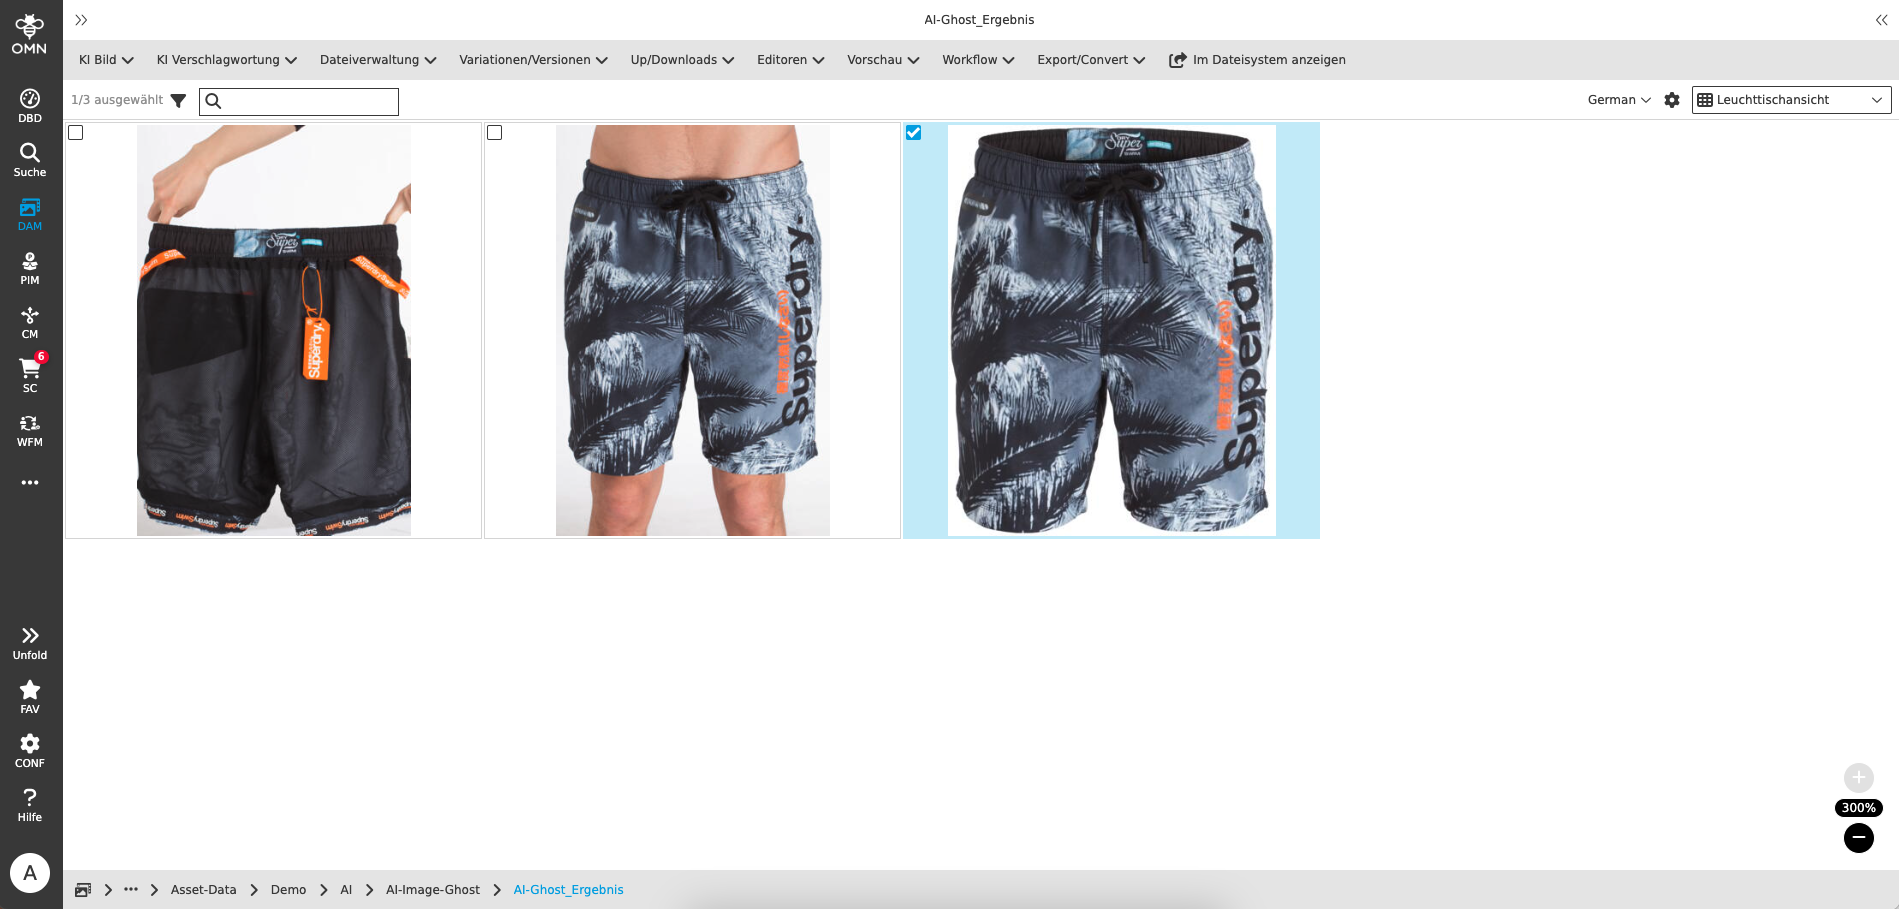
Using AI Image (Ghost Mannequin)
In the fashion world, a ghost mannequin (also called a neck mannequin, invisible mannequin or hollow man) is the name for an image editing technique that creates the illusion of a human body filling out the clothing.
The Ghost Mannequin effect is a proven powerful post-processing technique for clothing photos. This technique involves editing photos inside and out to remove all traces of the model or mannequin and obtaining a photo that perfectly reflects the fit of your product in 3D. Flat photos of clothing can put off shoppers as they don’t show the full size of your products. 3D silhouettes can speed up your sales as your customers can imagine themselves in the clothing and have more confidence in their purchase.
With this service, you can merge two related images, namely the product photo that was photographed on the body and the image for the inlay (also called a back mirror), into one image - the Ghost Mannequin.
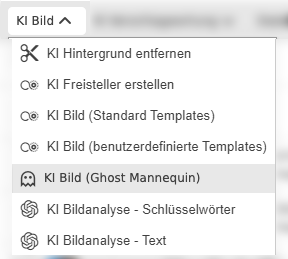
You can find the function under AI image >> AI image (Ghost Mannequin)
The function can only be executed on two related images in the DAM module.
The correct order is important for the function to be executed (product photo on the left, inlay on the right).
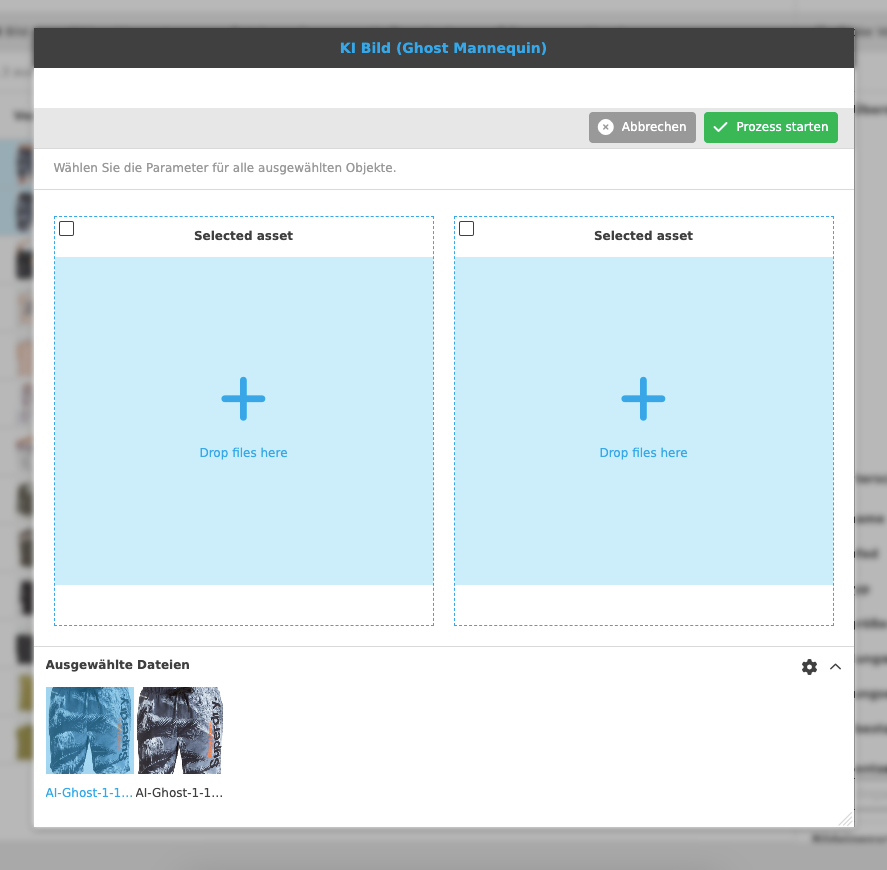
Generating a ghost mannequin image can take several minutes.
The result is a new image in PNG format, which is visible immediately in OMN after generation.
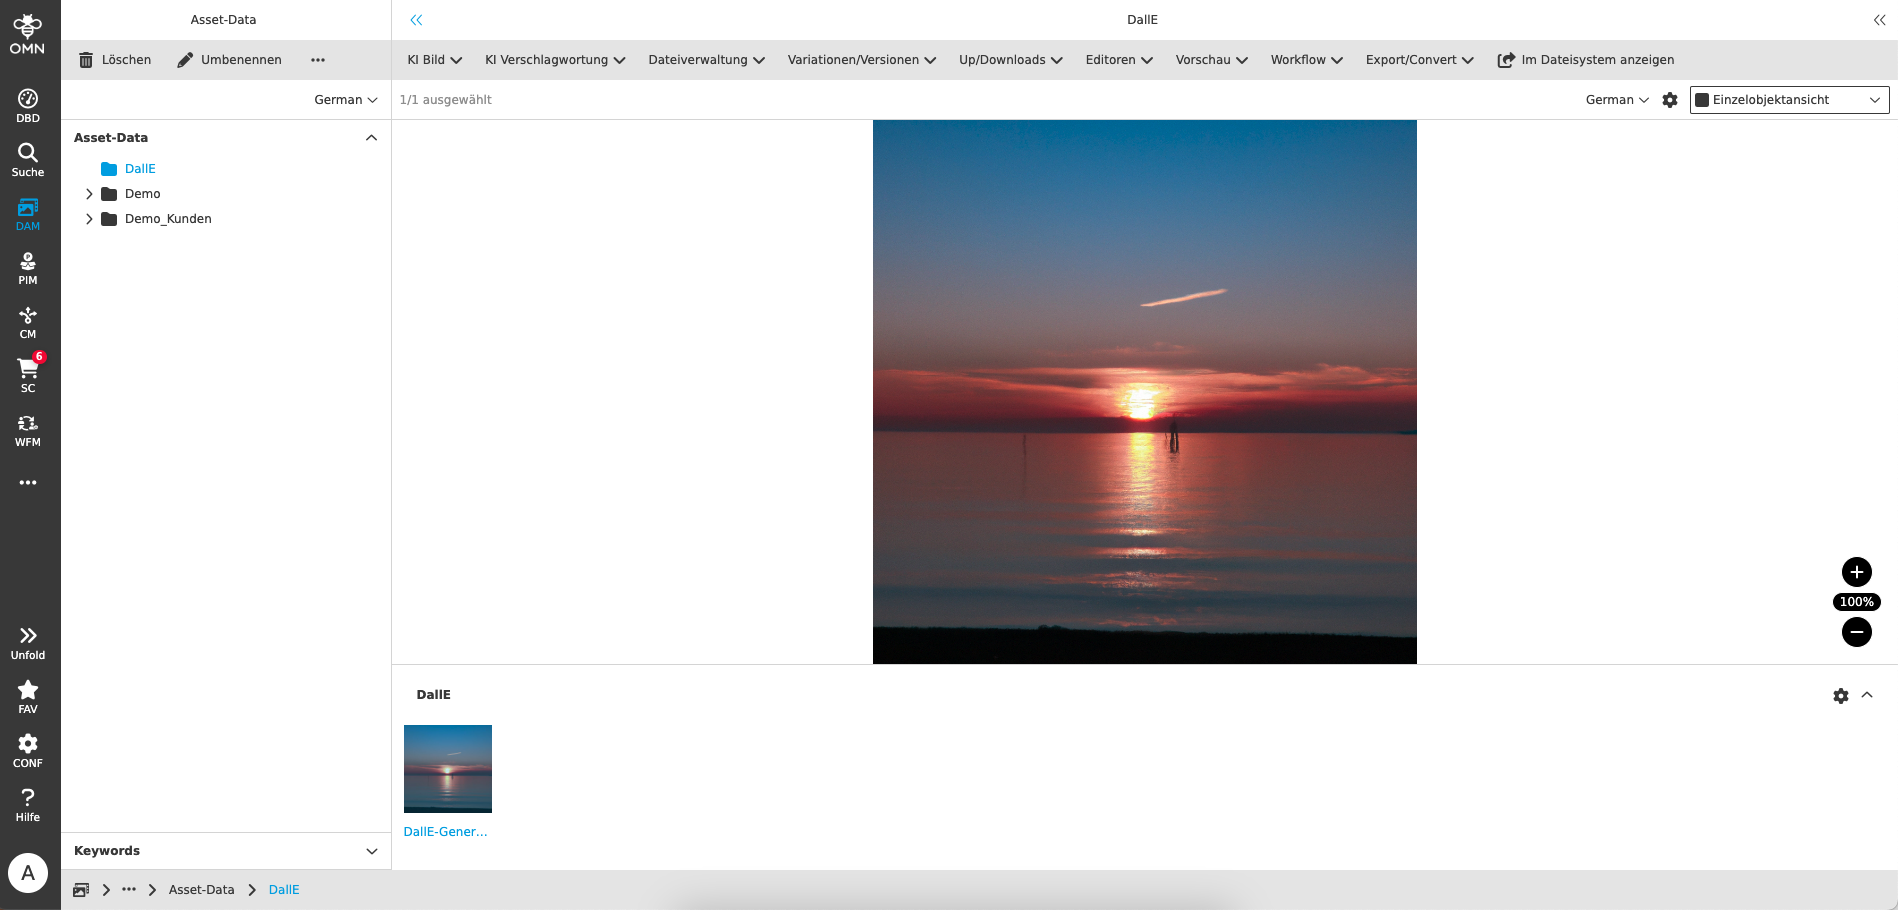
Using AI Image (Dall-E Image Generation)
This service allows the generation of a pixel image based on a prompt using the AI service Dall-E from Open AI.
Dall-E is an AI system that can create realistic images and works of art based on a description in natural language.
If you want to generate images, you can use the function in the DAM module directly.
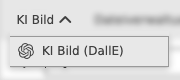
You can find the function under AI image >> AI image (DallE)
It is important that you have not selected an asset, otherwise the function will not appear in the toolbar.
When executing the function, you must specify a few parameters so that your image can be generated.
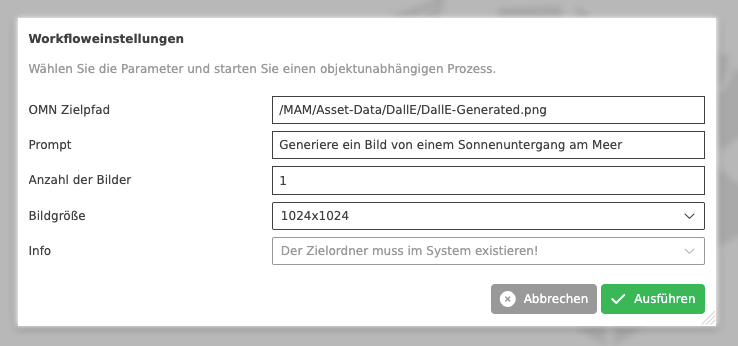
You can take the parameters for generation by the AI service from the following table:
| Parameter name | Description |
|---|---|
OMN target path |
|
Prompt |
|
Number of images |
|
Image size |
|
The generation can take some time.
The result is a new image in JPG format, which is available directly in OMN Visible in the defined target folder after generation.
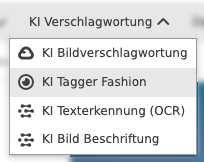
AI Tagging Services
In OMN Accelerator you will find AI services that can examine/recognize images and generate meta information under the AI Tagging function group.

The following AI image functions are currently available in OMN Accelerator:
You can find an explanation of which use cases the individual AI functions cover in the AI service overview.
Using AI Image Tagging
To effectively manage, search and use images in the DAM module, it is useful to tag them with descriptive text elements called keywords, labels, tags or key words. This process is called image tagging or indexing.
Image tagging can be done manually or automatically in OMN. Manual image tagging requires a lot of time and effort from humans who have to analyze the images and select the appropriate keywords. Automatic image tagging, on the other hand, uses artificial intelligence (AI) technology to recognize and classify images. AI-based image tagging uses algorithms that learn from large amounts of data what images look like and what they mean. These algorithms can identify various features of an image, such as colors, shapes, objects, people, scenes or emotions. Based on these features, they can then generate relevant keywords that describe the image. AI-based image tagging has many advantages over manual image tagging. On the one hand, it is faster and more efficient because it can process thousands of images in a short time. On the other hand, it is more accurate and consistent because it applies objective criteria and avoids human errors. It is also more flexible and adaptable because it can take different languages, domains and requirements into account.
In order for automatic image recognition to work, it needs a model that is trained for specific recognition tasks.
A distinction is made between pre-built models and custom models:
-
A prebuilt model in image recognition is a pre-built model that has been trained on a large set of images to recognize different objects or features. A prebuilt model can be used for different applications without the need to adapt or retrain it. A prebuilt model has the advantage of being quick and easy to implement, but the disadvantage that it may not be suitable for specific requirements or domains.
-
A custom model in image recognition is a customized model that has been trained on a smaller set of images to recognize specific objects or features. A custom model can be used for special applications that require high accuracy or special recognition logic. A custom model has the advantage of being more flexible and customizable, but the disadvantage that it requires more time and resources to build and train.
By default, OMN Accelerator only uses pre-built models from various services, but if required, it also allows the creation and integration of your own, customer-specific custom models that can be created as part of a project.
If you want to tag images in OMN, you can use the function directly in the DAM module or directly from the search.

You can find the function under AI tagging >> AI image tagging
The function can also be executed on one or several assets at once.
When executing the function, you must specify a few parameters so that the image tagging can be carried out.

You can take the parameters for image tagging by the AI service from the following table:
| Parameter name | Description |
|---|---|
AI provider |
|
Recognition threshold |
|
Target attribute |
|
Image format |
|
Language |
|
Generating keywords can take some time, especially if they have to be translated afterwards.
You can see the result of the image recognition in the details area under "Keywords & Tagging" in the respective field. You can also delete automatically generated tags or add them manually.
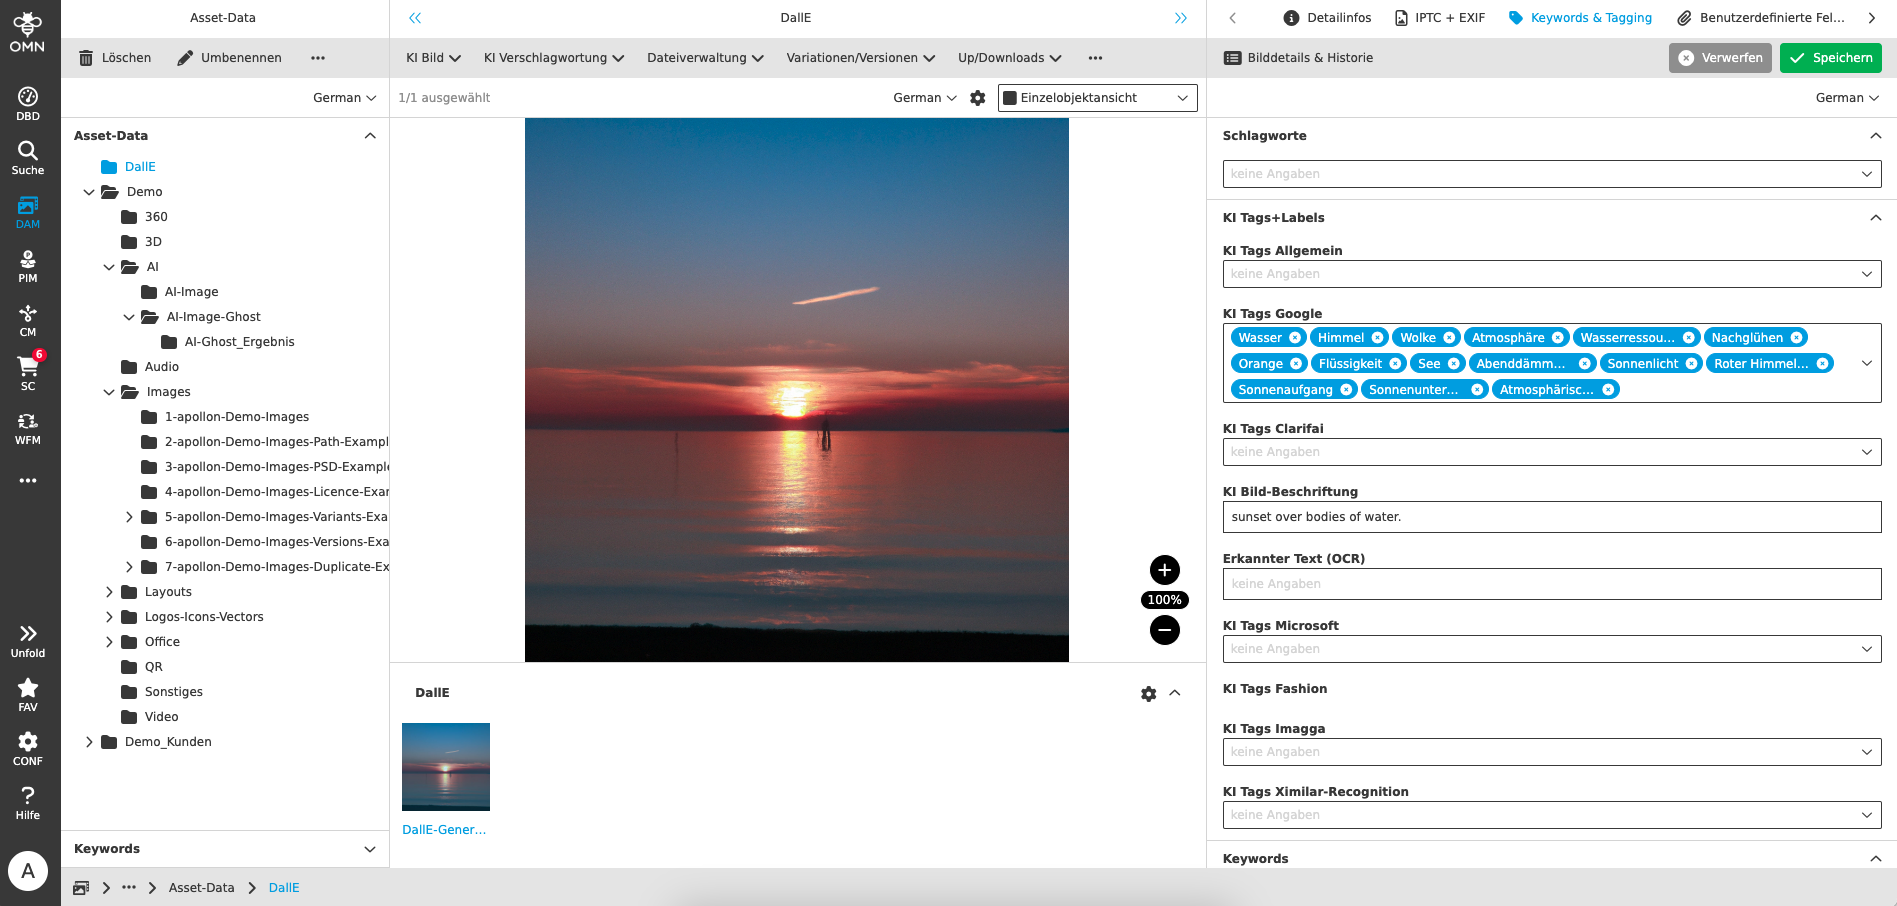
| All automatically generated tags are automatically indexed in OMN and are therefore always accessible via search. For example, you can find the image from the example using the automatically generated tags "water", "sky" etc. via search. |
Using AI Tagger Fashion
This service analyzes fashion images using artificial intelligence that recognizes objects/clothing and provides properties for each recognized object.
You can also find further general information on our website at: AI Tagger - apollon
If you want to tag fashion images in OMN with the special fashion model, you can use the function directly in the DAM module or directly from the search.
 ]
]
You can find the function under AI Tagging >> AI Tagger Fashion
The function can also be executed on one or several assets at once.
When executing the function, you must specify a few parameters so that the image tagging can be carried out with the fashion model.

You can take the parameters for image tagging by the AI service from the following table:
| Parameter name | Description |
|---|---|
Recognition threshold |
|
Image format |
|
Language |
|
Generating the keywords can take some time.
You can see the result of the image recognition in the details area under “Keywords & Tagging” in the AI Tags Fashion field.

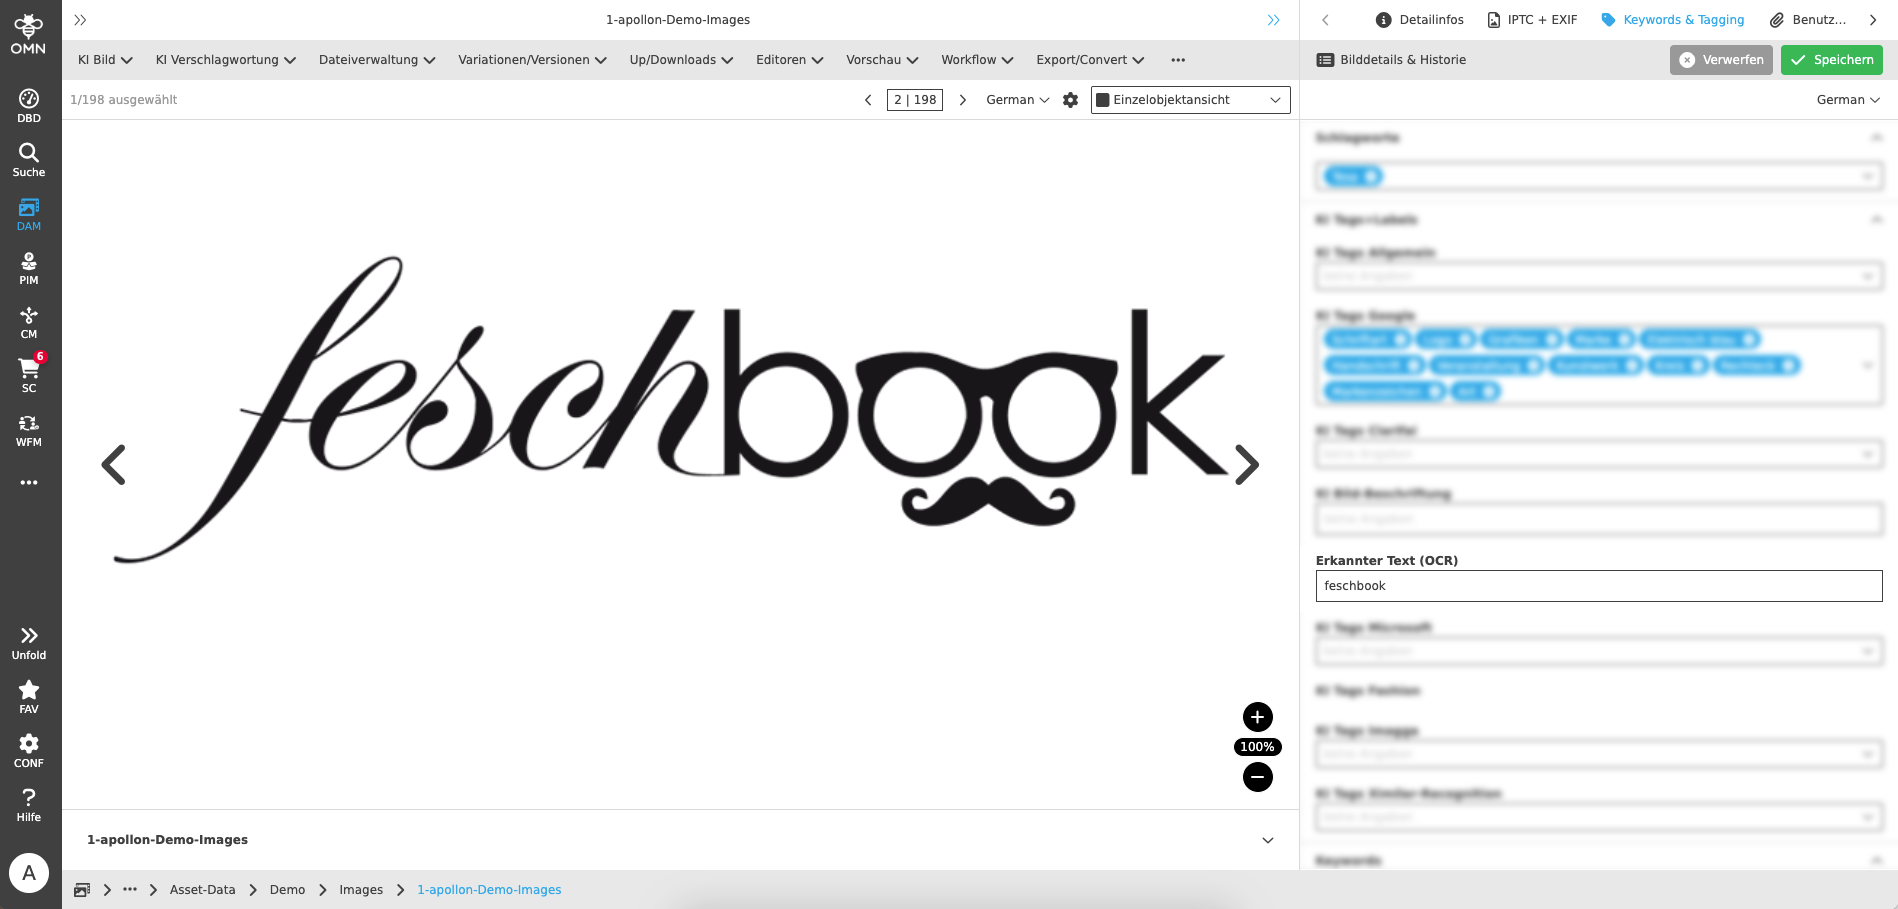
Using AI Text Recognition (OCR)
OCR is a technology that allows text in images to be automatically recognized and converted into editable and searchable information. OCR stands for “Optical Character Recognition”.
If you want to perform OCR recognition on images in OMN, you can use the function directly in the DAM module or from the search.
You can find the function under AI tagging >> AI text recognition (OCR)
The function can be executed on one or more selected images in the DAM module or from the search. No further parameterization is required to execute the function.
The result of the text recognition is written back to the recognized text (OCR) attribute, which you can find in the Keyword & Tagging detail area. In OMN Accelerator, OCR recognition is based on Google image recognition.
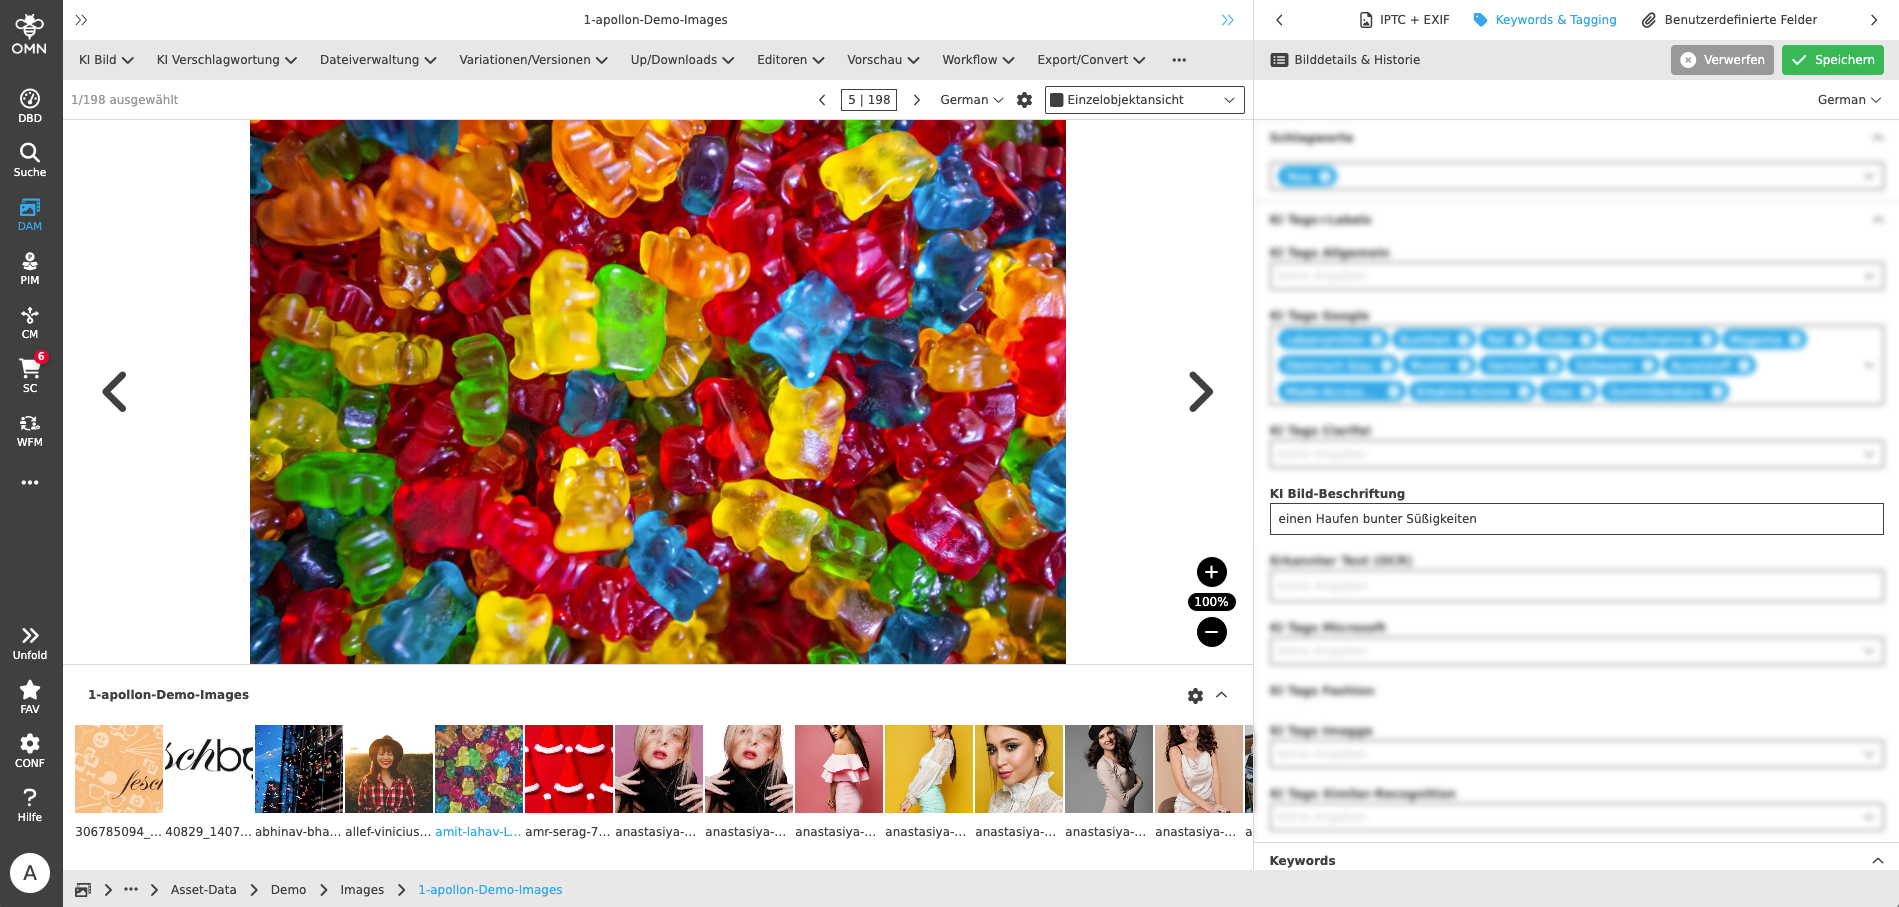
Using AI Image Captioning
Image captioning is the task of describing the content of an image in words. This combines two AI areas, namely computer vision (image recognition) and natural language processing (text generation).
If you want to automatically generate a caption for an image in OMN, you can use the function directly in the DAM module or from the search.

You can find the function under AI tagging >> AI image caption.
The function can be executed on one or more selected images in the DAM module or from the search. No further parameterization is required to execute the function.
The generated image caption is written back to the attribute AI image caption, which you can find in the detail area Keyword & Tagging. In OMN Accelerator, the image caption is based on services from the provider clarifai.
AI Text Services
In OMN Accelerator you will find AI services that can automatically generate texts, e.g. a product description, under the AI Text function group.
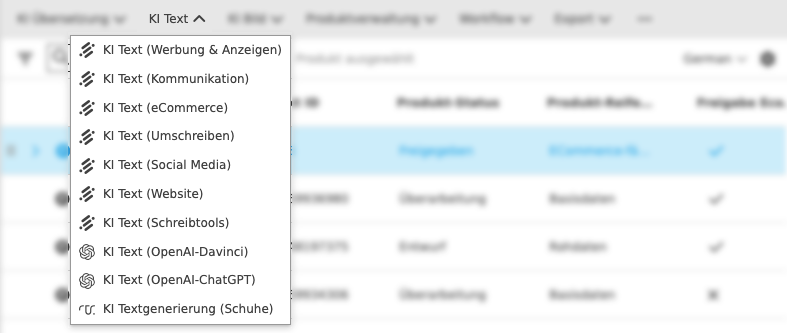
The following AI text functions are currently available in OMN Accelerator:
You can find an explanation of which use cases the individual AI functions cover in the AI service overview.
Using Neuroflash for text generation
With the Neuroflash service, you can use artificial intelligence to automatically generate texts and create different types of texts, such as advertising texts, blog articles, product descriptions or emails. A variety of templates for different types of text are available for this purpose.
If you want to generate texts for a product, you can use the function directly in the PIM module (from different views) or directly from the PIM search.

You can find the function under AI text >> AI text (eCommerce), AI text (advertising & ads) etc.
Each function, e.g. AI text (eCommerce), includes different types of text for this area. For AI text (eCommerce), e.g. text types such as product descriptions, product benefits, Amazon product descriptions etc.
The function can also be executed on one or several products at once.
When executing the function, you must specify a few parameters so that the text generation can be carried out with Neuroflash.
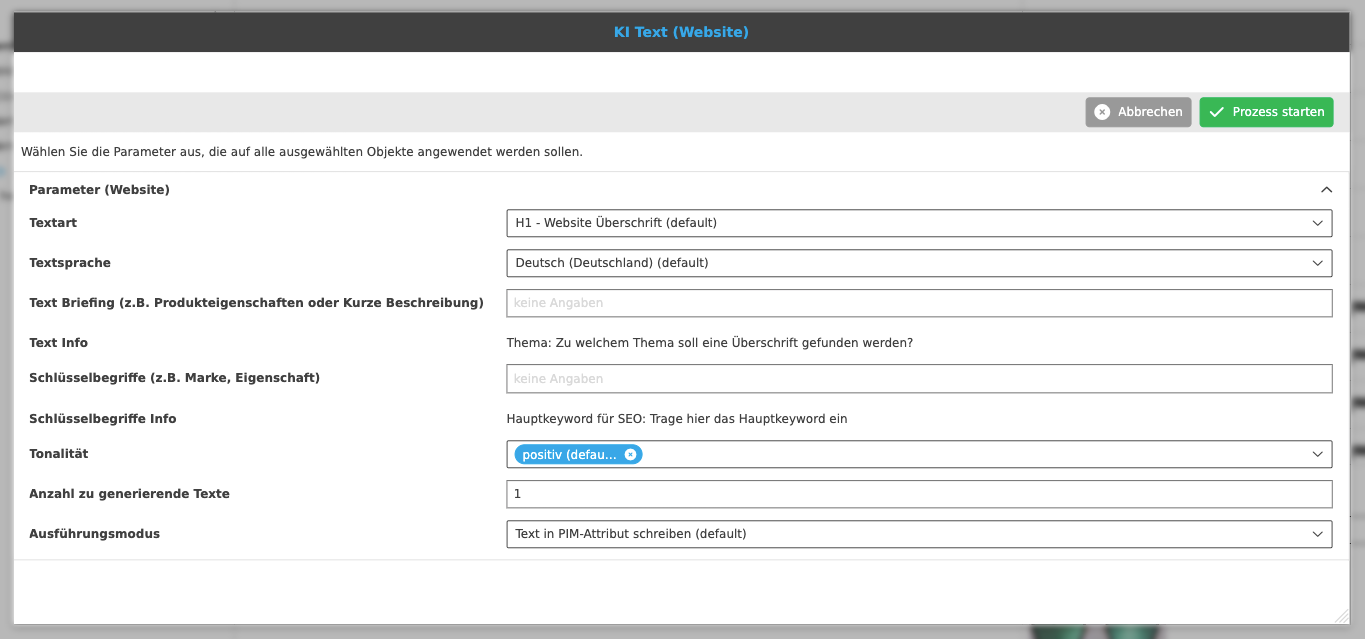
You can use the parameters for generation by the AI service from the table below. Please note that the parameters may vary slightly depending on the text type.
| Parameter name | Description |
|---|---|
Text type |
|
Text language |
|
Text Briefing |
|
Key terms |
|
Tone |
|
Number of texts to be generated |
|
Execution mode |
|
The text generation can take some time (usually 5-30 seconds).
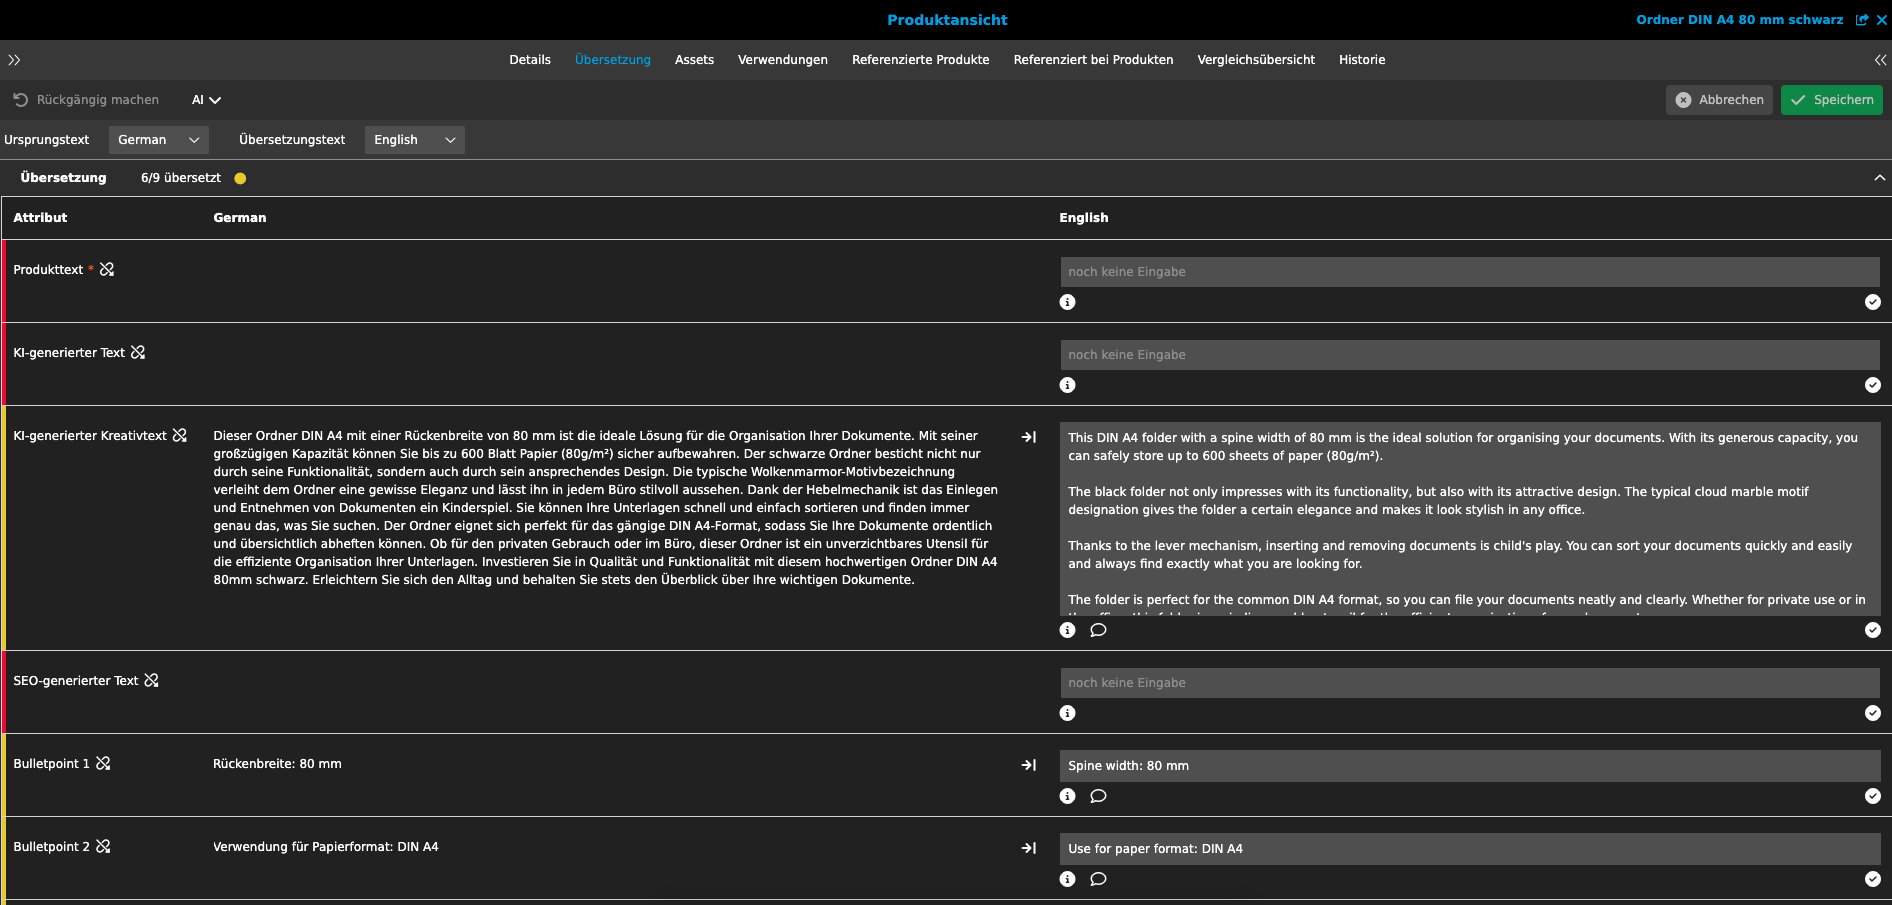
You can see the result of the text recognition, for example, in the product view under "Details" in the accordion "Product descriptions + text" and the attribute AI-generated creative text.
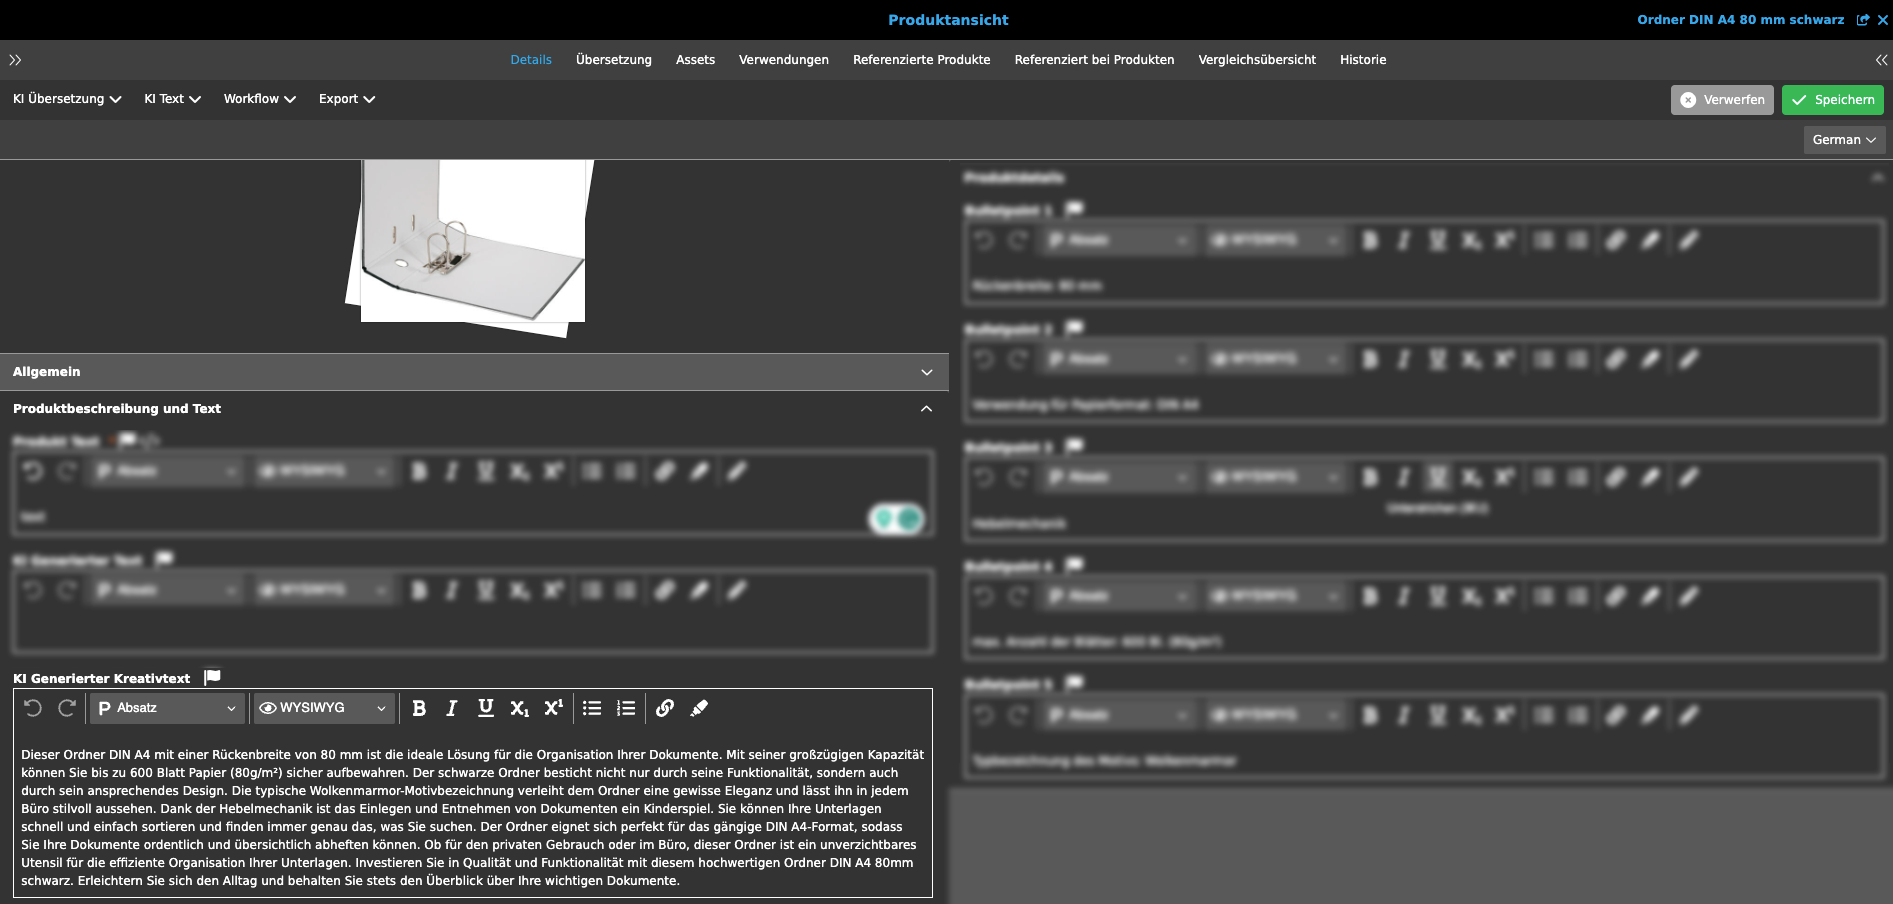
| You can subsequently modify the automatically generated text yourself using the editor or generate a new text if you do not like the suggested text. |
Using ChatGPT for prompt-based text generation
Text generation with ChatGPT is a process where an artificial intelligence algorithm called ChatGPT generates natural language texts based on a prompt. A prompt is a text that contains a question, instruction, or other type of request addressed to ChatGPT. For example, a prompt might be “Write a short article about the benefits of solar energy.” ChatGPT would then try to generate appropriate text that matches the prompt.
ChatGPT is based on a language model that has learned how language works and how to use it from vast amounts of text on the Internet. ChatGPT can recognize and apply patterns and rules in language to generate coherent and fluent texts. ChatGPT can also understand the context and purpose of the prompt and try to use an appropriate tone and style. ChatGPT can generate various types of texts, such as stories, poems, essays, news articles, product descriptions, reviews, and much more.
However, ChatGPT is not perfect and has some limitations. Firstly, ChatGPT cannot always verify the facts or guarantee the quality of the information it generates. ChatGPT can sometimes make false or misleading statements or mix or twist information from different sources. Secondly, ChatGPT cannot always be creative or original or meet the user’s expectations or wishes. ChatGPT can sometimes generate boring or inappropriate texts or misinterpret or ignore the prompt.
To use text generation with ChatGPT in OMN, you should keep a few things in mind. Firstly, you should formulate a "good" prompt that is clear and specific and gives ChatGPT enough clues to generate relevant text. Secondly, you should critically review the generated text and correct or improve it if necessary. One should not blindly trust ChatGPT or use its texts without checking. Third, you should consider the ethical and legal aspects of text generation with ChatGPT and make sure that you respect the copyright and privacy of others and do not generate harmful or abusive content.
If you want to generate texts for a product with ChatGPT, you can use the function directly in the PIM module (from different views) or directly from the PIM search.
You can find the function under AI Text >> AI Text (OpenAI-ChatGPT)
The function can also be executed on one or more products at once.
When executing the function, you must specify a few parameters so that the text generation can be carried out with ChatGPT.
You can take the parameters for generation by the AI service from the table below.
| Parameter name | Description |
|---|---|
Target attribute |
|
Style |
|
Prompt |
|
Language tag |
|
Attributes to be included |
|
Attributes to be excluded |
|
The text generation can take some time (usually 5-30 seconds).
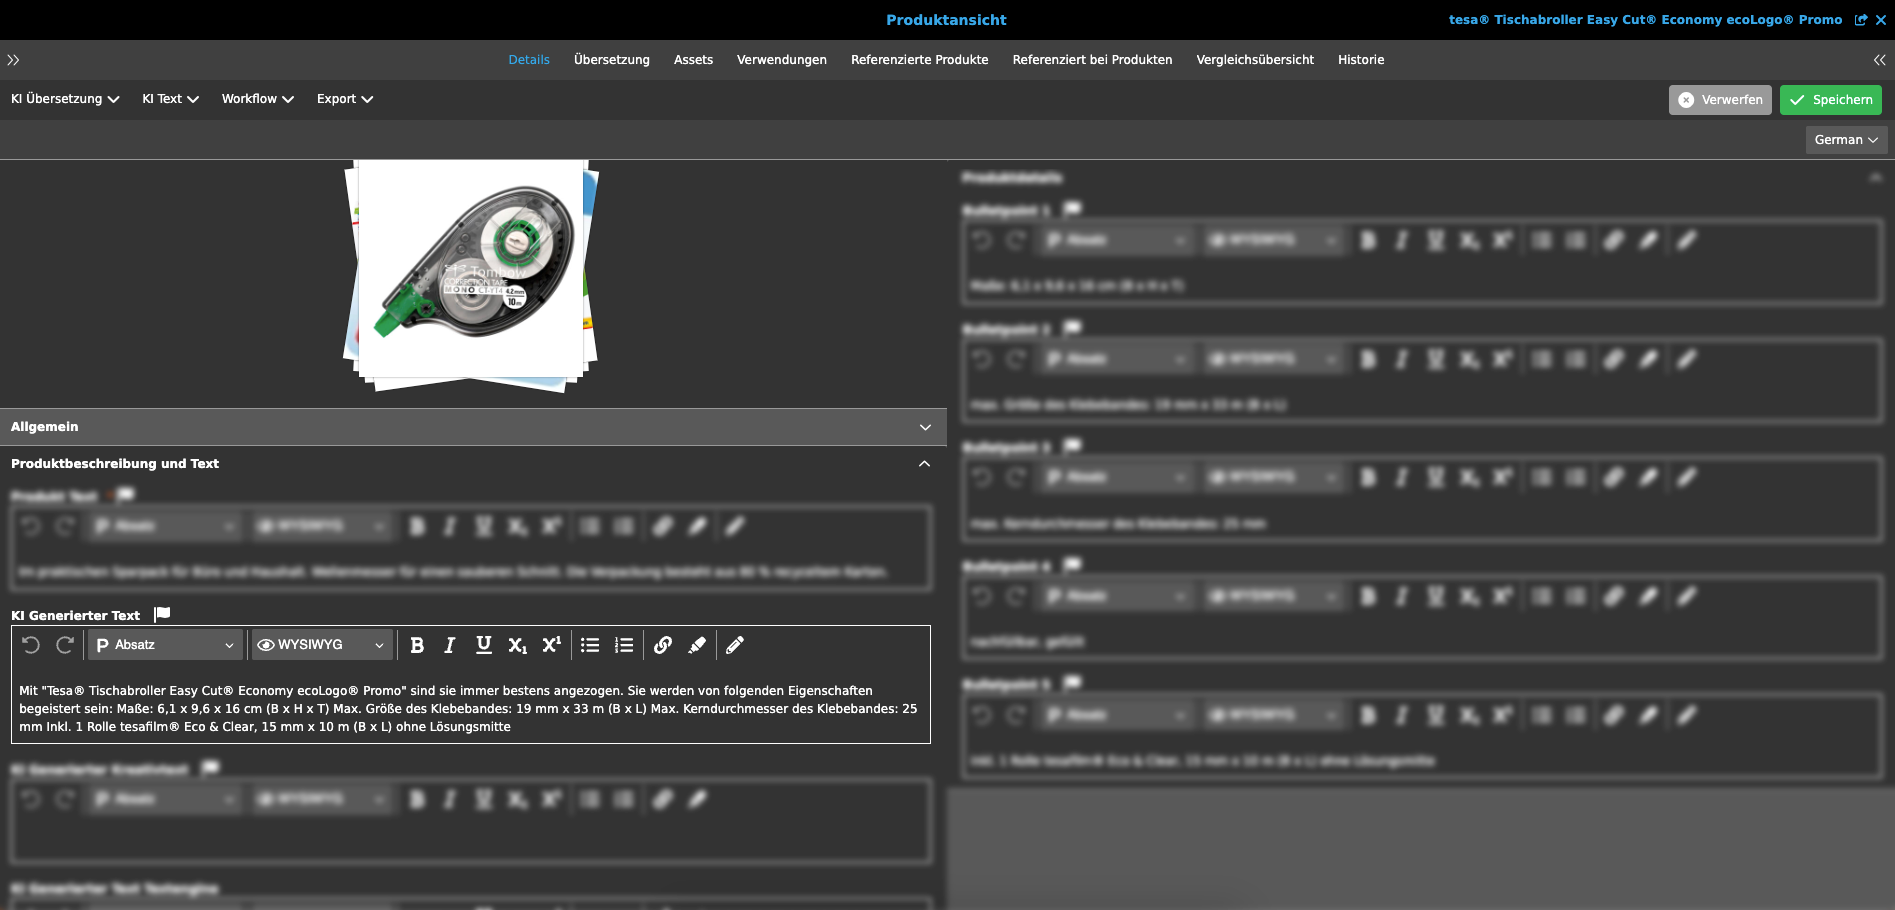
You can see the result of the text recognition, for example, in the Product View under "Details" in the accordion "Product descriptions+text" in the attribute AI generated text.
| You can subsequently modify the automatically generated text yourself using the editor or have a new text generated if you don’t like the text suggestion. |
Using AI text generation with template-based text generation (textengine.io)
In contrast to text generation with generative AI systems such as Neuroflash, Chat-GPT or Conversionmaker, text generation with Retresco and its textengine.io service requires the creation of one or more so-called templates (also called cartridges), which contain the rules and attributes of how the text should be generated and based on which attributes it should be generated. It is also common to create separate templates for different product groups. The template-based approach to text generation has the advantage that the template can be used to predetermine how and with which rules the text should be generated. It is therefore a deterministic process that ensures that only texts that follow the set of rules are generated. This means that not every text has to be checked and is therefore suitable for large quantities of text generation or updates.
To use template-based text generation in OMN Accelerator, a corresponding, customer-specific template must be created in Textengine.io. Creating a text model requires certain qualifications. If you are interested, Apollo will be happy to "enable" you to create such text models or will also take on this task as a service.
In OMN, under AI text >> AI text generation (shoes), you will find a demo function that can create an automatically generated text for demo products from the shoe range (this is not intended for productive use).
You can find the function under AI Text >> AI Text Generation (Shoes)
Using AI translation services
AI-based translation is the use of artificial intelligence to automatically translate text and speech from one language to another. It uses natural language processing and deep learning methods to understand the meaning of a given text and translate it into different languages without the need for human translators.
In OMN Accelerator you will find different AI services that can translate texts from a source language to a target language using automatic translation.
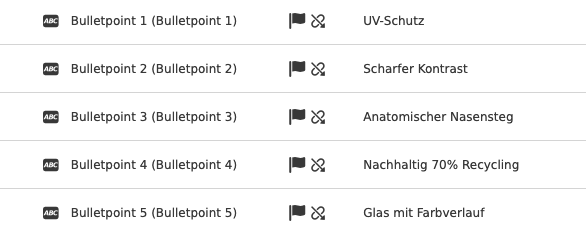
| During text translation, all language-dependent text fields are translated from the source language to the target language. You can recognize these attributes by the icon with the flag. |
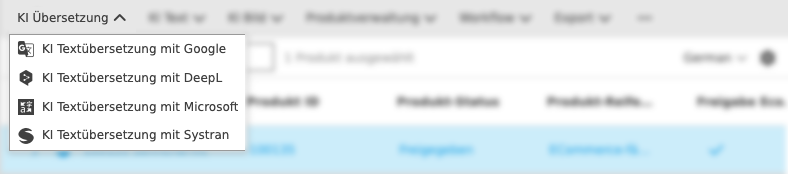
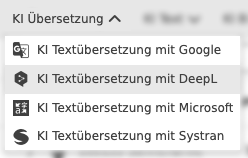
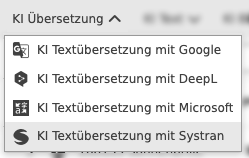
The following AI translation functions are currently available in OMN Accelerator
Using AI Translation with Google
If you want to translate text information in your product data with Google Translate, you can use the function directly in the PIM module (from different views) or directly from the PIM search.
The strength of Google Translation is the number of languages available. You can find more information about the service and the languages supported at: Google Cloud Translation
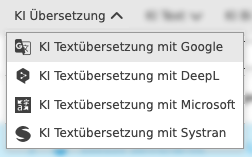
In OMN Accelerator you can find the function under AI Translation >> AI Text Translation with Google
The function can also be executed on one or several products at once.
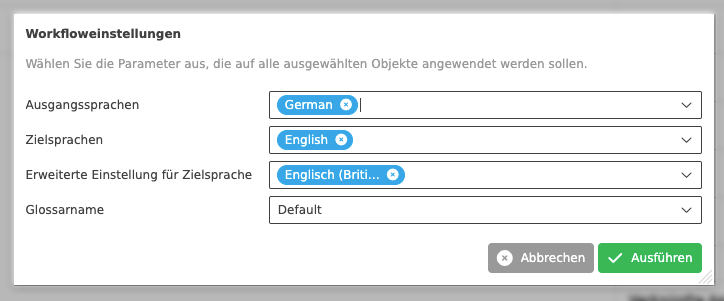
When executing the function you have to specify a few parameters so that the text translation can be carried out.
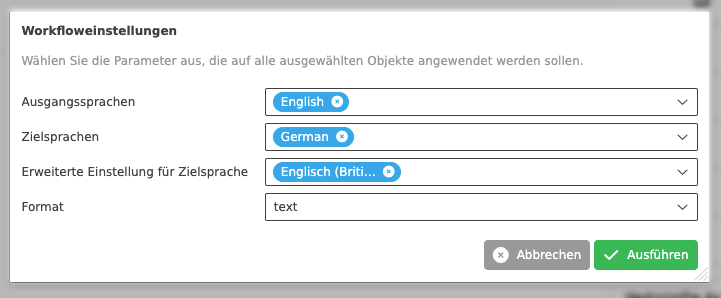
You can use the parameters for text translation by the AI service from the table below.
| Parameter name | Description |
|---|---|
Source language |
|
Target languages |
|
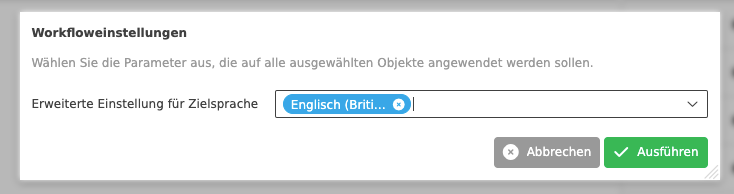
Advanced setting for target language |
|
Format |
|
Depending on the amount of text, the text translation can take some time (usually 3-10 seconds).
You can view the result of the text translation in various views, such as the product view. The best way to view the result is in the translation view, which contains all language-dependent attributes. You can find this in the product view and the "Translation" tab.
Using AI Translation with DeepL
If you want to translate text information in your product data with DeepL, you can use the function directly in the PIM module (from different views) or directly from the PIM search.
The strength of DeepL translation is the high translation quality. You can find more information about the service and the languages supported at: DeepL Translator
In contrast to other translation services, DeepL can also take terminology into account when translating that cannot be translated or can only be translated in a predefined form. Such terminology can be organized in various glossaries via the OMN Terminology module and exported to DeepL. You can read how to do this here: Terminology
In OMN Accelerator you can find the function under AI Translation >> AI Text Translation with DeepL
The function can also be executed on one or more products at once.
When executing the function you have to specify a few parameters so that the text translation can be carried out.
You can use the parameters for text translation by the AI service from the table below.
| Parameter name | Description |
|---|---|
Source language |
|
Target languages |
|
Advanced setting for target language |
|
Glossary name |
|
Using AI Translation with Microsoft
If you want to translate text information in your product data with Microsoft Translate, you can use the function directly in the PIM module (from different views) or directly from the PIM search.
The strength of the Microsoft Translator is the support of more than 100 languages, its speed and the fact that the service is integrated into a large number of Microsoft applications and is therefore widely used. You can find more information about the service and the languages supported at: Microsoft Translator
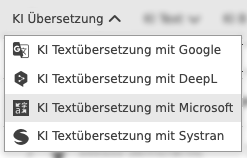
In OMN Accelerator you can find the function under AI Translation >> AI Text Translation with Microsoft
The function can also be executed on one or more products at once.
When executing the function you have to specify a few parameters so that the text translation can be carried out.
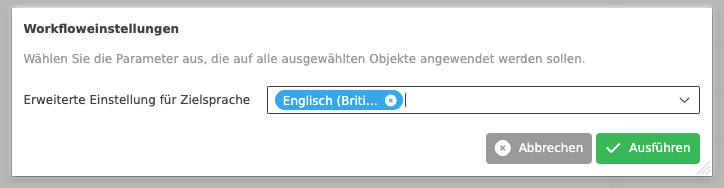
You can use the parameters for text translation by the AI service from the table below.
| Parameter name | Description |
|---|---|
Advanced setting for target language |
|
Depending on the amount of text, the text translation can take some time (usually 3-10 seconds).
You can view the result of the text translation in various views, such as the product view. The best way to view the result is in the translation view, which contains all language-dependent attributes. You can find this in the product view and the "Translation" tab.
Using AI Translation with Systran
If you want to translate text information in your product data with Systran, you can use the function directly in the PIM module (from different views) or directly from the PIM search.
The strength of the Systran Translator is translation precision in the areas of law, medicine and computers and the ability to translate into around 50 languages. You can find more information about the service and the supported languages at: SYSTRAN Translate
In OMN Accelerator you can find the function under AI Translation >> AI Text Translation with Systran
The function can also be executed on one or several products at once.
When executing the function you have to specify a few parameters so that the text translation can be carried out.
You can use the parameters for text translation by the AI service from the table below.
| Parameter name | Description |
|---|---|
Advanced setting for target language |
|
Depending on the amount of text, the text translation can take some time (usually 3-10 seconds).
You can view the result of the text translation in various views, such as the product view. The best way to view the result is in the translation view, which contains all language-dependent attributes. You can find this in the product view and the "Translation" tab.
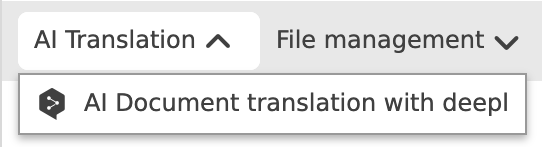
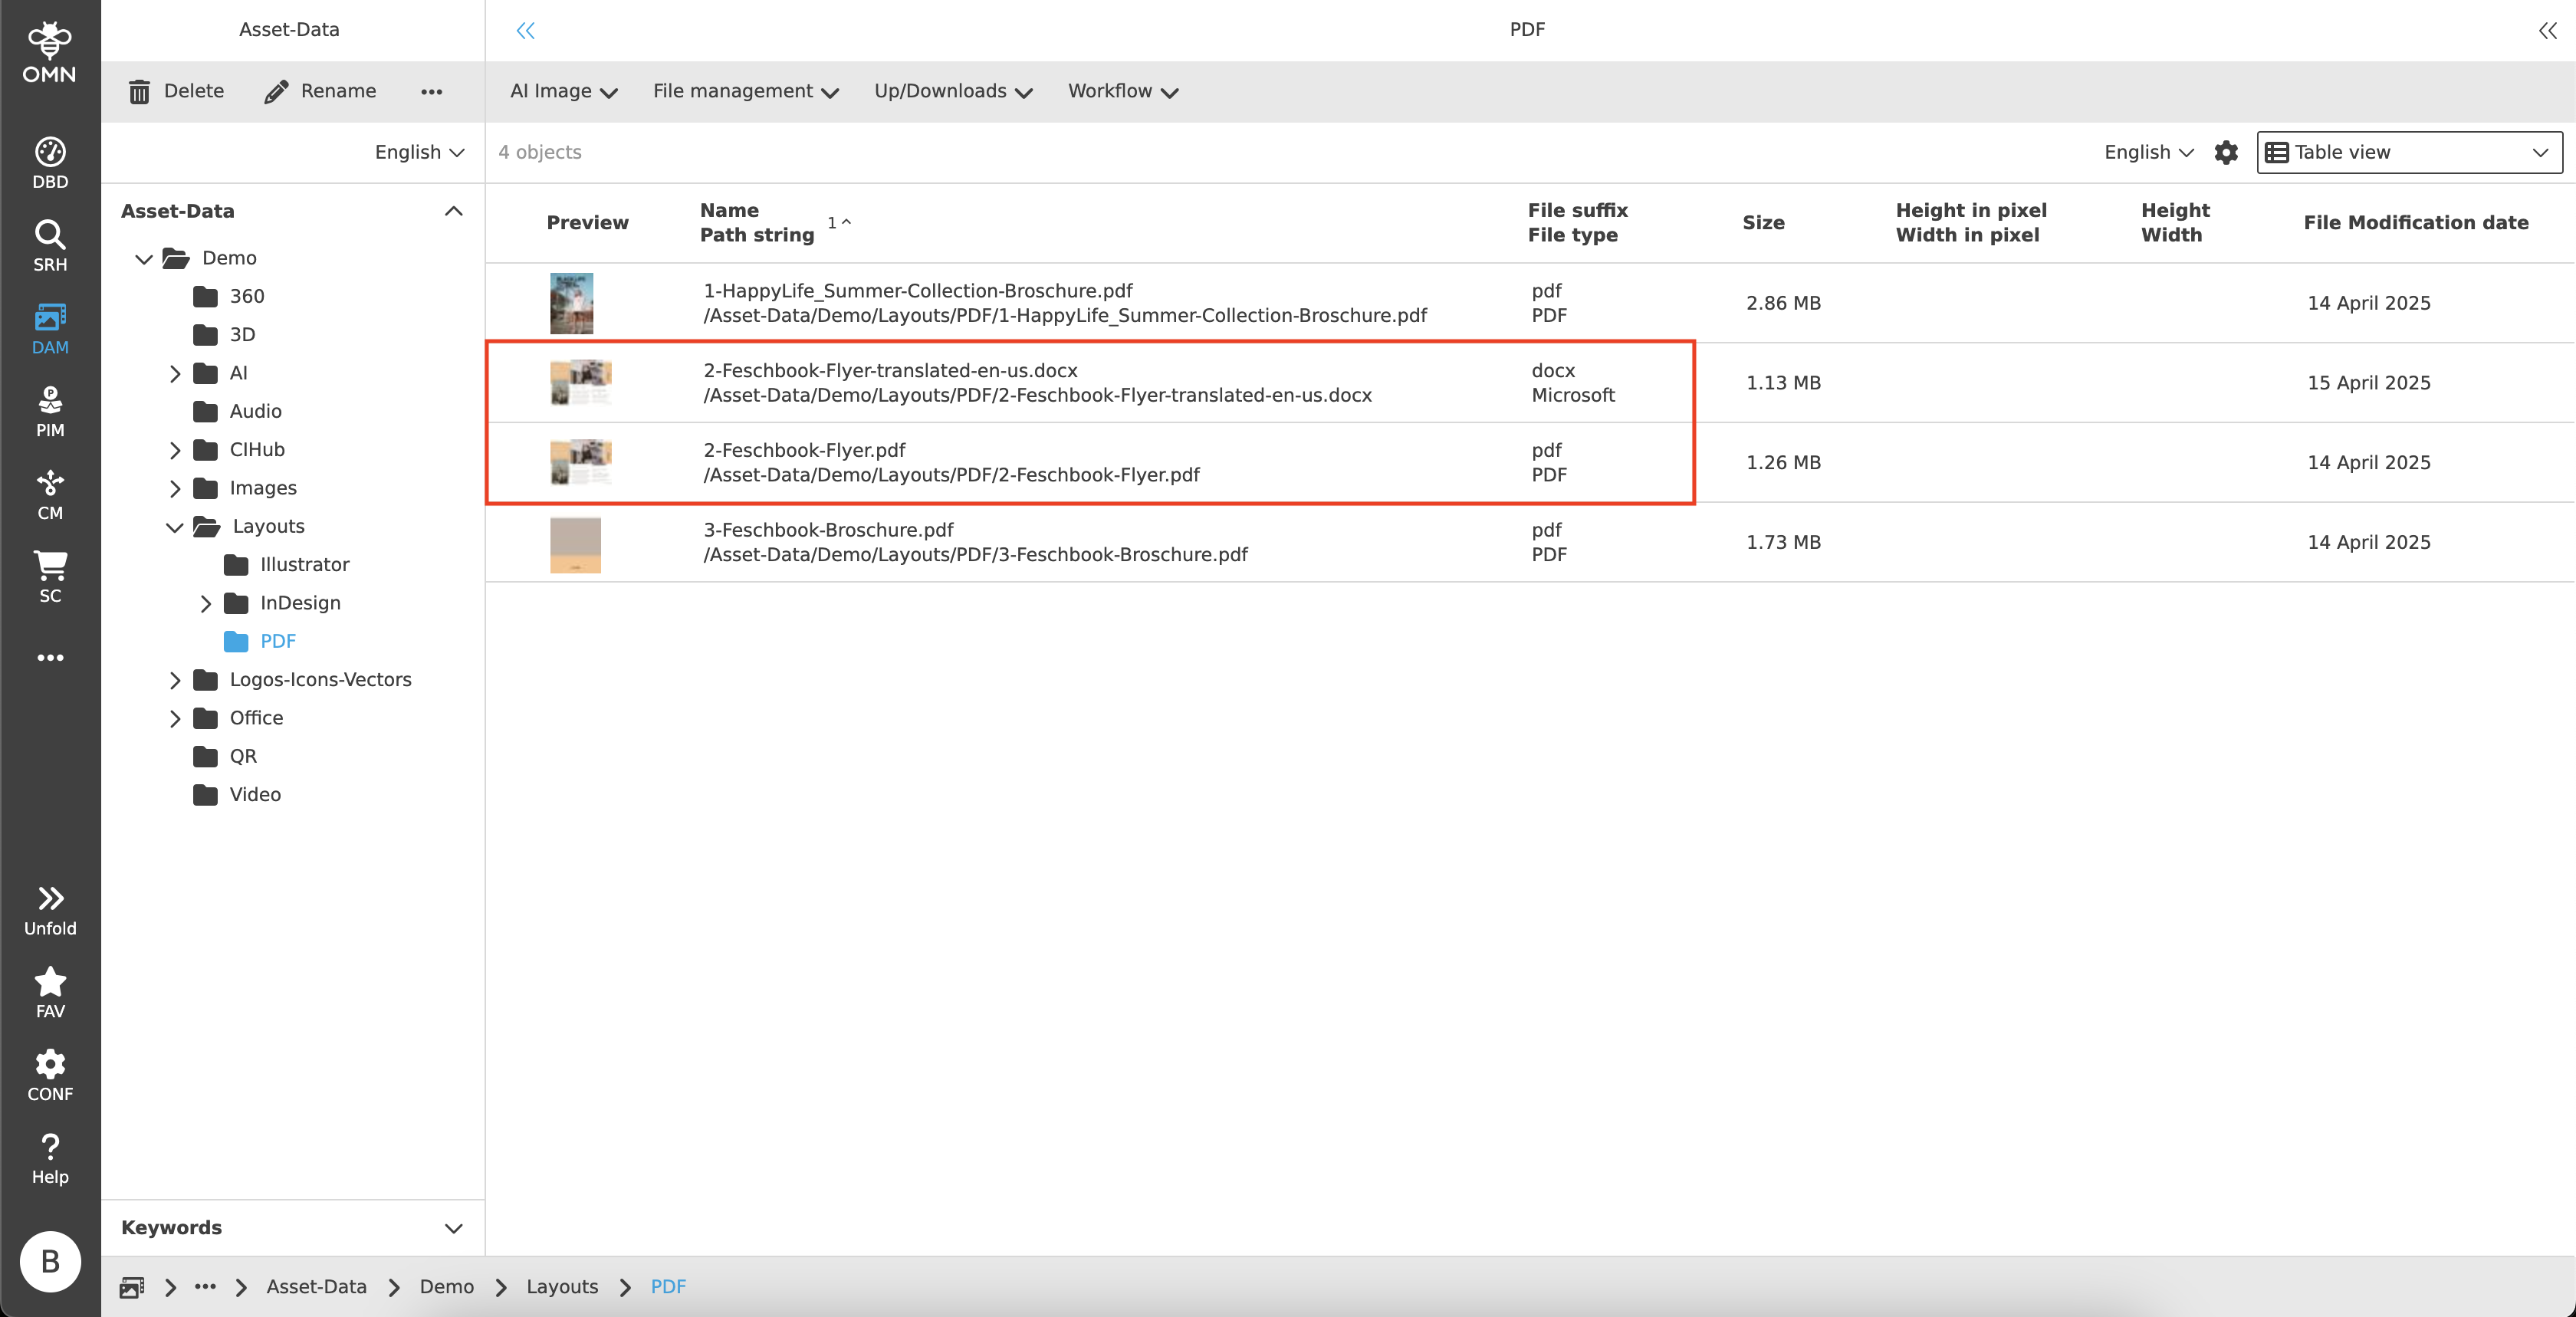
Using AI Document Translation with DeepL
If you want to translate documents directly from OMN DAM, you can use the function to send them directly to the DeepL document translation service.
In OMN Accelerator, you can find the function in the DAM module under AI Translation >> AI Document Translation with DeepL
The function can be executed on one or more files simultaneously.

You can have documents up to 30 MB in size translated in one of the following formats:
-
Word (.docx oder .doc)
-
PowerPoint (.pptx)
-
Excel (.xlsx)
-
PDF (.pdf)
-
Text (.txt)
-
HTML (.html)
-
XLIFF (.xlf/.xliff) since version 2.1
Depending on the DeepL subscription, different formats and restrictions apply per document. You can find more information on this at the following Link.
When executing the function, you must specify some parameters so that the document translation can be executed.
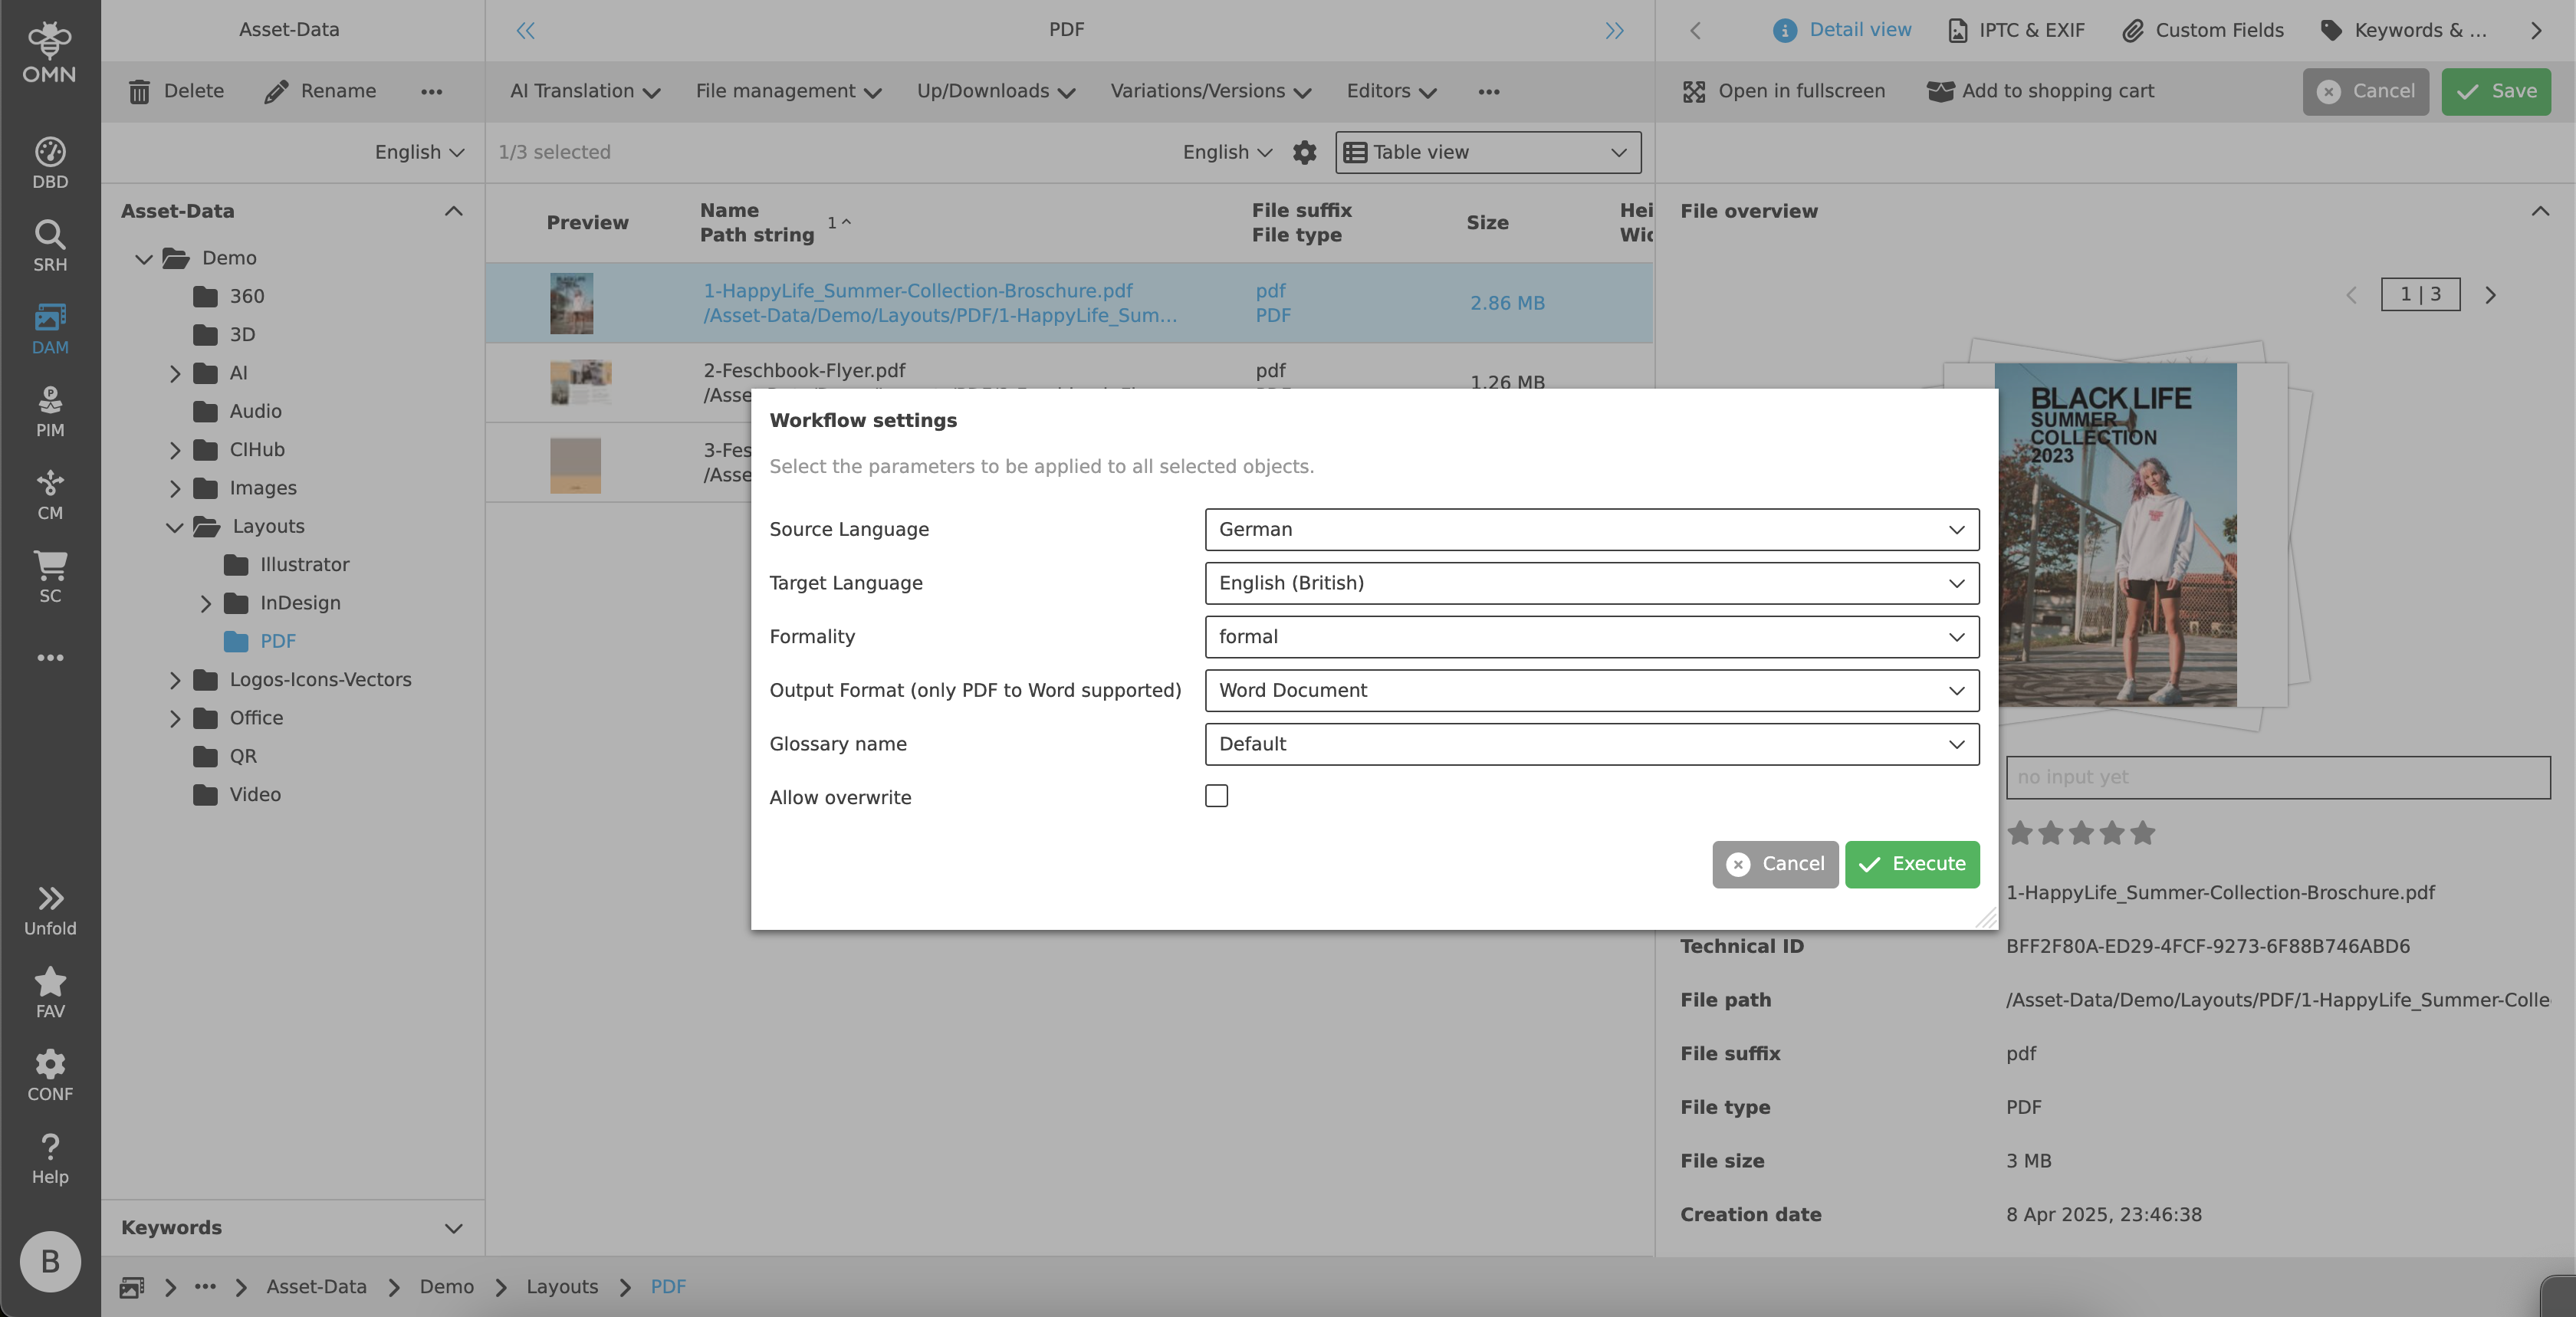
| Parameter name | Description |
|---|---|
Source Language |
Selection of the source language in which the document is available, e.g. PDF with German content |
Target Language |
Select the target language into which the document is to be translated, e.g. translate PDF to English |
Formality |
|
Output Format |
If you are translating a PDF, you can either create a PDF document (default) or a Word document with translation as the output format. |
Glossary name |
|
The translation of the document can take several minutes to hours. The translated document is stored as a new file next to the original file with the appropriate name and a corresponding postfix “-translated-language”.
| The default name can also be adjusted globally by the administrator if required. |