Security
For each mandator, restrictions can be created.
-
Access the settings via Mandators → <Mandator name> → Security
Below you can see the areas in which restrictions can be defined:

| Field | Description | Notice |
|---|---|---|
Permissions |
Together with roles or rules permissions restrict all OMN objects and modules (e.g. assets, products, projects, workflows, functions, keywords etc.) |
see "Permissions" |
Rules |
Rules restrict access to the parts inside the application by using values of metadata fields or other object information (e.g. name, path). |
|
Usable roles |
Roles grant general access to a mandator |
|
Testing |
Possibility to verify all settings made in the Permissions tab |
see "Testing" |
Configuring Usable Roles
Here you can see how configuration of usable roles looks like:
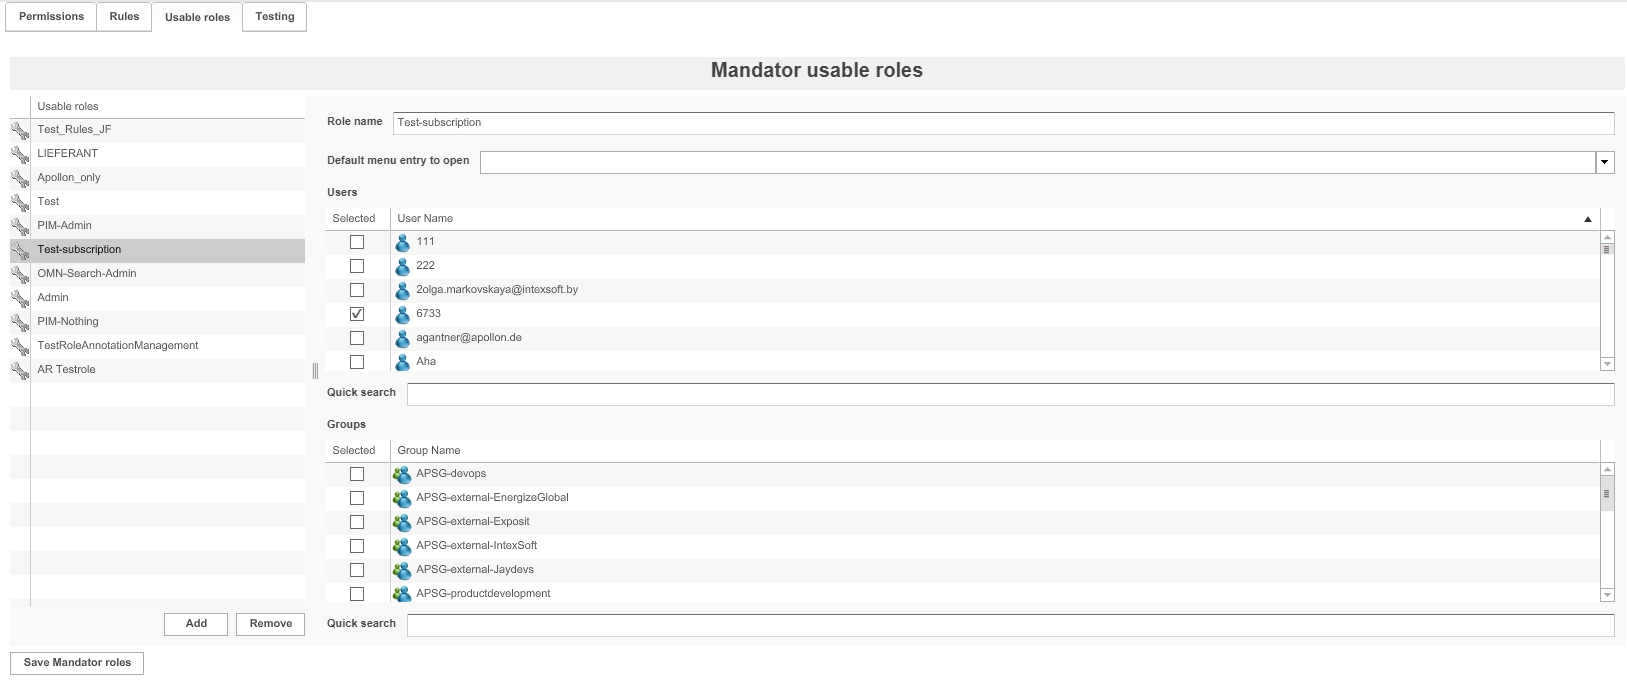
The table on the left shows all available usable roles.
1. To delete a role, highlight it and click Remove.
2. To add a role, click Add.
3. Enter a unique name for the role in the field Role name.It is recommended that the name
already points to the purpose of the role.
4. To specify the users belonging to the role, activate the checkbox Selected in front of the user name.
– or –
5. To specify the group belonging to the role, activate the checkbox Selected in front of the
group name.The necessary LDAP groups can be configured and administered via Administration → Users and groups.
| Use the quick search field to search for users or groups you want to assign. |
6. Assign a Default Page plug-in to open via the drop-down menu.
| This option is no longer supported with HTML5 Frontend. |
7. To save the roles and all changes made, click Save Mandator roles.
Configuring Rules
Here you can see how configuration of rules looks like:
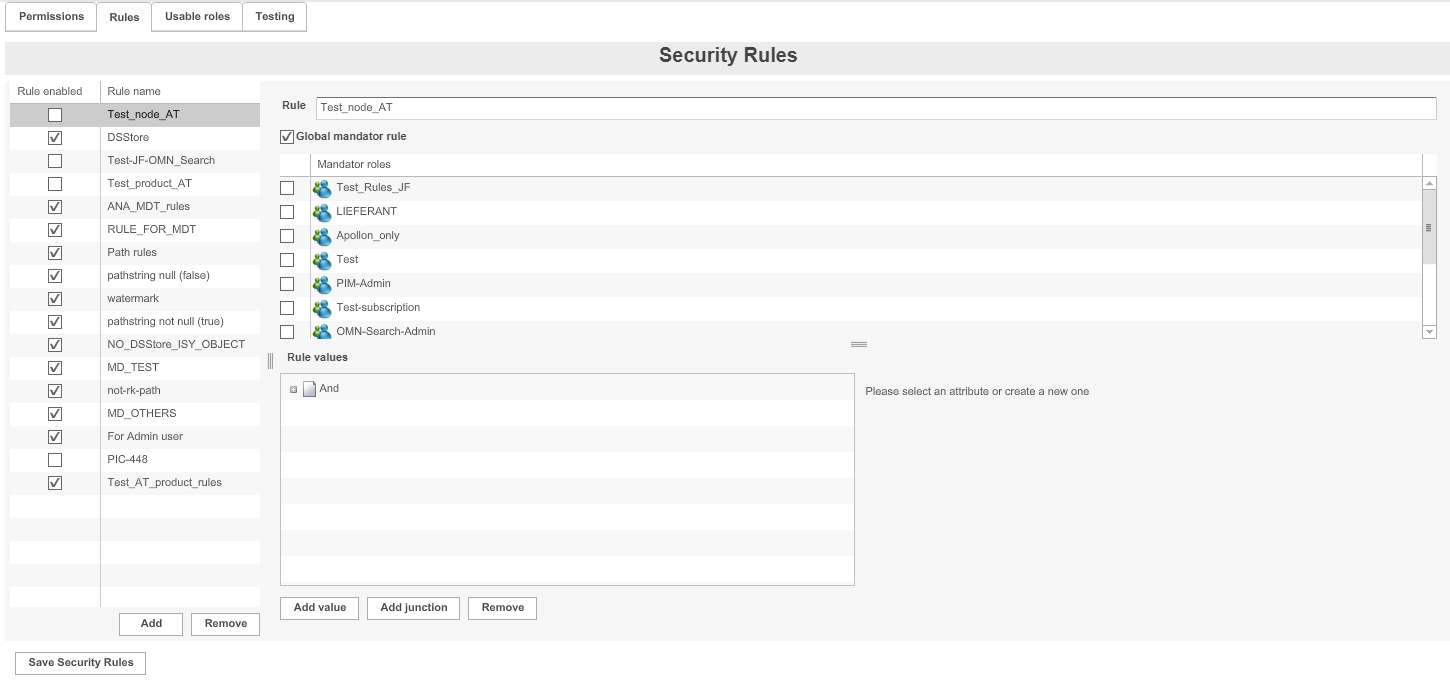
The table on the left shows all available rules.
1. To delete a rule, highlight it and click Remove.
2. To add a rule, click Add.
3. Add a name for the rule in the field Rule
It is recommended to use a combination of the assigned role, the main rule expression, and the value for the name.
4. Define the area of application for the rule:
-
To set the rule for each mandator role, activate the checkbox for Global mandator rule
-
To set the rule for specific mandator roles, activate the checkbox in front of the Mandator roles
5. Define the rule values (see "Defining rule values" page). Special operators are available for the expression "Object: Keyword".
6. To enable a rule, activate the checkbox Rule enabled.
| A rule only takes effect, if it is enabled here and, in the Permissions tab, (see "Configuring Permissions Depending on Rules"). If a rule is not configured for one or more specific roles it is automaticaly considered a global rule. |
7. To save the configuration and all changes made, click Save Security Rules.
Permissions
Permissions can be assigned in the following ways:
-
Depending on roles (see "Configuring Permissions Depending on Roles")
-
Depending on rules (see "Configuring Permissions Depending on Rules")
| Field | Description | Notice |
|---|---|---|
Main Menu |
Restricts a main menu item |
No longer supported for HTML5 Instead of Main Menu Sidebar is used |
Sidebar |
Restricts a sidebar menu item |
|
Functions |
Restricts the availability of some functions (e.g. Download, Upload) |
|
Objects |
Restricts objects |
|
Attributes |
Restricts object types |
|
ProjectTypes |
Restricts project types |
|
PIM2IndexedFields |
Restricts PIM2 Indexed Fields |
|
ProductViews |
Restricts PIM2 Product Views |
|
Keywords |
Restricts keywords |
|
ProjectViews |
Restricts project views |
OMN Workflow Management required |
OMN-Search |
Restrict OMN-Search |
Allows also to enable functionality to see index state and use index rebuild function |
User Settings |
Restrict User Settings |
Includes Settings for User Profile and Change Password |
Dashboard Plugin |
Restrict Dashboard |
|
Checkin |
Restrict Checkin |
Related to handshake plugin |
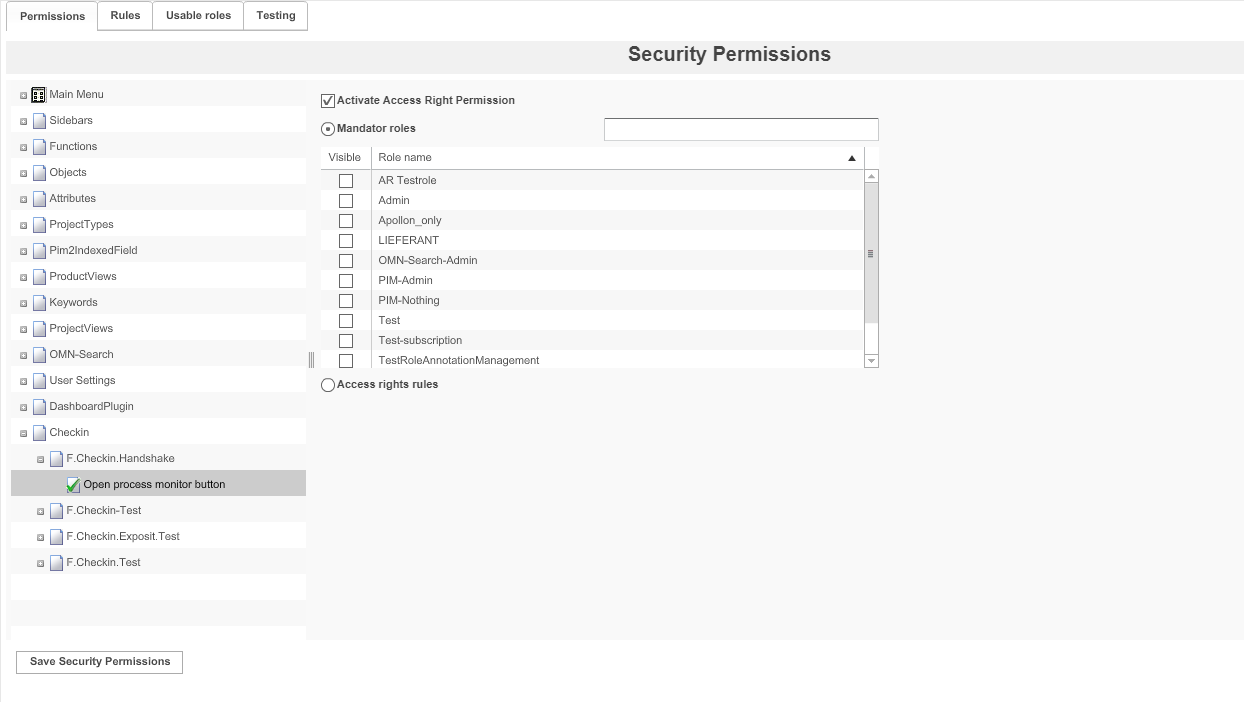
Configuring Permissions Depending on Roles
1. Expand the desired permission node, e.g. Attributes → ISY Object.
2. Choose the attribute which shall be restricted, e.g. Object:Keyword.
→ Until now, every user was able to see or edit the attribute.
3. Activate the checkbox Activate Access Right Permission, to set up permissions.
→ Nobody is now able to see or edit the attribute.
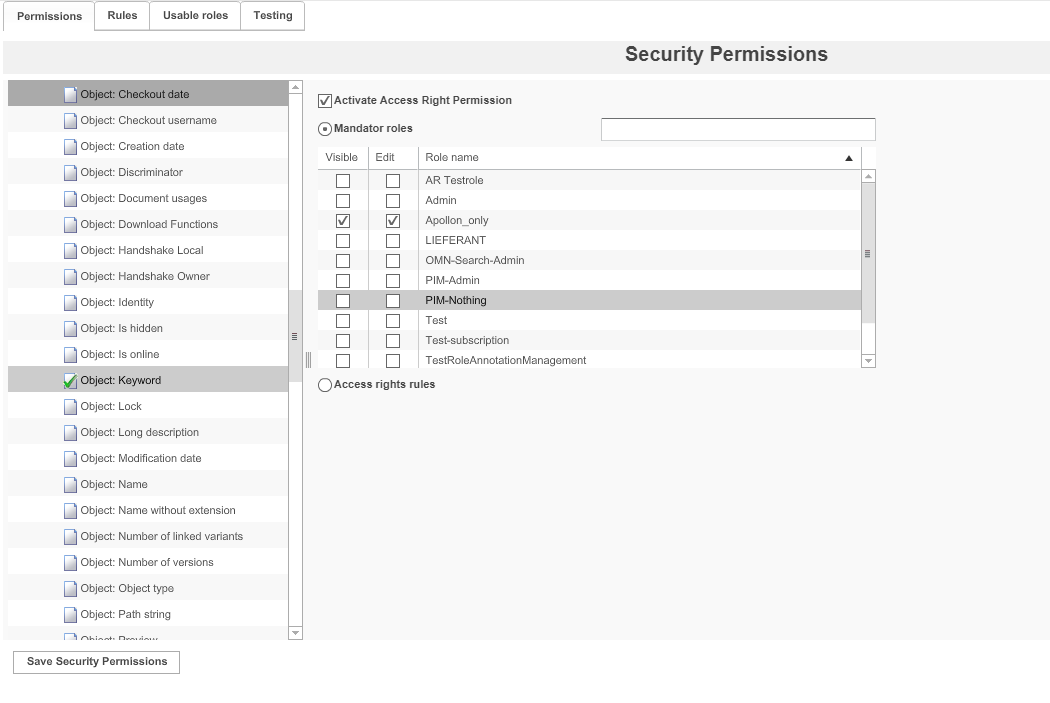
4. To allow roles to see the attribute, activate the checkbox in the column Visible.
5. To allow roles to edit the attribute, activate the checkbox in the column Edit.
→ Depending on the permission node, the columns Visible and Edit may not be available or be named differently.
6. To save the configuration and all changes made, click Save Security Permissions.
Configuring Permissions Depending on Rules
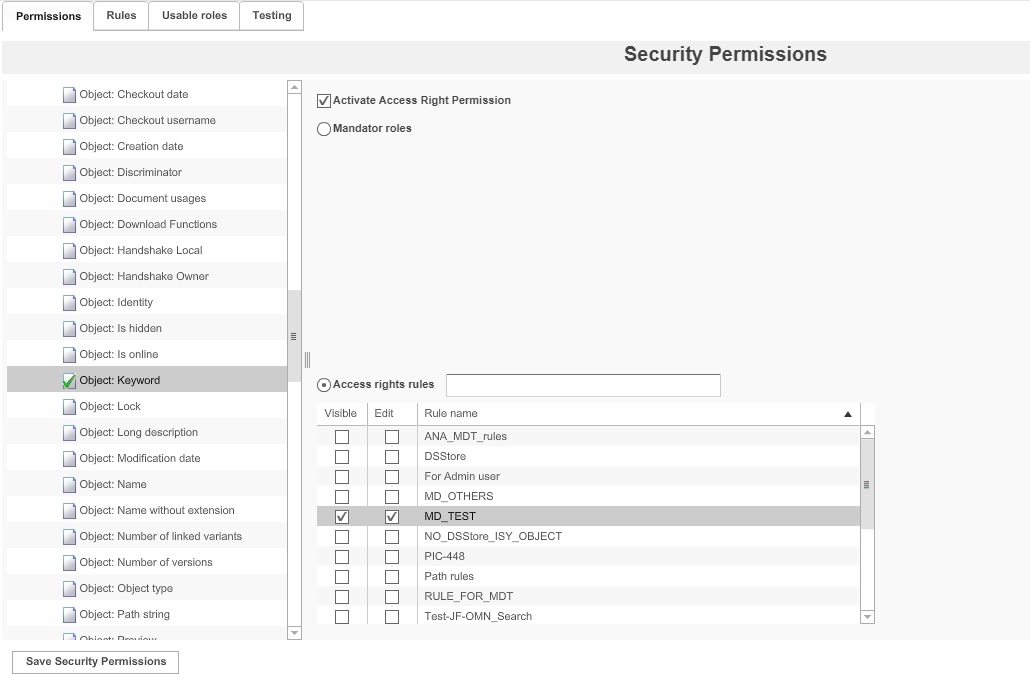
1. Expand the desired permission node, e.g. Attributes → ISY Object.
2. Choose the attribute which shall be restricted, e.g. Object:Keyword.
→ Until now, every user was able to see or edit the attribute.
3. Activate the checkbox Activate Access Right Permission, to set up permissions.
→ Nobody is now able to see or edit the attribute.
4. Activate the checkbox Access rights rules.
5. To allow for attributes to be visible if the rule returns "true", activate the checkbox in the column *Visible.
6. To allow for attributes to be edited if the rule returns "true", activate the checkbox in the column Edit.
→ Depending on the permission node, the columns Visible and Edit may not be available or be named differently.
7. To save the configuration and all changes made, click Save Security Permissions.
| A rule is used to "allow" a user to use a function, not to prohibit the usage. If a permission is controlled by ACL and "Access Rights rules" are active, you have to specifiy at least one rule. If you don’t, nobody will be able to access use the function because there is no rule that allows it. |
Using rules for conditional access to certain content or functions
The access to the system can be very fine controlled. For example user "A" can be allowed to access all directories, e.g. "DIR1" and "DIR2", and user "B" is only allowed to access "DIR2" and its subdirectories.
Example for a configuration:
-
Add a rule "Access_A" and connect it to a role for access control for user "A"
-
Add a rule "Access_B" and connect it to a role for access control for user "B"
-
Configure "Access_A" in the following way
-
Set main junction to "OR"
-
Add a new value
-
Set "Expression" to "ISY_Object" → "Object" → "Path String"
-
Set "Operator" to "like"
-
Set "Value" to "/*"
-
-
-
Configure "Access_B" in the following way
-
Set main junction to "OR"
-
Add a new value
-
Set "Expression" to "ISY_Object" → "Object" → "Path String"
-
Set "Operator" to "like"
-
Set "Value" to "/DIR2*"
-
-
If you want to restrict access to a certain subdirectory only you have to configure the rules in steps because the objects the rule is checking are loaded lazy. For ISY_Object for example
-
you can set the main junction to "OR".
-
Add a value "Object: Path String == /DIR2"
-
and a second value "Object: Path String like /DIR2/SUBDIR1"
| To use the rule you have to add it to the permission for the object you are using. |
This does not only work for ISY_Objects but for every object and its attributes. You can restrict the access to functions depending on the project (CM) the user is currently working in for example. But be aware of the fact, that the object type of the structure the user is currently navigating through can change.
The user can start in Content Management where the object-type would is "Project". But if the user clicks on "images" the object-type will change to "ISY_Object". But a rule will only be able to recognize that if the user clicks an actual object. That can cause functions to not show up, despite a rule which actually would allow the function.
To work around that fact, you have to accommodate for that fact in your rule. For example you could allow the function with the rule Project.Identity is not null" OR "ISY_Object: Path String like /DIR1/"
Configuring Access Rights for Keywords
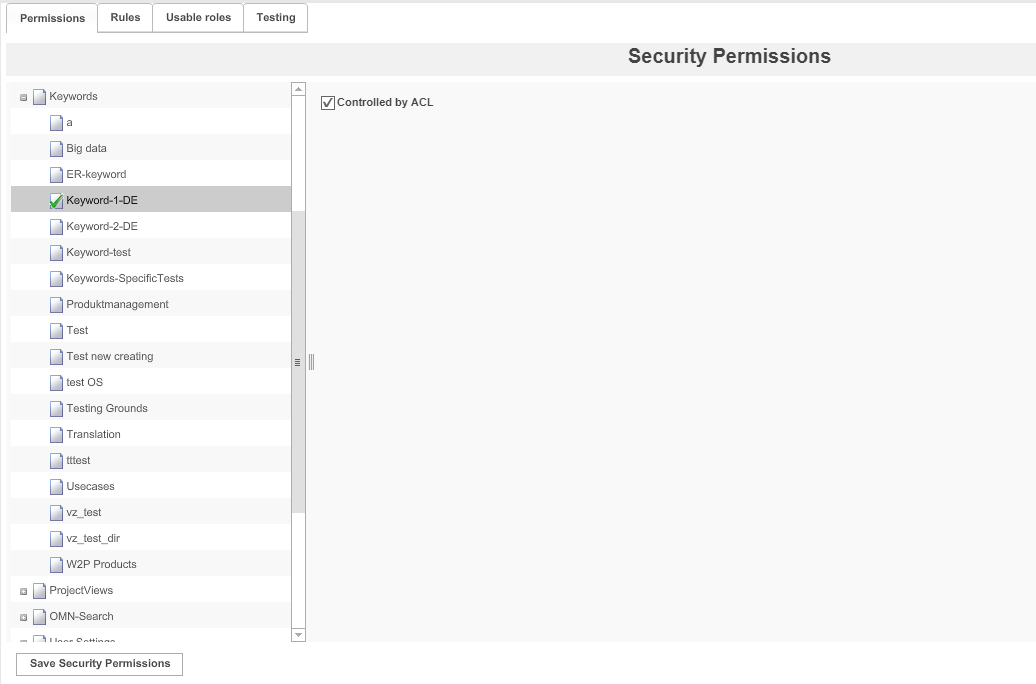
1. Expand the permission node Keywords.
2. Choose root keyword, e.g. Keyword-1-DE.
3. To set up access rights, activate the checkbox Controlled by ACL.
4. To save the configuration and all changes made, click on Save Security Permissions.
→ For each keyword with activated ACL, roles can be assigned to the root keyword and its sub-keywords in the Frontend
Testing

1. Enter a username or a group name in the textbox 'Test information'.
2. Start the test:
– for a user: Click Test user
– for a group: Click Test group
The result of the test is shown in the area below:
-
Membership of groups (for users only)
-
Membership of roles
-
Rules and the resulting access rights for each property or application part