Annotation status
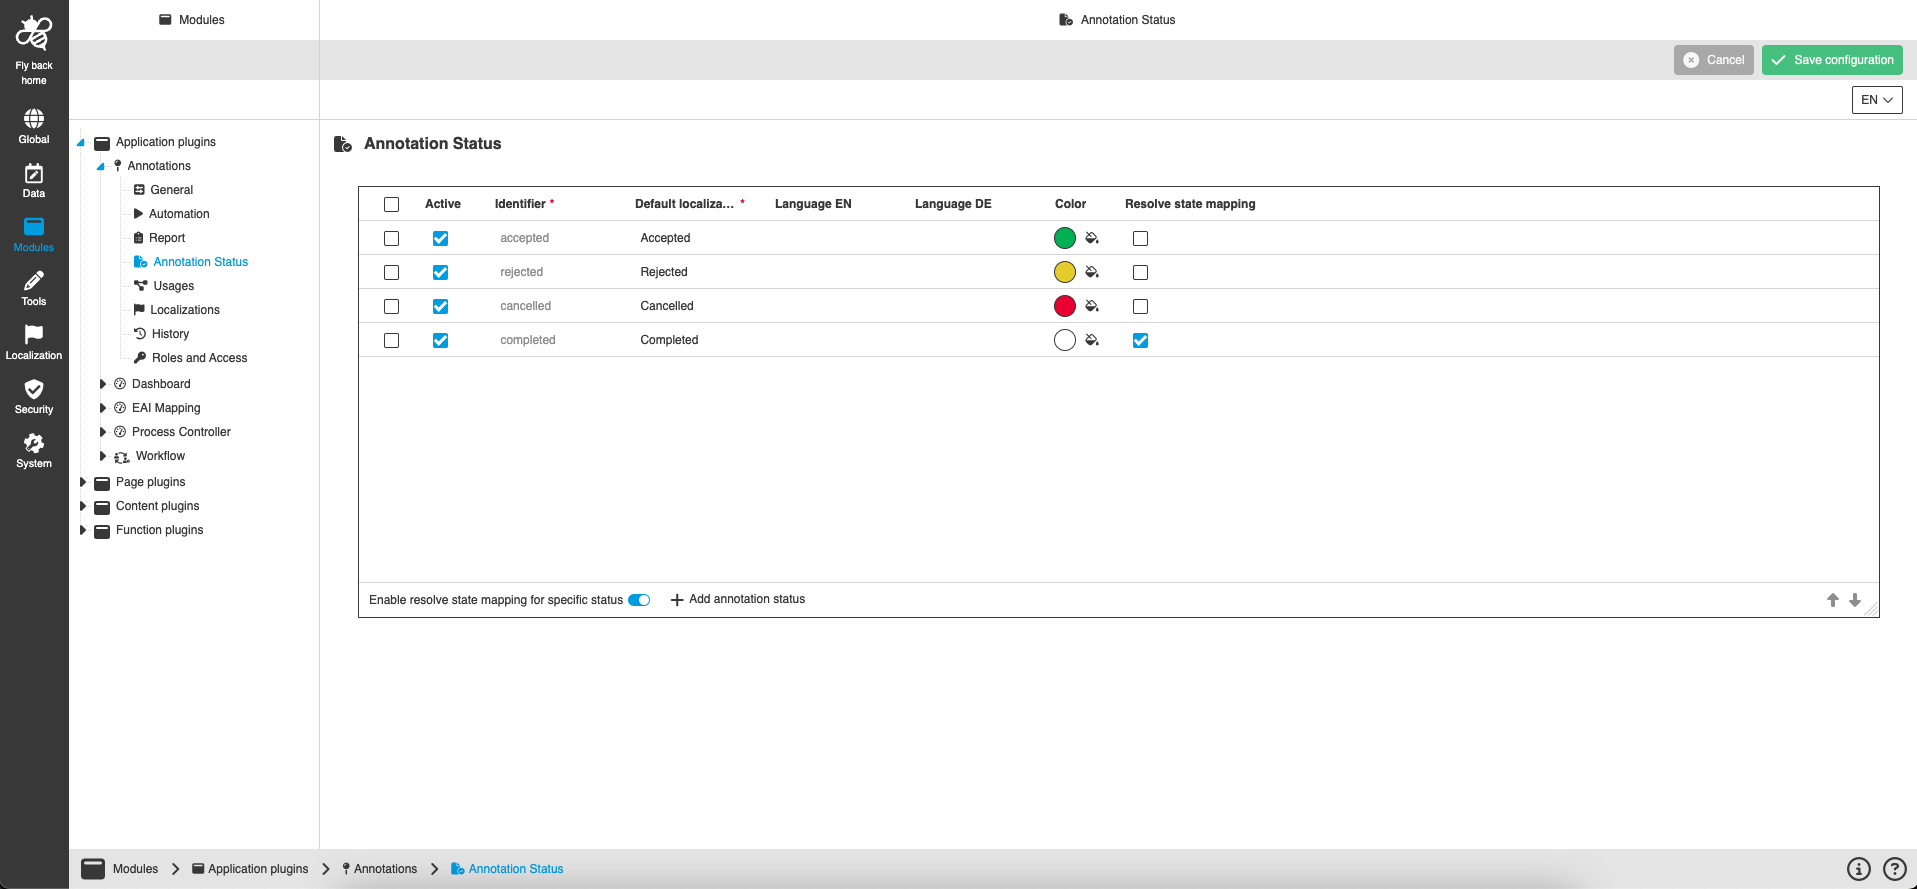
This page provides the possibility to define individual use case-related annotation status, which is mapped to a resolved state of annotations.
| Name of option | Description | Note |
|---|---|---|
Active |
If the checkbox is checked - the status is available in the UI. If the checkbox is unchecked - the status is not available in the UI. |
The checkbox is in active state by default. |
Identifier |
The identifier can be added for newly created custom status only and once they have been defined they cannot be changed anymore. The standard annotation status contains defined English localizations as identifier. |
The field is required. |
Default localization |
The user defines the default localization which will be shown in the UI when no localization is maintained. The standard annotation status contains defined English localizations as default localizations. |
The field is required. |
Localization |
For each localization that is activated on the mandator for system language an own column is shown in the table. Localizations cannot be changed for default annotation status. |
The field is optional. |
Color |
Color picker opens by click on the icon and the user can apply a wished color. |
Not available for default annotation status. |
Enable resolve state mapping for specific status |
If the toggle is on - the column 'Resolve state mapping' is available in the table. If the toggle if off - the column 'Resolve state mapping' is not available in the table. |
|
Resolve state mapping |
If the checkbox is checked - the annotation is marked as 'resolved' in the UI as soon as a user sets this specific annotation status.
If the checkbox is unchecked - the annotation corresponding annotation status has no effect on the resolved state (means if user sets the annotation status in the UI the annotation is still not resolved). |
The column is only visible in case the 'Resolve state' toggle is activated, otherwise column is hidden. |
Add annotation status |
The user can create new individual annotation status by clicking on "Add annotation status" button. |
The option is available independent of selection in the table. |
Remove annotation status |
The user can remove configured annotation status from 'Annotation status' table by clicking on "Remove annotation status" button. |
The option is available only if custom annotation status has been selected in the table. |
How to add annotation status
-
Click on "Add annotation status" button
-
New row is appeared in the Annotation status table.
-
-
Select whether the status will be available on the UI using "Active" checkbox.
-
Enter the status identifier.
The Identifier validation:
- Must not be empty;
- Must be unique. -
Enter the status default localization.
The default localization validation:
- Must not be empty;
- Must be unique. -
Enter the status localization (one or several).
-
Apply a wished color for status.
-
Save status configuration.