User Management
Purpose of the plugin
The User Management is a special plugin that enables the display and editing of OMN users.
Introduction
Within the User Management, it is possible to maintain and manage user properties, such as the name, company or e-mail address.
In addition, a user can be assigned one or more roles that control their rights within the OMN.

Prerequisites and relations to other modules
The User Management has no relationship to other modules.
The only effect on other modules is that users with different roles may have different rights and functions available OMN-wide.
How to access
The module can be opened directly via the sidebar (usually found in the Administration area).
How to use
The User Management consists of a center and right view.
No left view is required for navigation or similar.
-
Center View
Display of existing users and option to manage users using functions -
Right View
View for displaying and editing the user properties
Center View
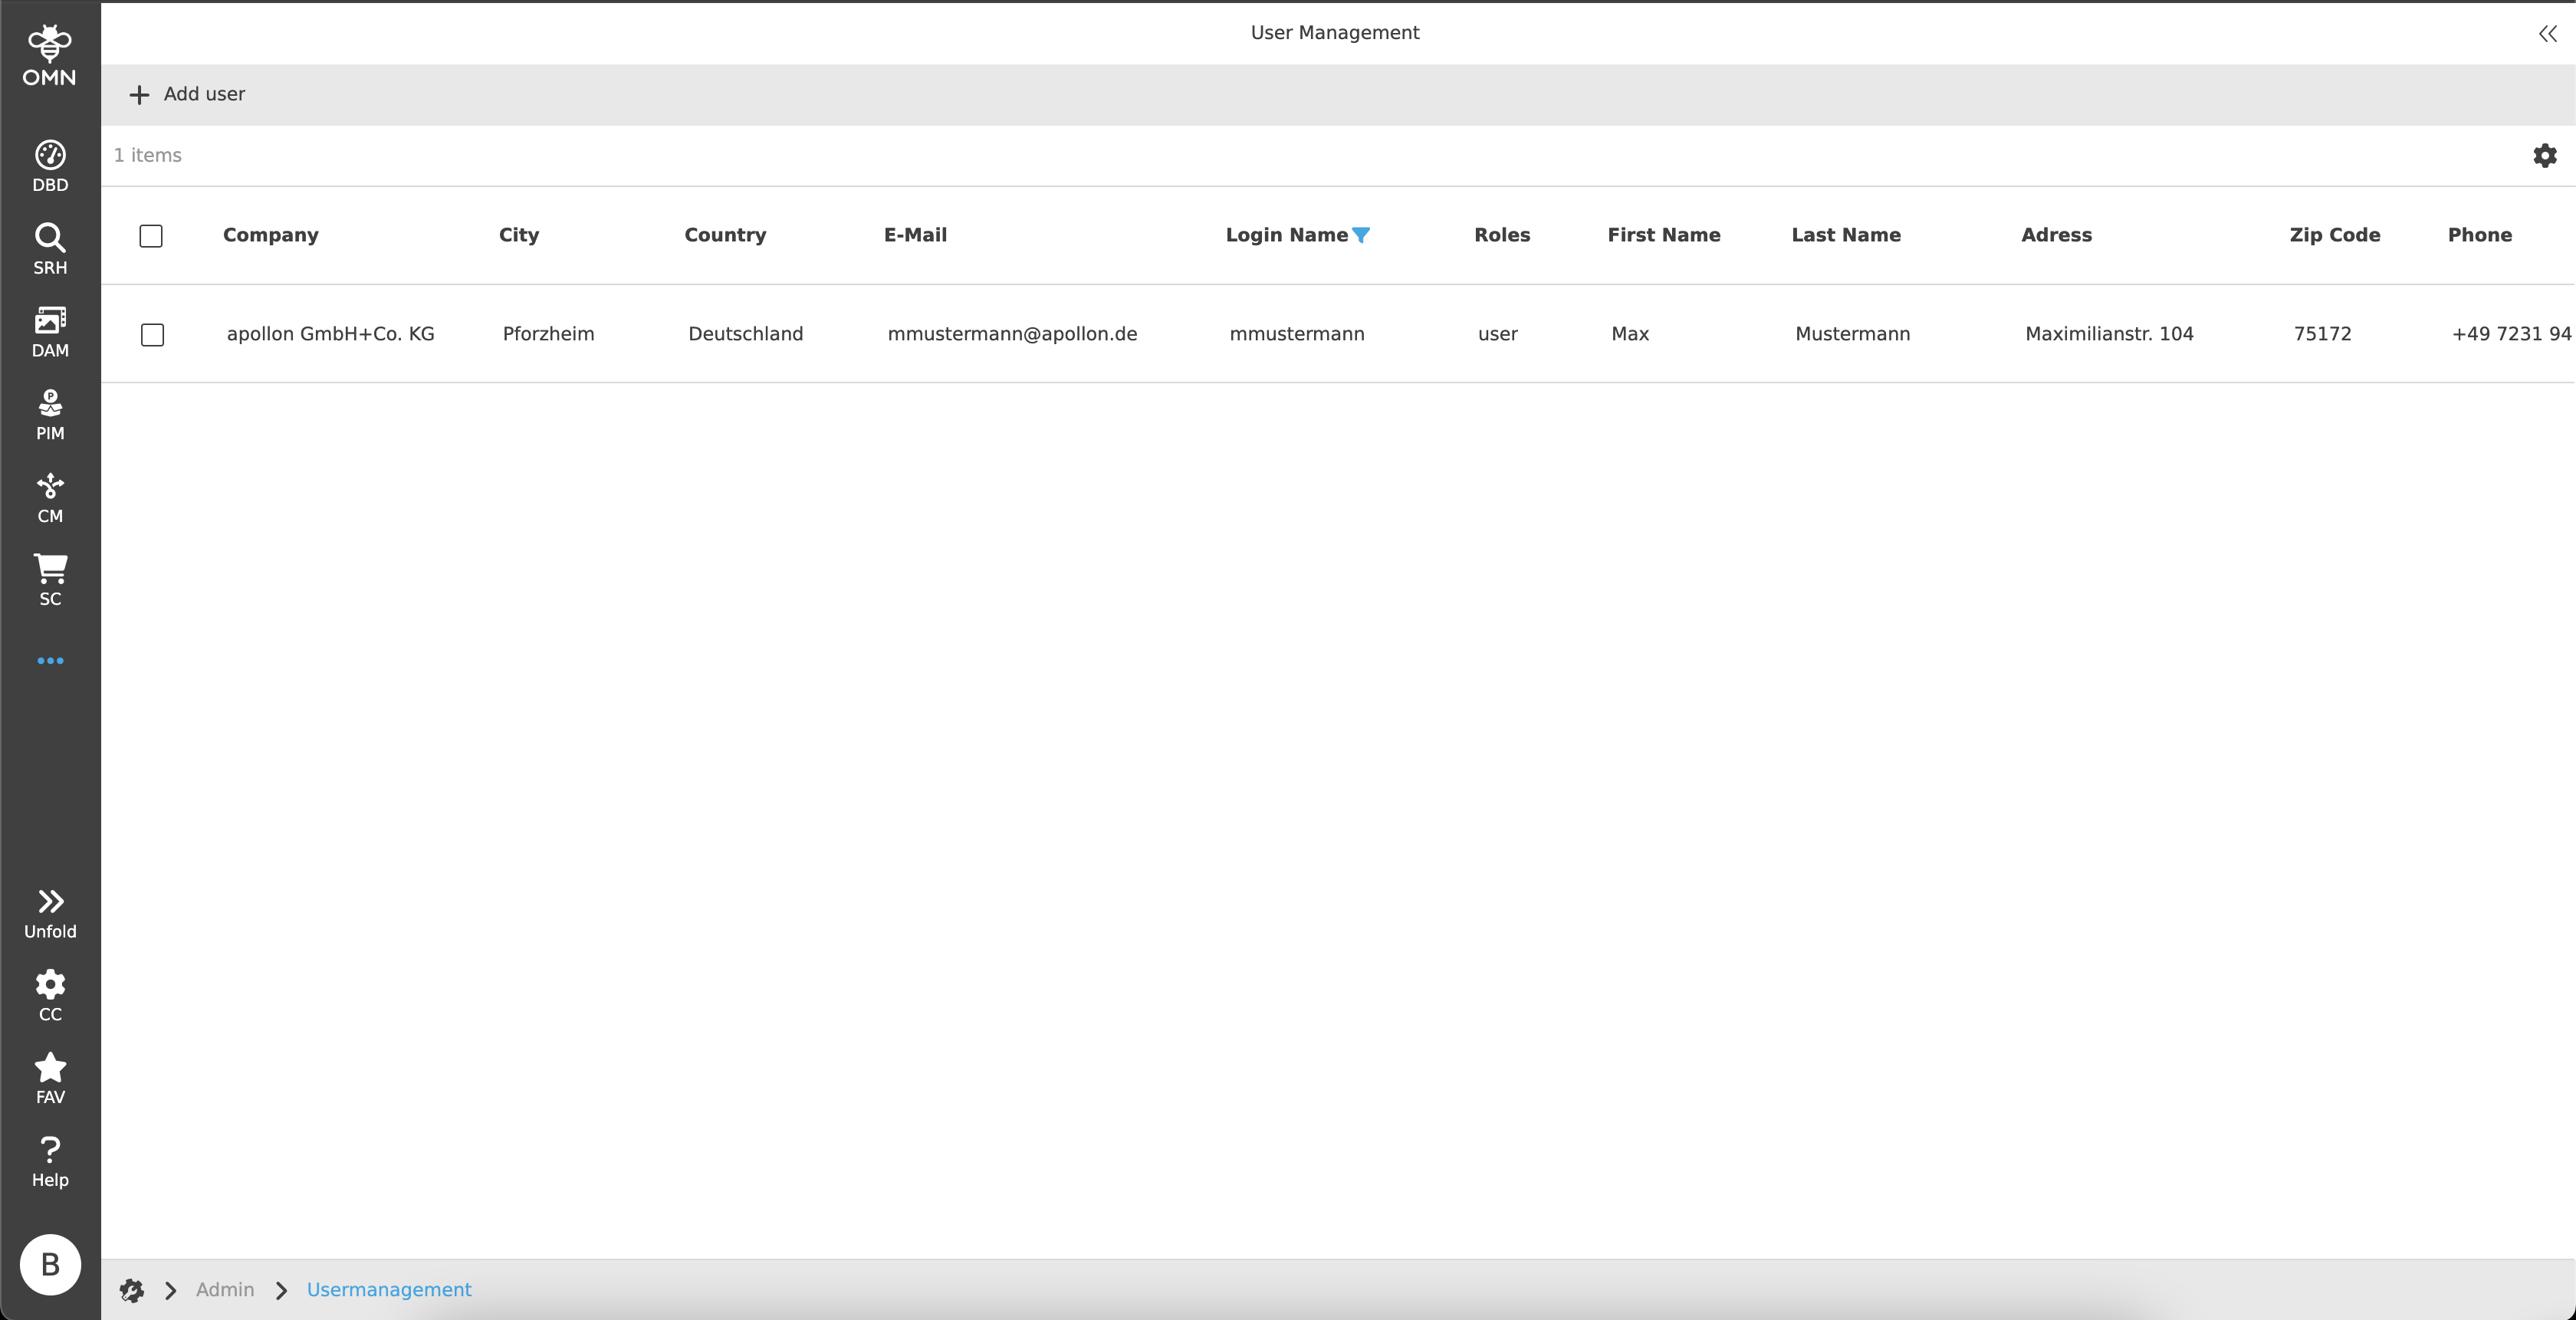
The center view shows all user properties of OMN users in tabular form.
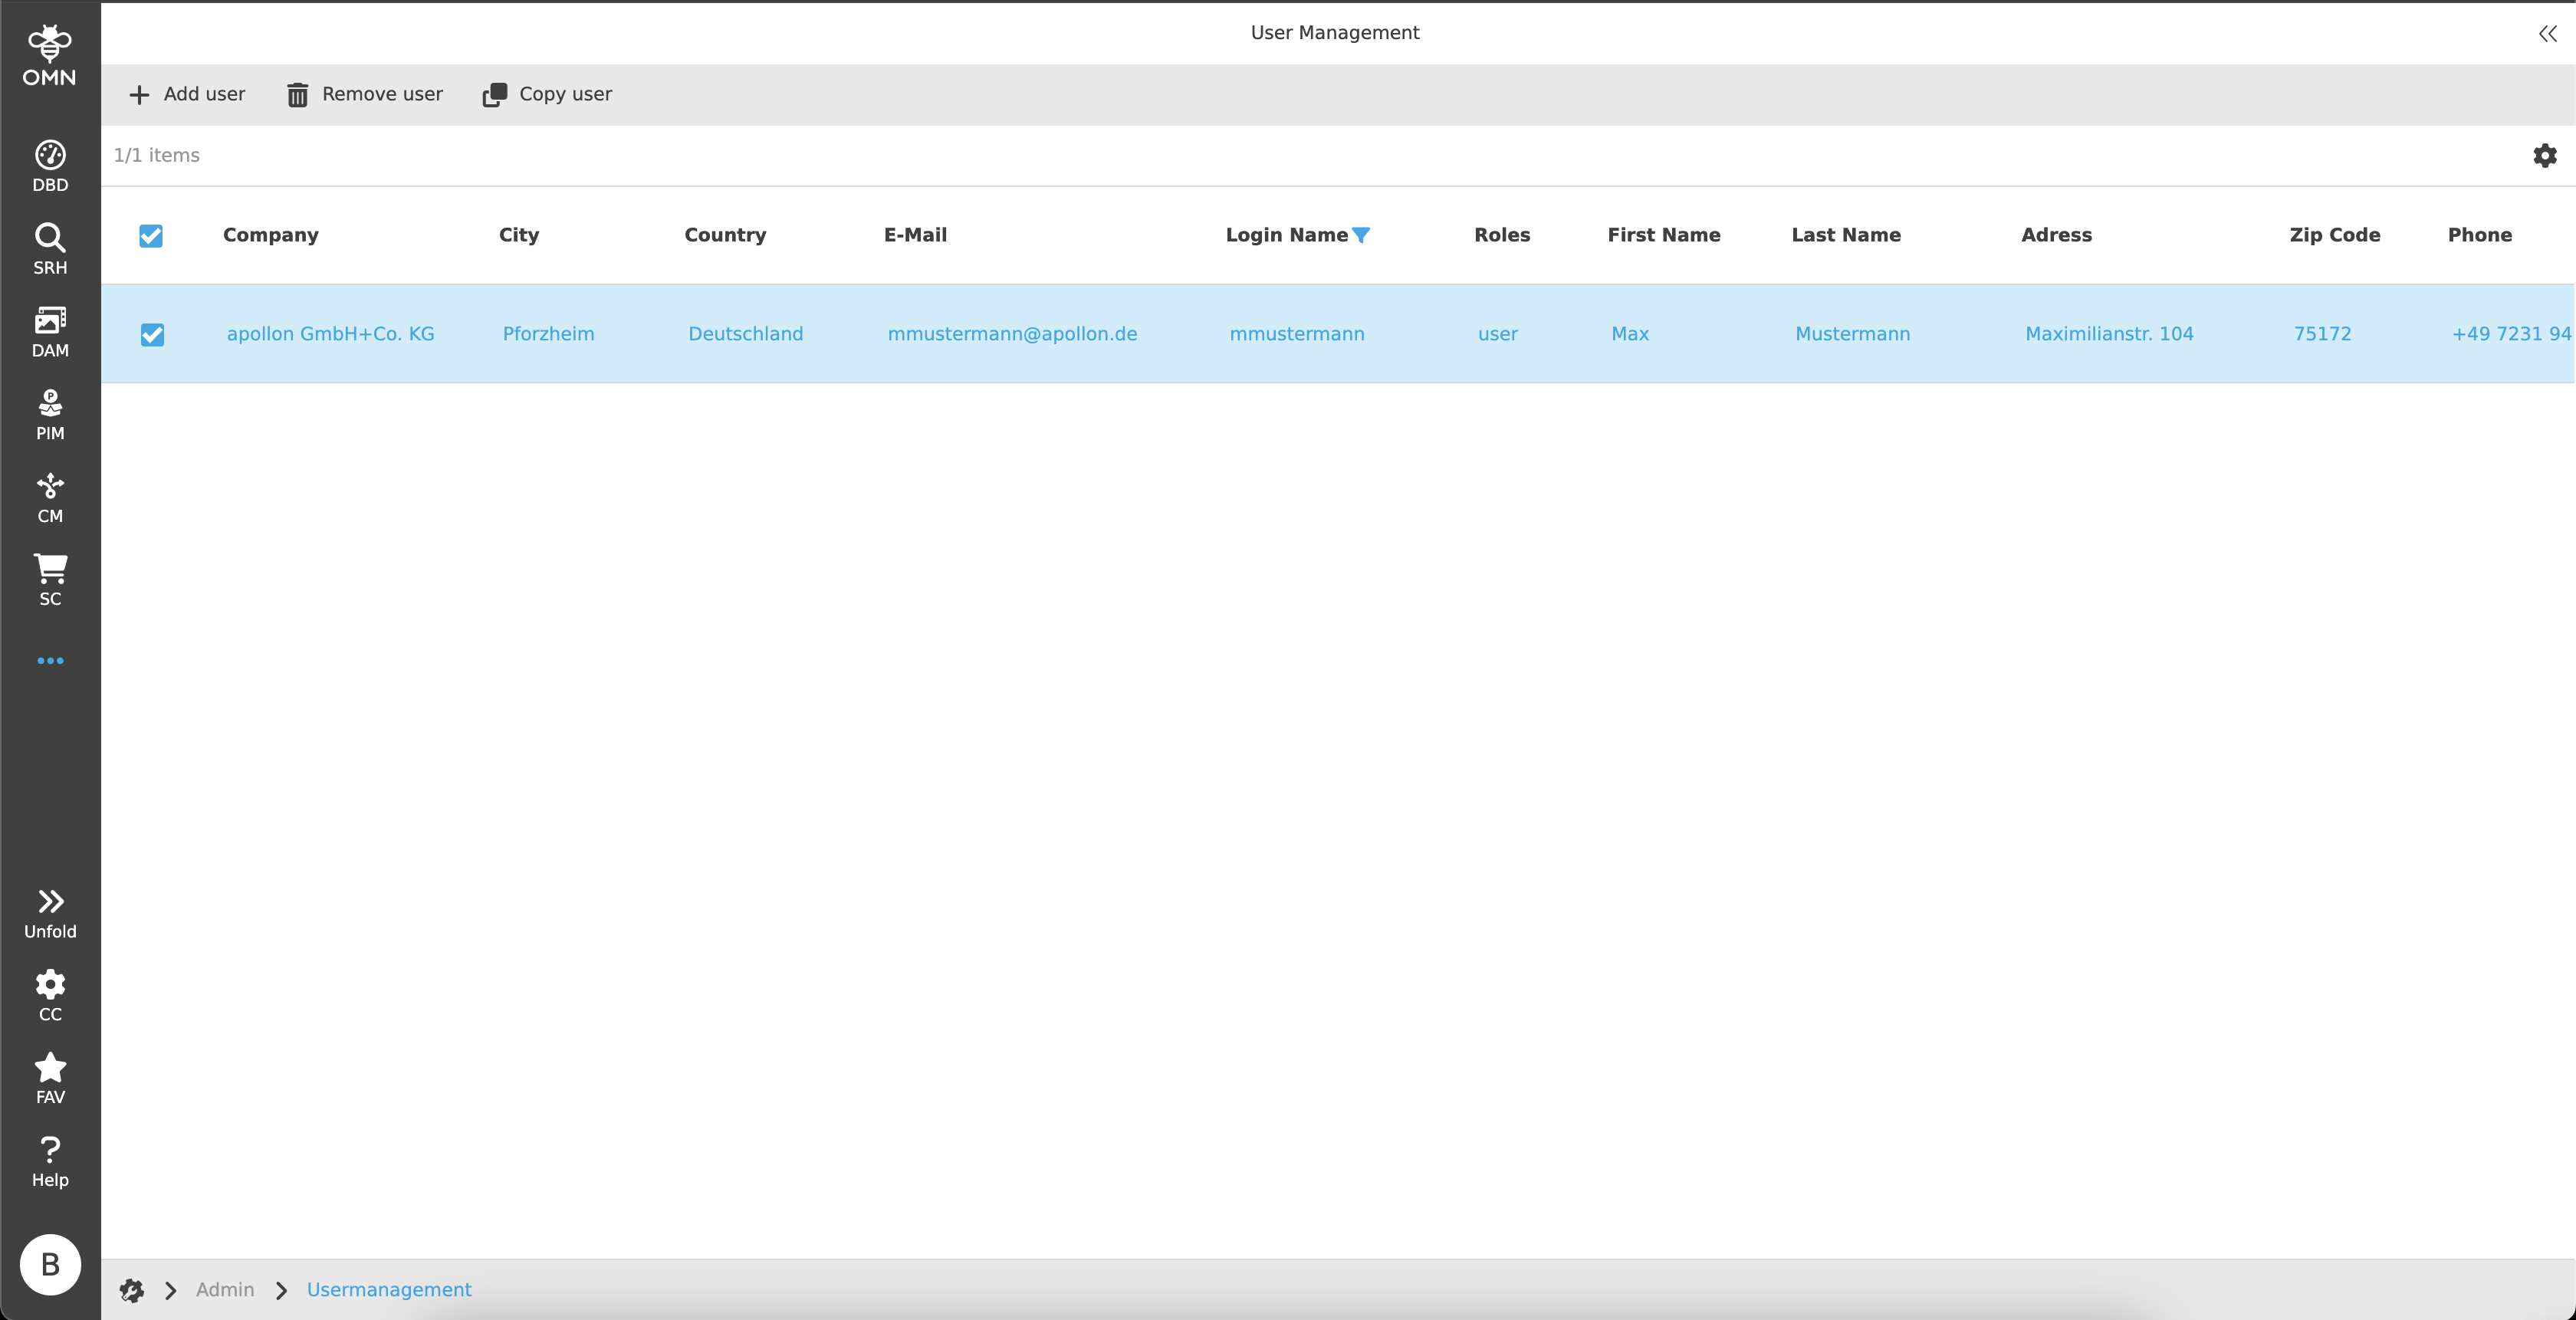
Toolbar & Functions
The toolbar contains the following three functions:
-
Add user
The "Add user" function is always available, even without selection.
If the function is executed, a dialog with various input fields opens to create a new OMN user.Login names must always be unique. 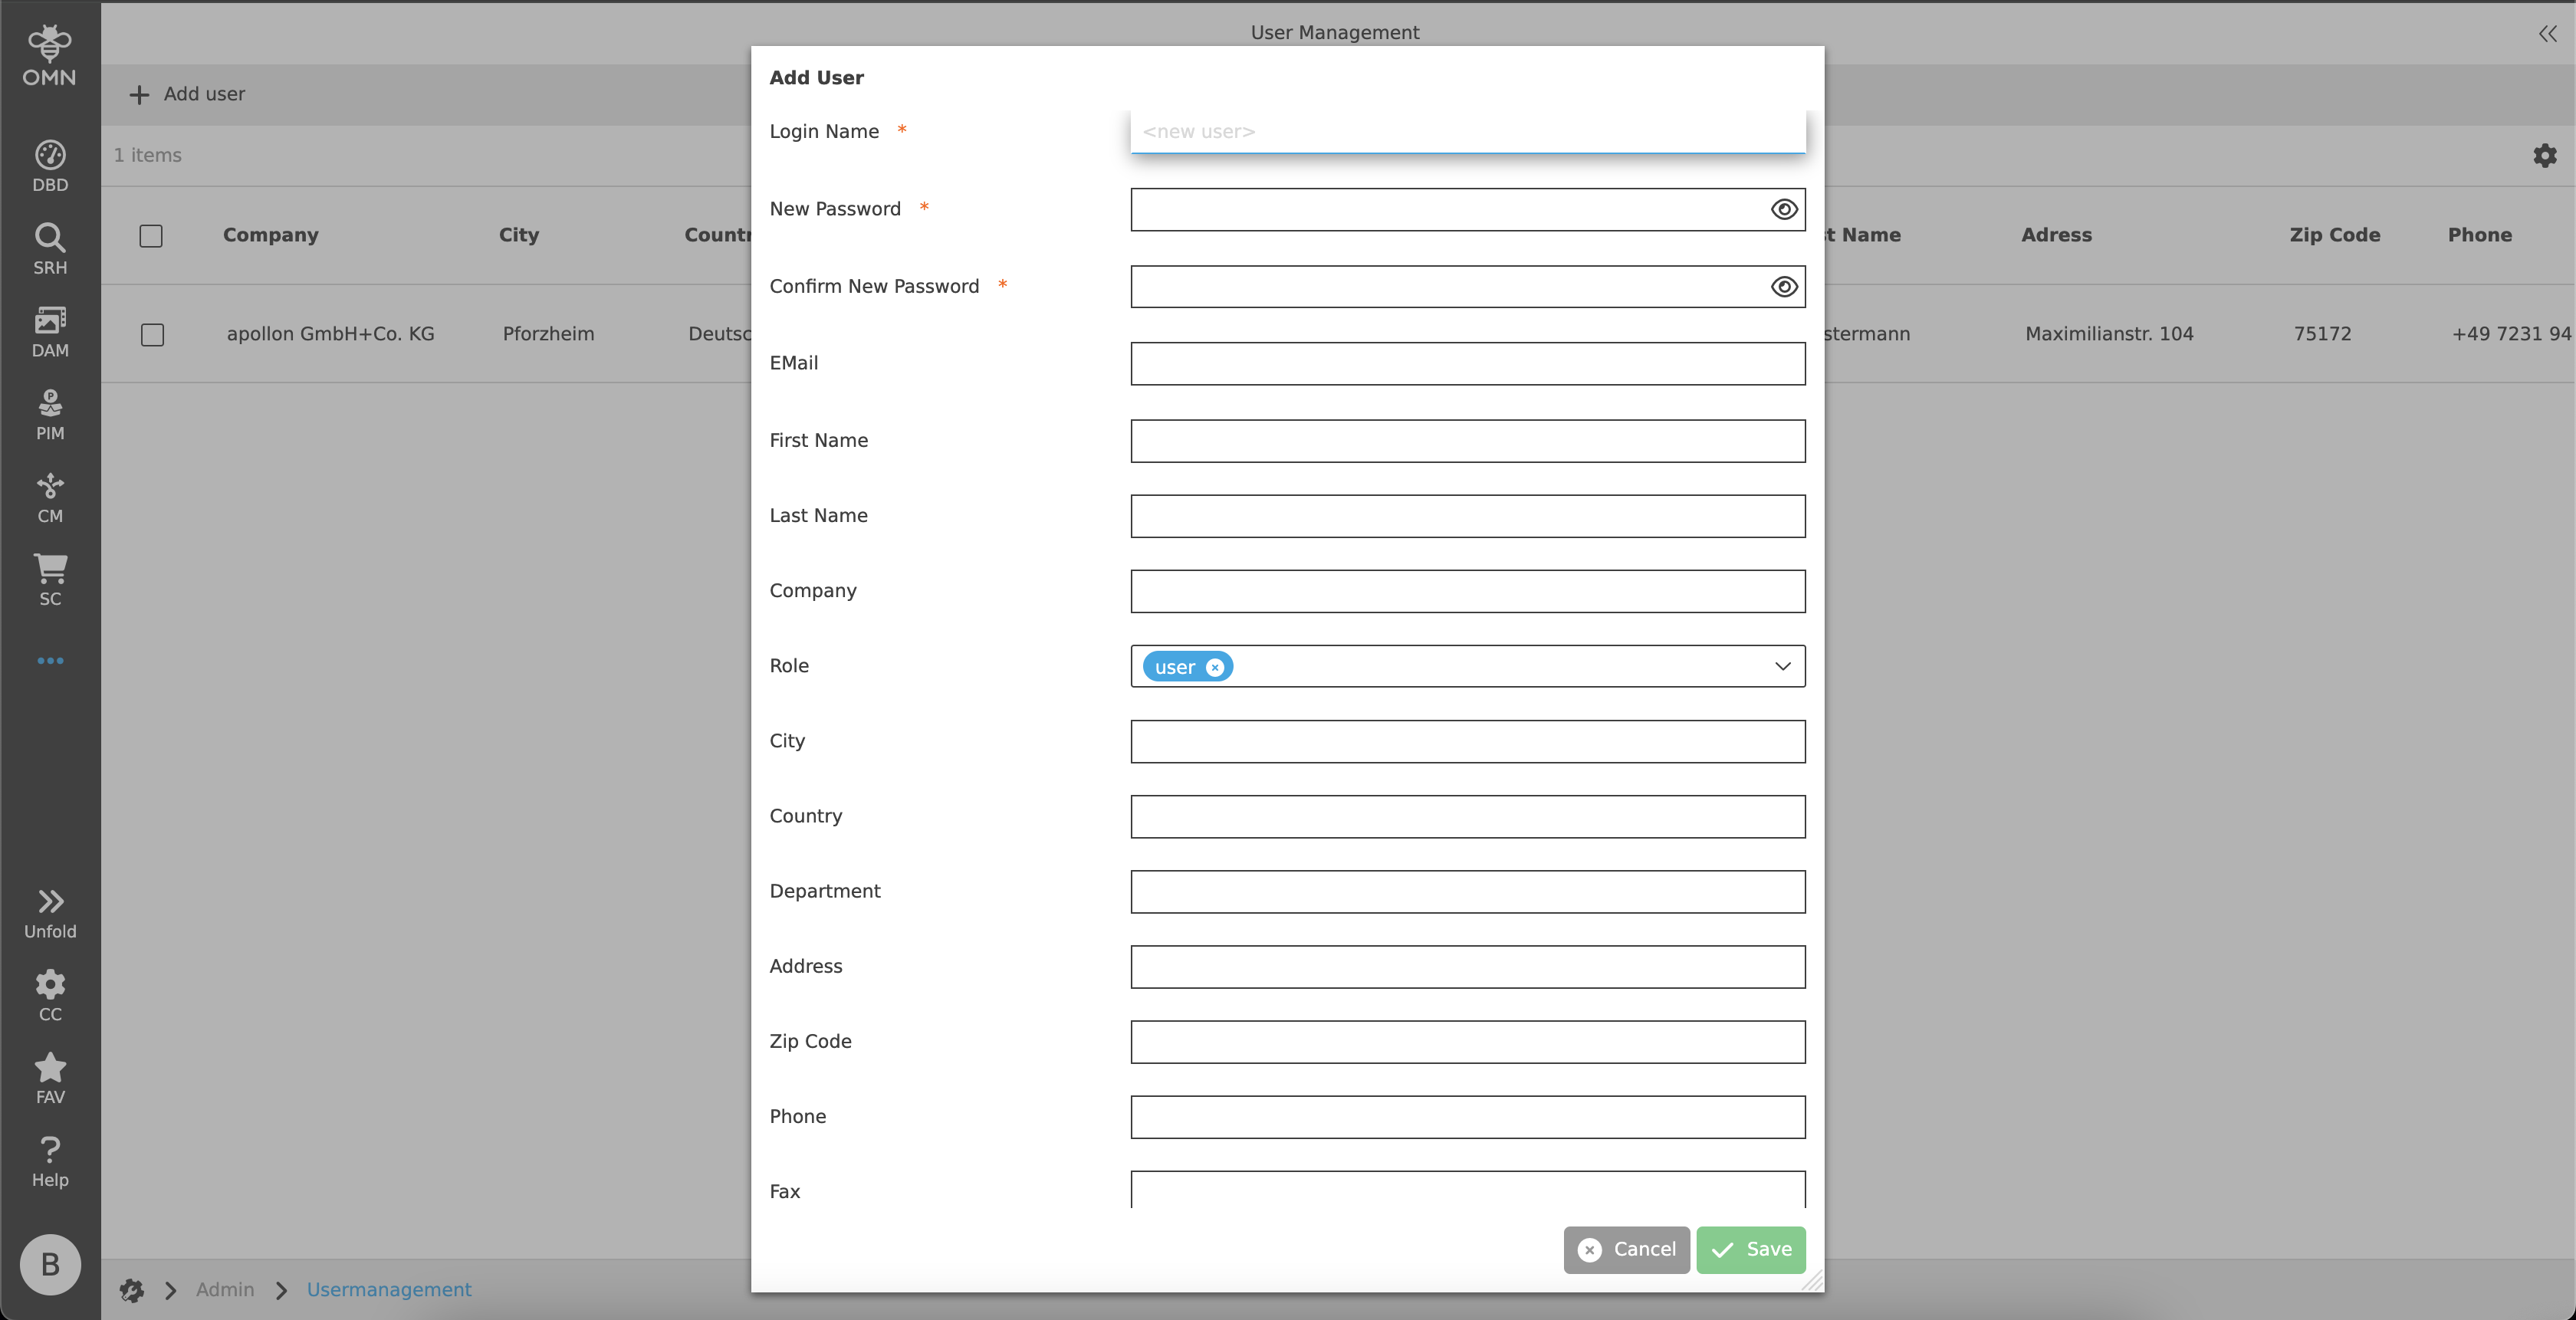 Figure 3. Add user dialog
 -
Copy user
The "Copy user" function is only visible if a user has been selected in the canvas.The function does not allow multi-selection. As soon as the function is executed, the same dialog opens as before for "Add user".
The difference is that all fields - except login name, password and e-mail - have been copied from the selected user.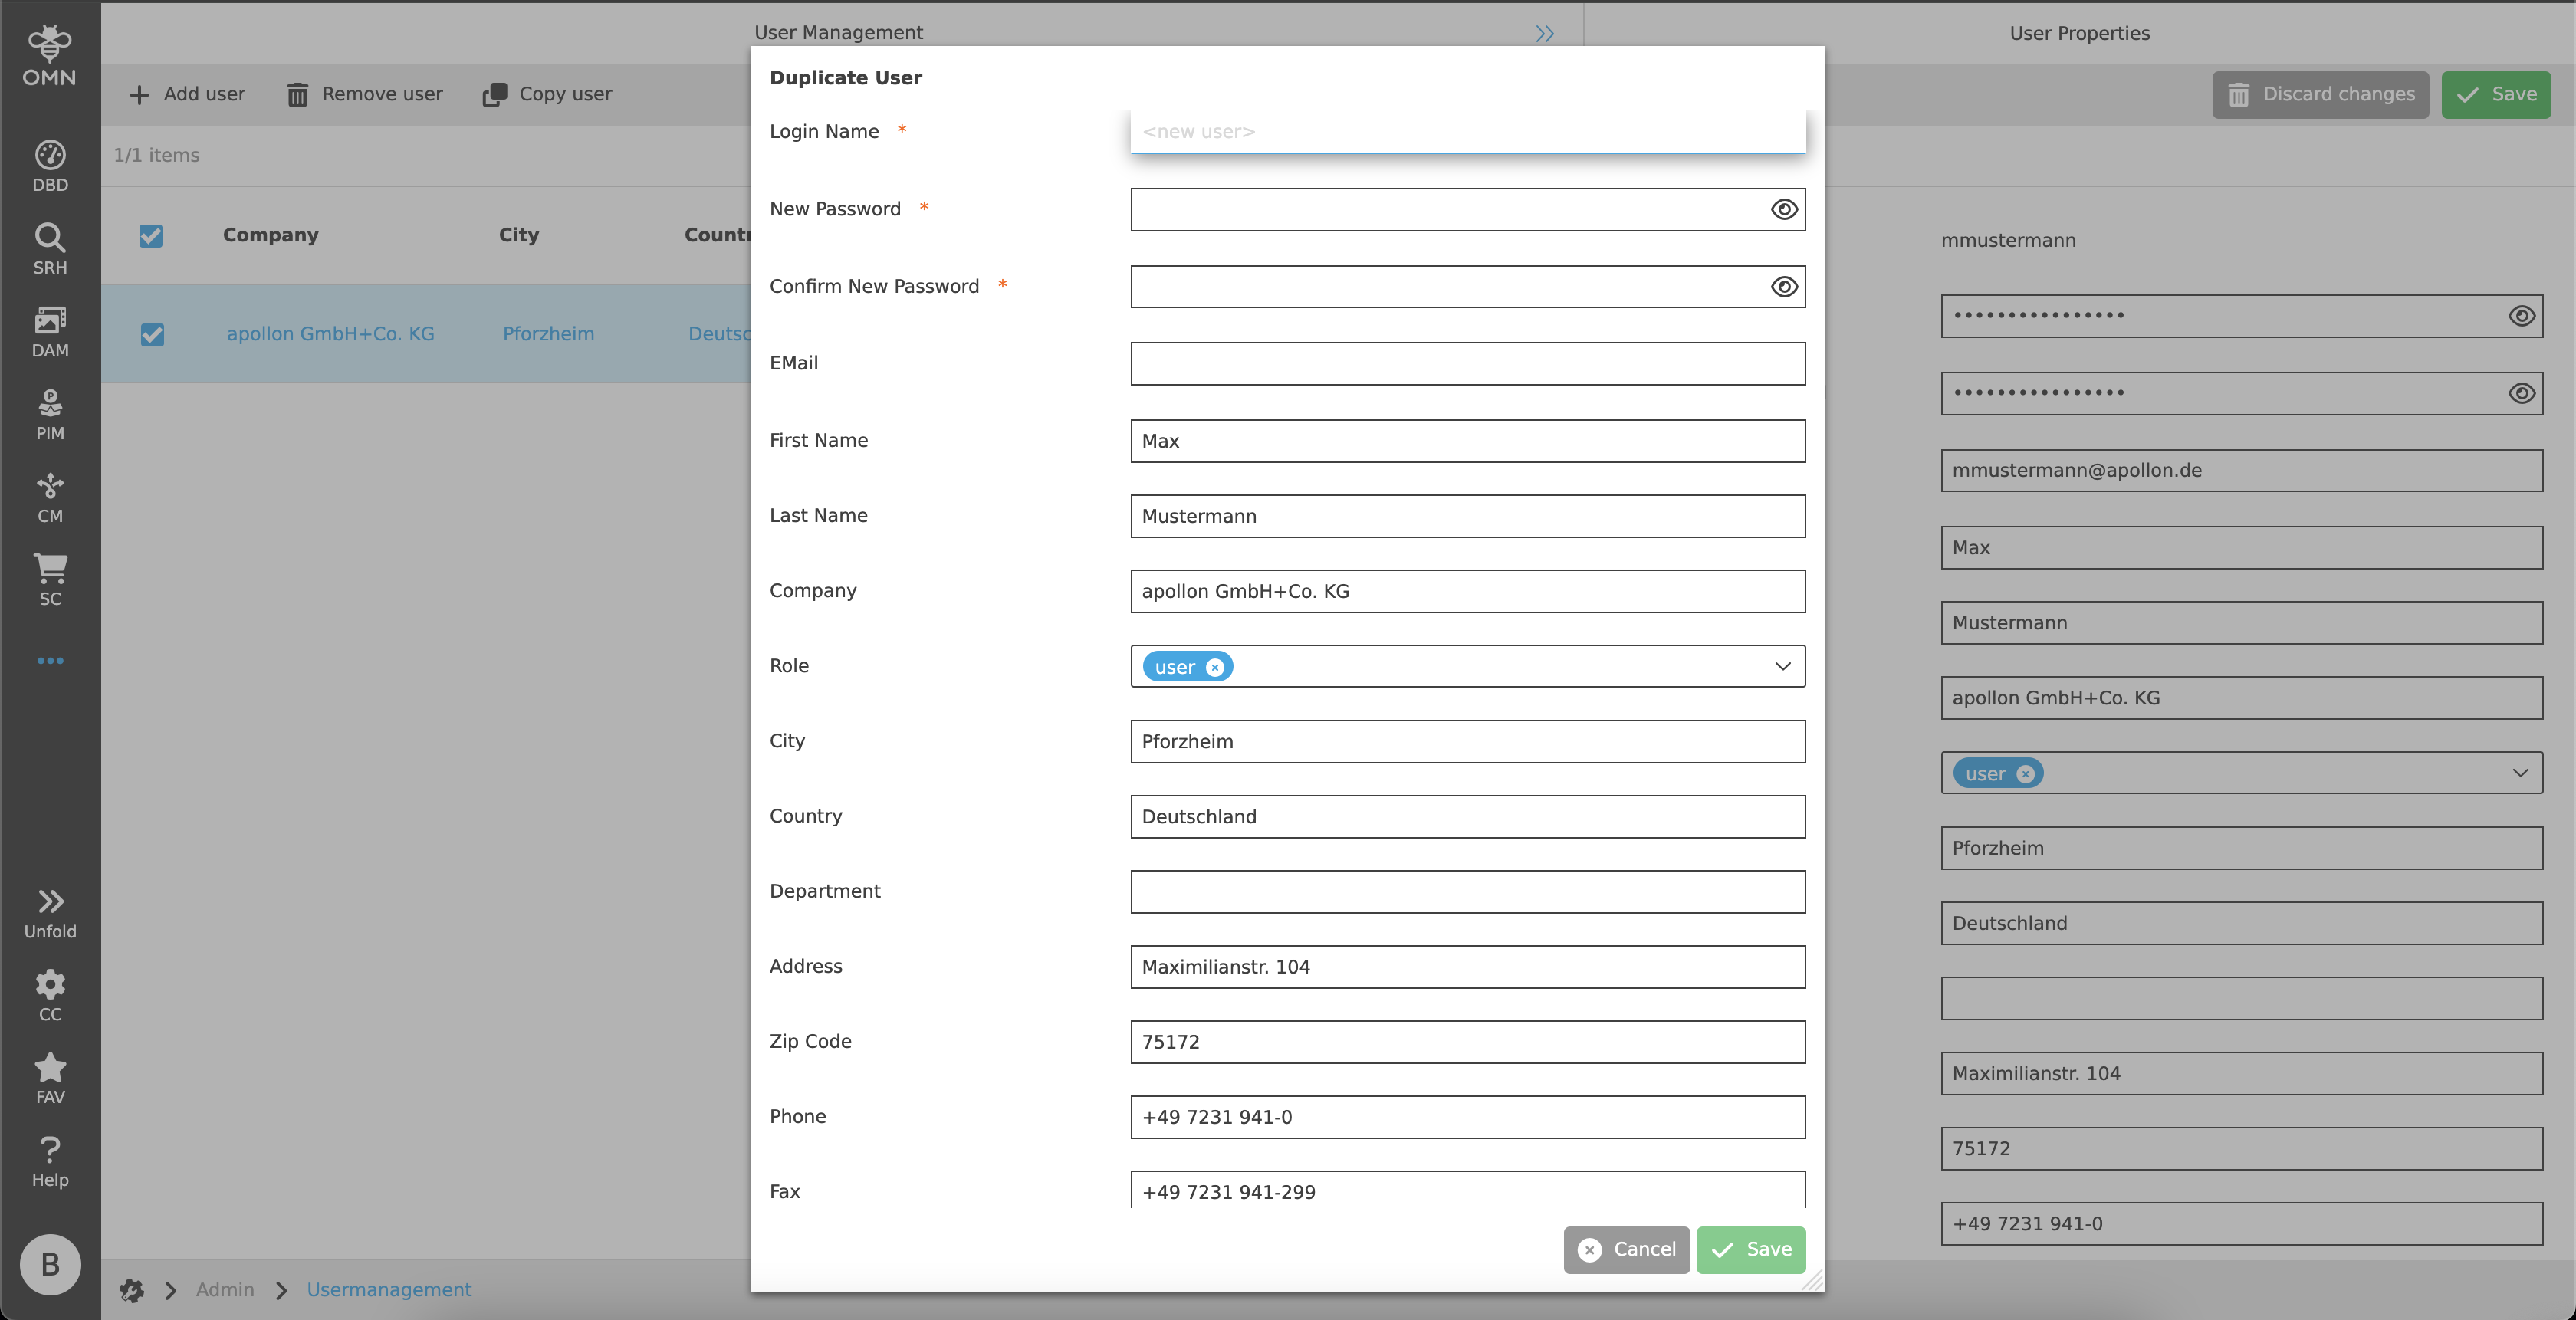 Figure 4. Copy user dialog
 -
Remove user
The "Remove user" function is only visible if one or more users have been selected in the canvas.
As soon as the function is executed, a dialog appears in which the deletion must be confirmed.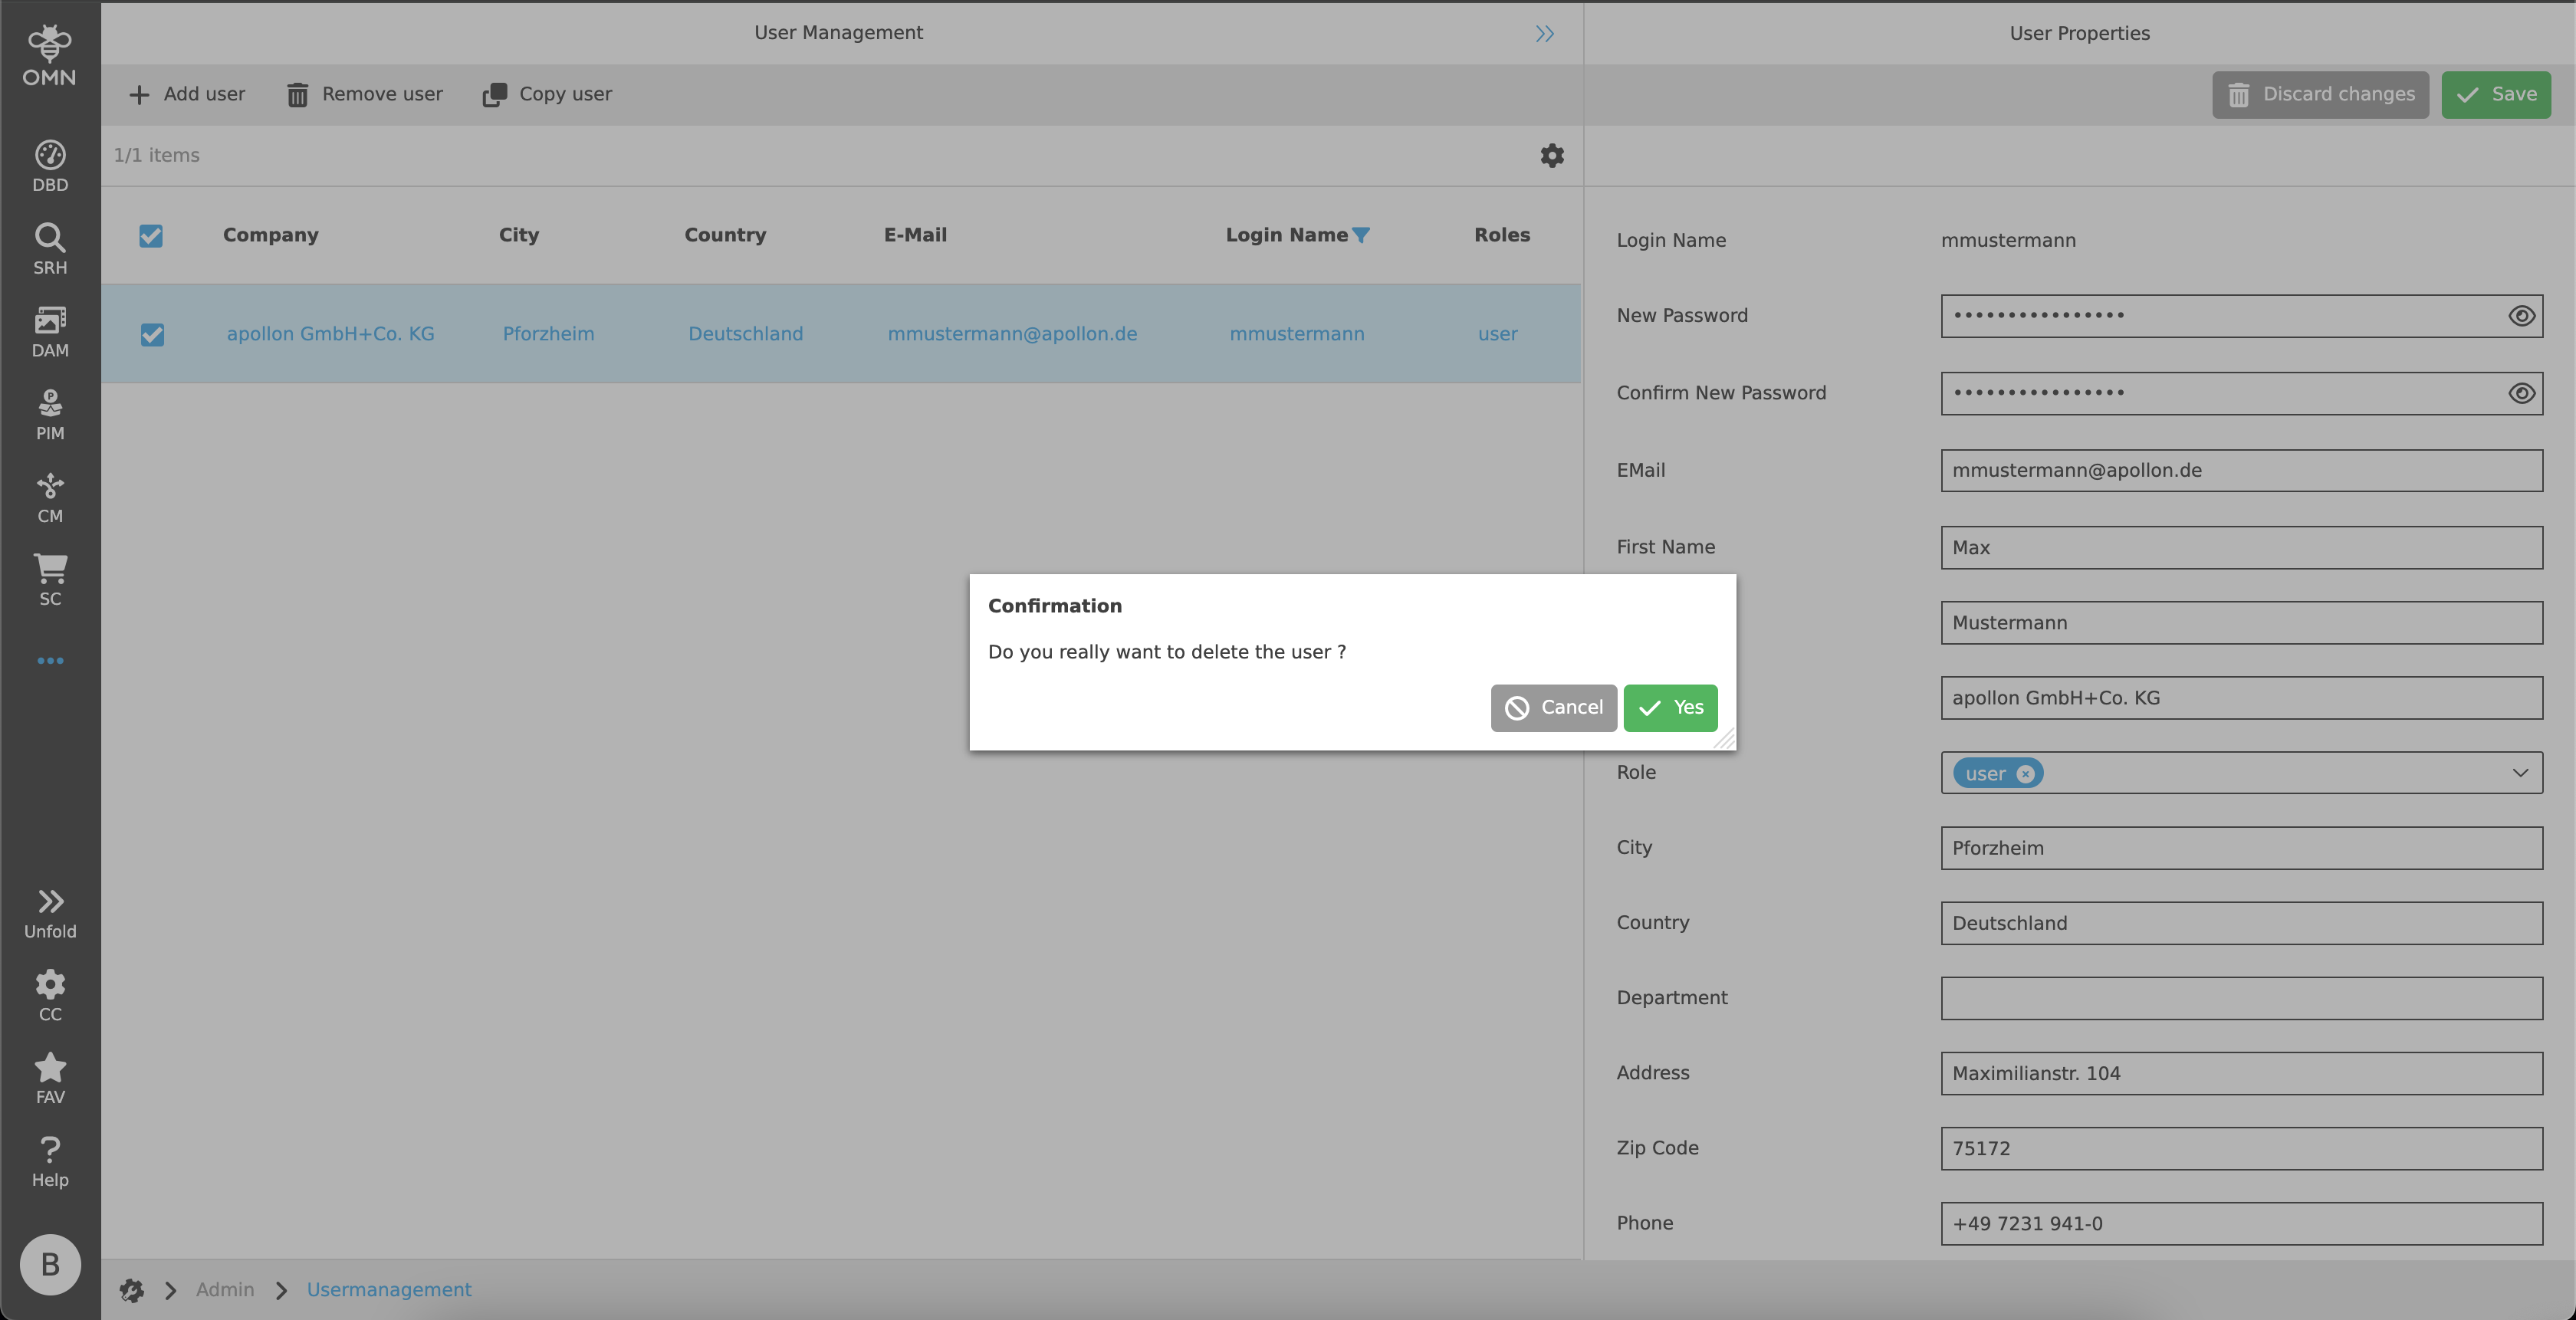 Figure 5. Remove user dialog
Statusbar & Settings
The Statusbar contains an object counter and settings.
The object counter on the left in the status bar shows how many items there are in total on the page and how many items have been selected.
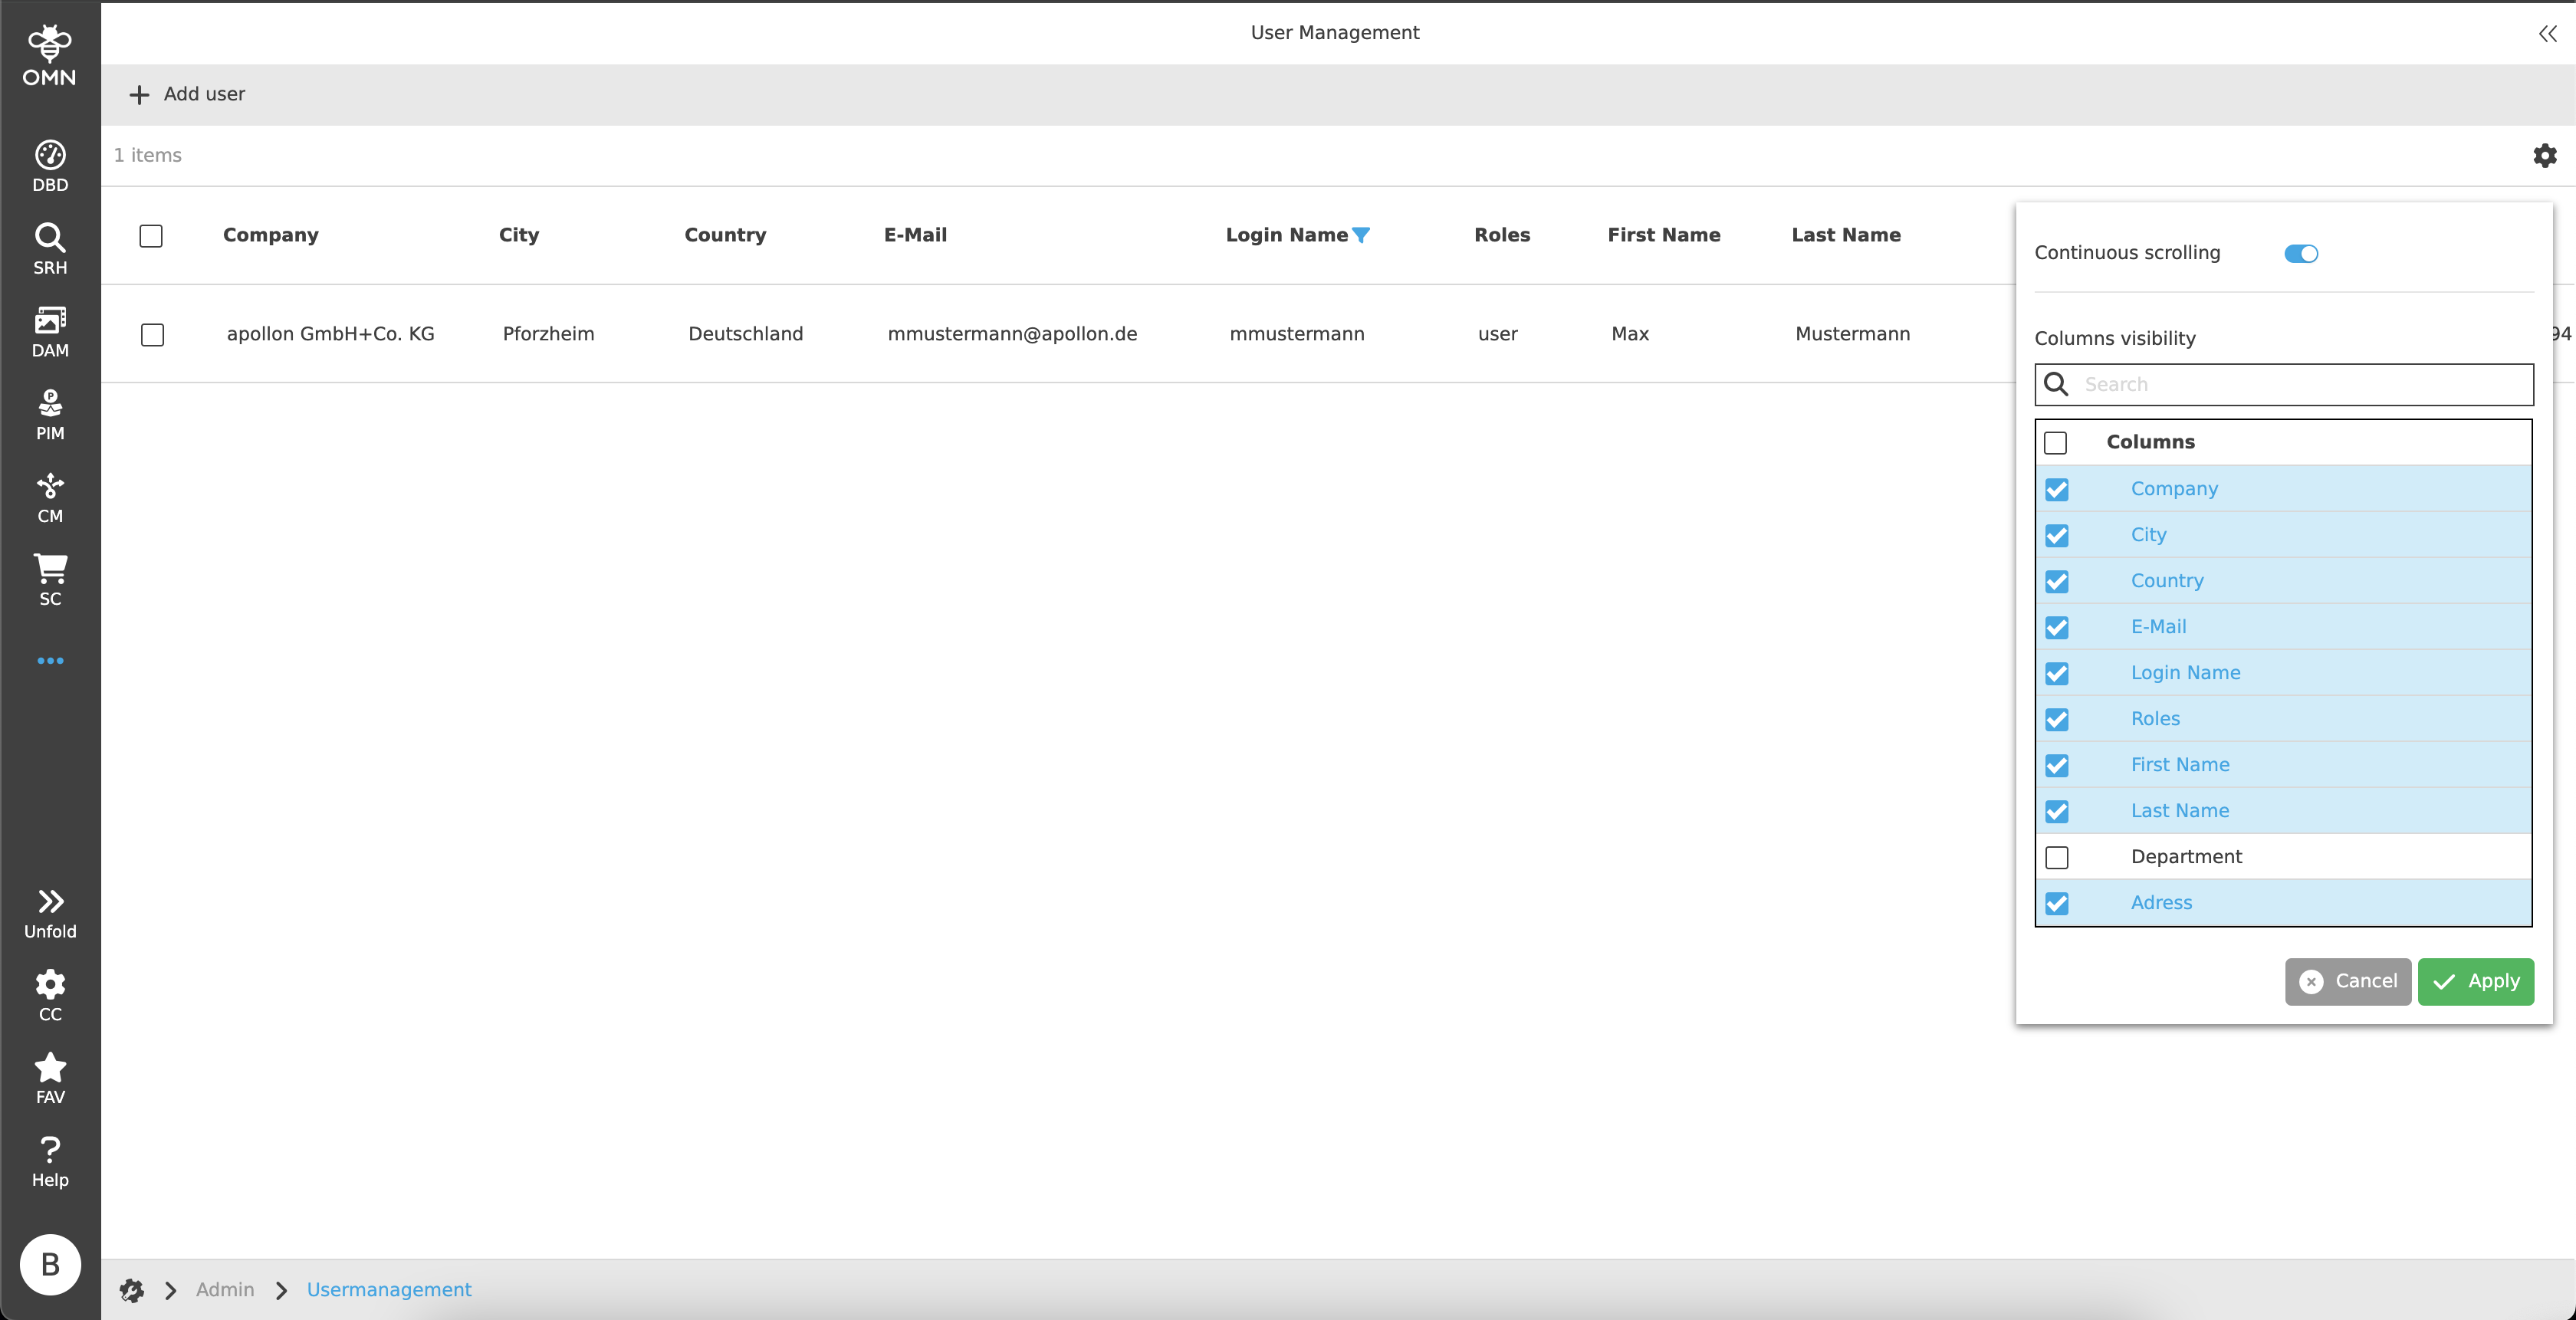
In the Statusbar settings, the user has the following options:
-
Continuous scrolling or pagination (how many elements should be displayed per page)
-
Column visibility
Right View
The right view shows all user properties as a detail view, which can also be found in the table. With multiple selections in the canvas, empty or identical details are displayed in the right view to enable mass editing.
The following user properties are available:
-
Login Name
-
New Password & Confirm New Password
-
E-Mail
-
First Name
-
Last Name
-
Company
-
Role
-
City
-
Country
-
Department
-
Address
-
Zip Code
-
Phone
-
Fax
-
User Creation Date
-
Activated
To activate a user, the checkbox must be active.
All values - except login name and user creation date - can be edited.
Some of this data, as long as it has been filled in, is transferred to the Profile data of User settings after saving.
|
Users can belong to different roles, which can be associated with different rights. This means that some users may have more or less functions available OMN-wide, depending on the role configuration. |
The toolbar includes the option to save or discard changes.
-
Discard
Clicking on the "Discard changes" button discards all changes made up to the last save. -
Save
Clicking on the "Save" button saves all changes made up to the last save.
Saving may be restricted if the mandatory password fields have not been filled in.
In this case, changes cannot be saved.