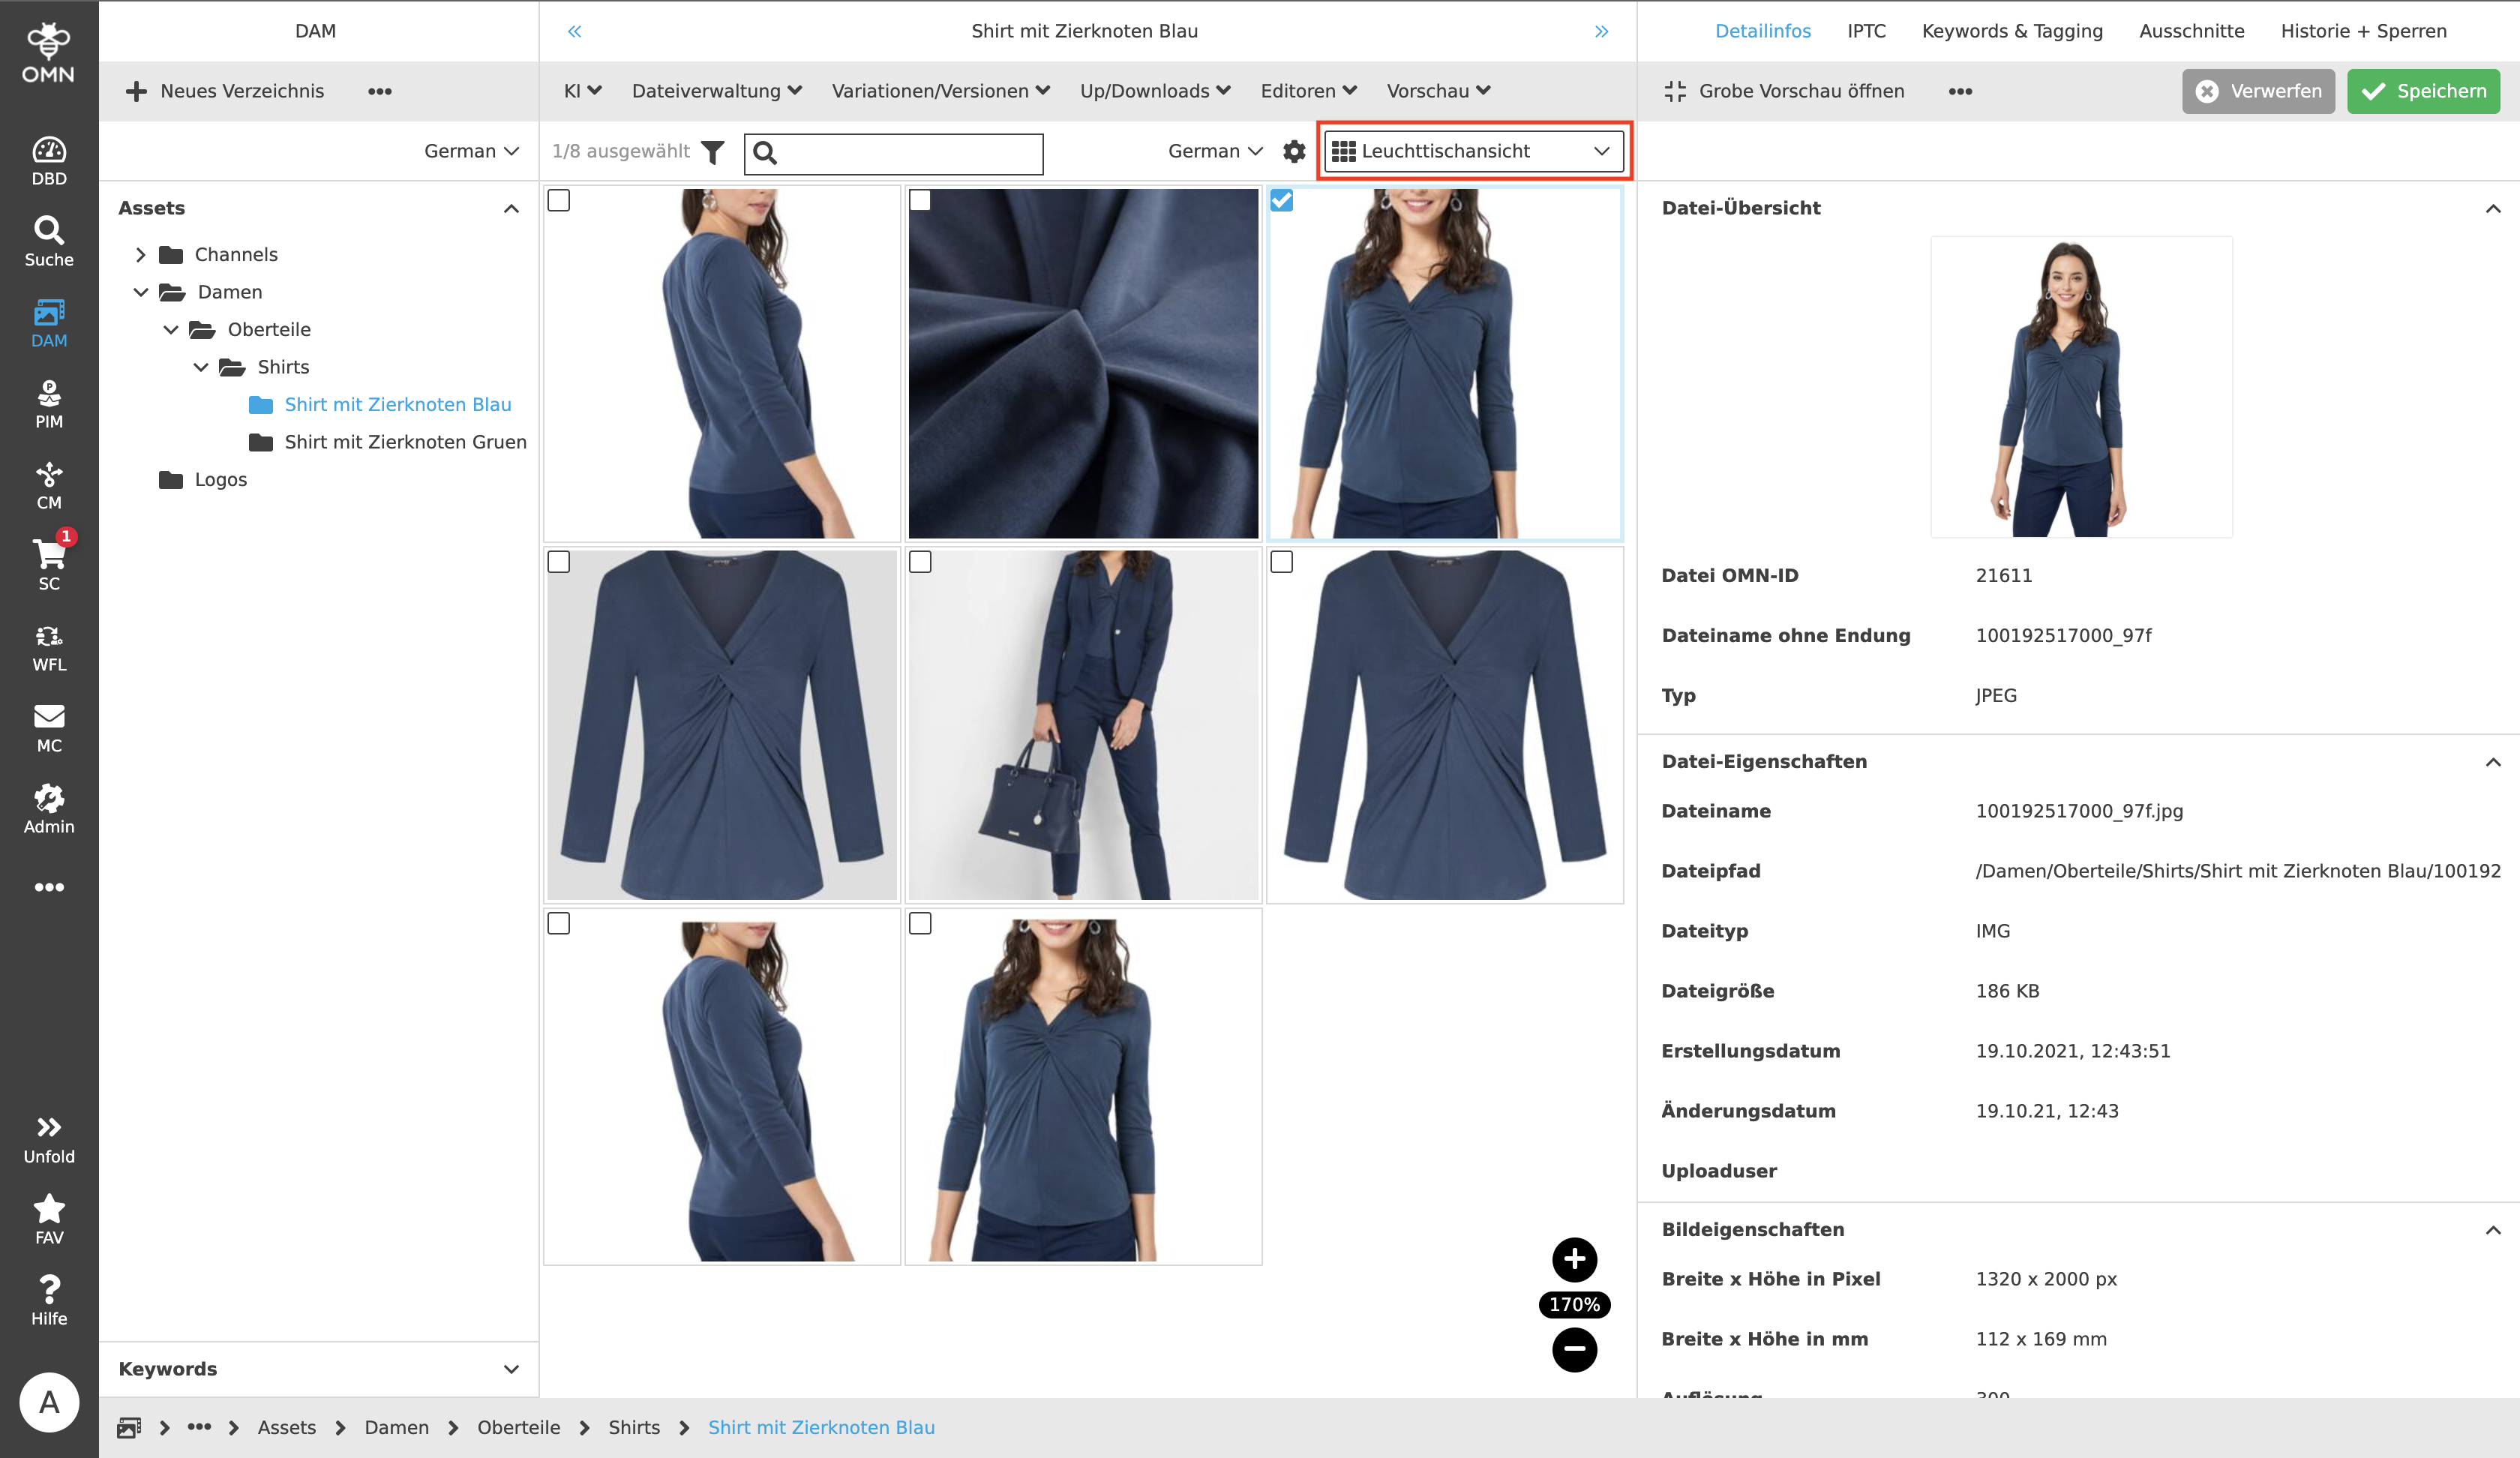
Light Table View
In the Light Table View, the user can take a closer look at the available files by bringing file previews into focus in larger tiles. These are images or other files of other formats (e.g. PDF, VID, …), which are often located in the folder structures of DAM.
In comparison with the Single Object View, here no single image file is displayed as large as possible and with full image detail, but rather tiles of image files arranged in a row can be clearly viewed.
Unlike the Table View, less details are available in the Light Table View, but additional information can still be made available by showing and hiding additional attribute details in the statusbar settings. When filtering in the statusbar (on the left), users can filter by attribute details.
Also the possibility of zooming is given.
By selecting the "Light Table View" in the content switcher dropdown, which is located in the statusbar, all contents are displayed in the Light Table View.
The files can be selected by clicking on them or their corresponding checkboxes. Feedback on this is provided by the ticked checkbox in the top left corner of the clicked file (either directly on the image or in the icon bar, depending on the setting). If the user wants to select more than one file, the checkboxes must be selected directly.
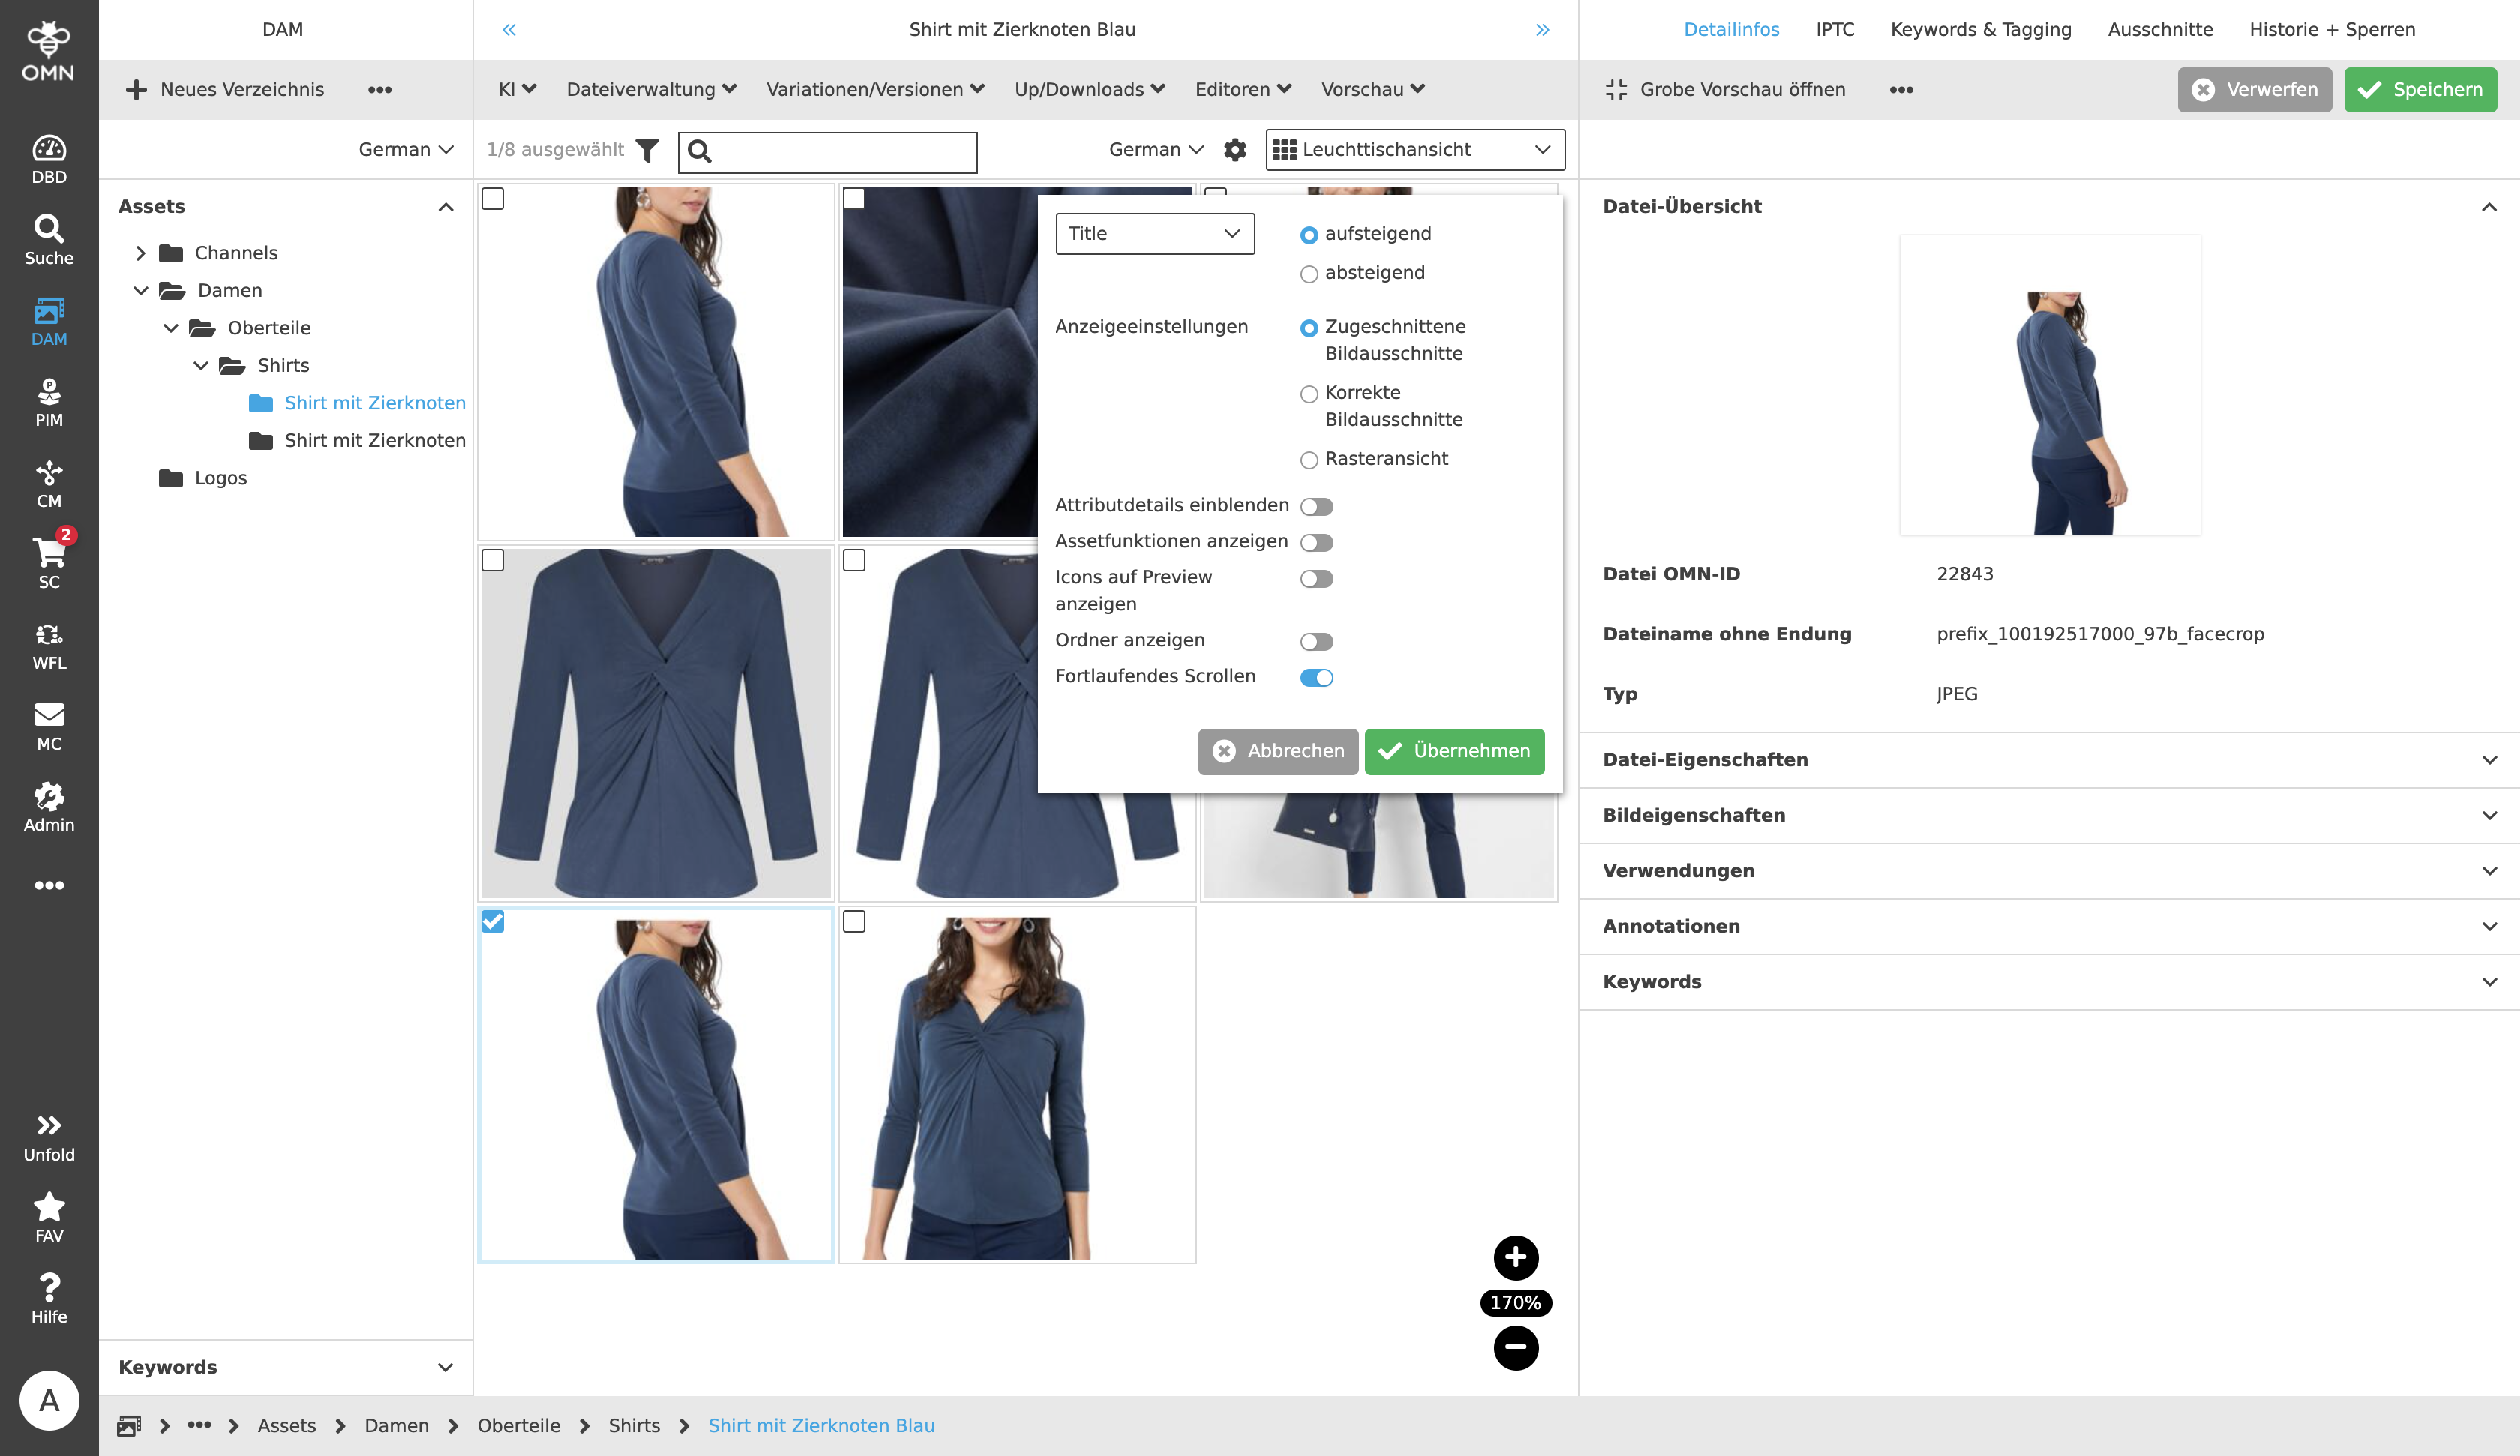
Display settings
Clicking on the settings icon in the statusbar opens a dialog in which various settings can be specified.
The files can be sorted in ascending or descending order depending on the attribute detail, e.g. by title or media code.
In the Light Table View, there are also various display options for presenting the content. Depending on the requirements, three different image sections can be displayed:
-
Cropped image mode
-
Correct aspect ratio mode
-
Liquid mode
In addition, toggles can be used to show and hide various information:
-
Show attribute details
-
Show asset functions
-
Show icons on preview
-
Show folders
Cropped image mode
The "cropped image mode" display option shows all files located in a folder in a cropped version. This means that it is cropped to show the tile in which the file is shown, e.g. the image of a fashion model, fully filled.
Correct aspect ratio mode
Images with correct aspect ratio, unlike cropped images, scale the files so that the entire image fits within the specified tile.

Liquid mode
The liquid mode displays complete, uncropped images scaled to the size of a non-visible frame or a specified line height. In this display option, attribute details can only be shown "on hover".
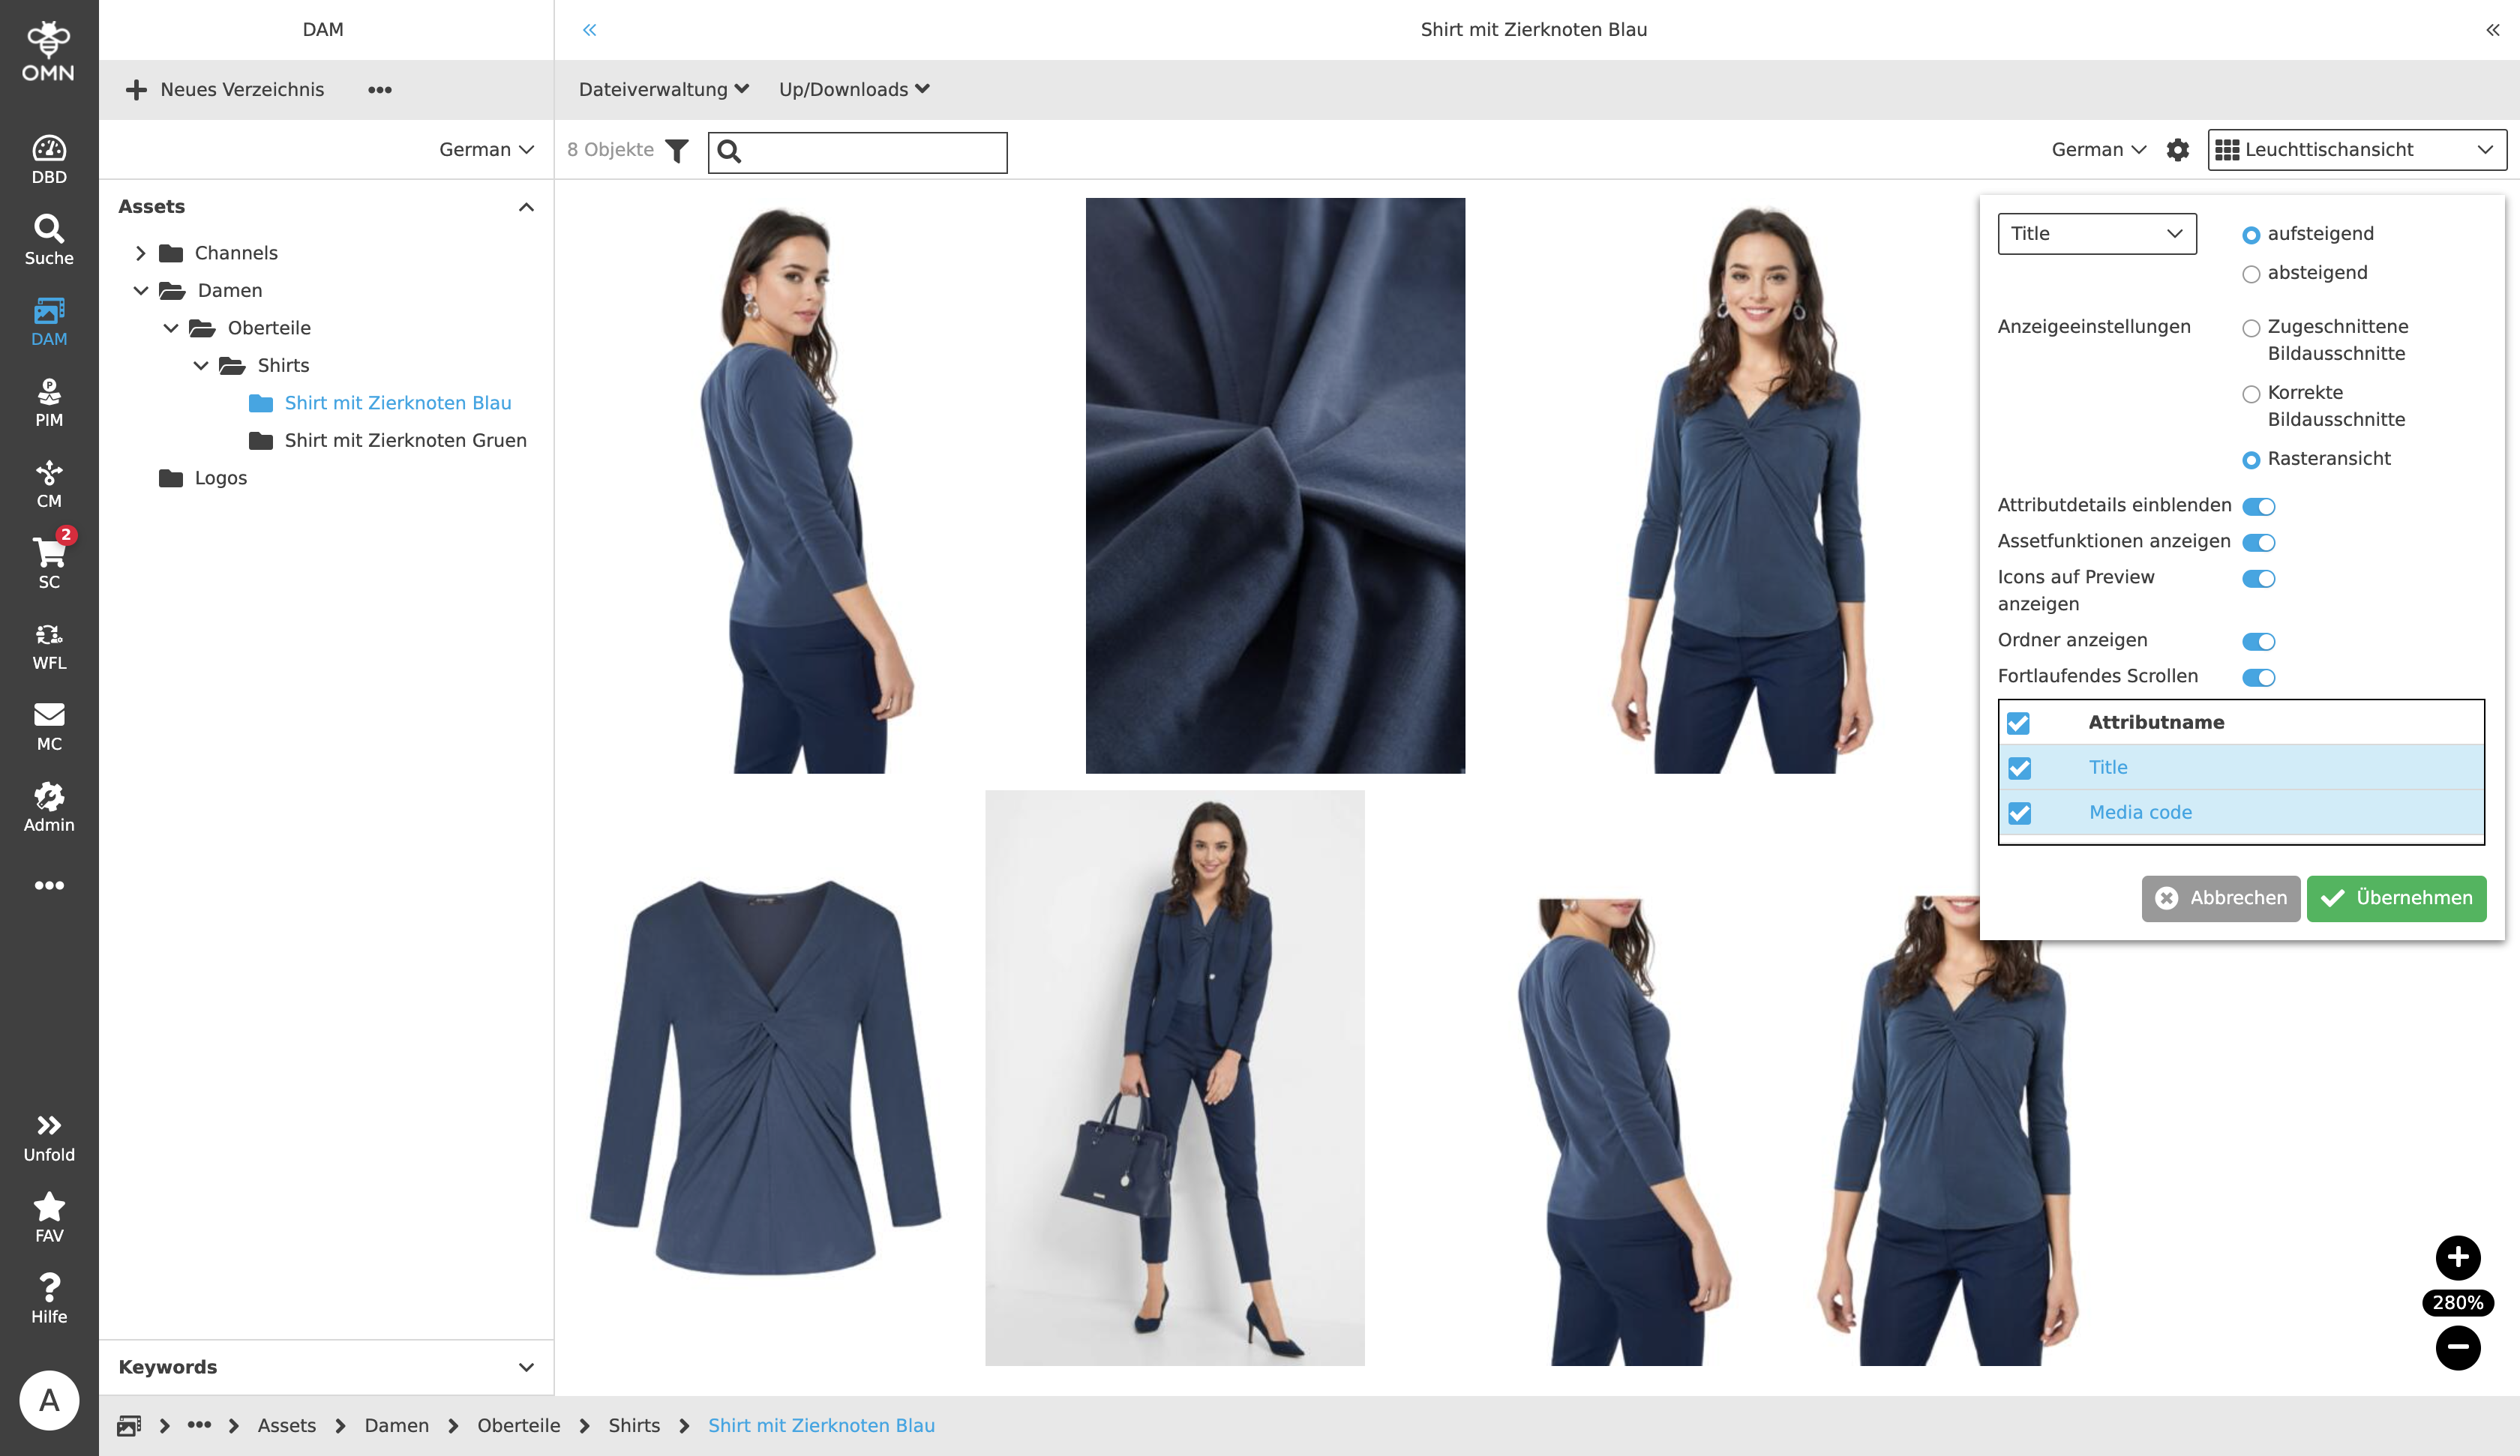
Show attribute details
Depending on the settings selected, this option displays the title and other information (e.g. path, date, …) below (or, in case of liquid mode, on top of) the preview of the file.
Show asset functions
In all of the three display options, after activating the "Show asset functions" toggle, the asset functions (functions that can directly be executed from the asset) are now displayed in the form of icons/symbols in an asset function bar (only visible on hover over the tile). Such asset functions could be, for example, opening the Aperture tool, the download function, deleting a file or displaying the full screen view.
A tooltip displays a short description of the function.
Show icons on preview
By activating the "Show icons on preview" toggle, all icons that are allowed/activated within the user settings (display options) are displayed in the top right corner inside the icon bar of the tile (in liquid mode directly on the preview on hover).