3D Viewer
This section describes how 3D files can be managed and rendered.
Configuration of 3D-Renderer Function plug-in
This page describes how to configure a 3D-Renderer-function.
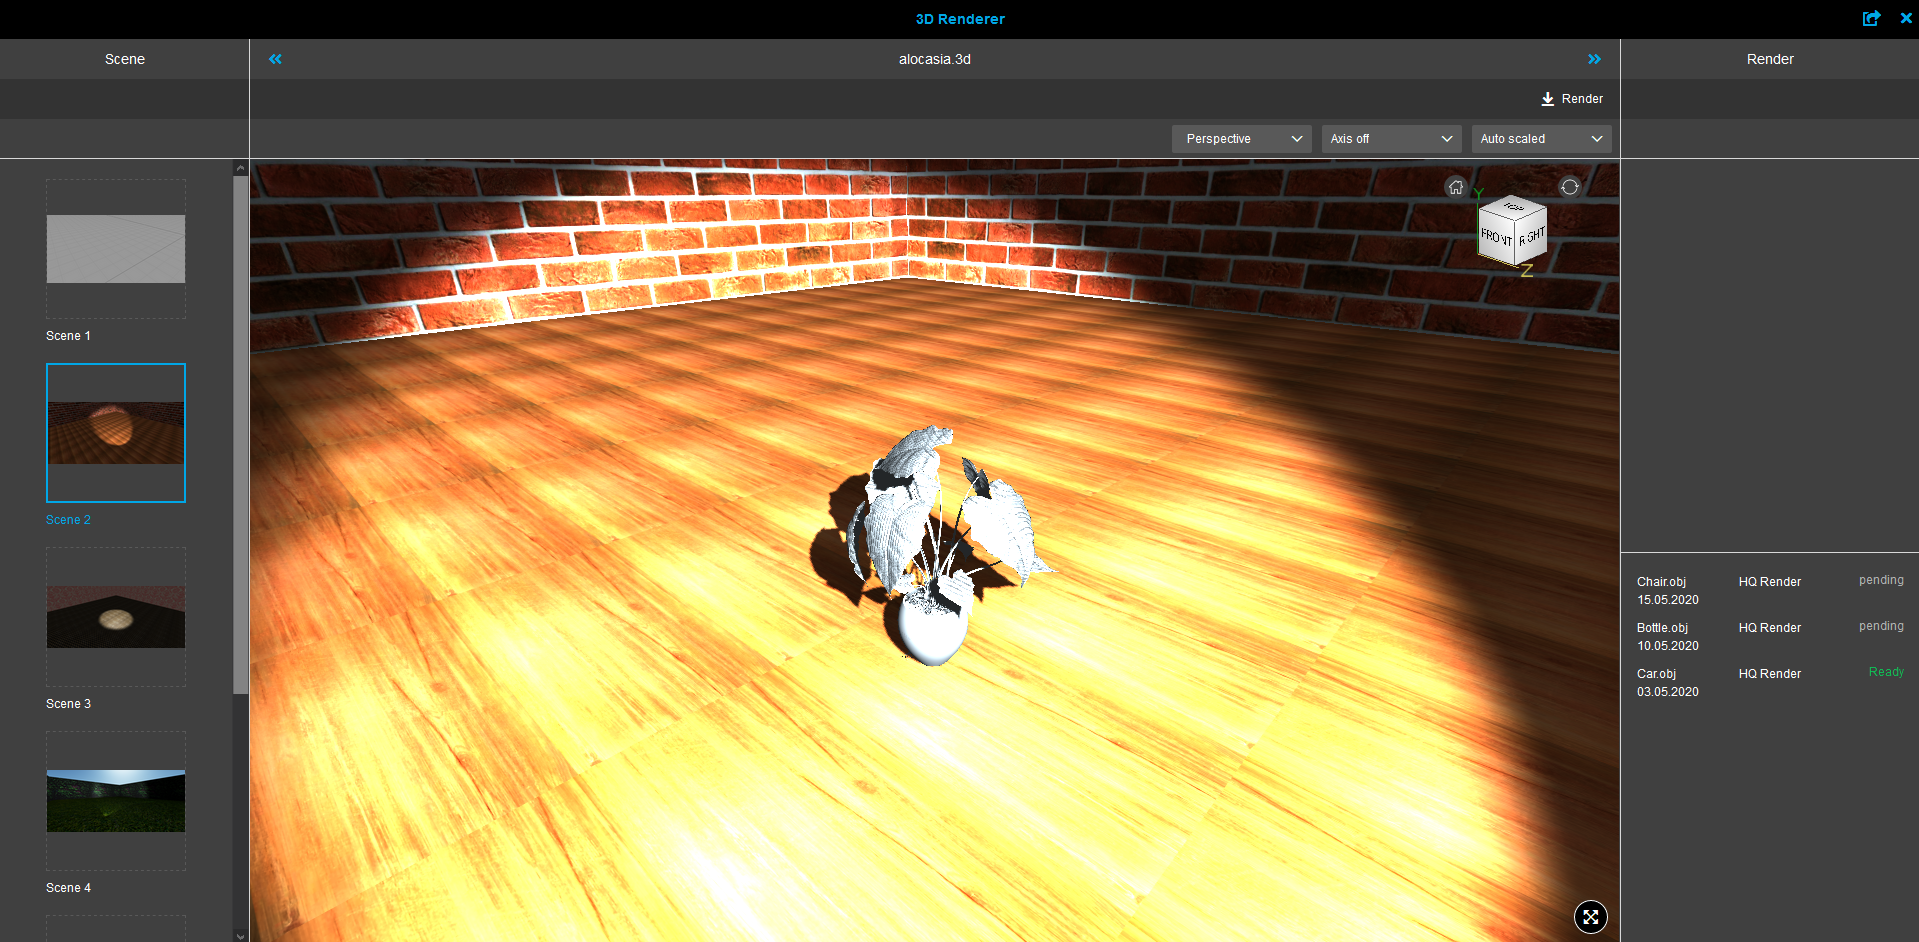
| The Functionality of 3D-Renderer will be available only for HTML-client. |
Configuration of 3D-Renderer function in the config-client
1. Create 3D-Renderer function instance
-
Open "Function - plug-ins"→3DRenderer".
-
Create the configuration of plug-in:
-
Open mandator → Function plug-in → 3D Renderer. → The ‘3D Renderer’ plug-in is available in the list Function-plug-ins.
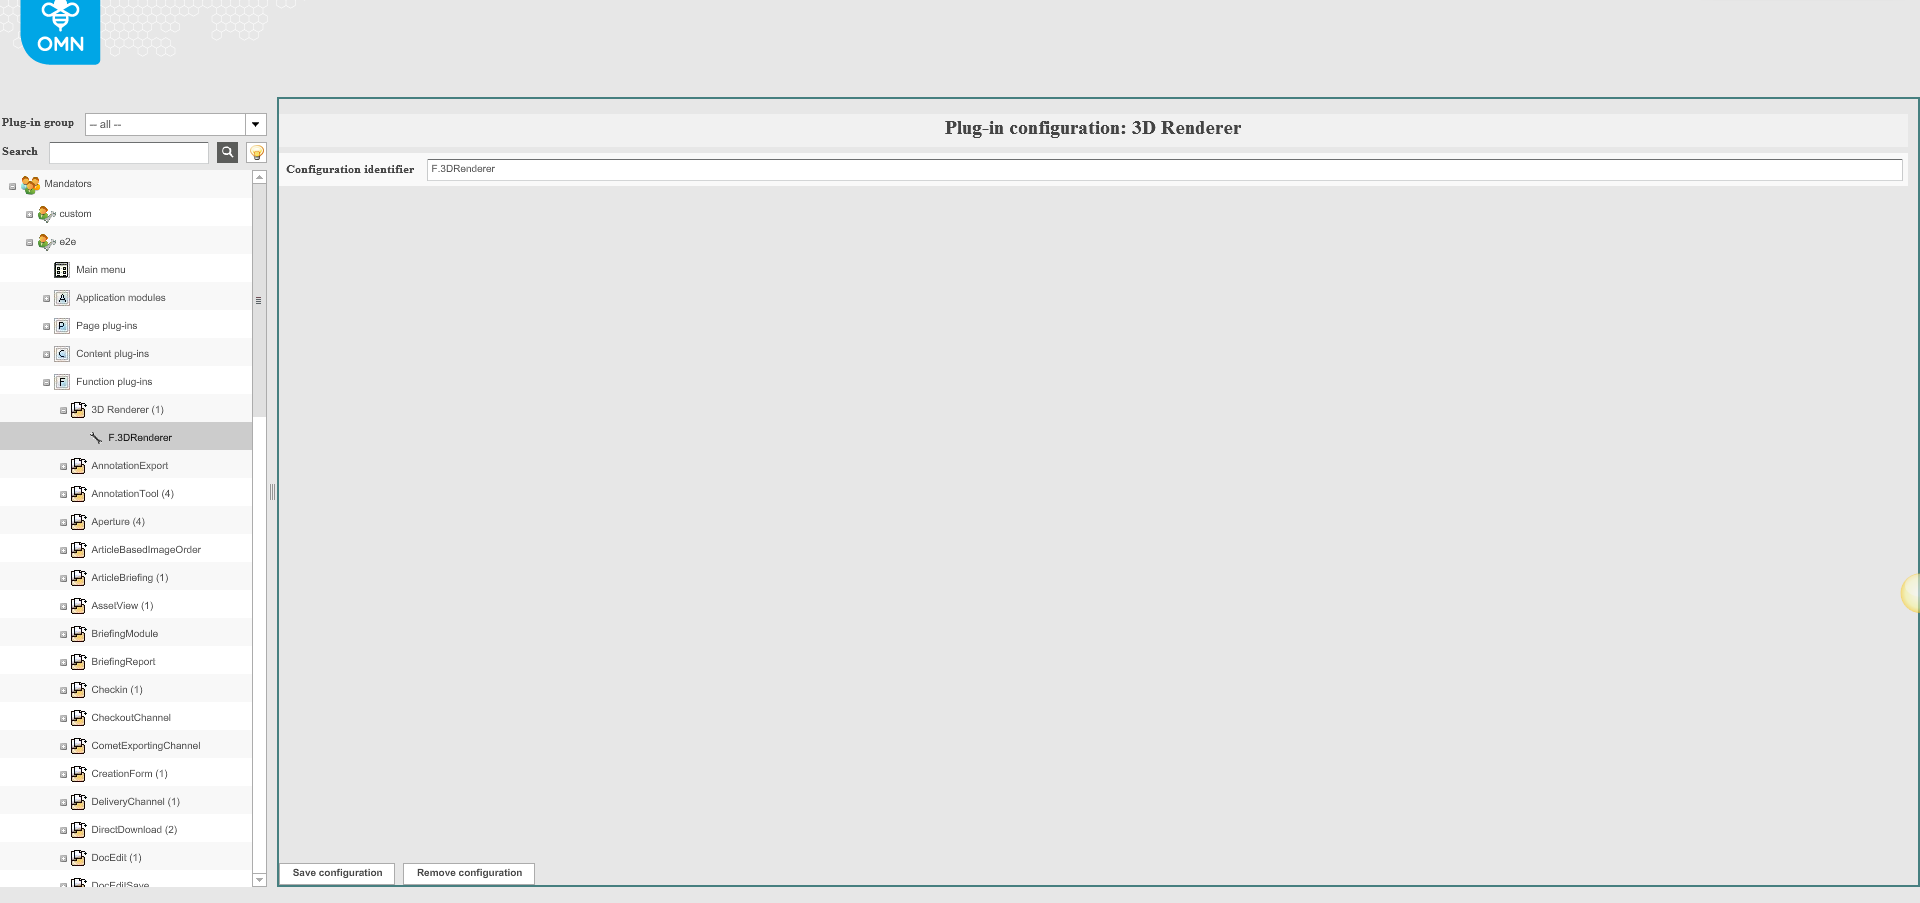
| It is possible to create several configurations. |
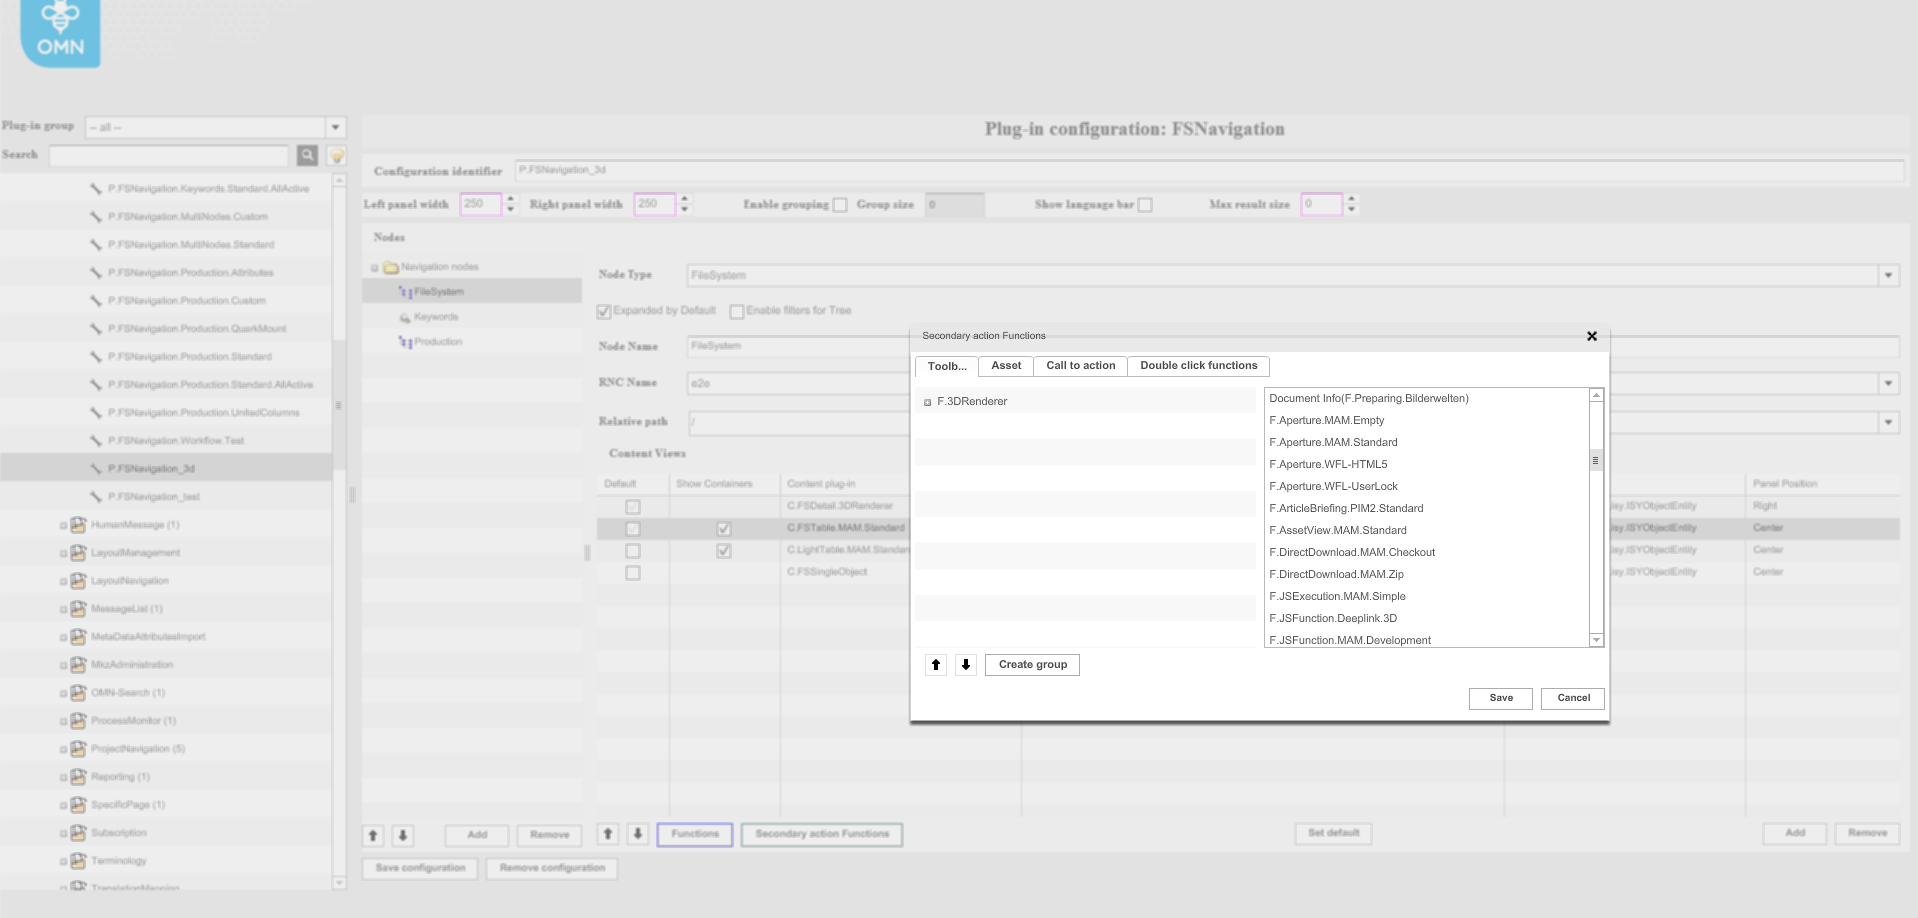
2. Add function to Content view
-
Add function on content views in FSNavigation (mandatory → Page plug-in → FSNavigation):
-
Open FSNavigation.
-
Select node type.
-
Select necessary content view.
-
Open Secondary action Functions window. (In the list, there will be available as many functions as created configurations).
-
Add ‘3D Renderer’ function on content view via dragging from the right column to the left.
-
Save changes.
|
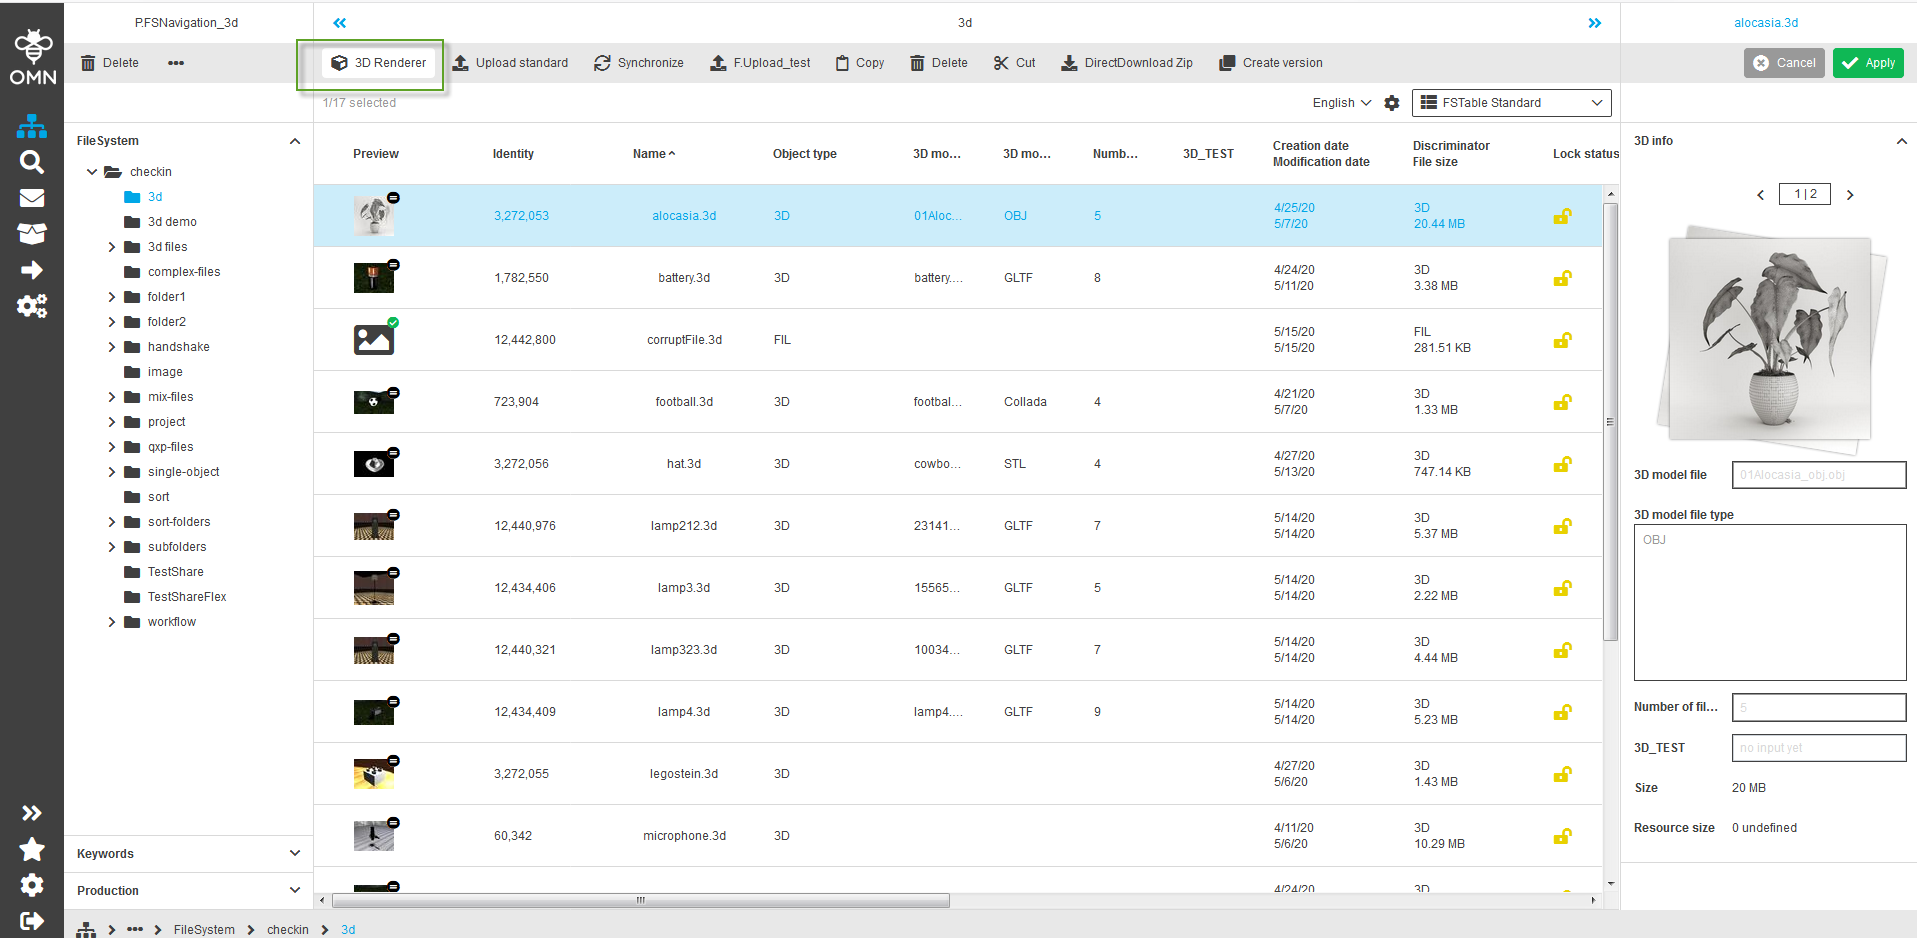
Functionality is available for:
|
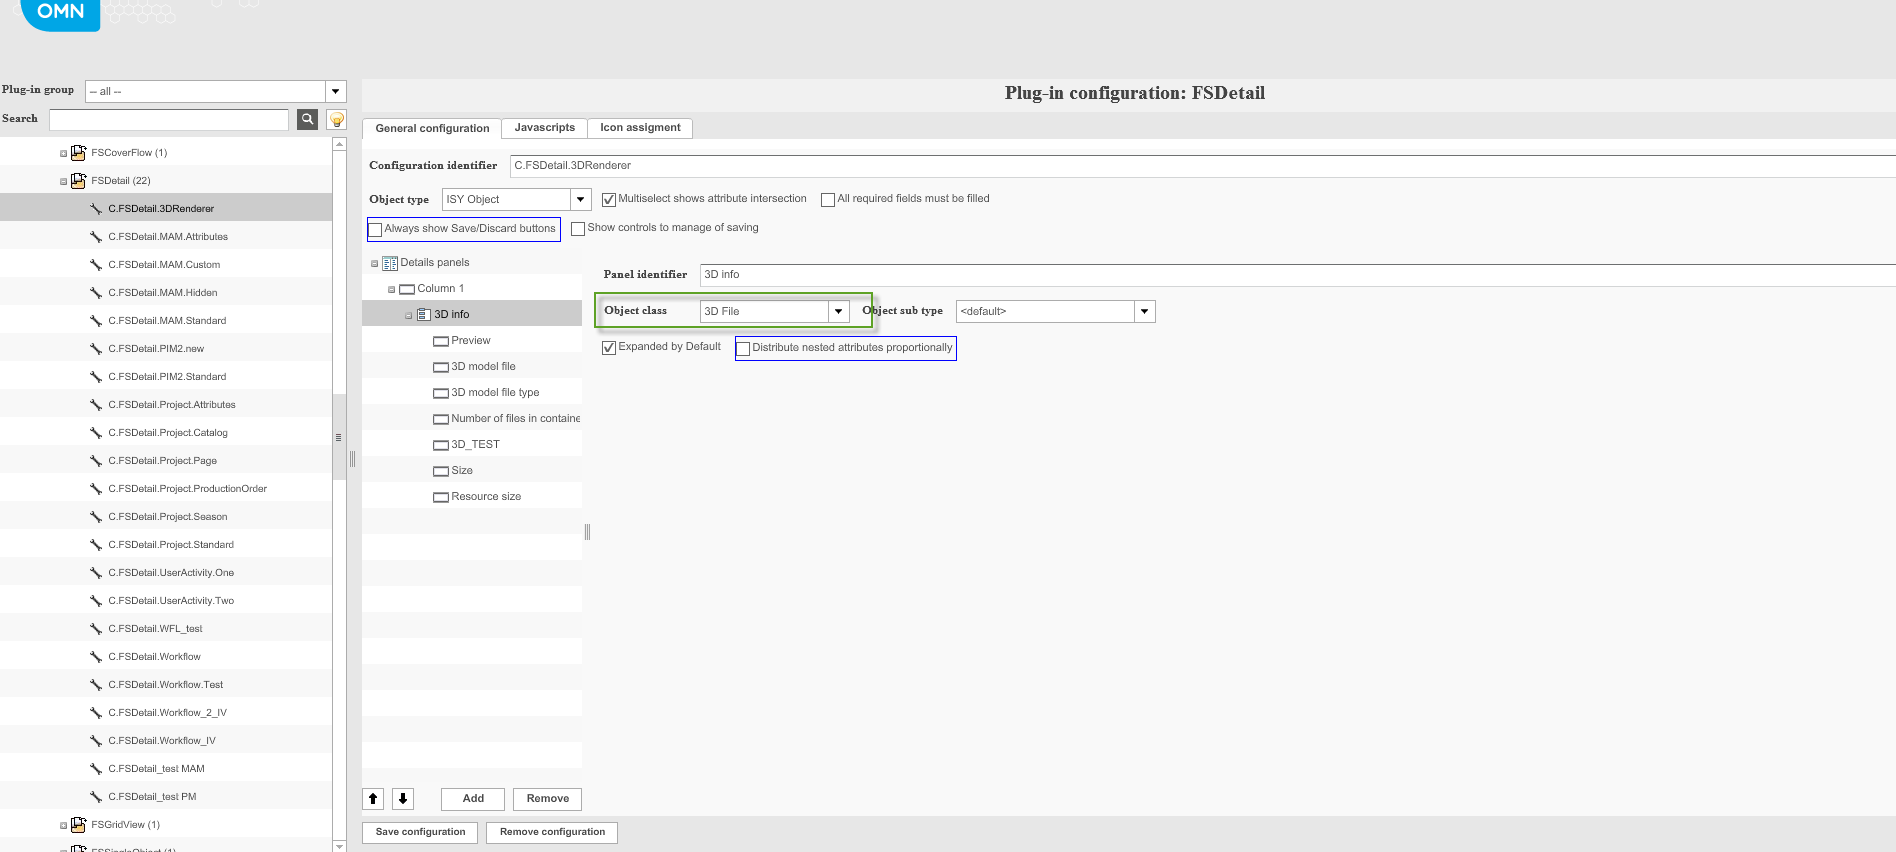
3. Add .3d expressions for content view
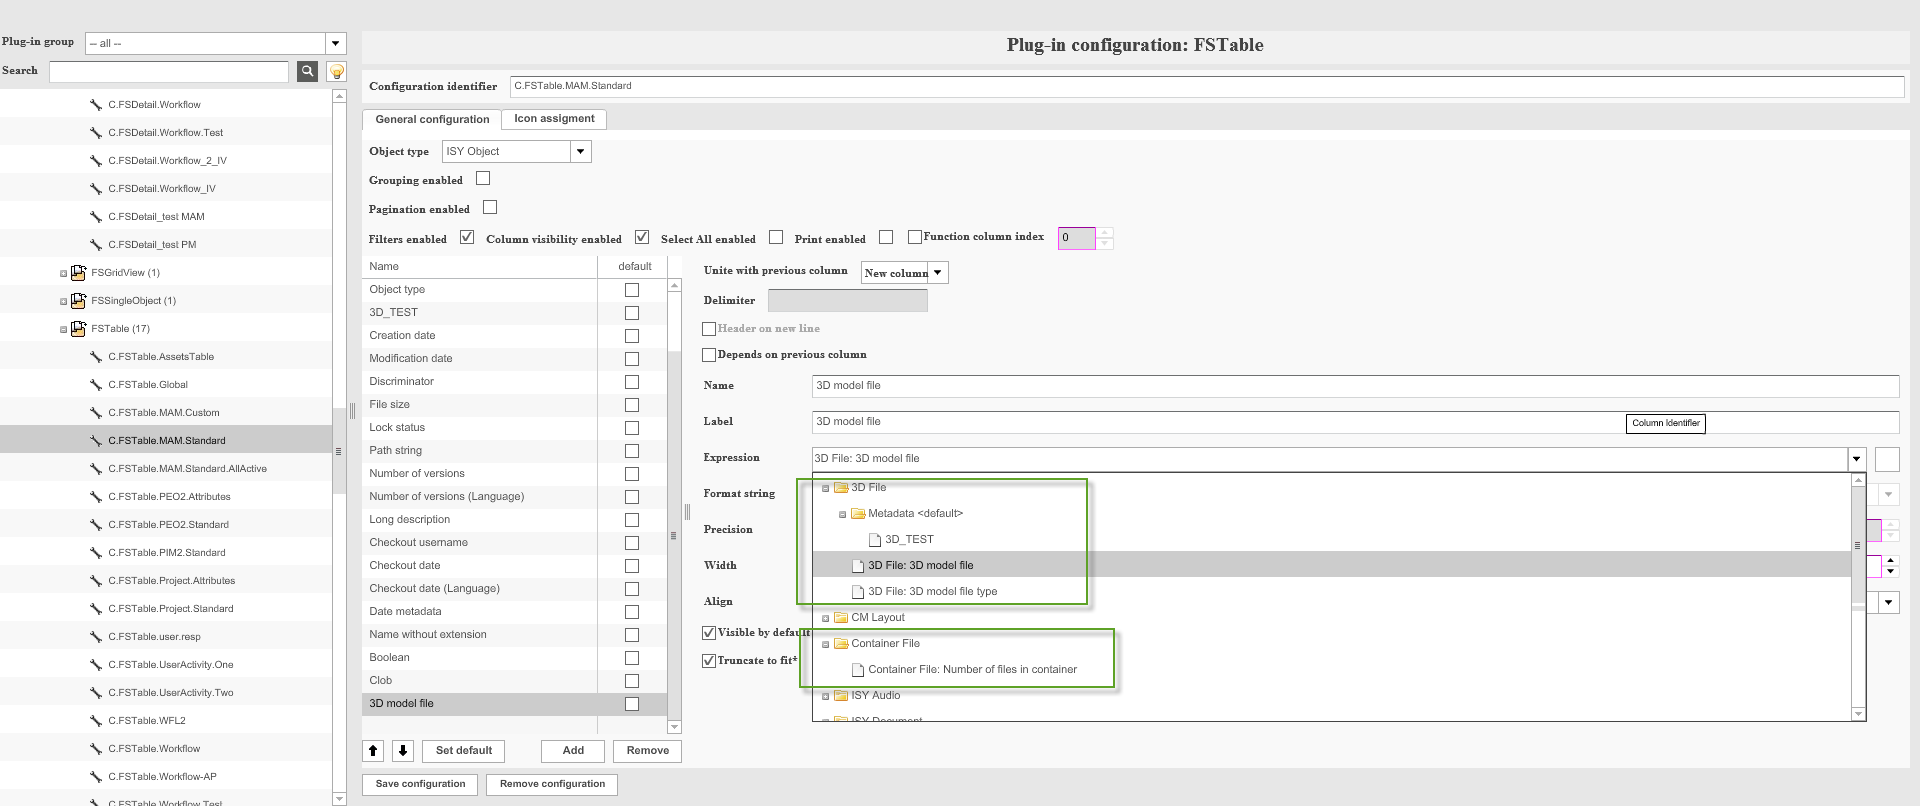
During the development of the new plug-in a ‘3D File’ object type was created. It became possible to create in ‘Metadata fields’ and add new static attributes to the content view:
-
Creation: Possible create a new attributes for ‘3D File’ Object type in Metadata fields ( mandatory → Application modules → MAM → Metadata fields)
-
.3d expressions:
Static:
-
3D File: 3D model file (name of the main file of 3D model).
-
3D File: 3D model file type (type of the main file of 3D model).
-
Container File: Number of files in container (number of files in container).
Dynamic:
-
expressions that were created in ‘Metadata fields’ for ‘3D File’ Object type
-
Add .3d expressions:
-
Open configuration of content view.
-
Select object class '3D file (actual for FSDetail).
-
Add new element.
-
Add .3d expressions: 3D File: 3D model file, 3D model file type; attribute created in Metadata fields; Container File: Number of files in container.
-
Save configuration.
The following picture shows the configuration of a 3D-Model-File.
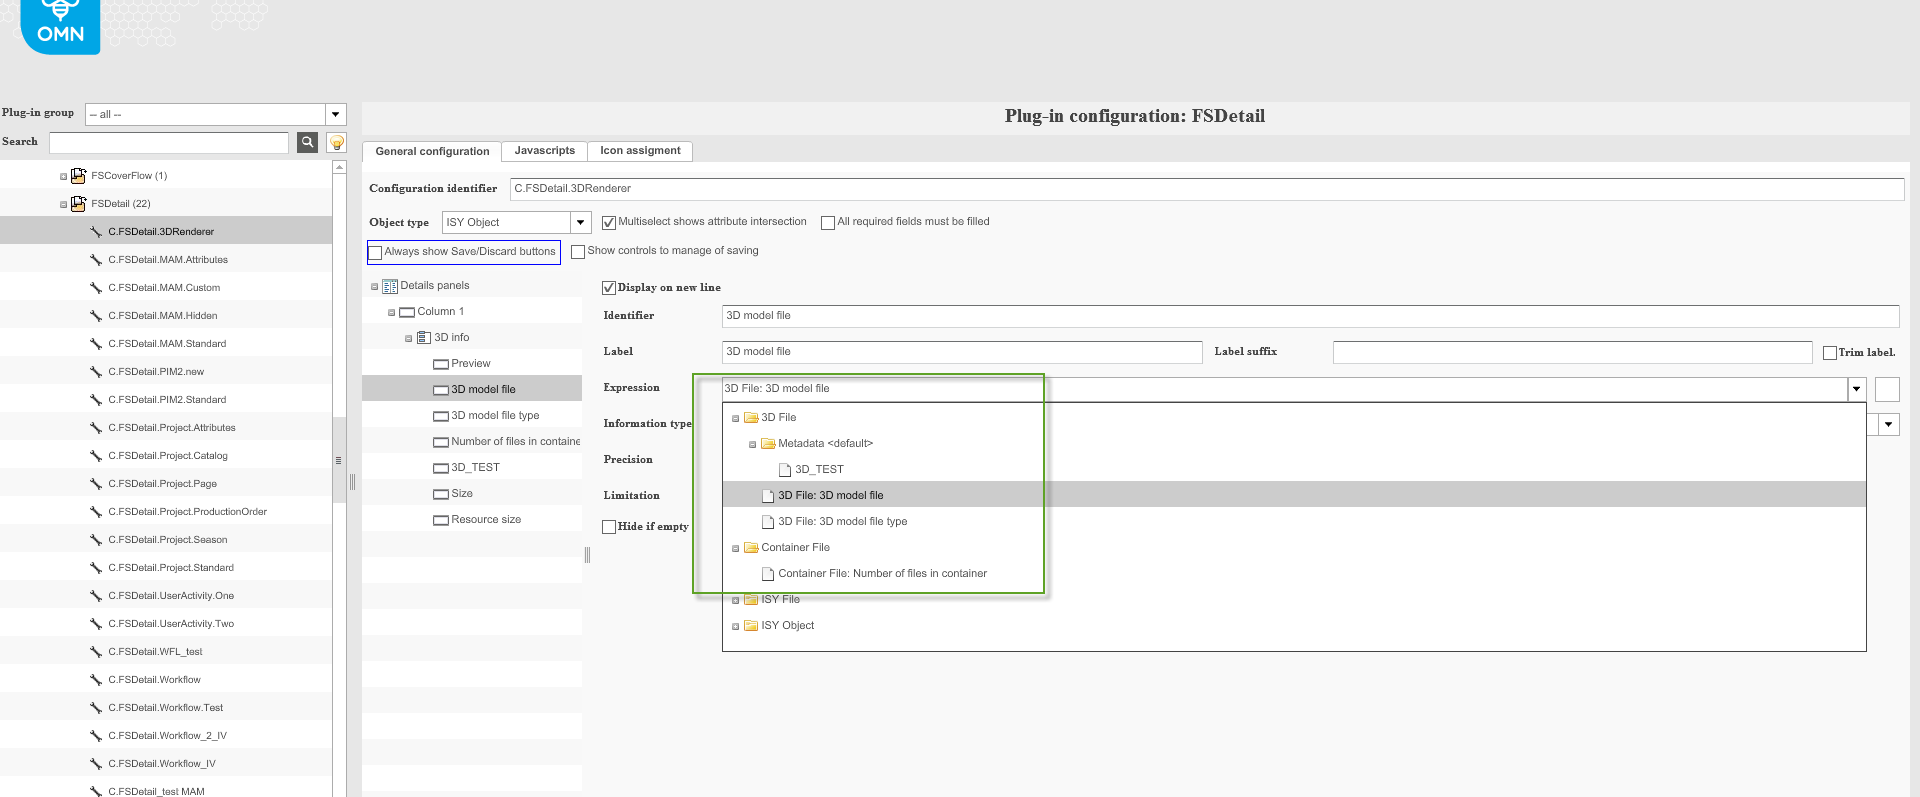
The following picture shows the configuration of 3D-File and Container-File.
3D File Creation
General information :
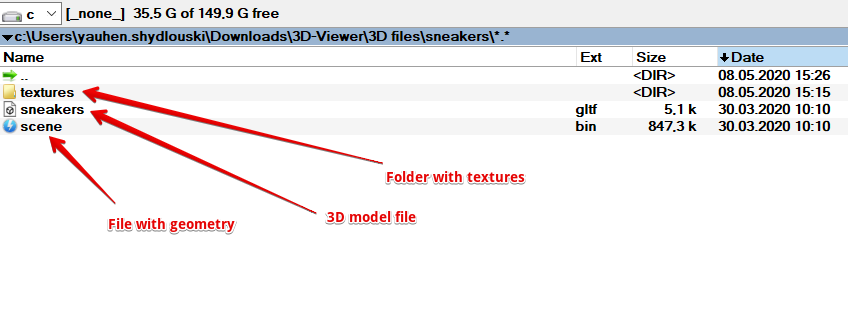
A 3D-file is a container for the following files:
-
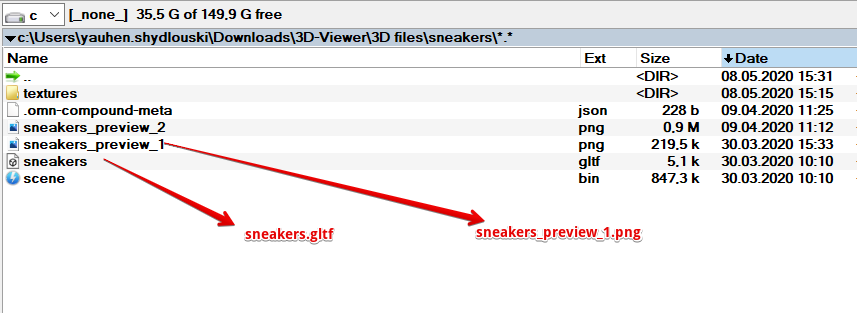
File of a 3D-model (e.g. sneakers.gltf);
-
Textures and materials structuring. (It can be a folder or just files in a root);
-
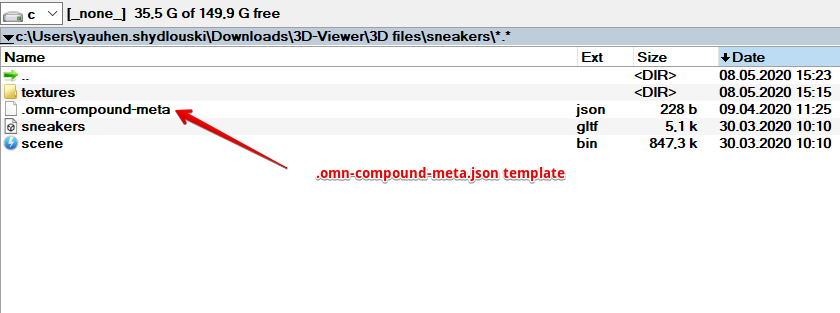
Template .omn-compound-meta.json (this file contains metadata);
-
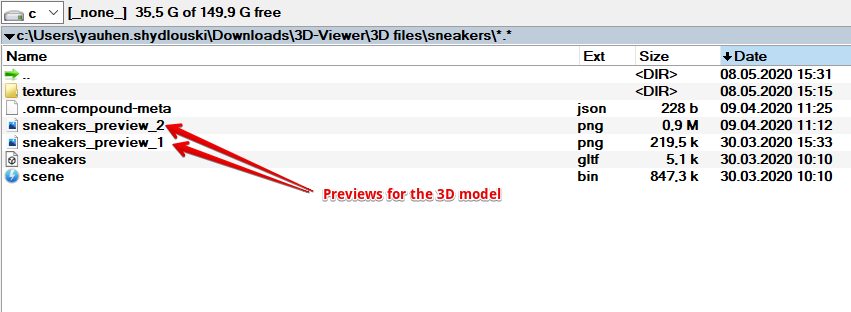
Previews of the 3D-Model (extension .png). You can add several previews from different perspectives.
How to create a 3D-file?
To create a 3D-file, a user should complete the following steps:
1) Create a new folder and name it (e.g. sneakers):

2) Copy or add to this folder a file with a 3D-model or a file with geometry (e.g. scene.bin). Also add a folder or files with textures:
3) Copy or add to this folder a template for .omn-compound-meta.json file.
4) To this folder, copy or add image(s) with previews of a 3D-model (one or more).
5) Make amendments to the template .omn-compound-meta.json file. Add names of your 3D-model-file and preview file(s). You can edit this file e.g. with notepad or notepad ++.
6) The following image shows the template .omn-compound-meta within the .json-file:
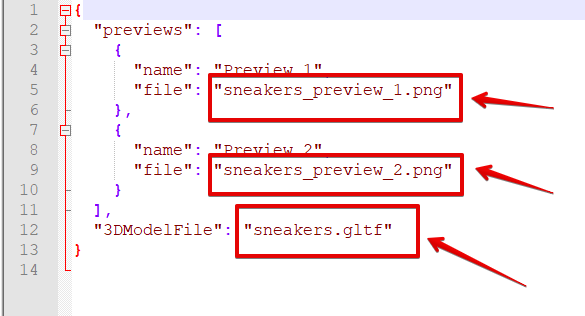
Following template can be used to create JSON files:
{
  "previews": [
    {
      "name": "Preview 1",
      "file": "example_preview_1.png"
    },
    {
      "name": "Preview 2",
      "file": "example_preview_2.png"
    }
  ],
  "3DModelFile": "example.gltf"
}
Instead of samples marked in yellow, a user will have to mention the existing file-names, add or remove previews according to what he actually has.
You can download the template .omn-compound-meta.json using this link: .omn-compound-meta.json
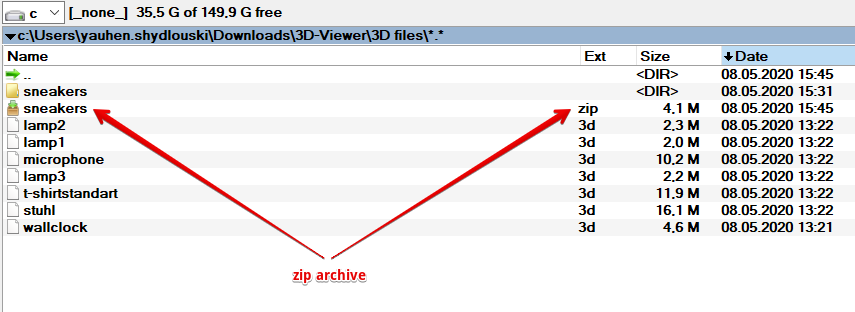
7) Convert the folder to a zip-archive with zero compression (e.g. sneakers.zip):
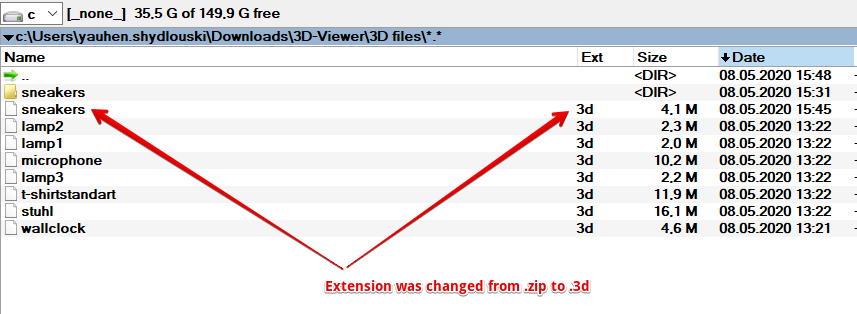
8) Change the file-extension from .zip to .3d manually:
For Mac users:
The content of the folder must be zipped, not the folder itself. You can’t use the finder-functionality to zip files, because the json-file starts with a dot. Therefore, it won’t be displayed and zipped.
In short:
Enter the directory via command-line and execute following command:
cd 3d-directory
# 0 no compression
# r add subdirectories
# x exclude etra attributes
zip -0rX ../3dfile.3d .
If you don’t pass option "X", the json-file will be added to the zipped structure. But it seems that the synchronizer unpack that file and doesn’t recognize the file as a 3D-file.