IDP Login Configuration
The IDP (Identity Provider) login refers to the process of authenticating a user via an external service that manages identities.
The user can log in with an account from an external identity provider, e.g. Azure AD.
This login approach needs to be configured in Keycloak backend depending on the requirements of the customers.
OMN does not manage the authentication and profiles of the IDP users since they are external identities, but the user could map them to work with OMN smoothly.
Currently, the following mappings are supported:
-
Mapping Activation for OMN Login (Mapping the activation state)
According to the requirements of the customers, the IDP logins could be configured in the keycloak admin console.
Keycloak supports both: OpenID Connect and SAML protocols.
This guide will focus on the OpenID Connect protocol.
It needs the administrator access to the keycloak admin console for configuring the IDP logins.
The credentials could be found in the keycloak.env file from the OMN server.
Furthermore, access to the MS Entra Admincenter (e.g. as Global Administrator) is required.
IDP Configuration Example - Azure AD
To configure an IDP login with Azure AD, two setup steps are necessary: with the Microsoft Entra Admincenter (Azure AD) and the Keycloak Admin Console.
The steps in the following chapters should be followed.
Microsoft Azure AD
-
Log in to your admin console and navigate to the Applications section:
-
Select
Applications→App Registrations→New registration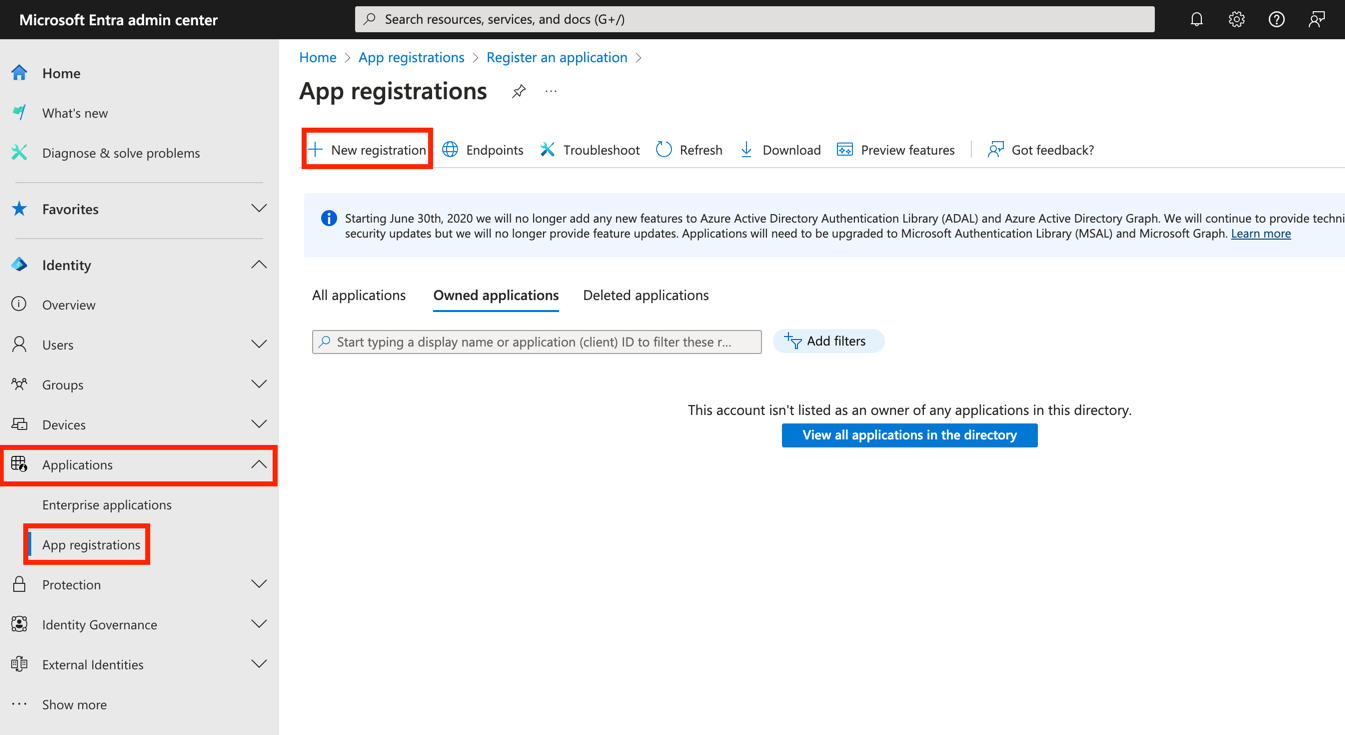
-
Provide a name for the application you are registering and select the account type that you would like to be supported →
single-tenant.
Then click the register button.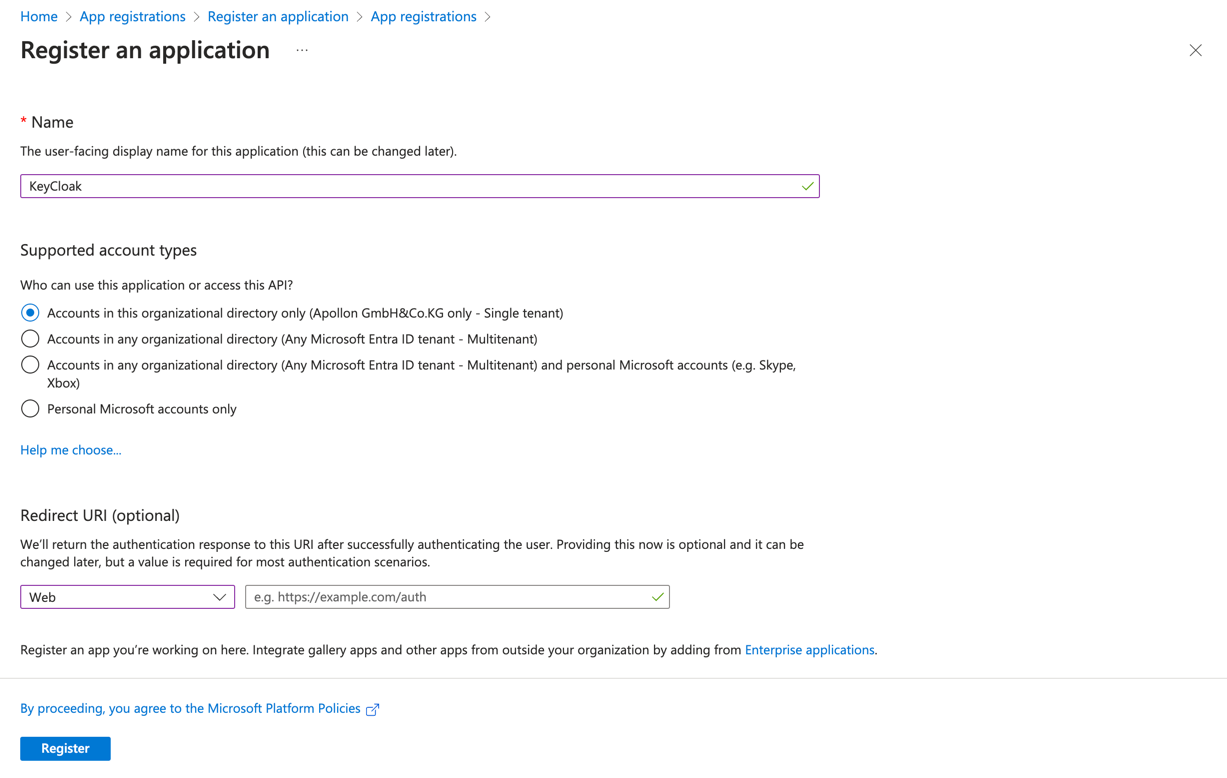
-
After you have registered your application, you will be returned to the Application registration’s overview page.
You need to save yourApplication (client) ID, since you will need it later.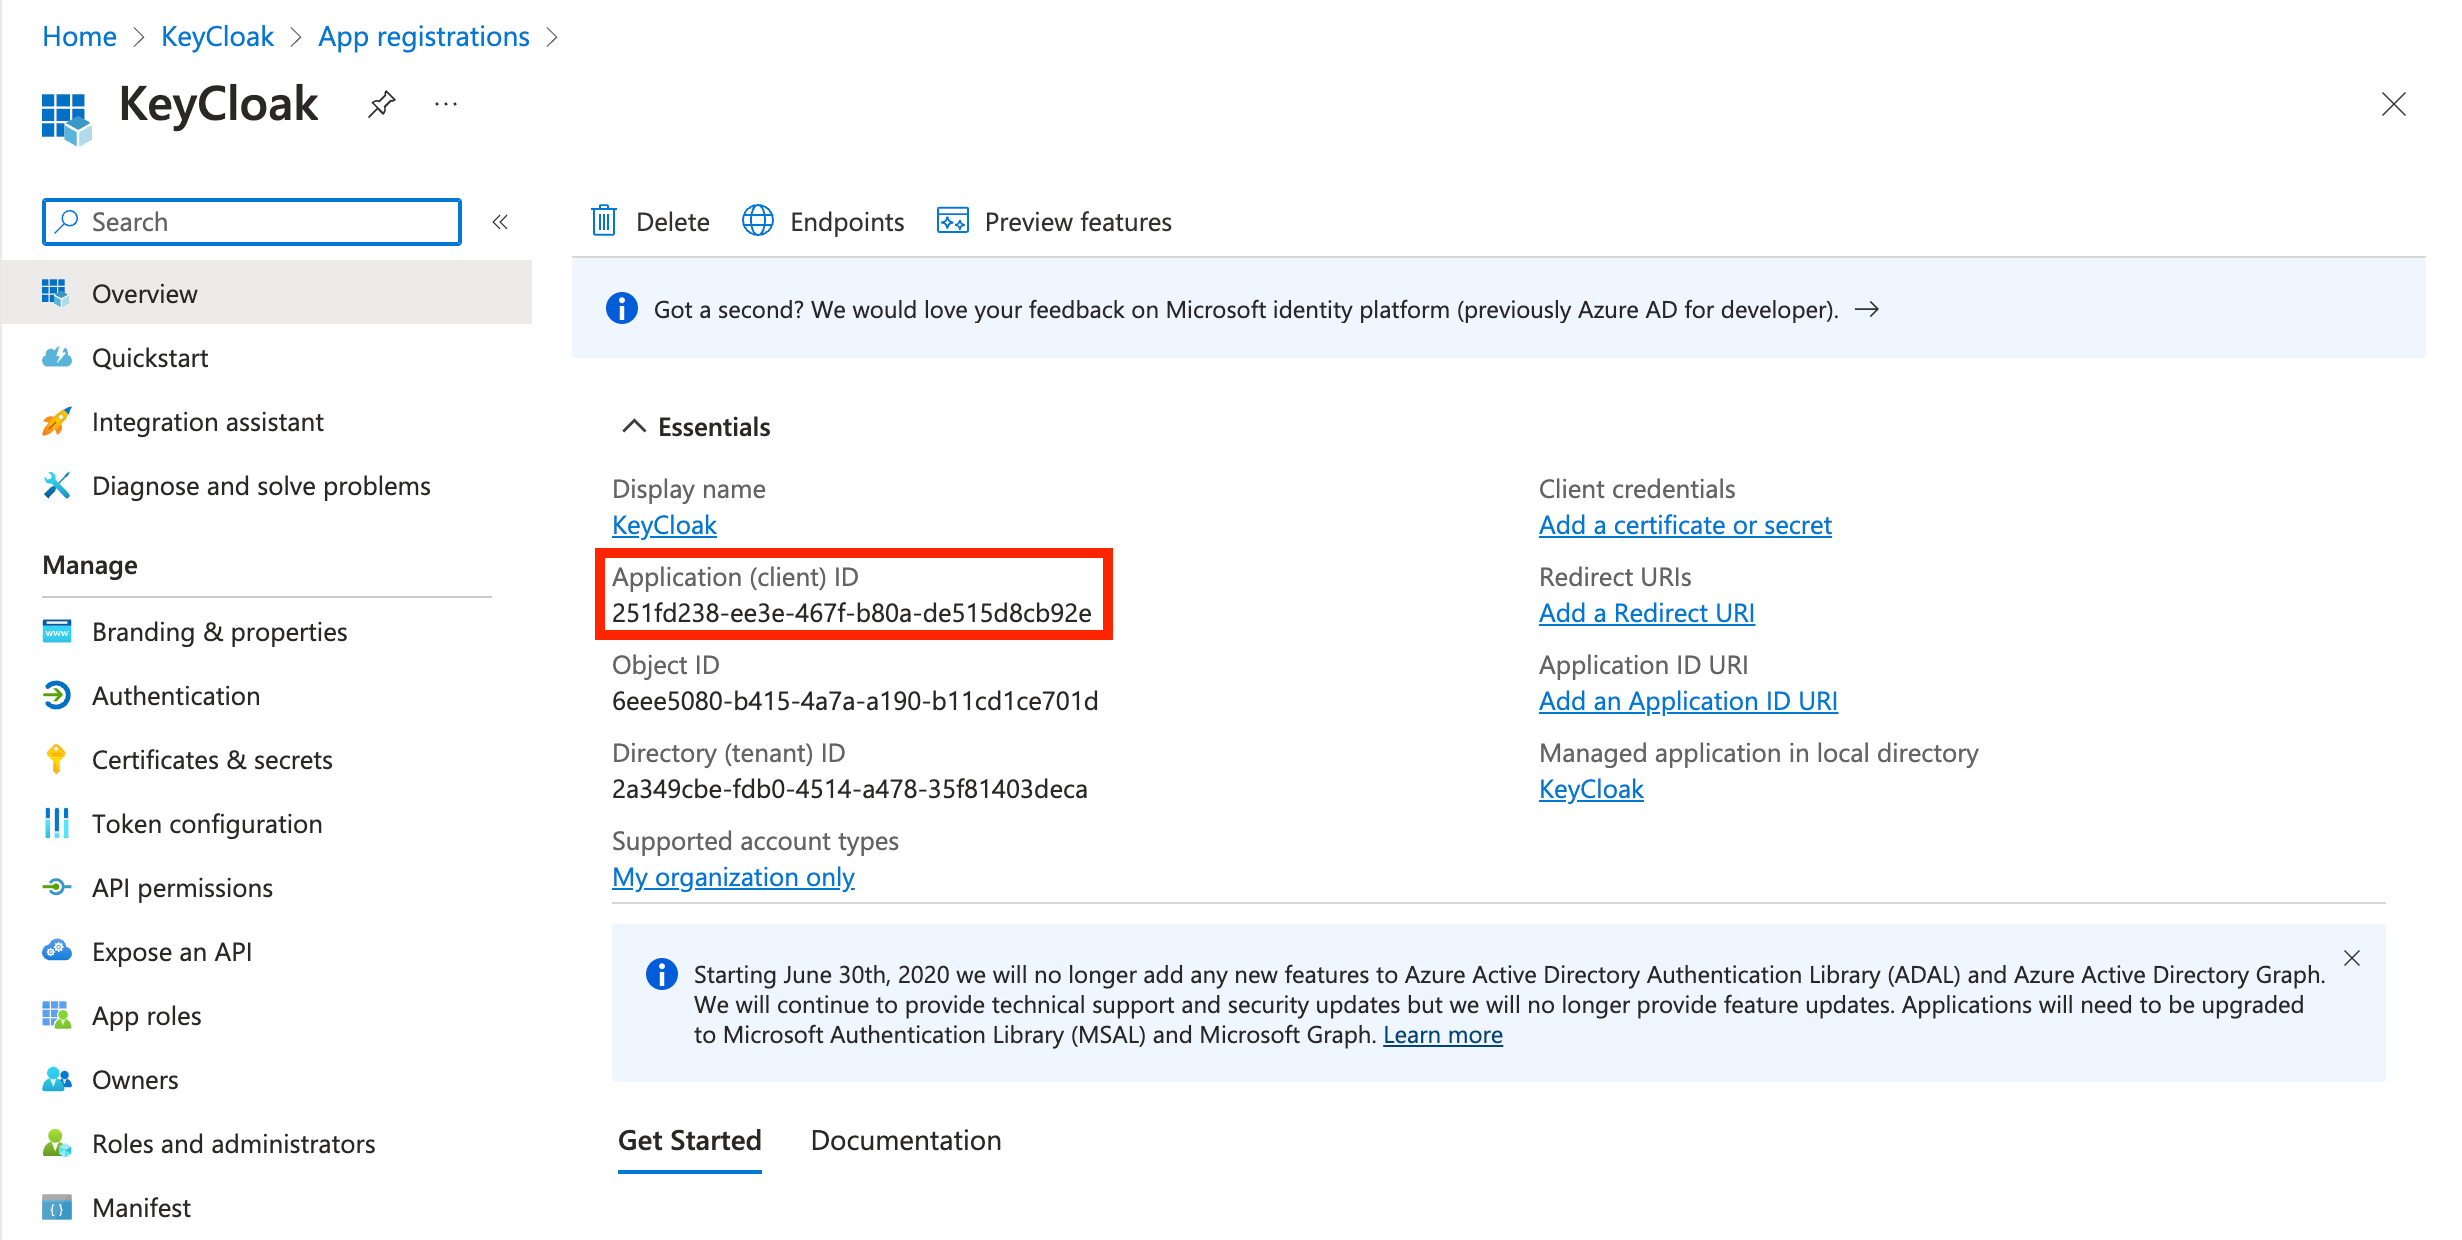
-
Create a Client Secret for your Application:
-
On the left side, navigate to
Certificates and secrets. Create aNew client secret.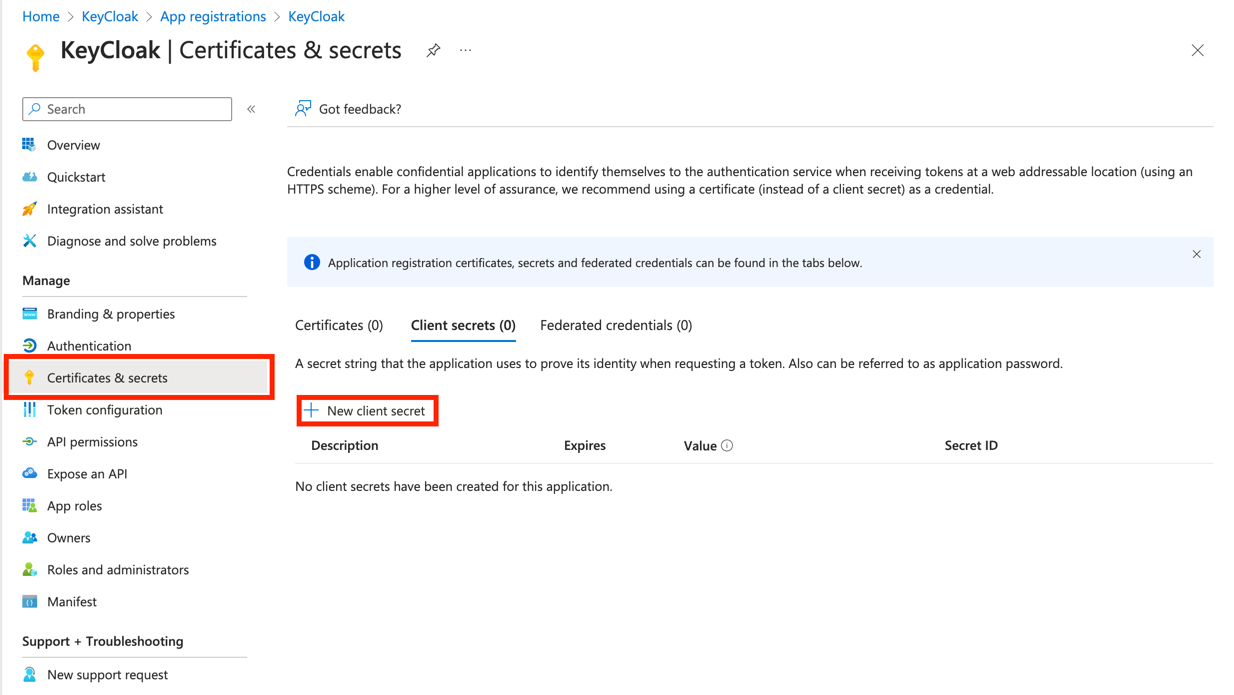
-
Add a description for your new secret and set an expiration for it.
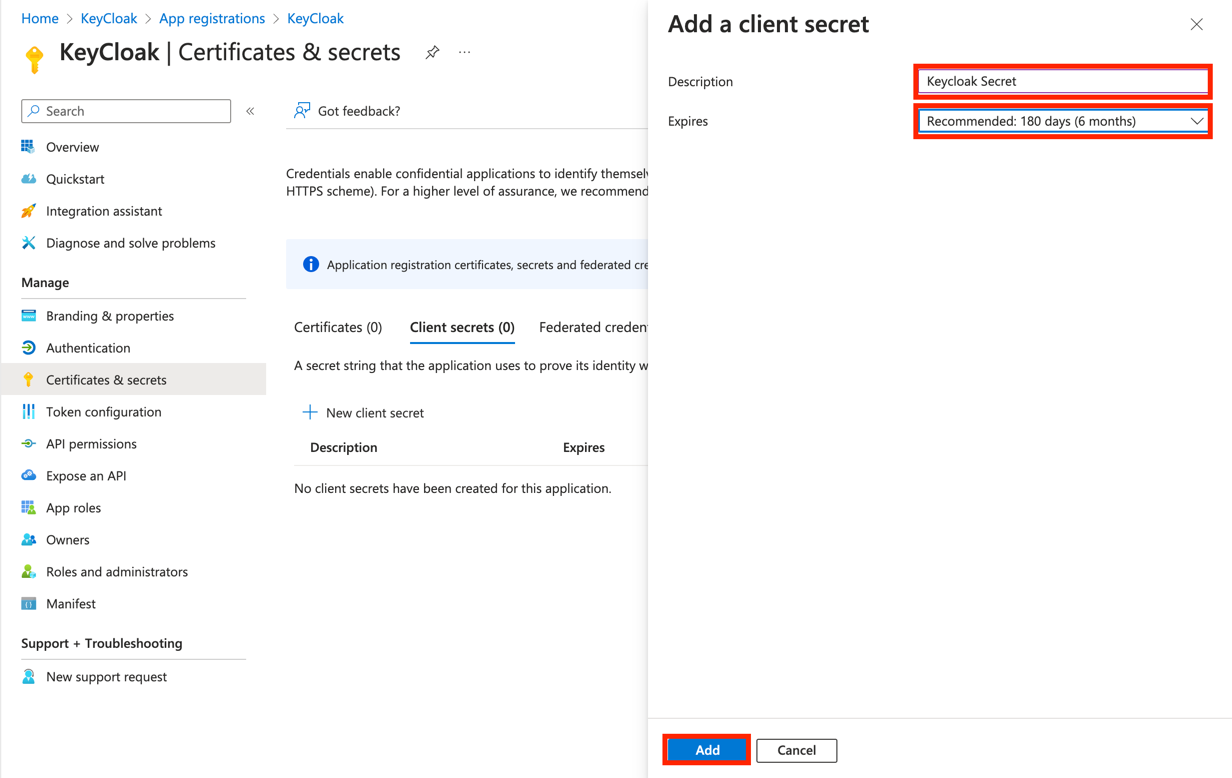
-
Please save the
Valueand theSecret IDfor later.
-
-
Add the Redirect URI generated from Keycloak to the Azure Application Registration.
-
Select
Add a Redirect URI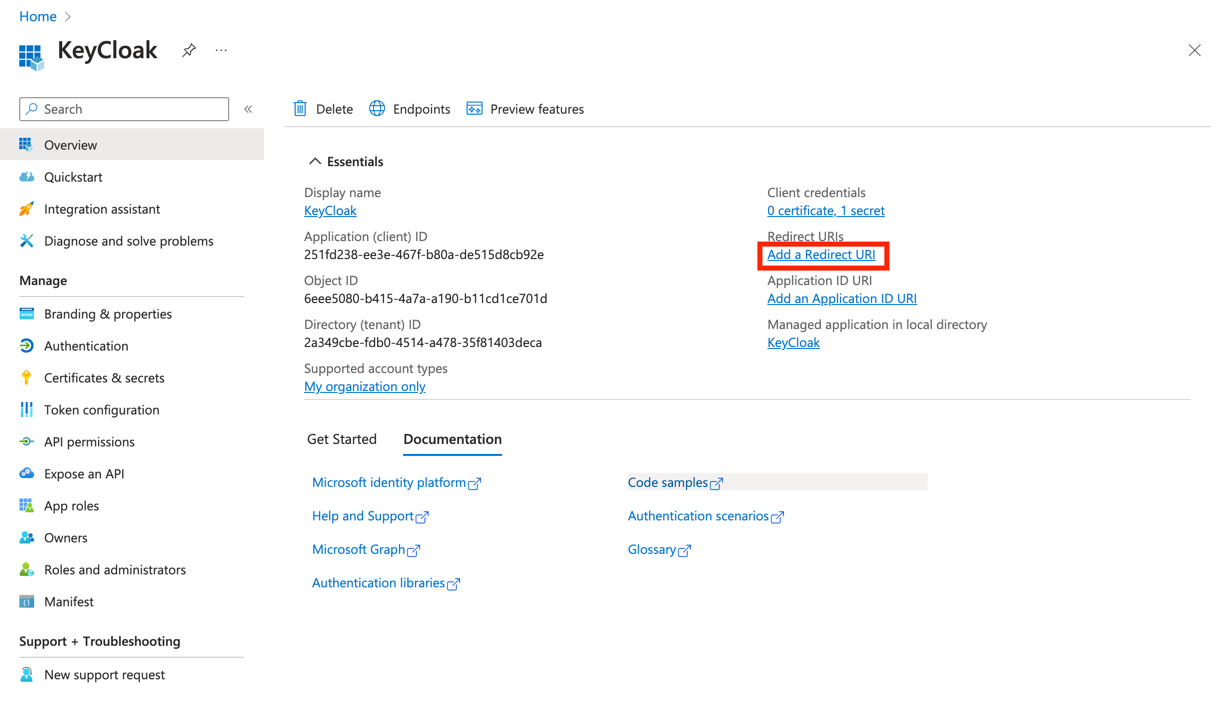
-
Select
Add a plattform→Web
-
Add your
Redirect URIyou saved when configuring your identity provider in Keycloak and paste it into the Redirect URI option for the platform you’re configuring.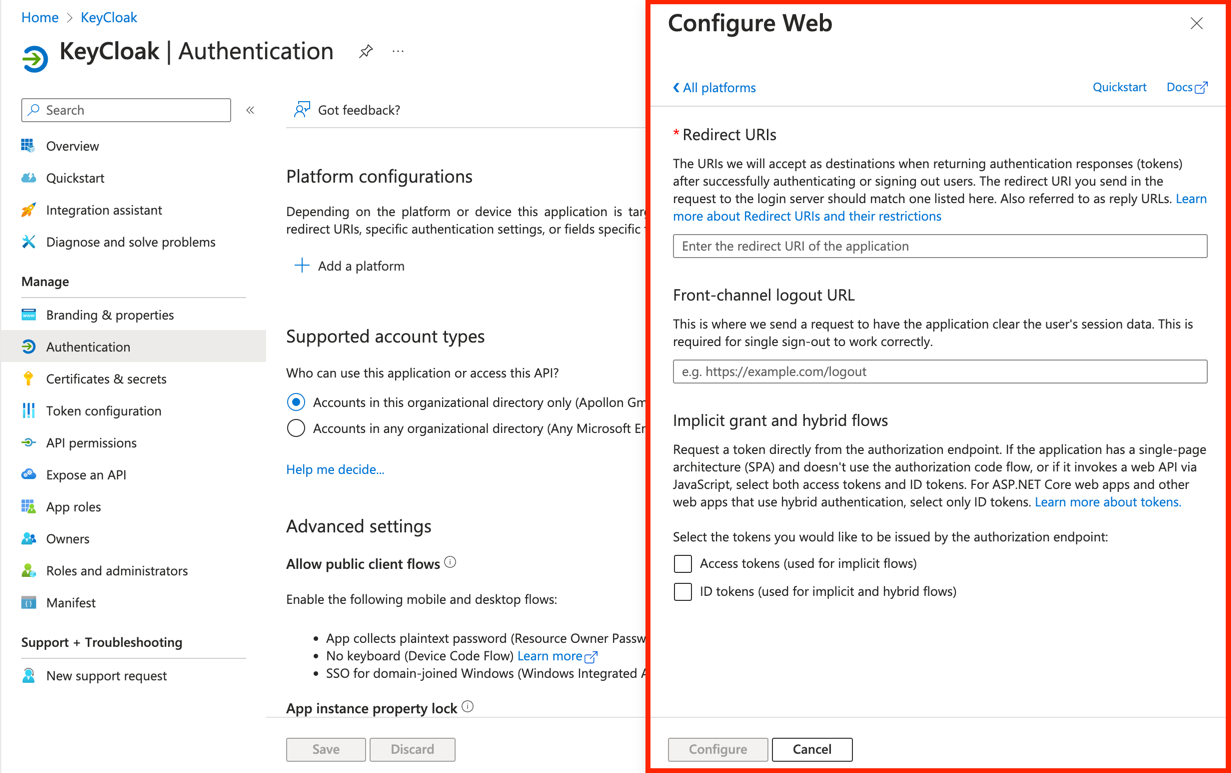
-
Keycloak
-
Create OpenID Connect v1.0 as an Identity Provider in your Realm
-
Log in to the Keycloak admin console and make sure the
OMNrealm is selected. -
Create Realm and Client in Keycloak Administration Console
 Figure 1. Create IDP with OpenID Connect Protocol
 -
Select
Identity Providers→Add provider→OpenID Connect v1.0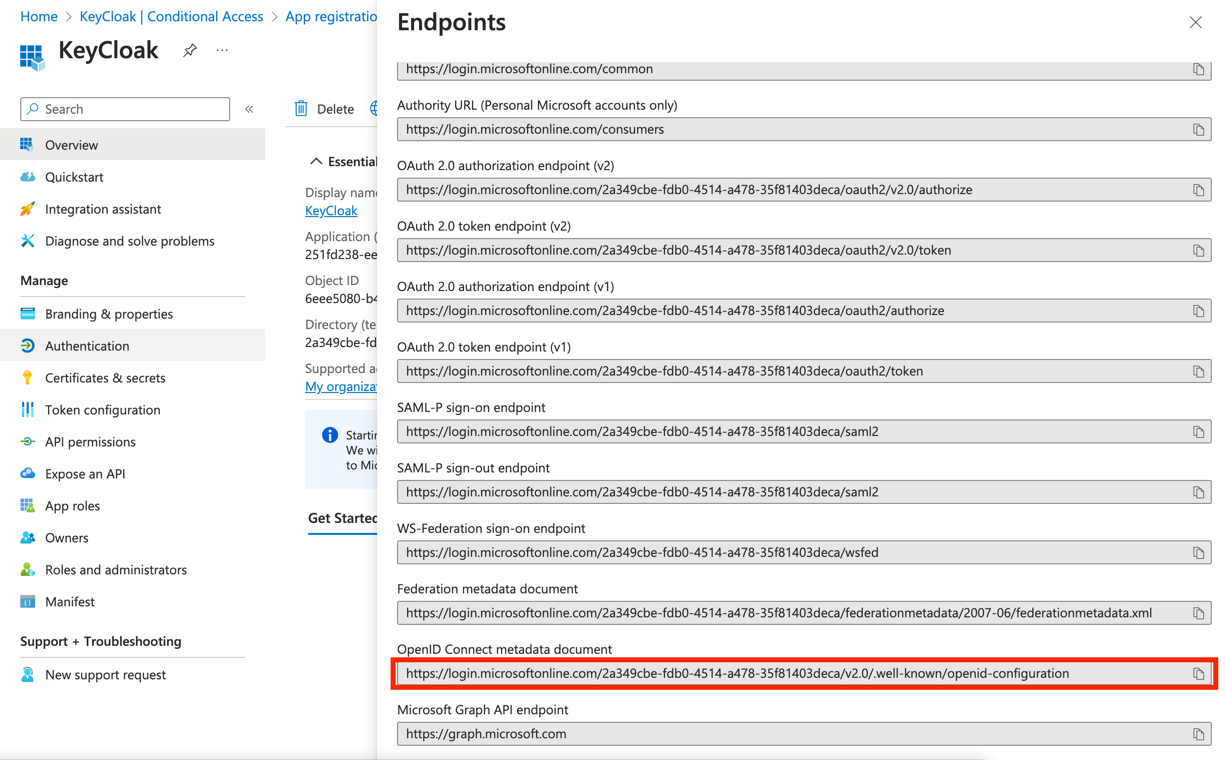
-
Under
Import External IDP Configyou need to add the External link from Entra AAD. For this go toEndpointsand copy theOpenID Connect metadata documentlink.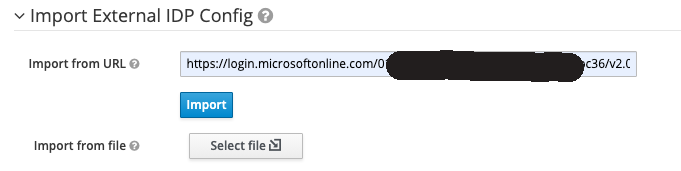 Figure 2. Import the metadata from IDP URL
-
-
Import the IDP configuration from the Azure AD metadata URL (Ask the customer for the metadata URL):
-
Fill the field Import from URL with the information you can find here, for example.
-
Click on the
Importbutton.
-
-
Fill the Alias field with the expected IDP name, e.g.
azuread, theRedirect URIfield will be filled automatically. -
Use the generated Redirect URI to register an application in the Azure AD side for getting the
Client IDandClient Secretfrom Azure AD (Ask the customer for help). -
Set Store Tokens to
ONso that keycloak could refresh the tokens from IDPs automatically. -
Set Backchannel Logout to
OFF. -
Fill the Client ID and Client Secret fields with the values from the Azure AD application configuration.
-
Set First Login Flow to
OMN First Broker Login -
Set Post Login Flow to
IDP-PostLogin -
Set Client Authentication to
Client Secret sent as post -
Set Prompt to
login -
Set Default Scopes to
openid profile offline_access -
Click on the
Savebutton
| Ensure that the refresh token is enabled on the IDP side. Some identity providers, such as Okta, disable refresh tokens by default. |
Validation of IDP configuration
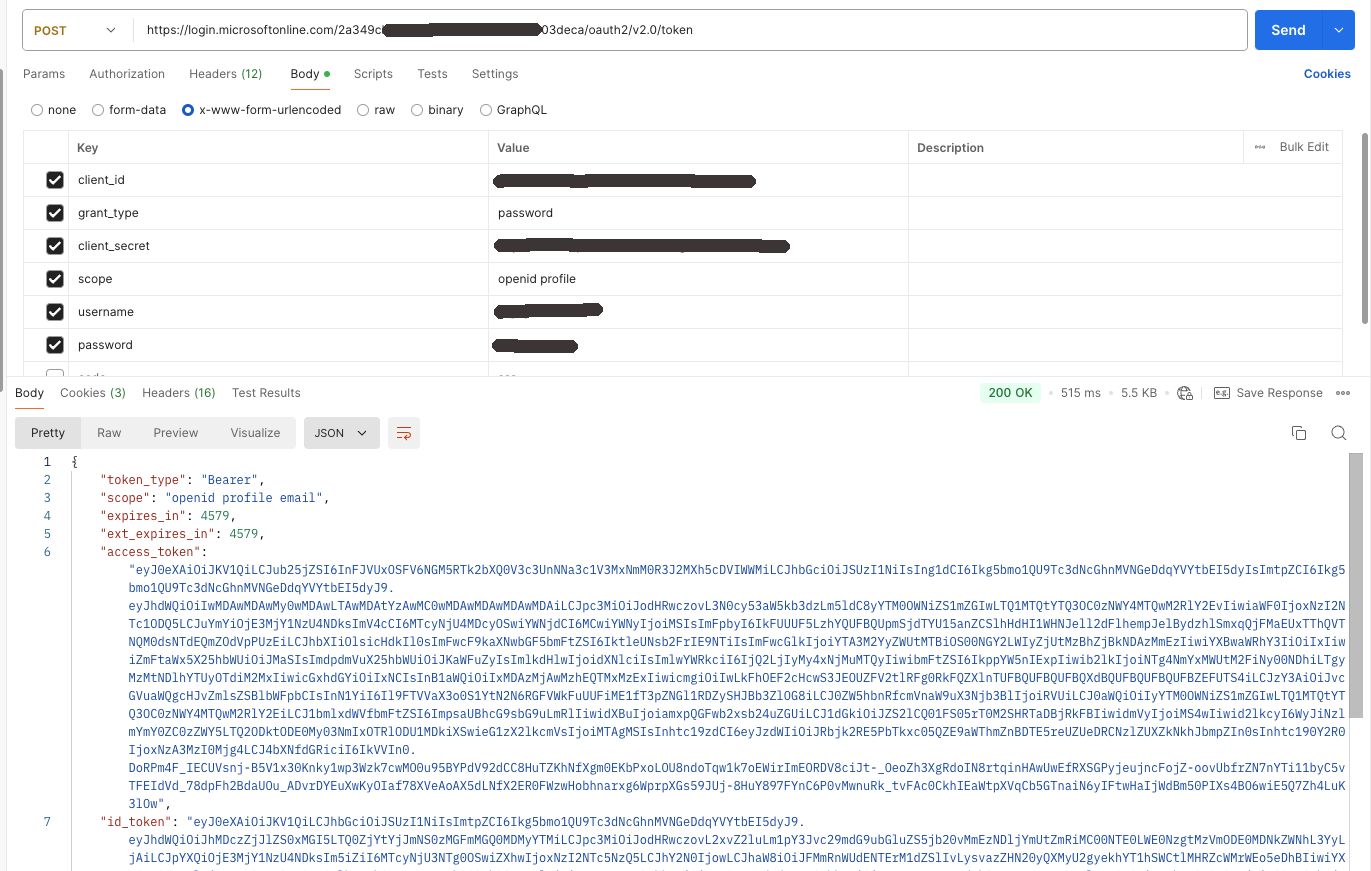
To validate the IDP side configuration, you could use the tools like Postman or Curl to get the token
from the token endpoint which could be found from the field Token URL in the IDP configuration above.
Also replace the client_id, client_secret, username, and password with the values from the IDP.
Query token by Curl
curl --location 'https://login.microsoftonline.com/YOUR_TENANT_ID/oauth2/v2.0/token' \
--header 'Content-Type: application/x-www-form-urlencoded' \
--data-urlencode 'client_id=YOUR_CLIENT_ID' \
--data-urlencode 'grant_type=password' \
--data-urlencode 'client_secret=YOUR_CLIENT_SECRET' \
--data-urlencode 'scope=openid profile' \
--data-urlencode 'username=YOUR_USERNAME' \
--data-urlencode 'password=YOUR_PASSWORD'
Query token by Postman
Then check the following points:
-
The access token and ID token should be returned successfully.
-
The user profile data should be included in the ID token.
-
The user groups should be included in the ID token.
-
The
login_hintclaim should be included in the ID token (optional).
You can use https://jwt.io to decode the ID token and check above mentioned points.
Mapping Activation for OMN Login
Normally in OMN a new created user is not to be activated by default.
In the case of IDP login, the users could be activated automatically by mapping to the built-in role omn-login-role.
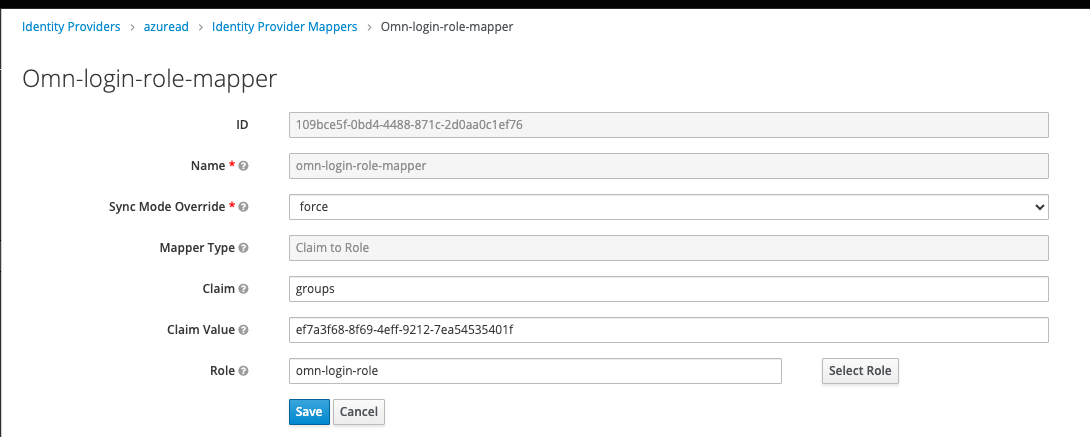
Go to the Mappers tab and create a new mapper with the following settings:
-
Name:
omn-login-role-mapper -
Sync Mode:
Force -
Mapper Type:
Claim to Role -
Claim:
groups
⇒ The claim name which provides the user groups from Azure AD -
Claim Value:
your-target-group-from-azure-ad
⇒ The group name whose members should be activated in OMN automatically. -
Role:
omn-login-role
If there are multiple groups in Azure AD which should be activated in OMN, you can create multiple mappers with different Claim Value settings for each group.
After that, all users from the configured groups will be activated automatically and others have to be activated manually by the administrator.
|
This automatic activation will be only executed at the first IDP login. After that, the user could be activated or deactivated only by administrator manually. |
Mapping IDP User Profile
An OMN user has own profile properties which could be also mapped from the IDP user profile data.
OMN has the following standard profile properties:
-
userName
-
firstName
-
lastName
-
email
-
phone
-
fax
-
zip
-
address
-
city
-
country
-
department
-
company
Keycloak normally does the mapping automatically for the standard claims like username, email, given_name, family_name, etc.
Others, e.g. company, should be mapped manually following the next steps:
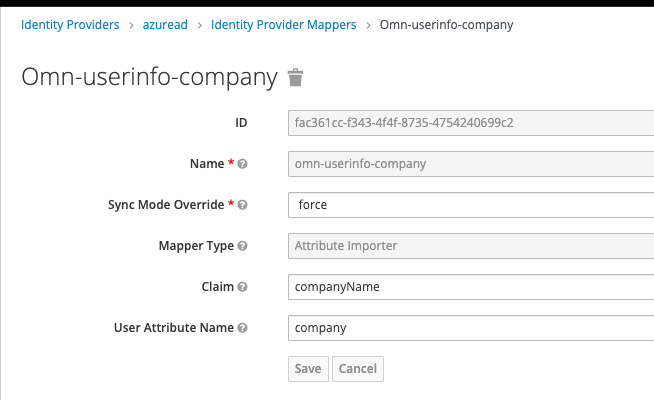
Go to the Mappers tab and create a new mapper with the following settings:
-
Name:
omn-userinfo-company -
Sync Mode:
Force -
Mapper Type:
Attribute Importer -
Claim:
companyName
⇒ The claim name matching thecompany namefrom Azure AD -
User Attribute Name:
company
⇒ The OMN user profile property name from the above properties list
After that, the company property will be filled with the value from the Azure AD user profile.
The same could be done for other user profile properties.
| The user profile mapping will be executed at each IDP login so that the user profile data will be always up-to-date. |
Mapping IDP User Groups
OMN has user groups with different access rights, that could be also mapped from the IDP user groups.
For example, the user from the group admin in Azure AD could be mapped to the admin group in OMN.
Before the mapping, the groups should be synchronized from the OMN LDAP into Keycloak.
Go to User Federation → omn-ldap → Mappers → omn-ldap-group, and click on Sync LDAP Groups to Keycloak button.
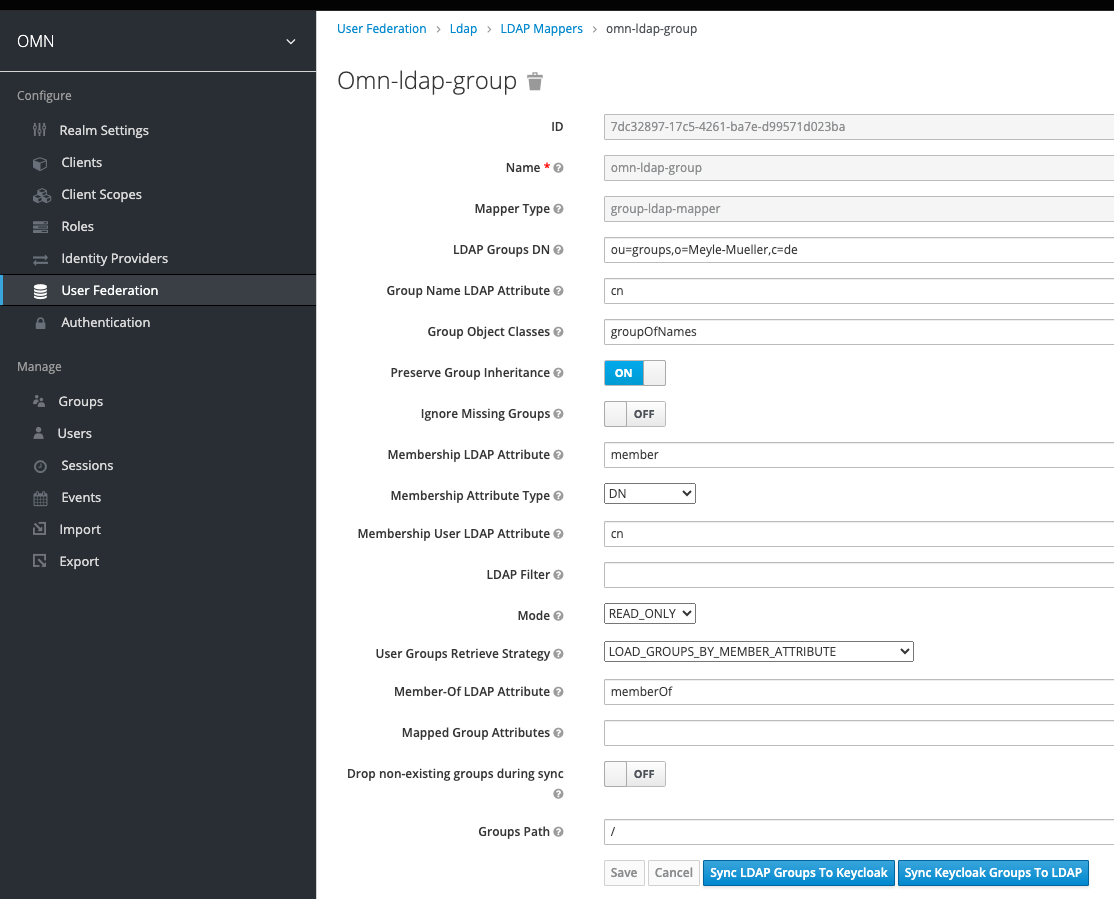
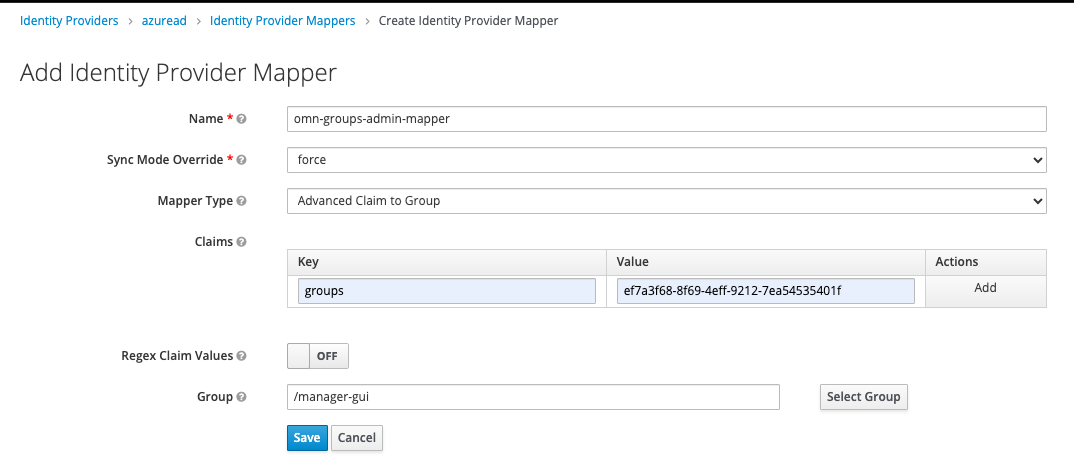
Go to Identity Providers → Azure AD, then open the Mappers tab and create a new mapper with the following settings:
-
Name:
omn-group-admin-mapper -
Sync Mode:
Force -
Mapper Type:
Advanced Claim to Group -
Claims: ⇒ add a claim key-value pair key:
groups⇒ The claim name which provides the user groups from Azure AD value:admin-IDP⇒ The IDP group name which needs to be mapped to the OMN group -
Group:
manager-gui
⇒ Choose the target OMN group by clicking on theSelect Groupbutton
The same could be done for other groups.
Configure ID Token with additional user information (Azure AD)
The following example shows the configuration or additional claims. In this case, we configure the IDP Token endpoint to print the user groups, additionally.
-
Log in to your admin console and navigate to the Applications section:
-
Select
Applications→App Registrations→All applications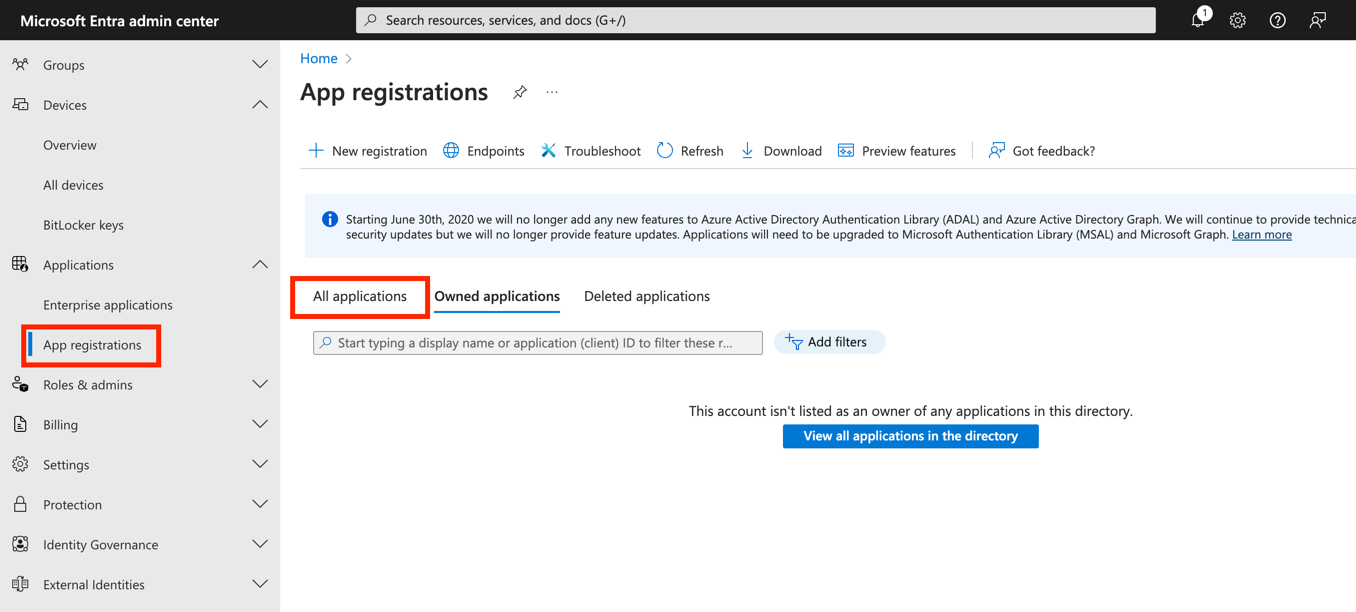
-
Select the
KeyCloakapp instance created previously.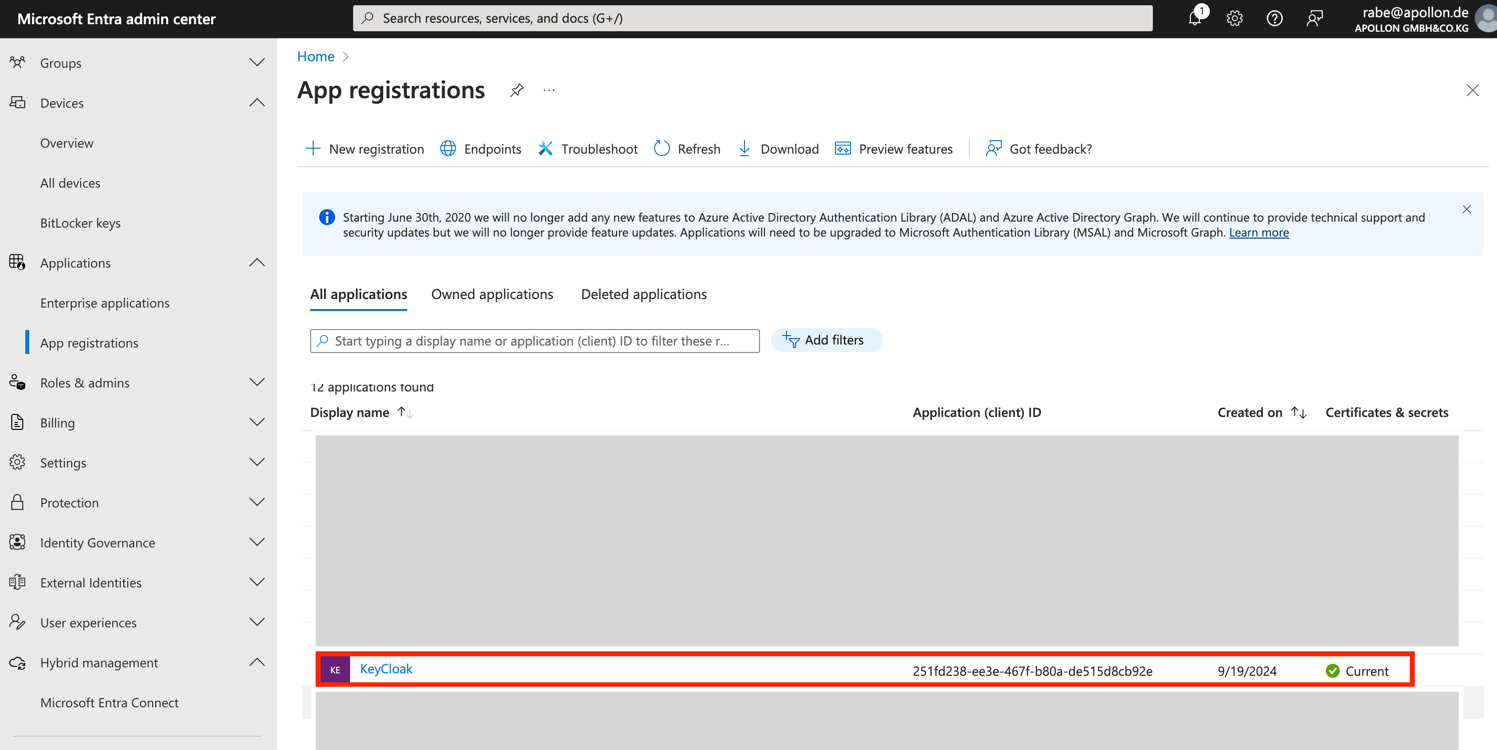
-
Go to
Token configuration→Add optional Claim→ID→ Select needed claims, e.g. Claim all and ClickAddButton.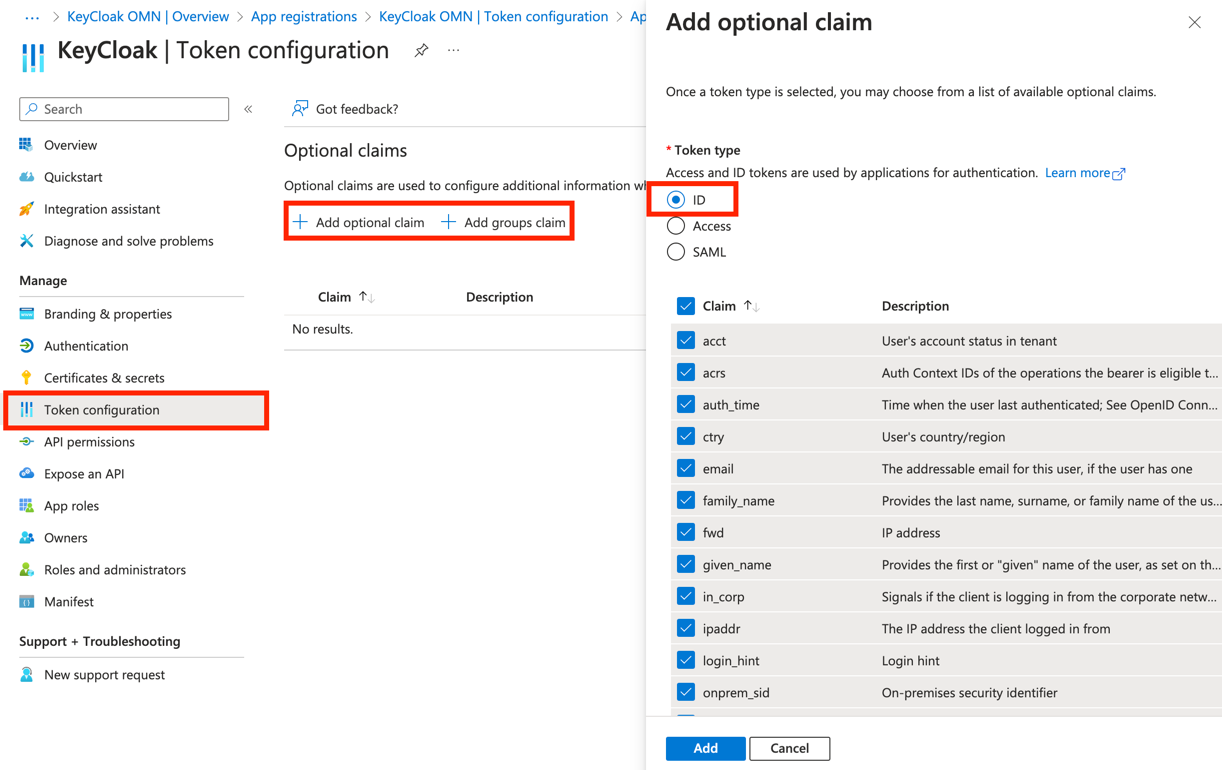
-
Go to
Add groups claim→ select e.g.Security groupsand the token ID with e.g.Group ID.
Then Click theAddbutton.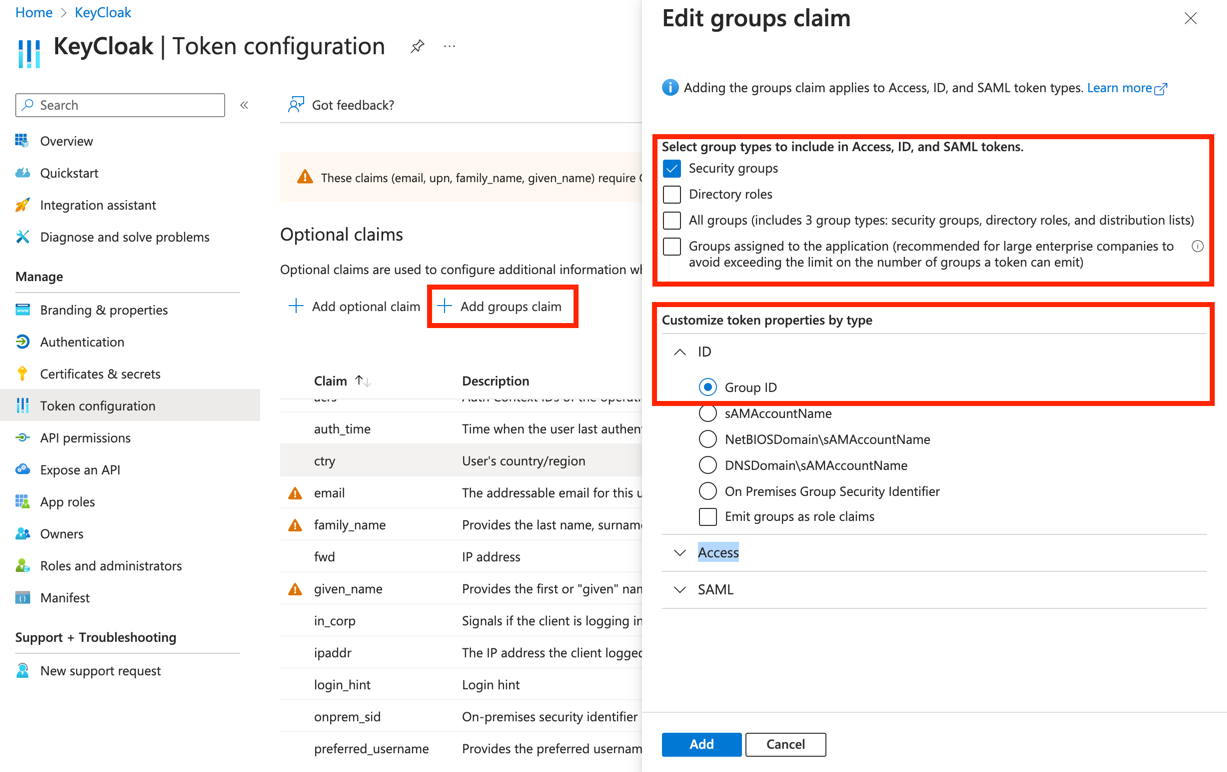
-
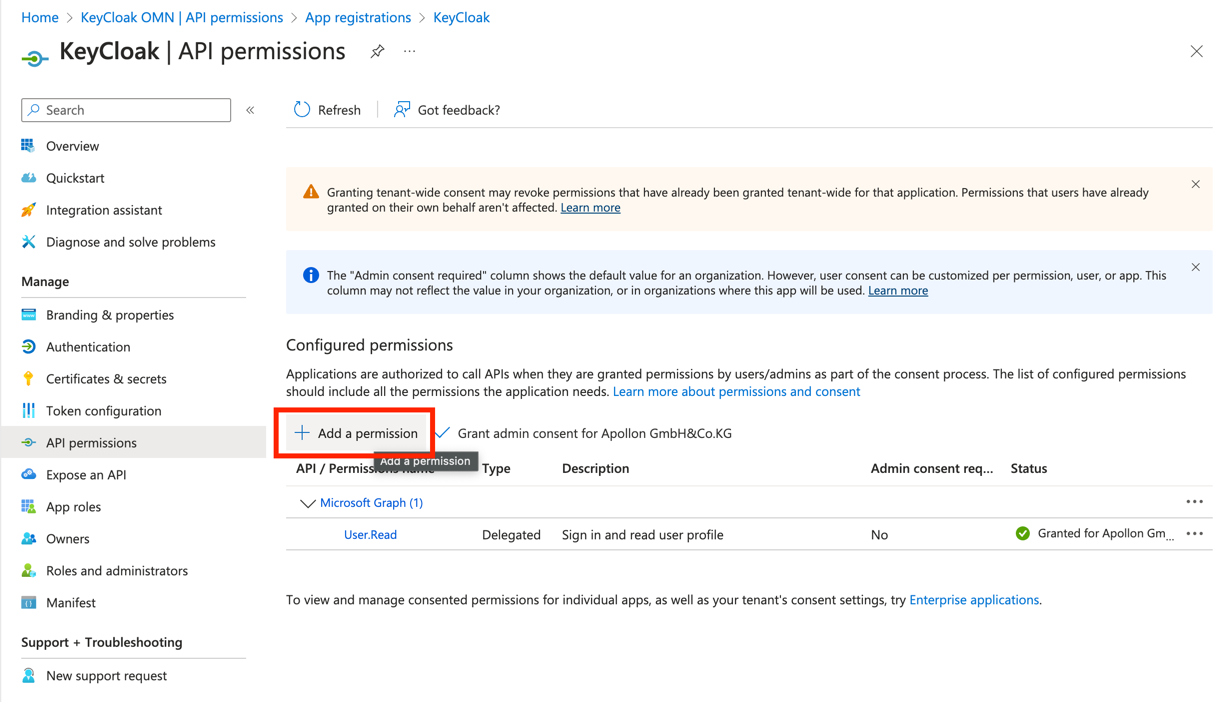
Go to
API permissions→Add a permission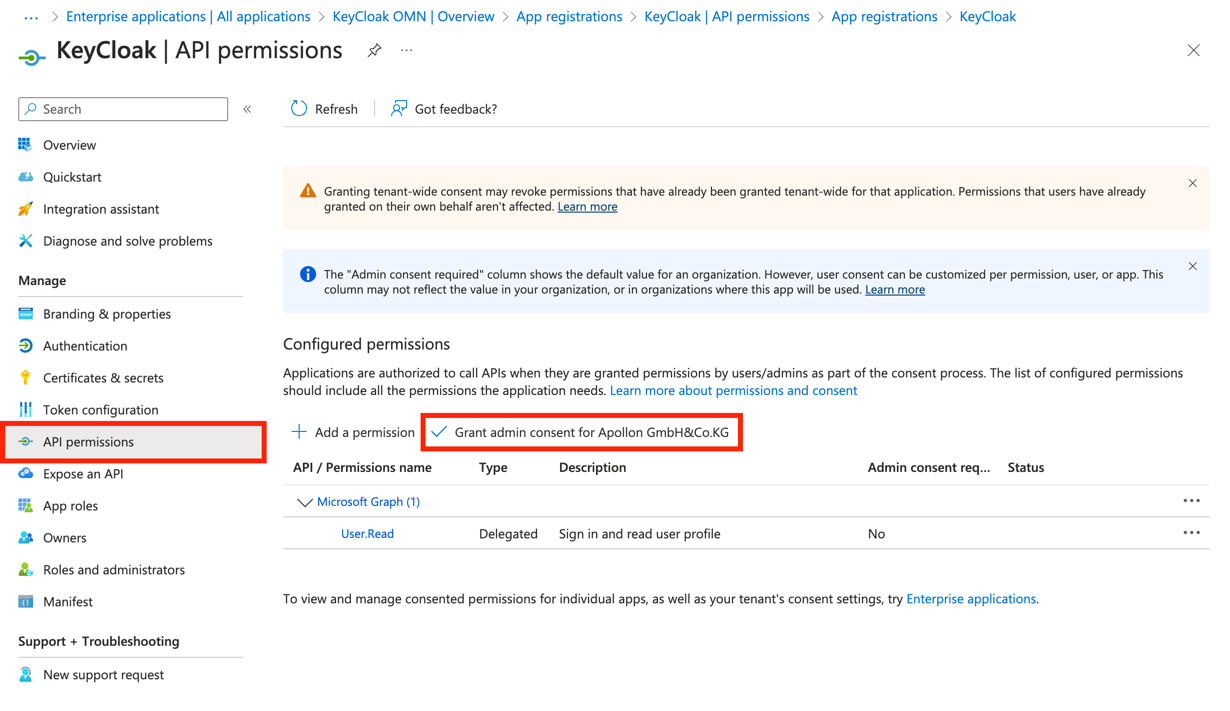
-
Go to
Microsoft Graph→add a permission -
Go to
Microsoft Graph→Delegated permissionis selected.
-
There you need the following permission set:
OpenId permissions: check thatemailandprofileis selected.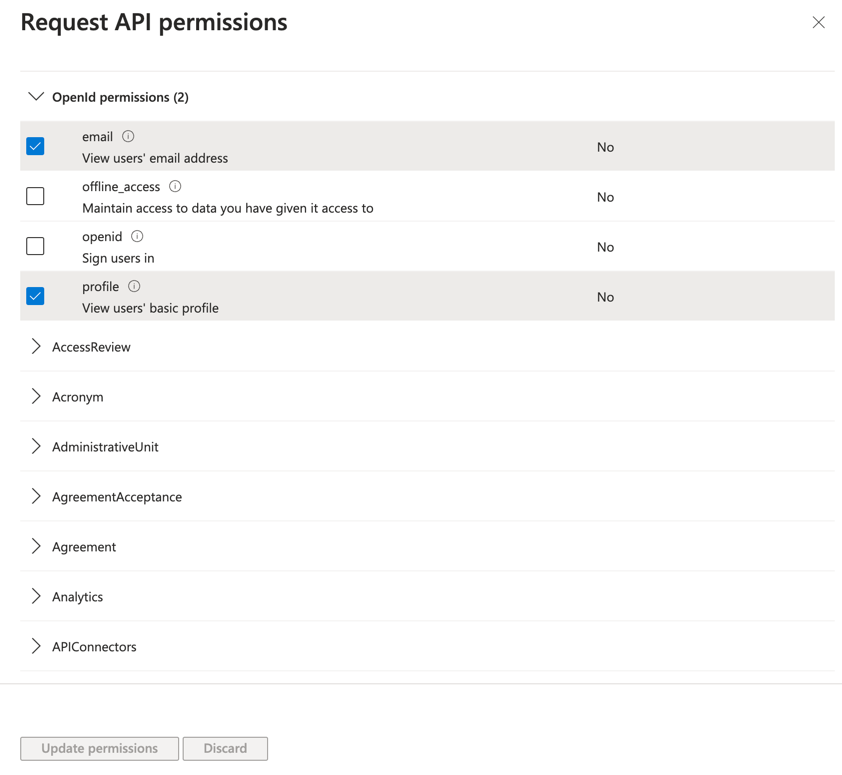
-
In
Usercheck thatUser.Readis selected.
-
Navigate to
Applications→Enterprise applications→PermissionsandGrant the Admin Consent….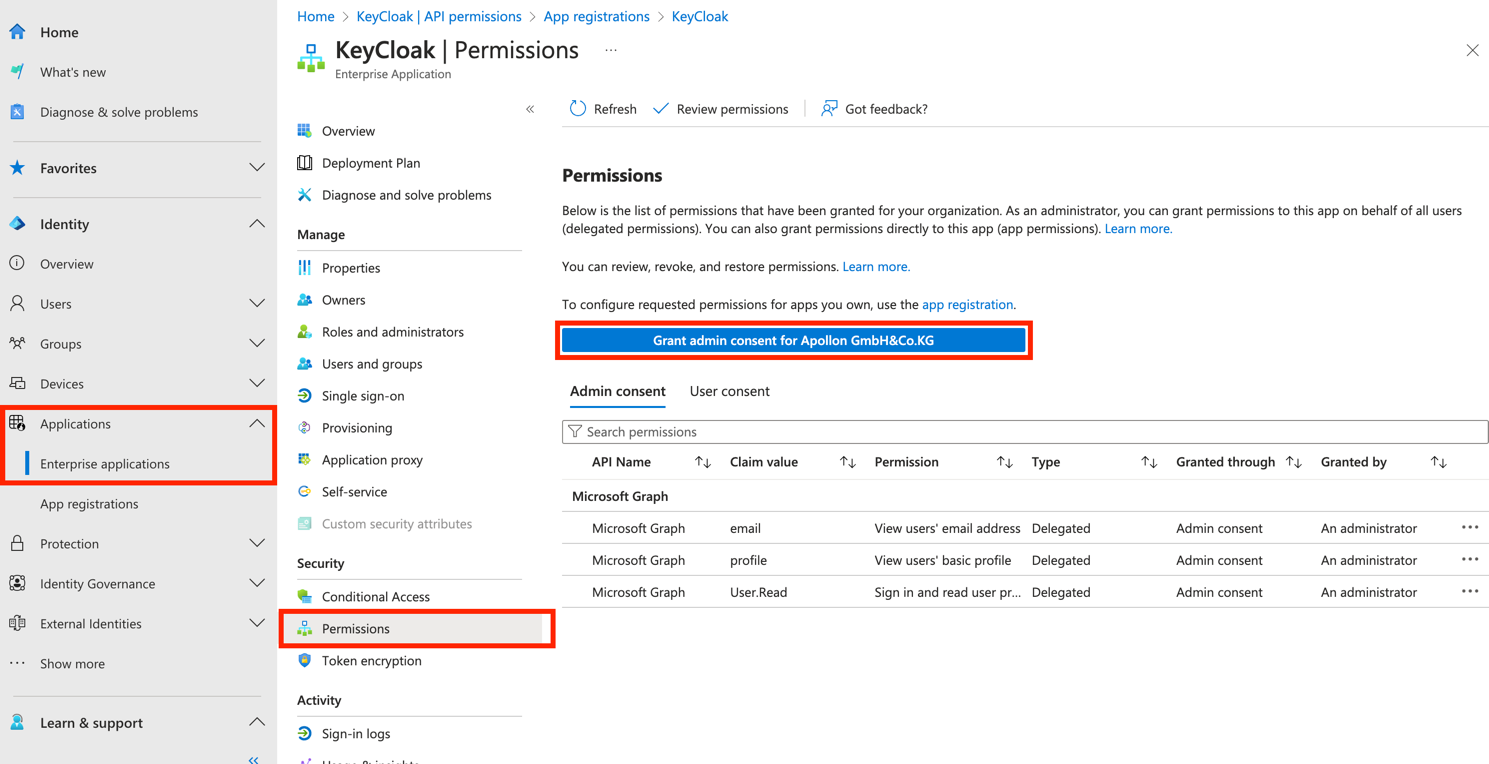
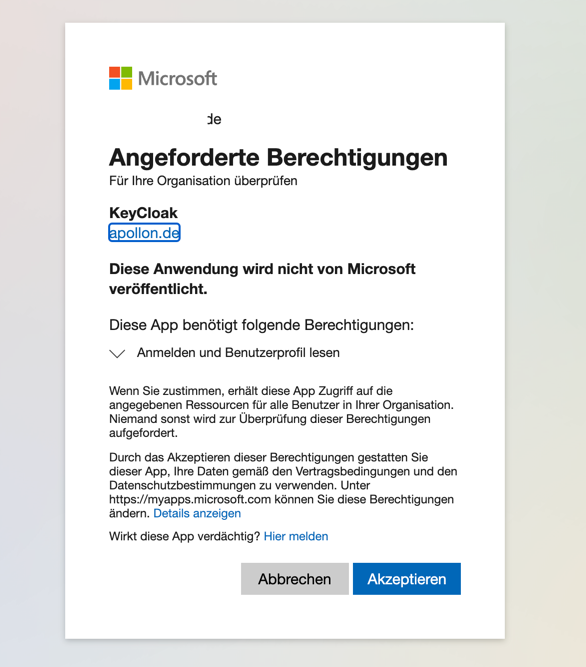
-
Accept the registration.
| This is just an example of a test configuration. More information for Configure optional claims from Microsoft. |
Download as PDF
To download this page as PDF click → here