Back End Configuration
Function Plug-In Configuration
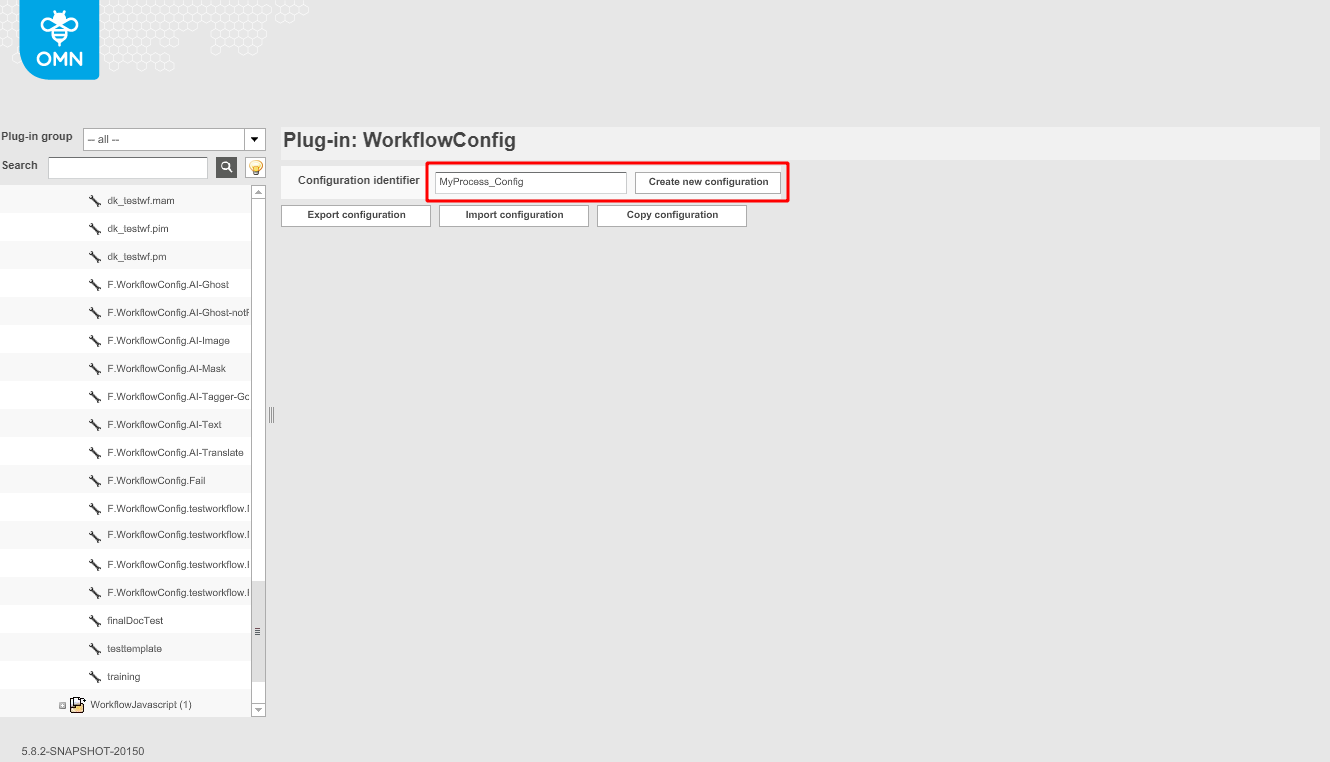
Open OMN Config Client and go to Mandators\<mandatorName>\Function plug-ins and click on the folder “WorkflowConfig”.
Enter the workflow name in the Configuration identifier field and click on “Create new configuration”.
A new workflow should appear in the folder "WorkflowConfig", as well as a new display with configurable options.
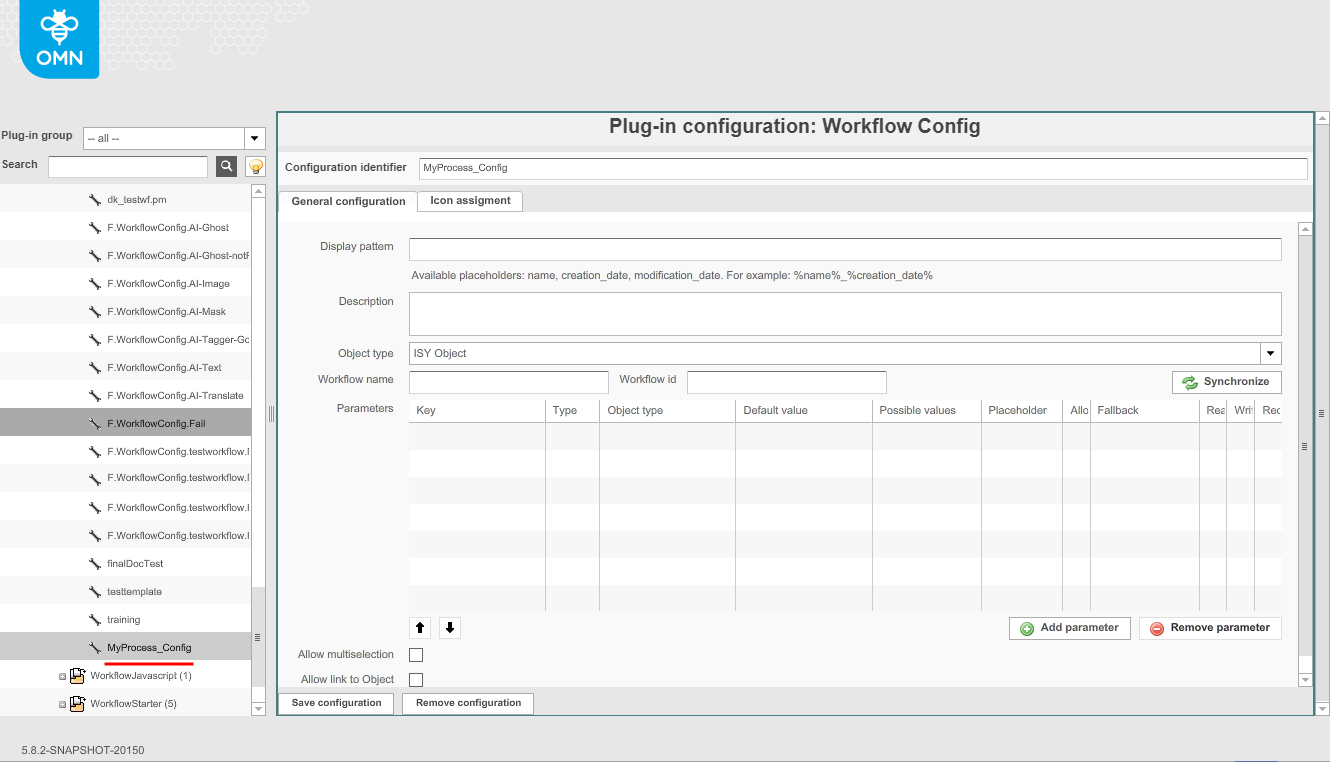
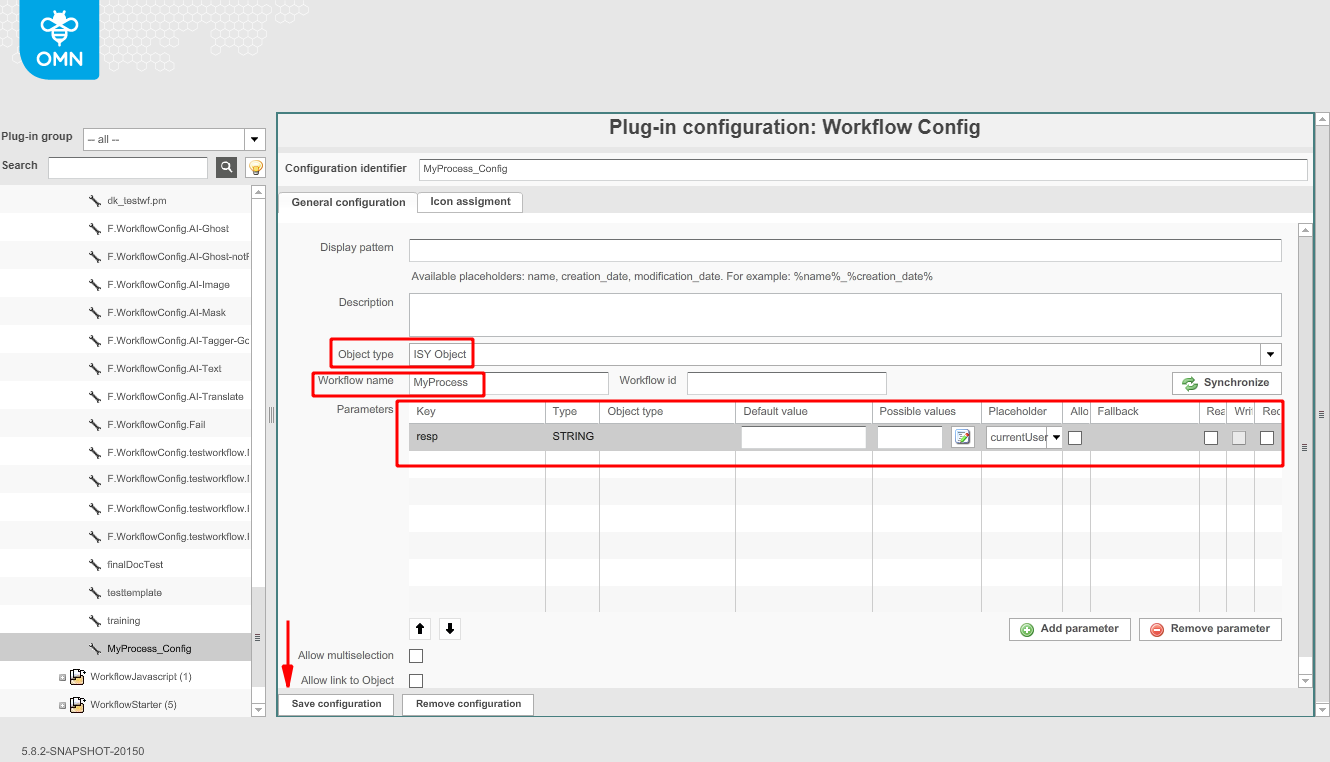
Choose the correct object type, depending on which kind of tasks will be executed with this workflow (MAM, PIM, or PM):
-
ISY Object
-
PIM2Project
-
Project
Enter the ID of the workflow in the field "Workflow name".
Note: for concrete deployment of the current used workflow version, enter the ID of the workflow in the field "Workflow id"
If necessary, parameters can be added. For example, this way it is possible to define the assignee of the task by clicking on “Add parameter” end entering the following:
Click on “Save configuration” on the lower left side of the display.
Page Plug-In Configuration
Note: The following steps vary depending on the purpose of the workflow that is being configured. This example shows how a workflow for MAM tasks should be configured.
Go to Mandators\<mandatorName>\Page plug-ins\FSNavigation\P.FSNavigation.Main
On the new display, go to Navigation nodes\Daten and click on the first item of the Content Views table
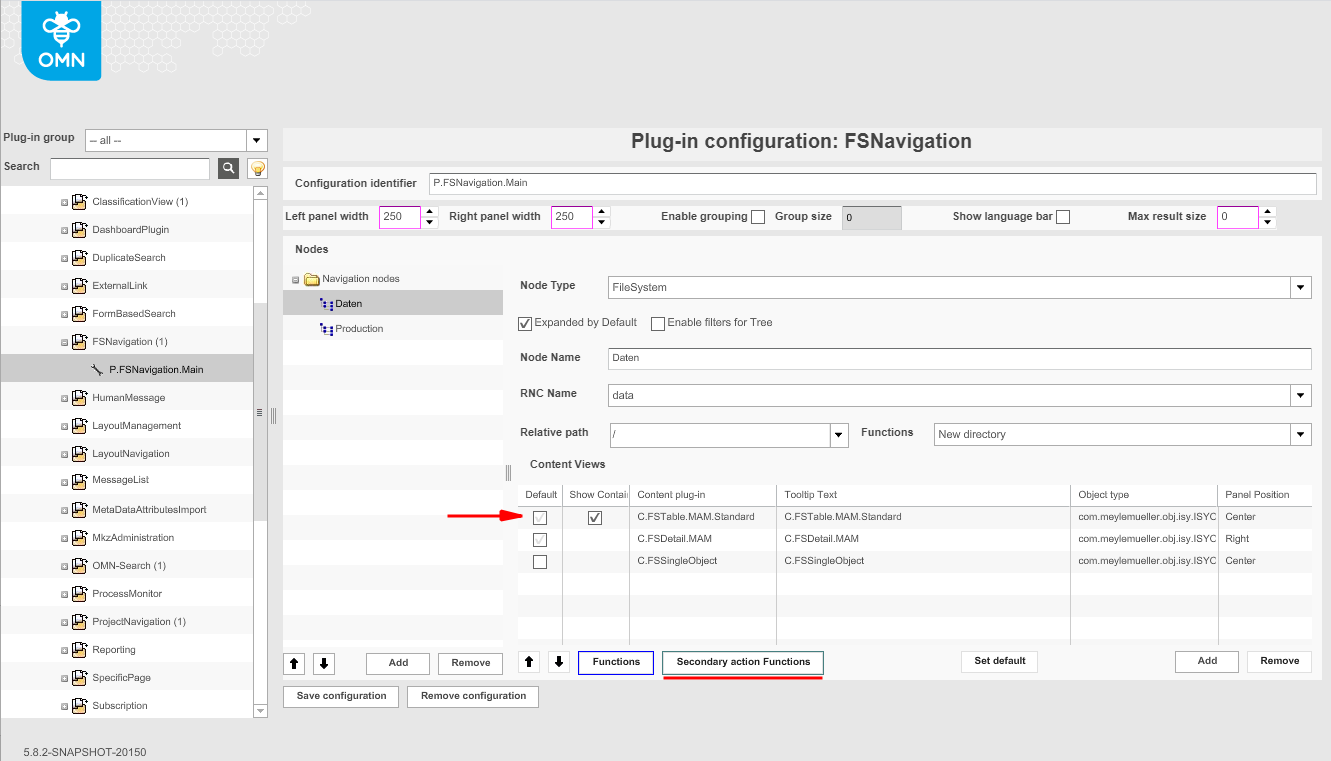
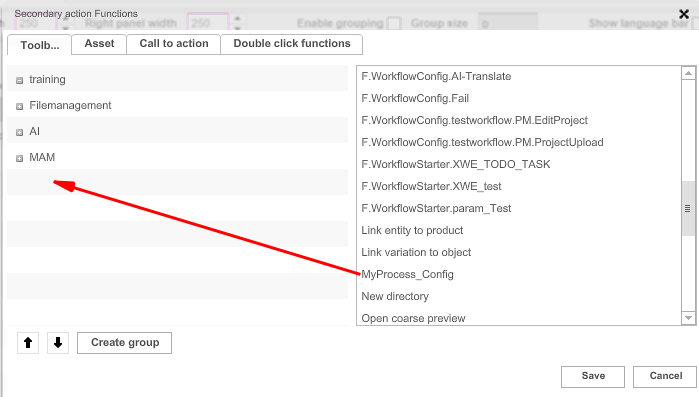
Click on the button "Secondary action Functions". A new window should pop up, and your workflow configuration should be on a list on the right side of the window
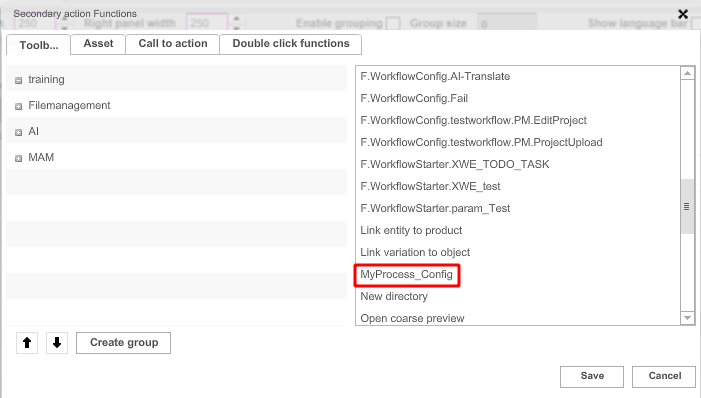
Click on your workflow configuration name and drag it to the left side of the display
Click on the button “Save” inside the window, then save the whole configuration by clicking on “Save configuration” in the bottom left side of the display.
Still under Page plug-ins, go to WFLStatus and click on P.WFLStatus.Camunda
Navigate to the tab "Enabled Workflows". The ID of your workflow configuration should be seen in the list on the left side of the display.
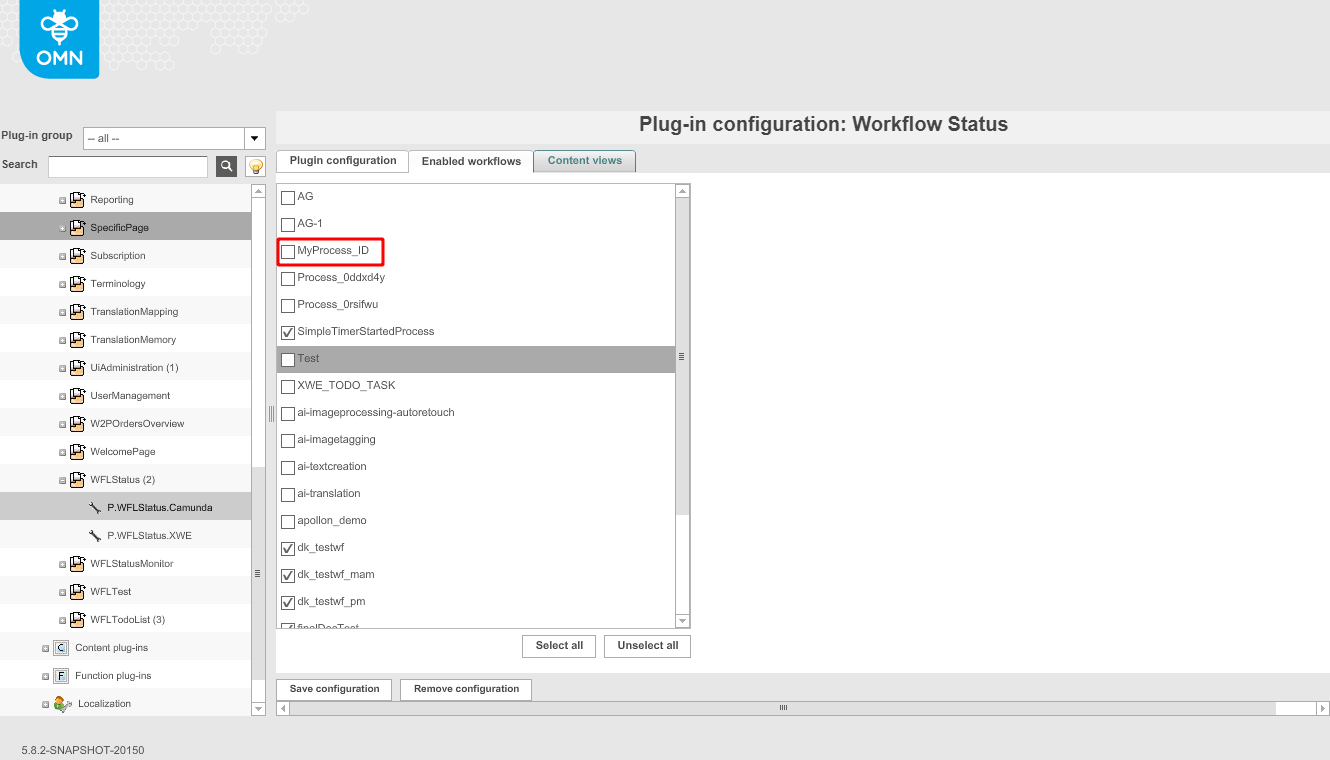
Enable your workflow by clicking on the checkbox next to its name. Then, save the configuration.